Having created an Entry in Codebook for an account we wish to log into, and a new, random password, let's now explore the ways to actually use that password to login to a website or another app. Codebook allows you to copy a password to the clipboard so that you can paste it into another app, but this can be inconvenient and tedious, copying values one-at-a-time. Each version of Codebook provides a means to fill in your login credentials and passwords for you directly (in some cases, several!)
First, you'll need to enable the AutoFill in browser Codebook setting (Home > Settings > Preferences). Please do that in order to follow along.
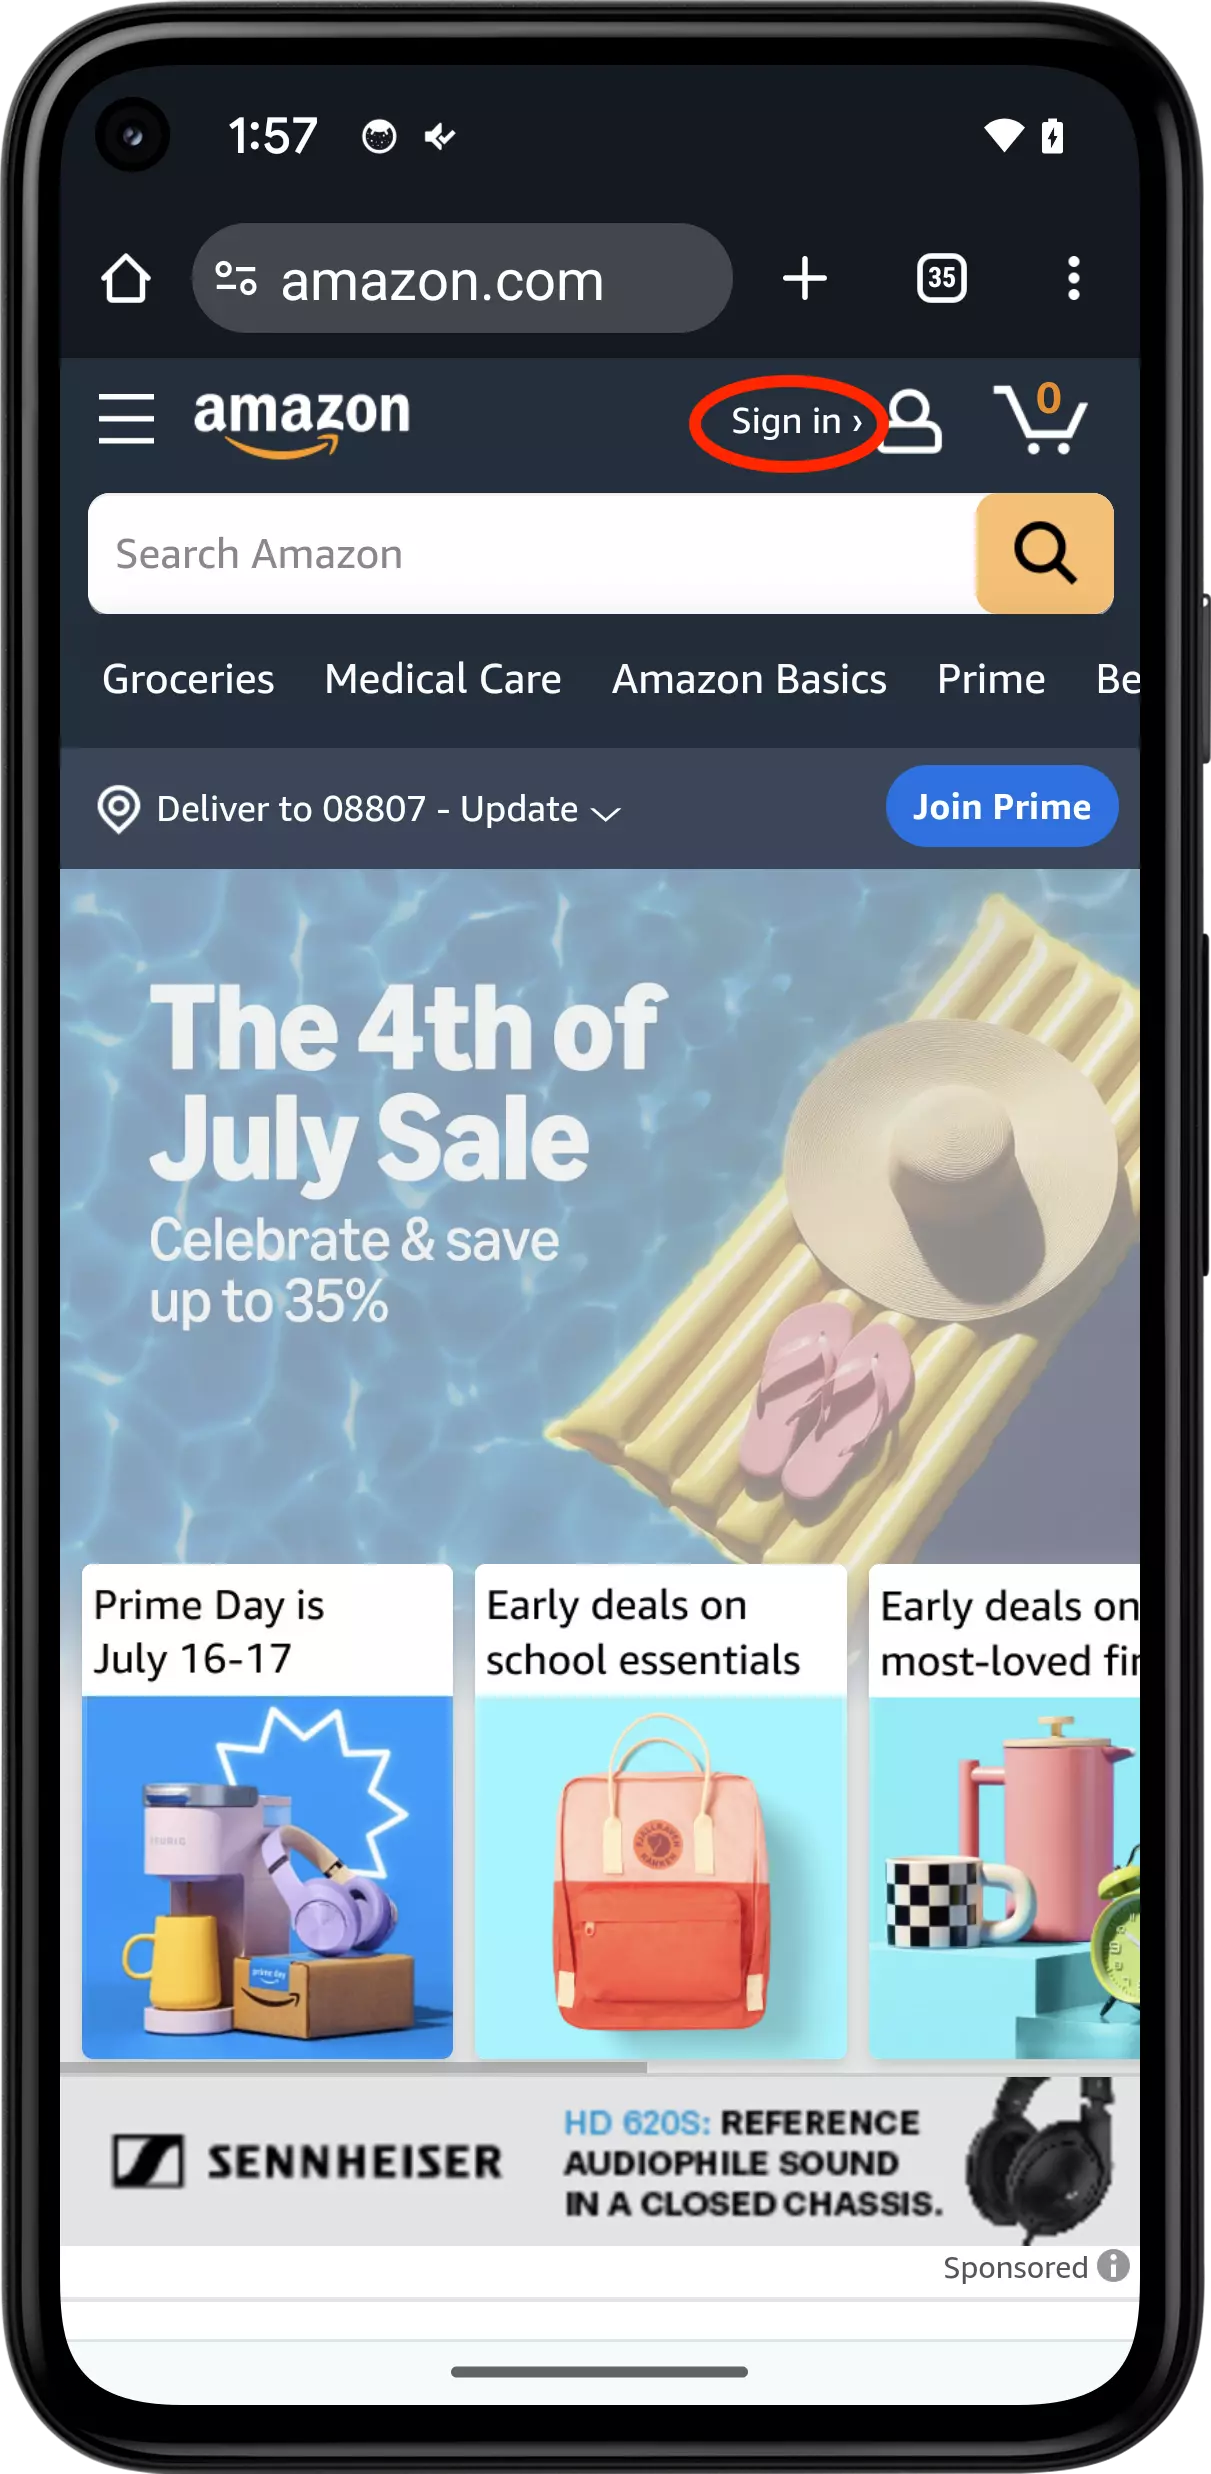
Now that you've enabled Codebook for AutoFill, it's time to try it out! Launch Chrome on your android device, navigate to amazon.com, and tap on the Sign In link.
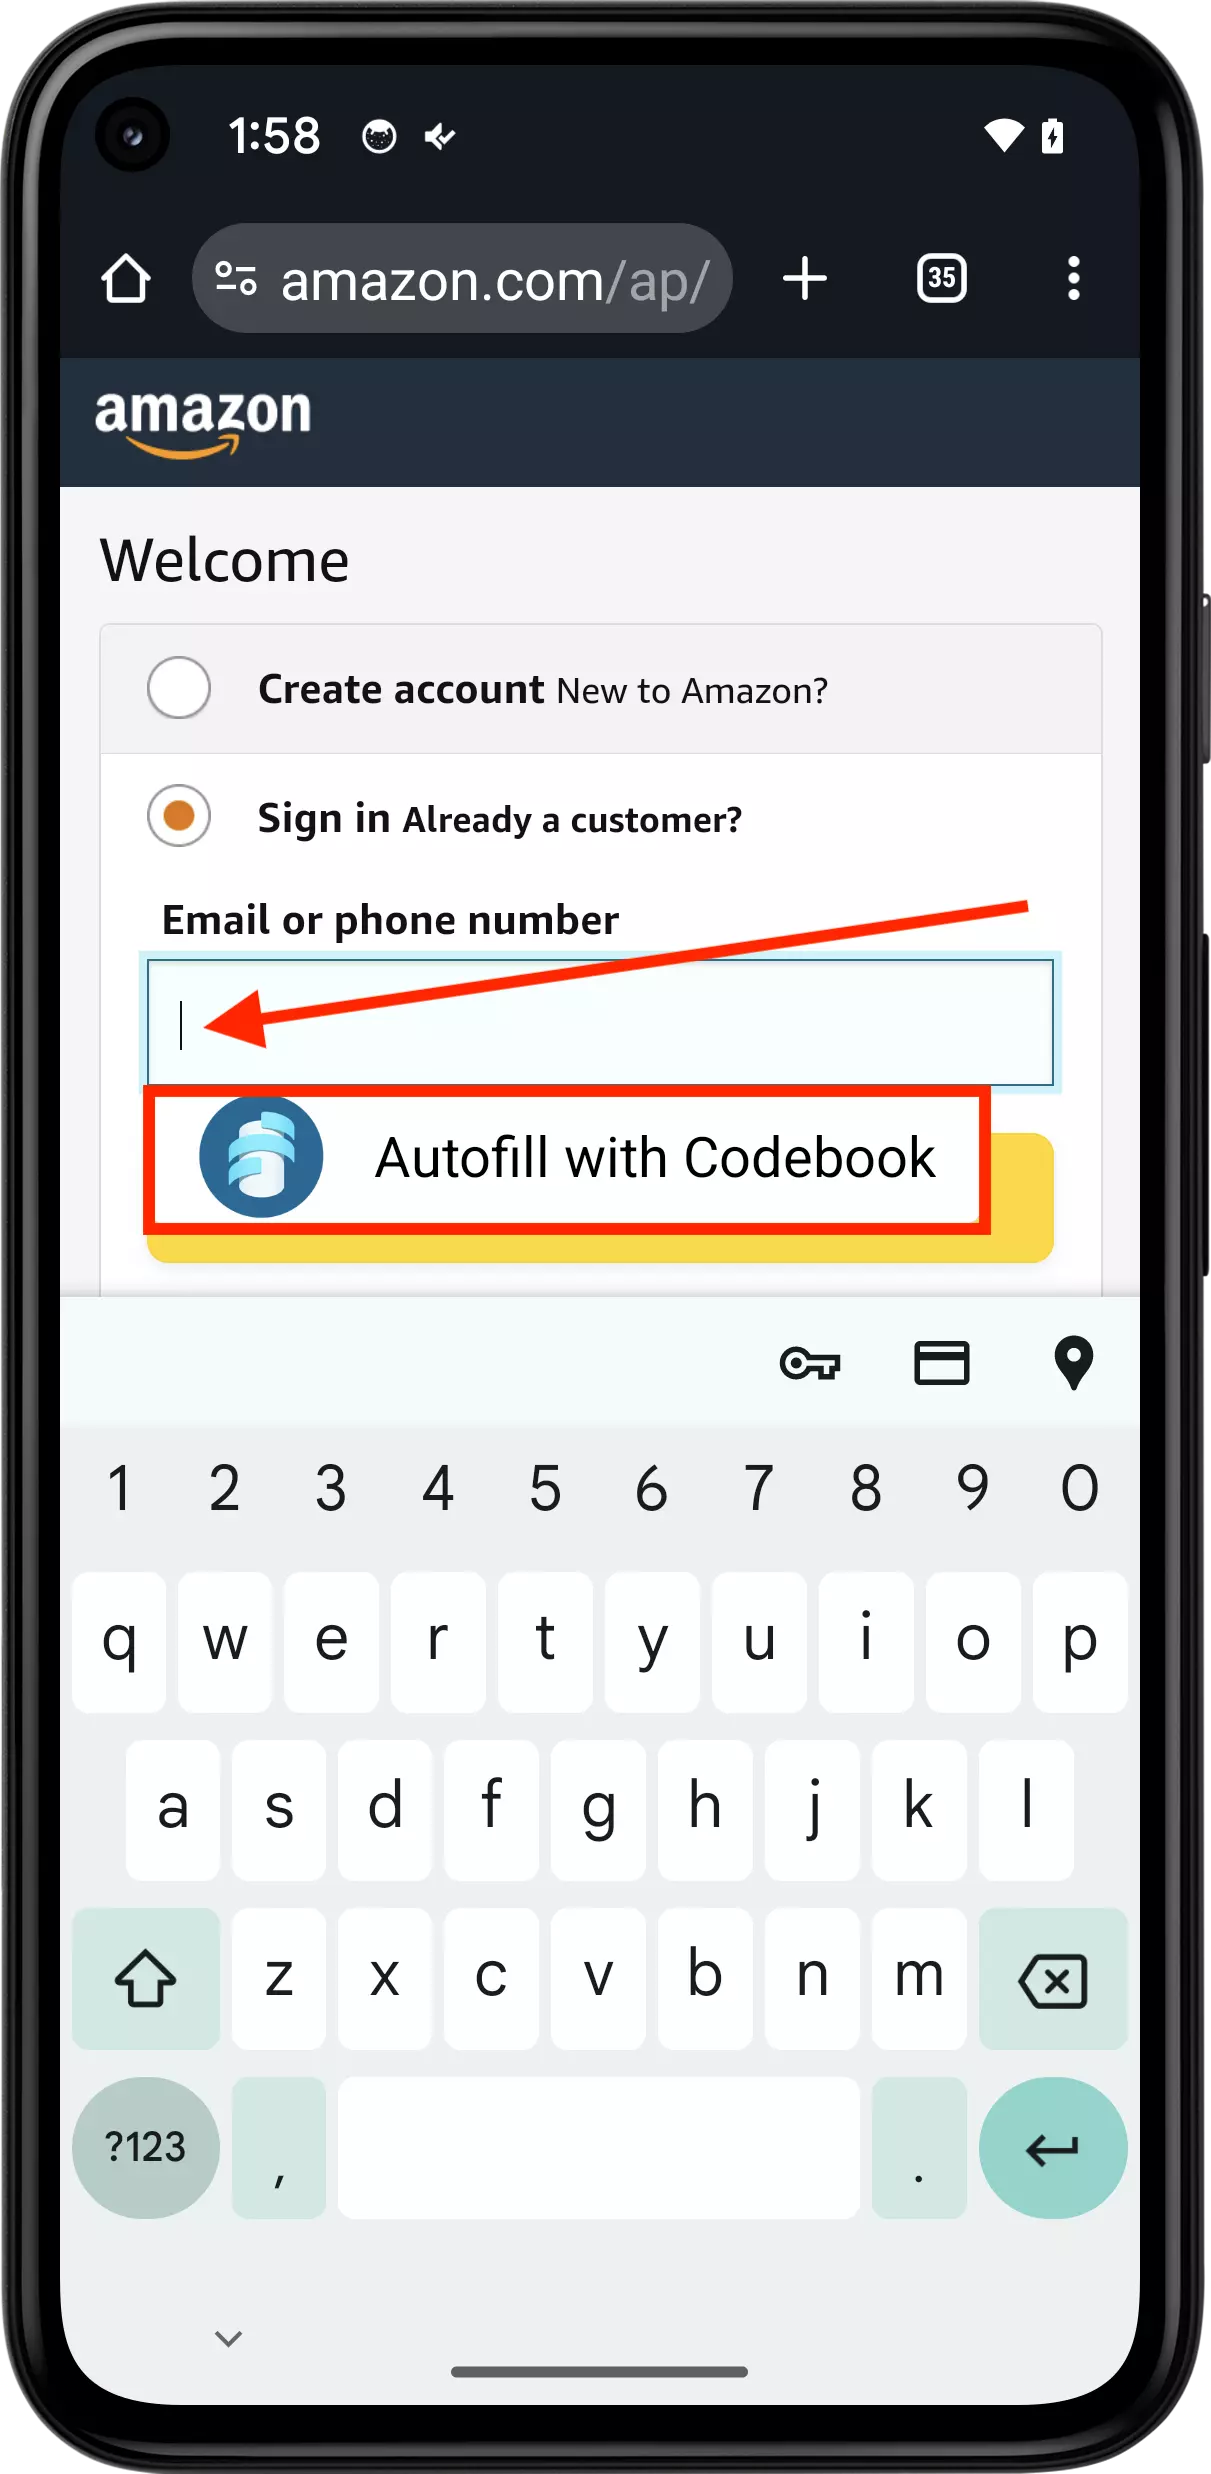
When the Sign In page loads, focus input on the email (phone for mobile accounts) field. The Codebook autofill dialog will be displayed. Tap it to use this feature
You will be prompted to authenticate with Codebook using your Master Password. If you have Touch Id Login enabled for Codebook, that will also be available when authenticating for AutoFill.

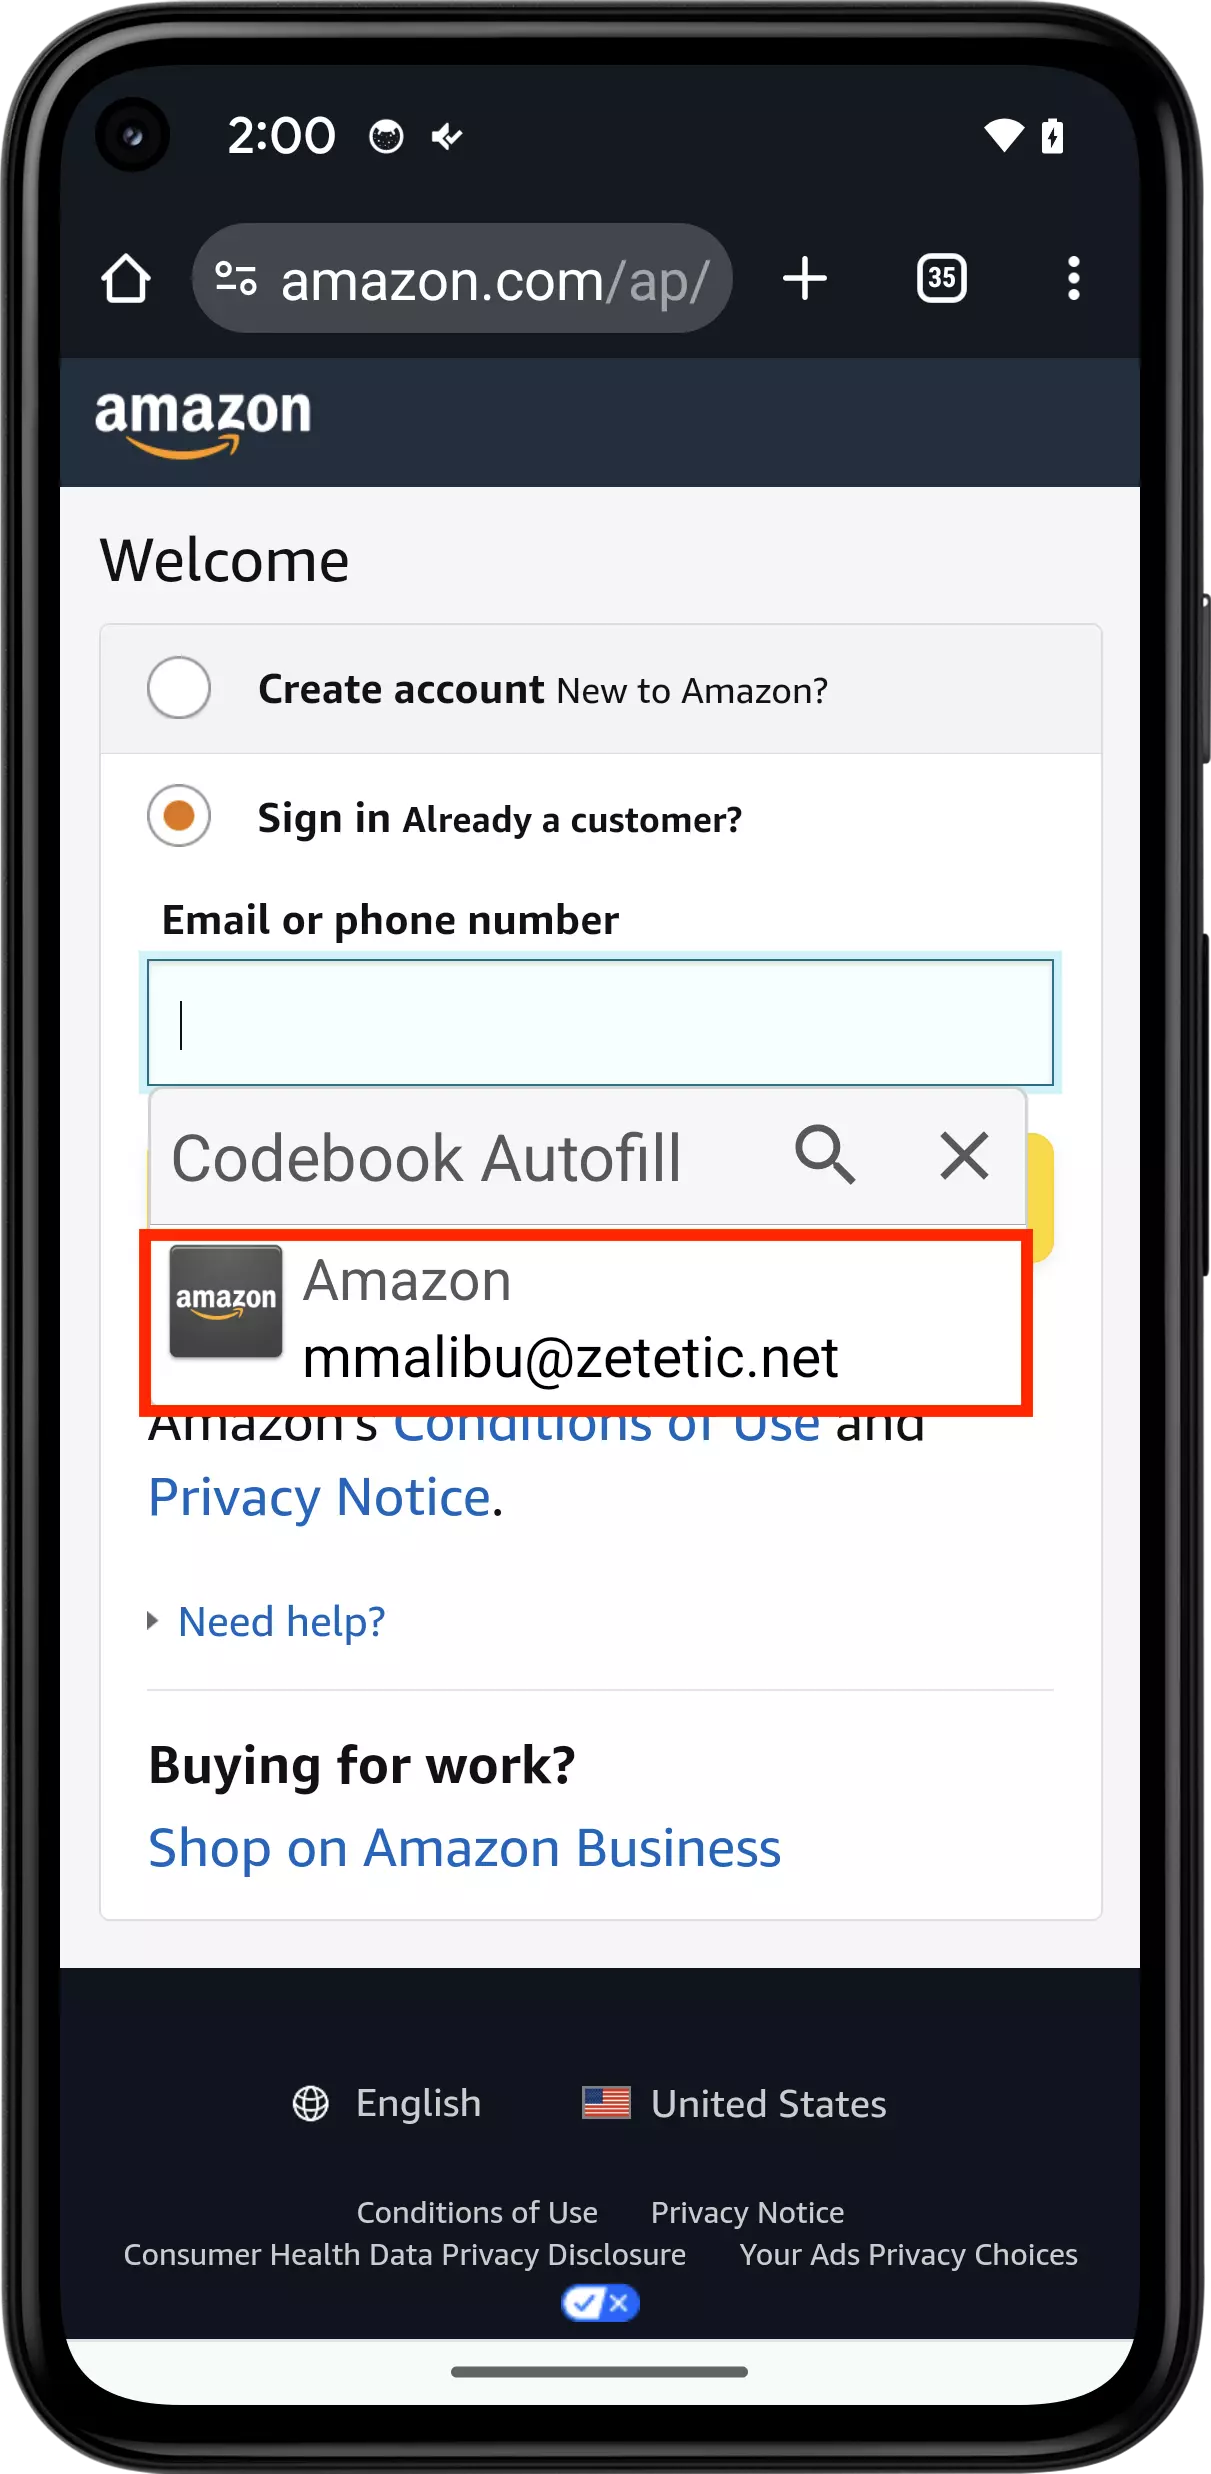
After authenticating, Codebook looks up the Password for the Amazon entry you set up, and passes it, along with the Email address back to Chrome and attempts to fill it into the login form.
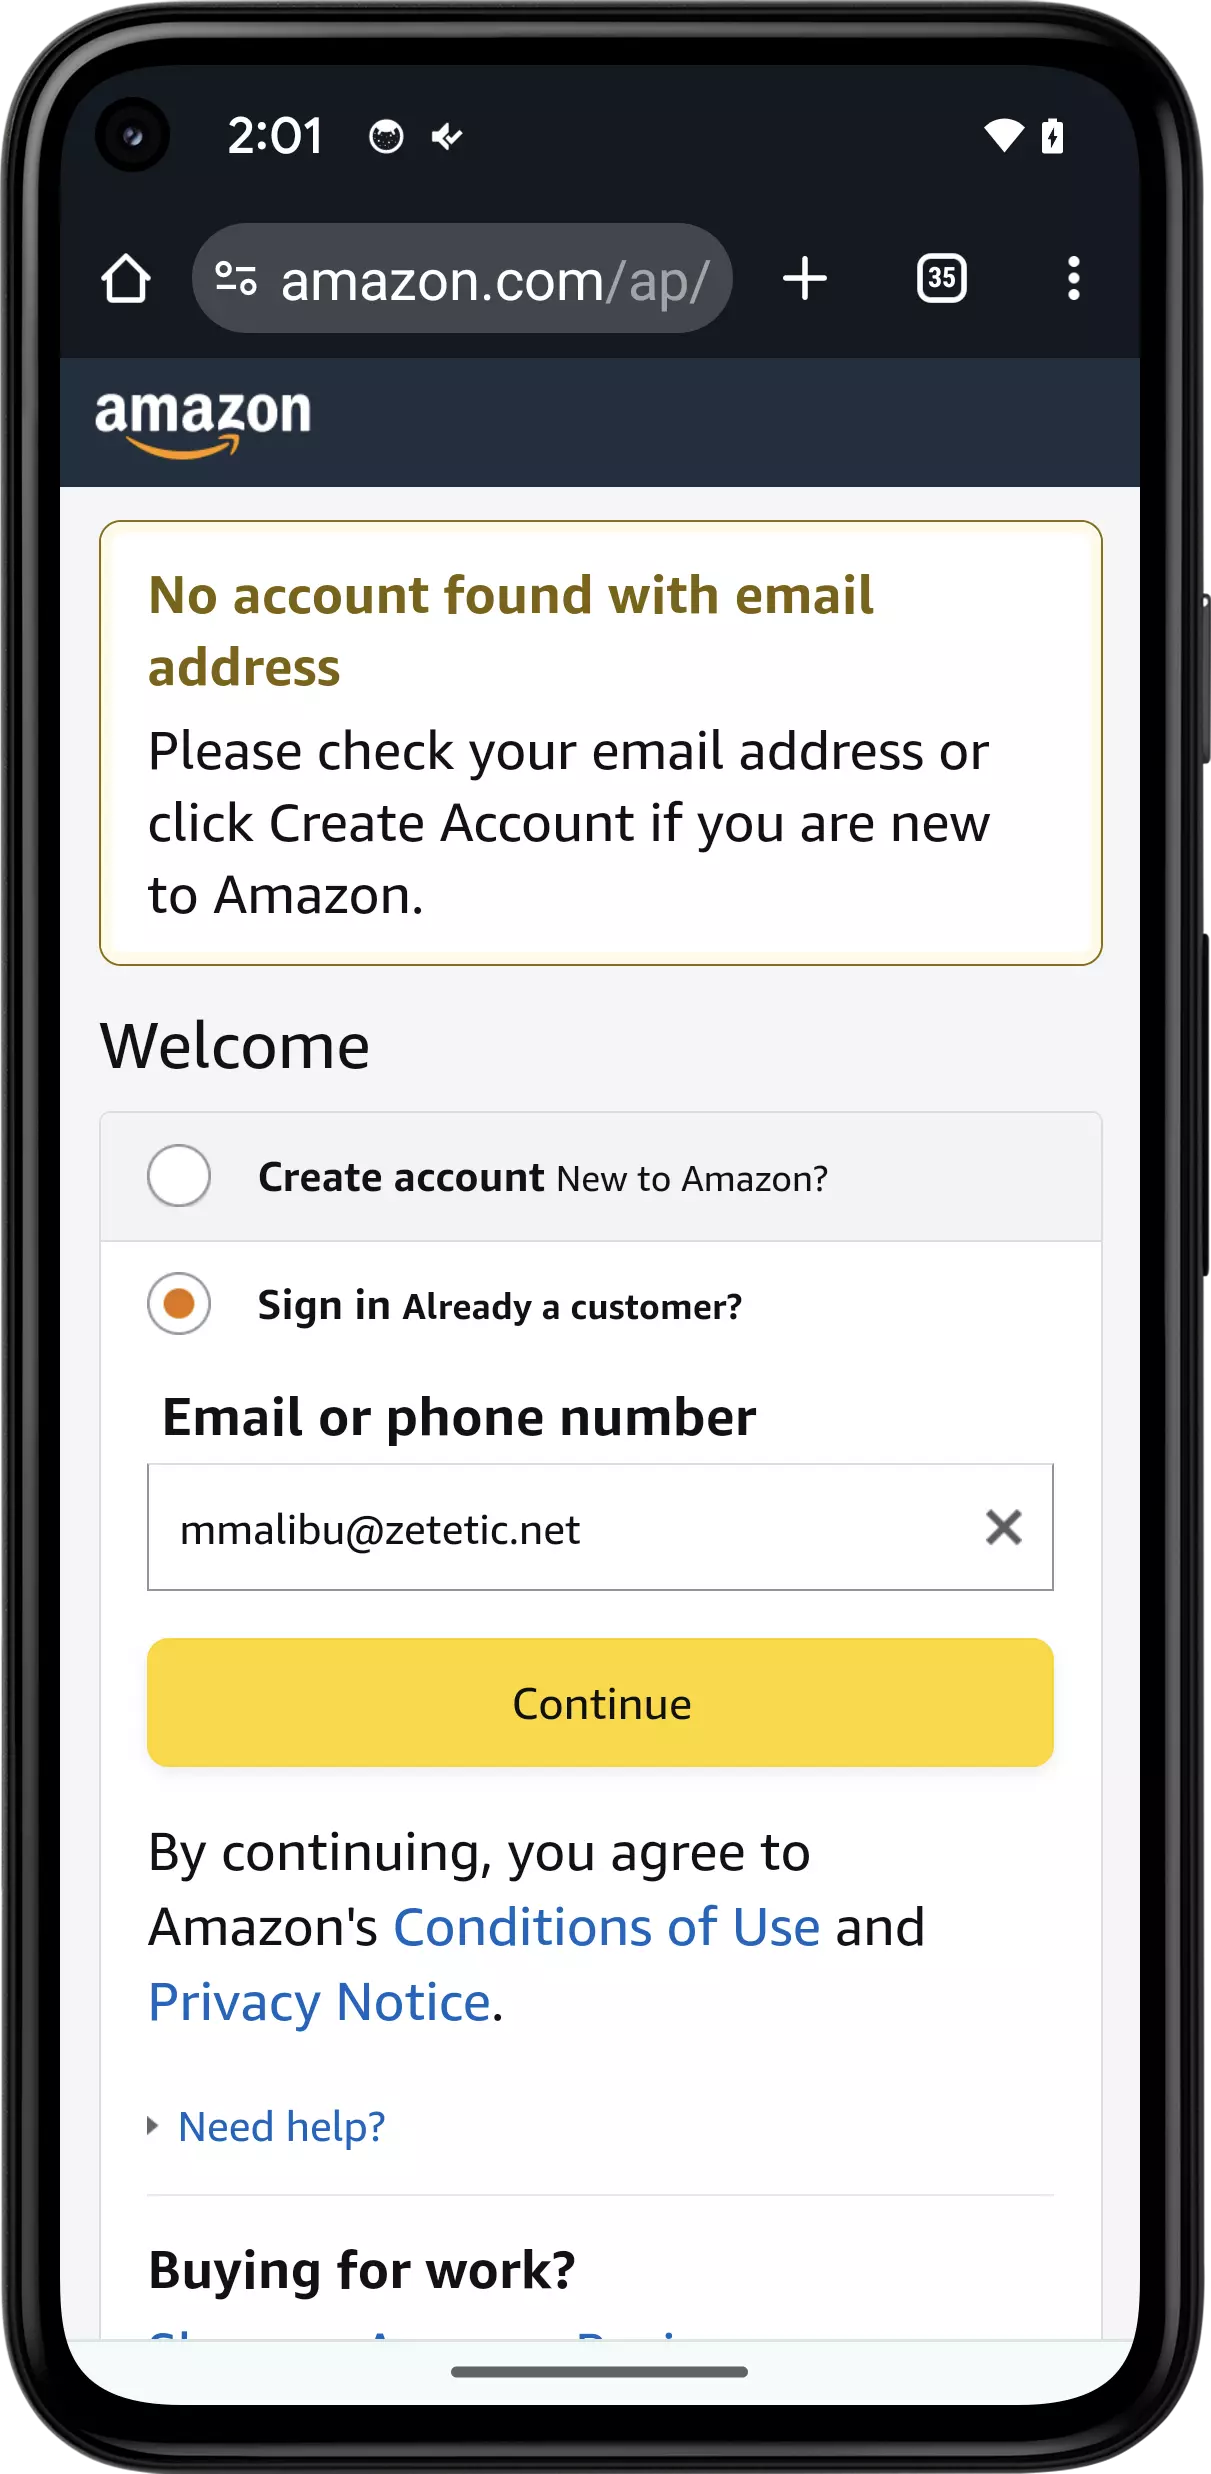
Whoops! Our example account, "mmalibu@zetetic.net" doesn't actually exist on Amazon, so we can't proceed further here, but we can see that Codebook has returned the information successfully to Chrome.
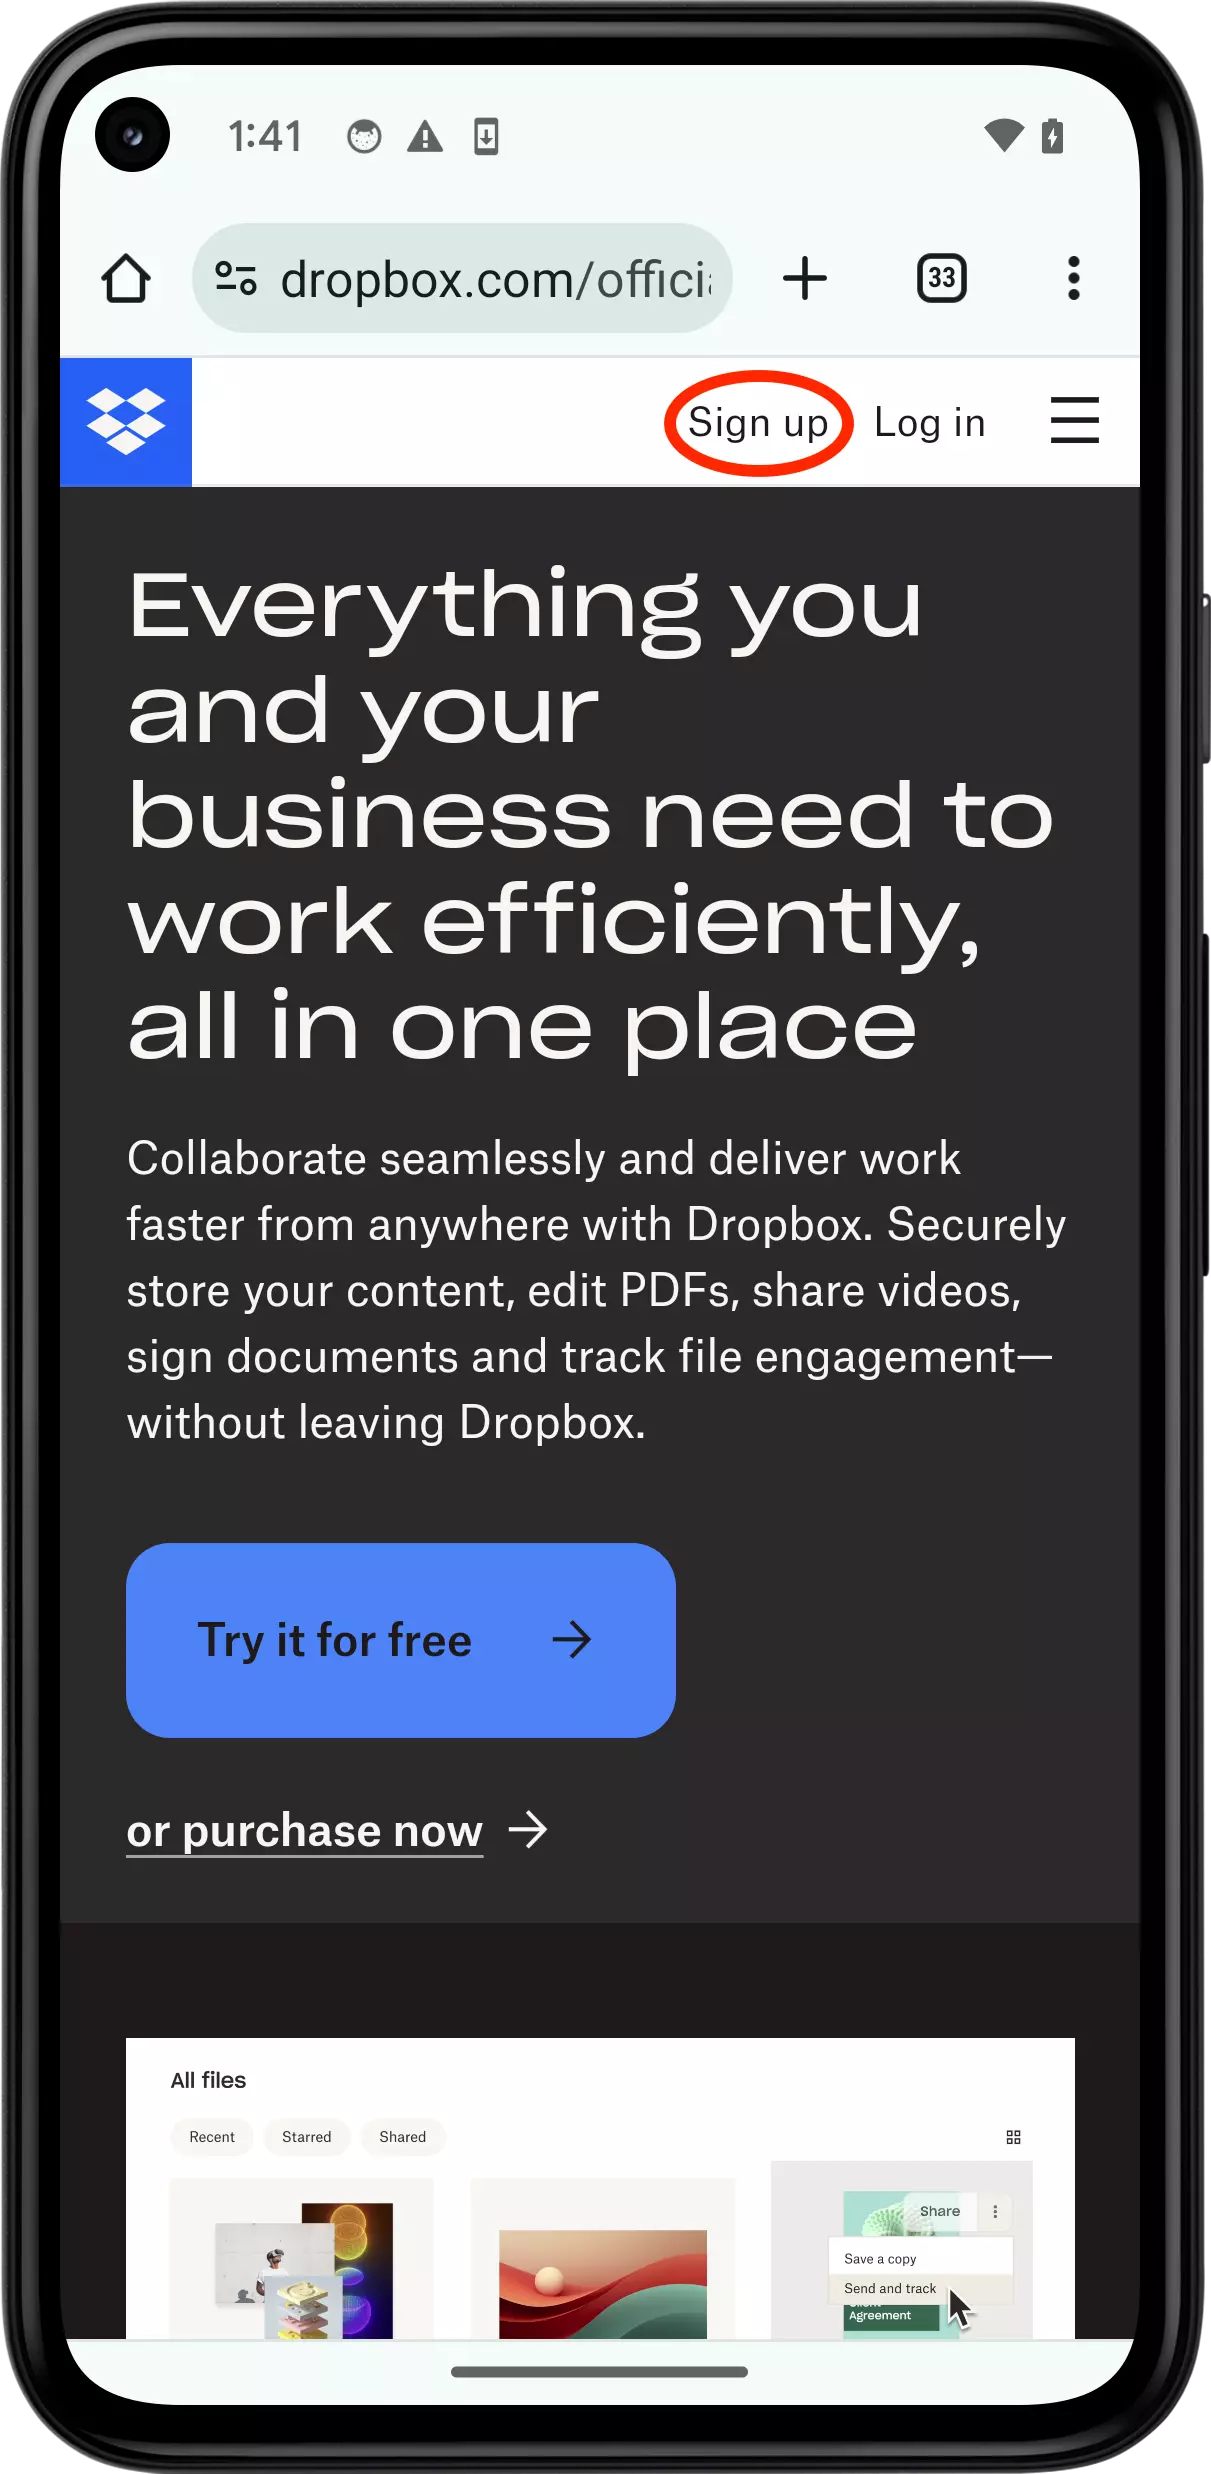
Let's try this login credential with another service. Navigate to dropbox.com in Chrome and click on the Log In link.
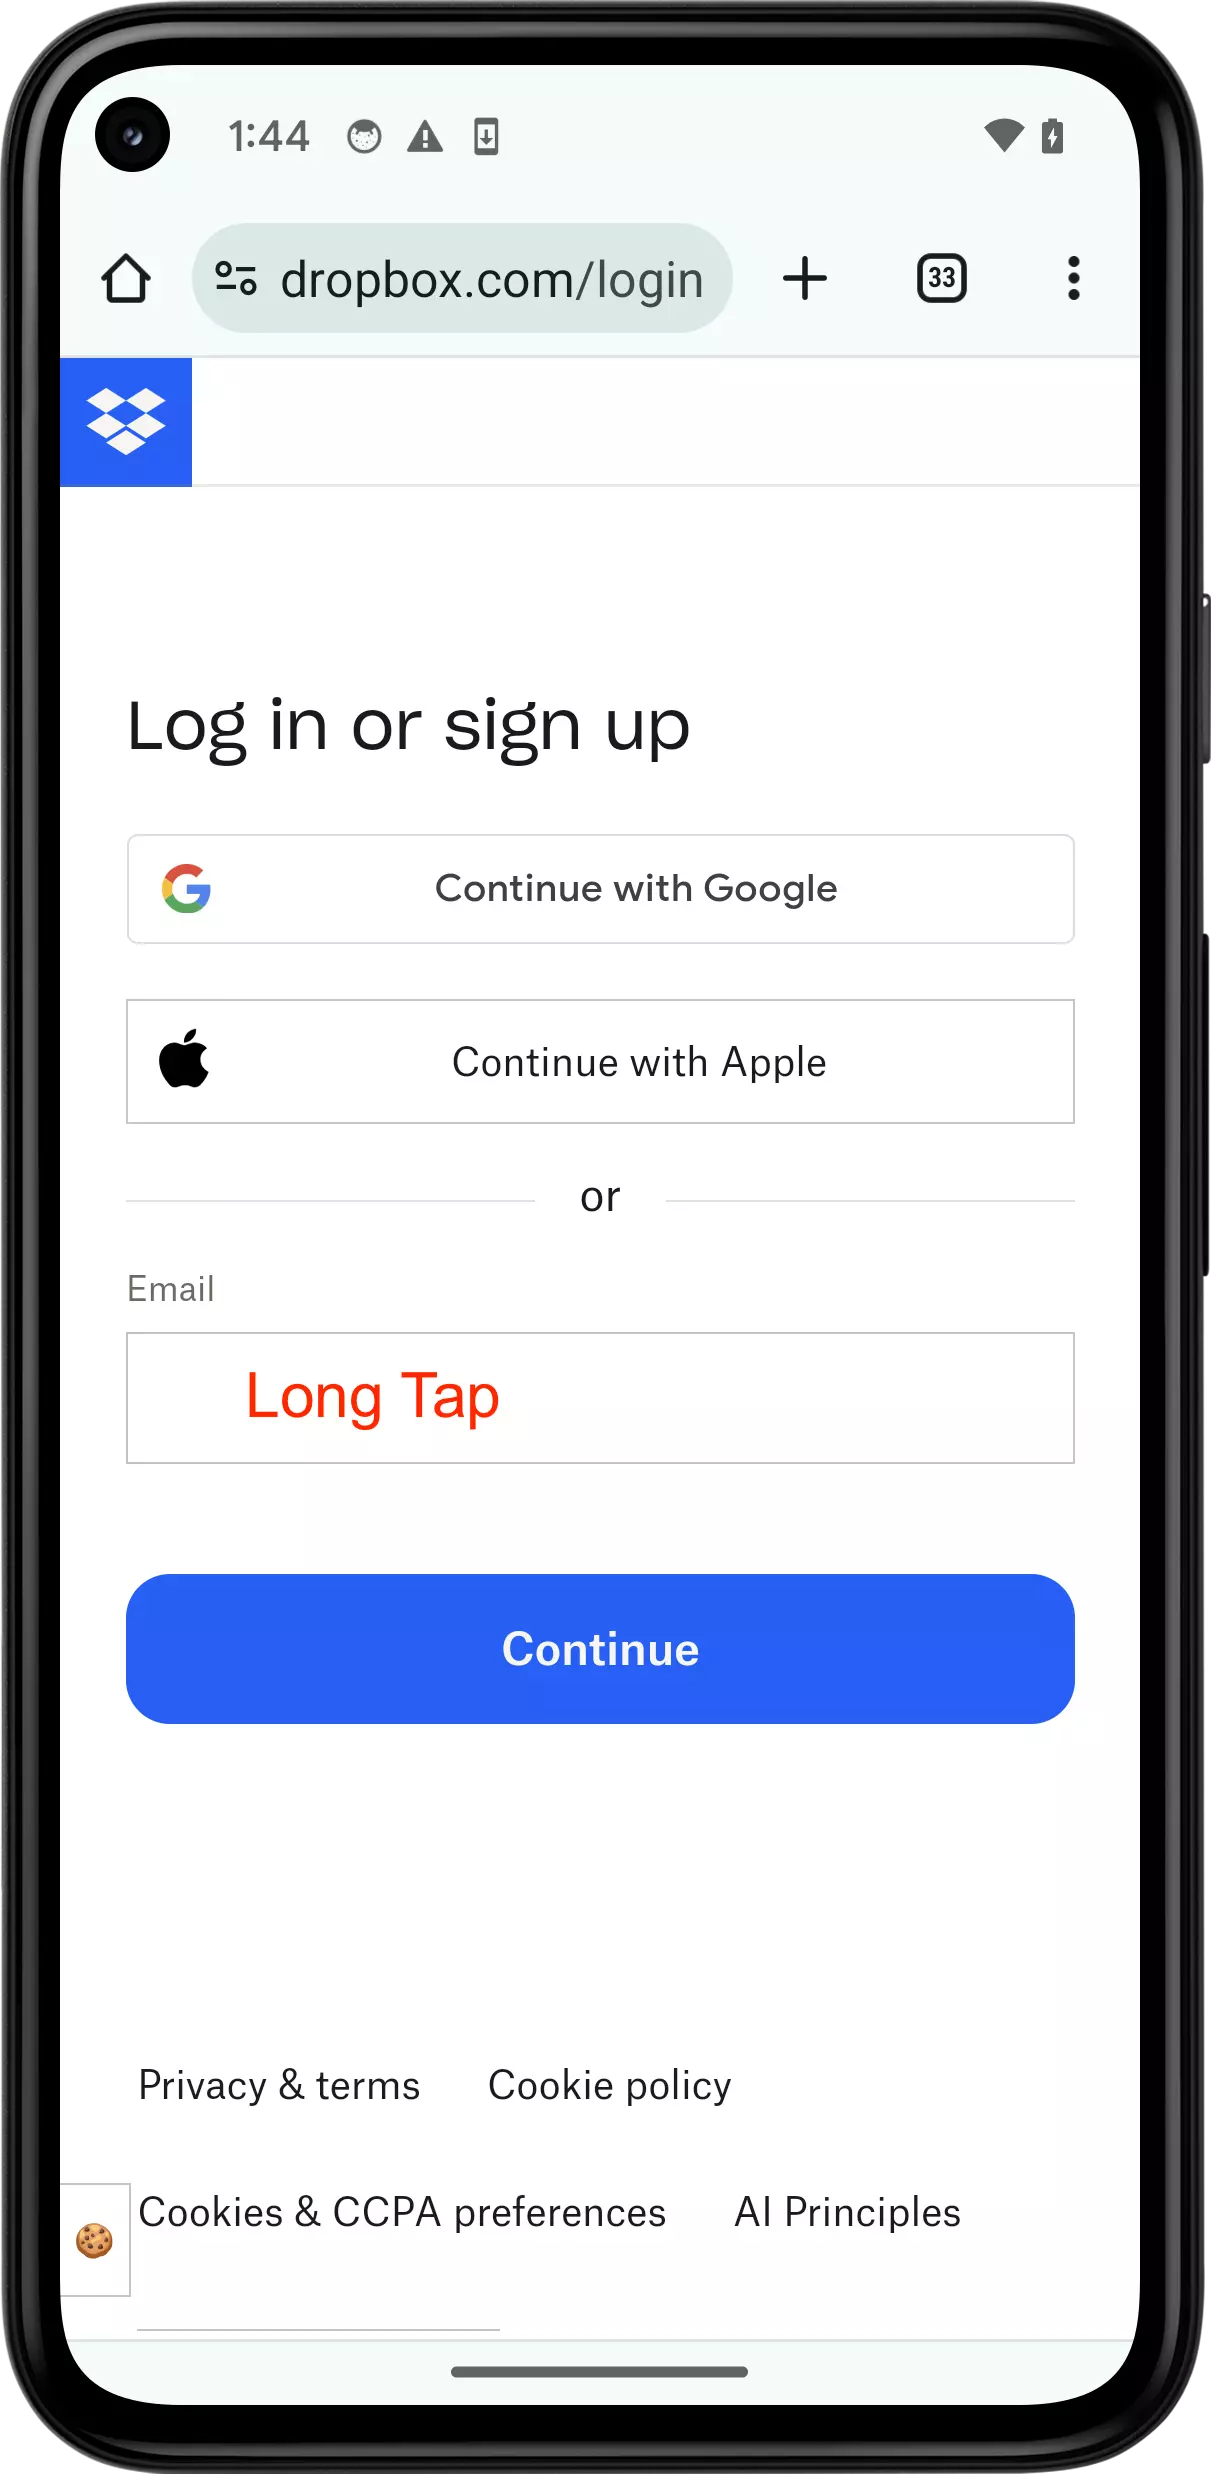
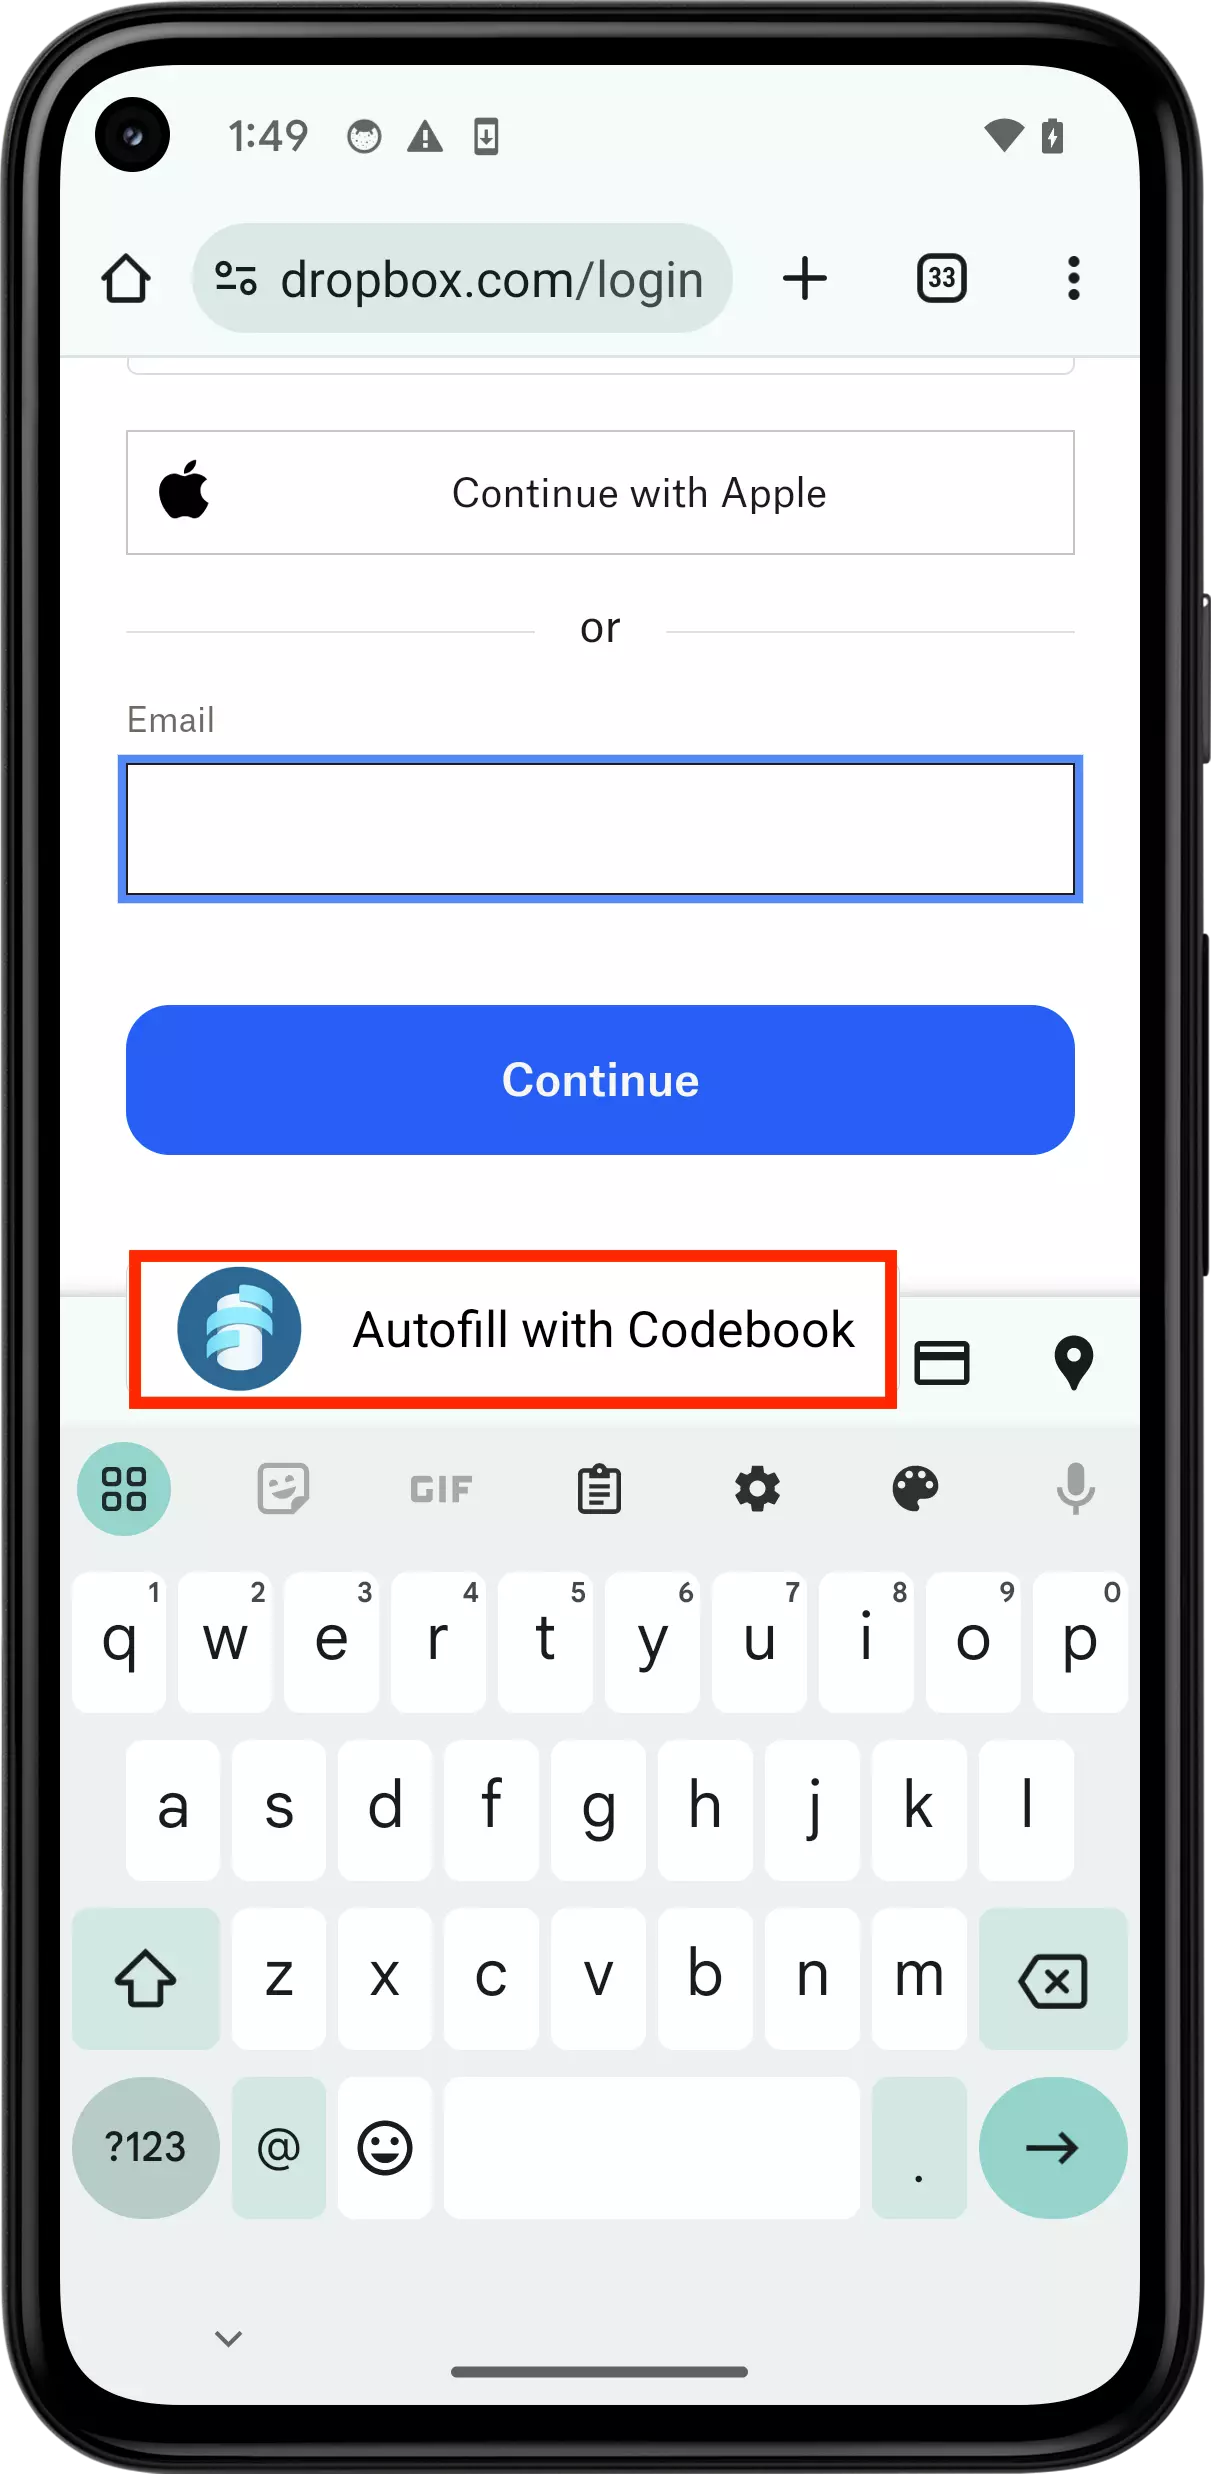
We can use the autofill feature even though we don't have information for Dropbox in Codebook. If we know that one of our entries does have the email and password we need, we can still proceed. Tap on the email field and the Autofill with Codebook dialog will appear.
As before, we are prompted to authenticate with Codebook with our Master Password.
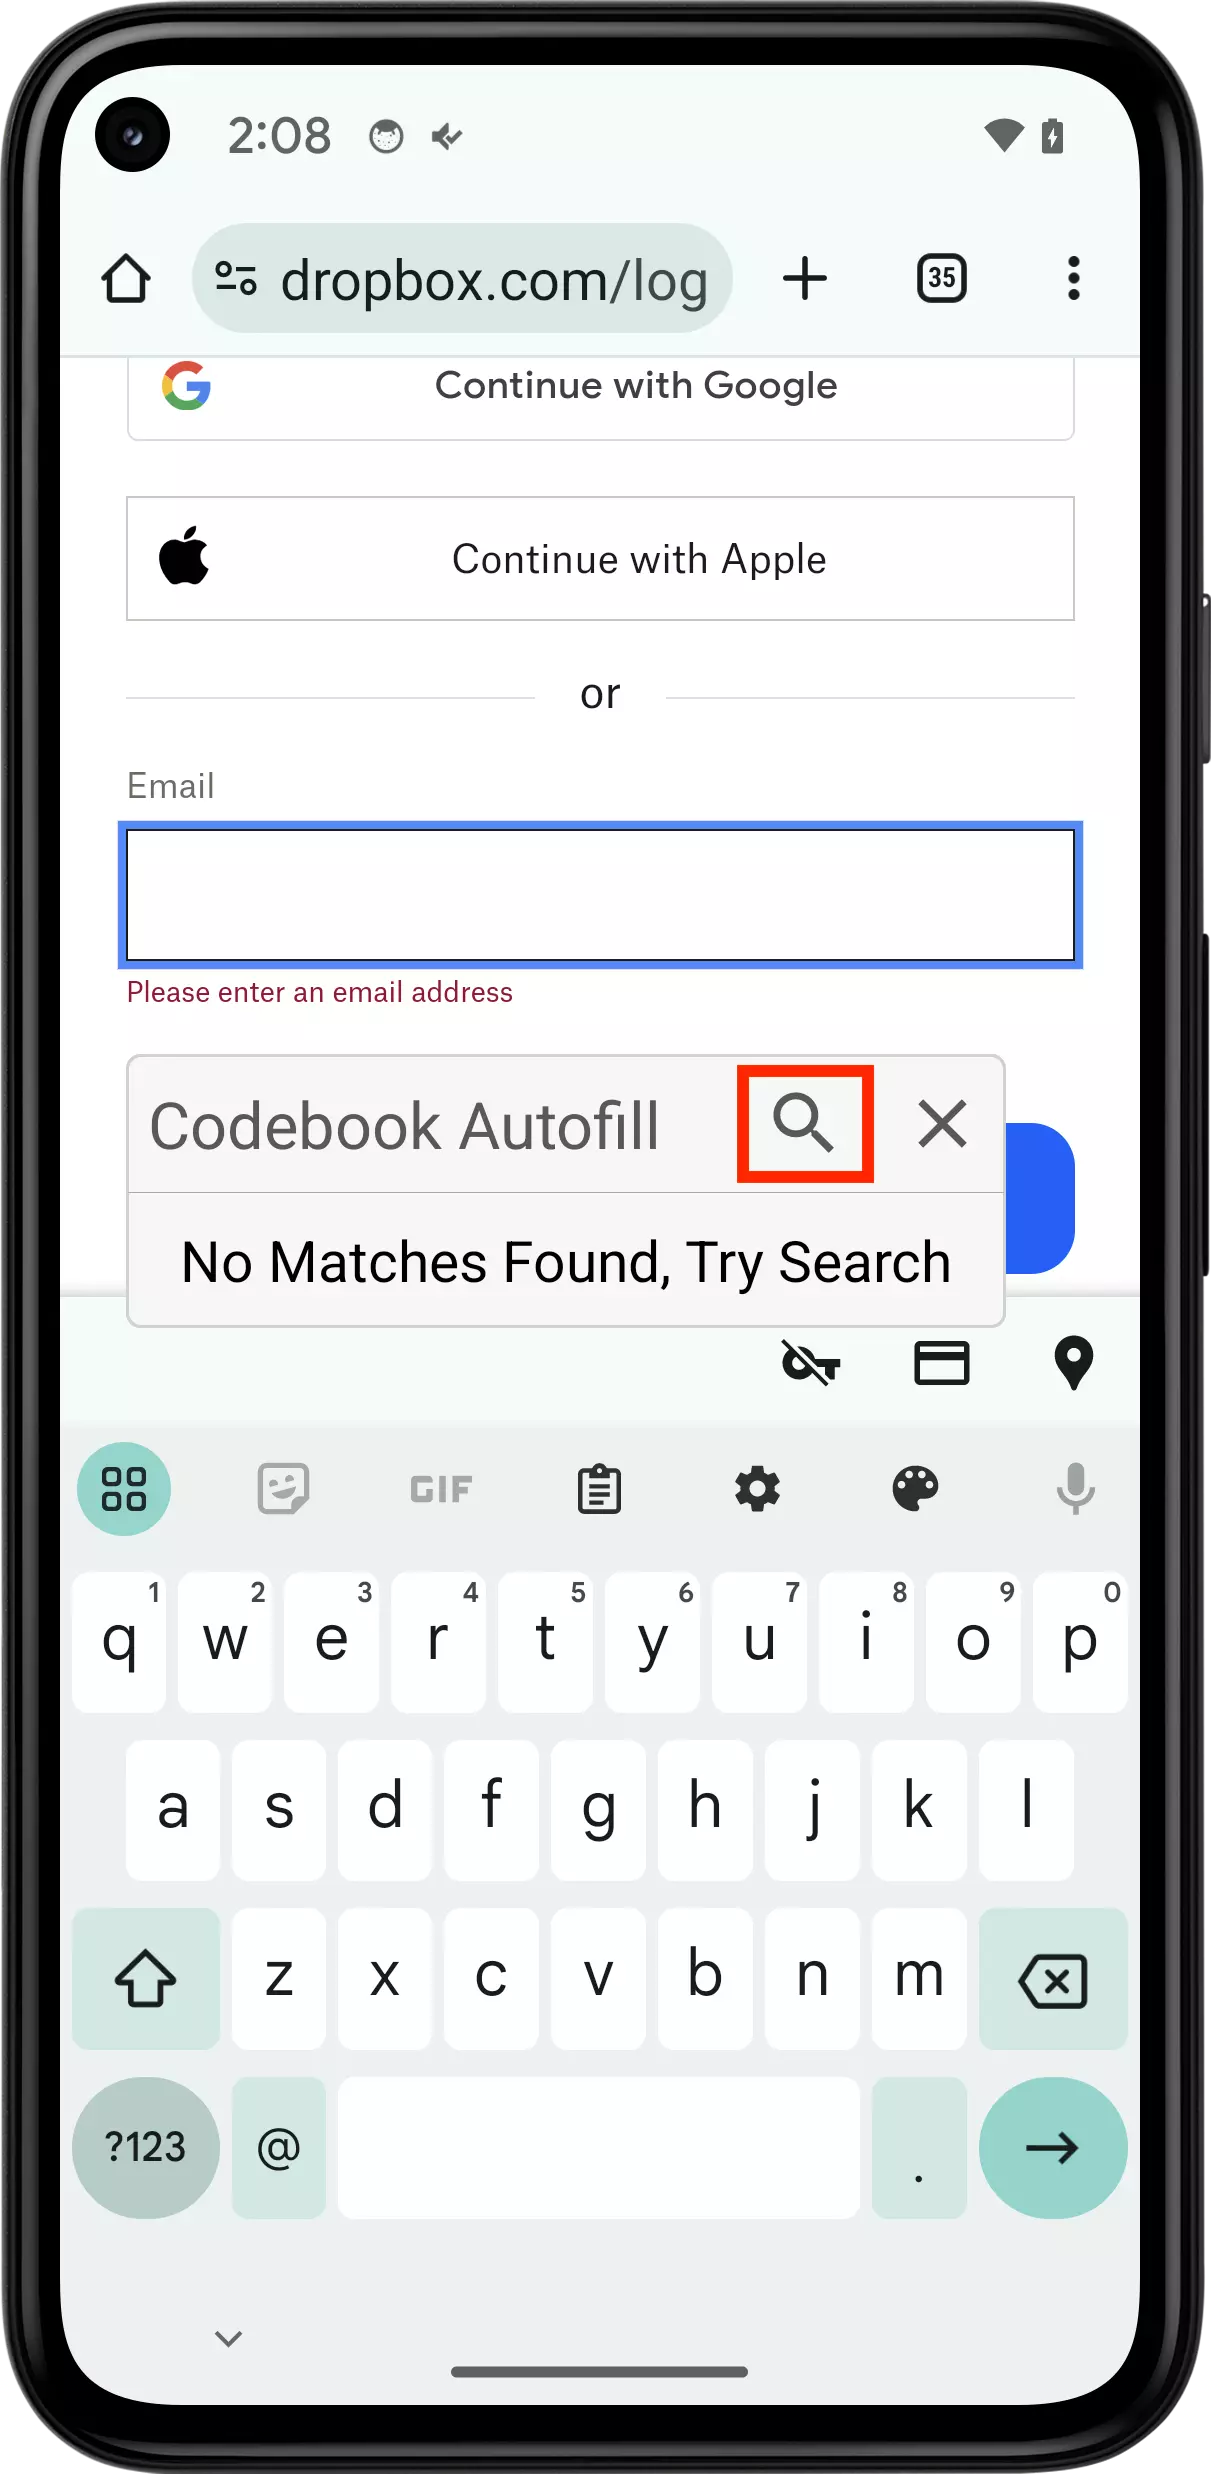
After authenticating, we see Codebook's AutoFill interface. There's not much to see here because Codebook doesn't know which Entry to suggest. However, if we tap on the magnifying glass, we can enter an entry to be retrieved. Begin typing a known entry name, 'a' in our case and our Amazon entry will be displayed.
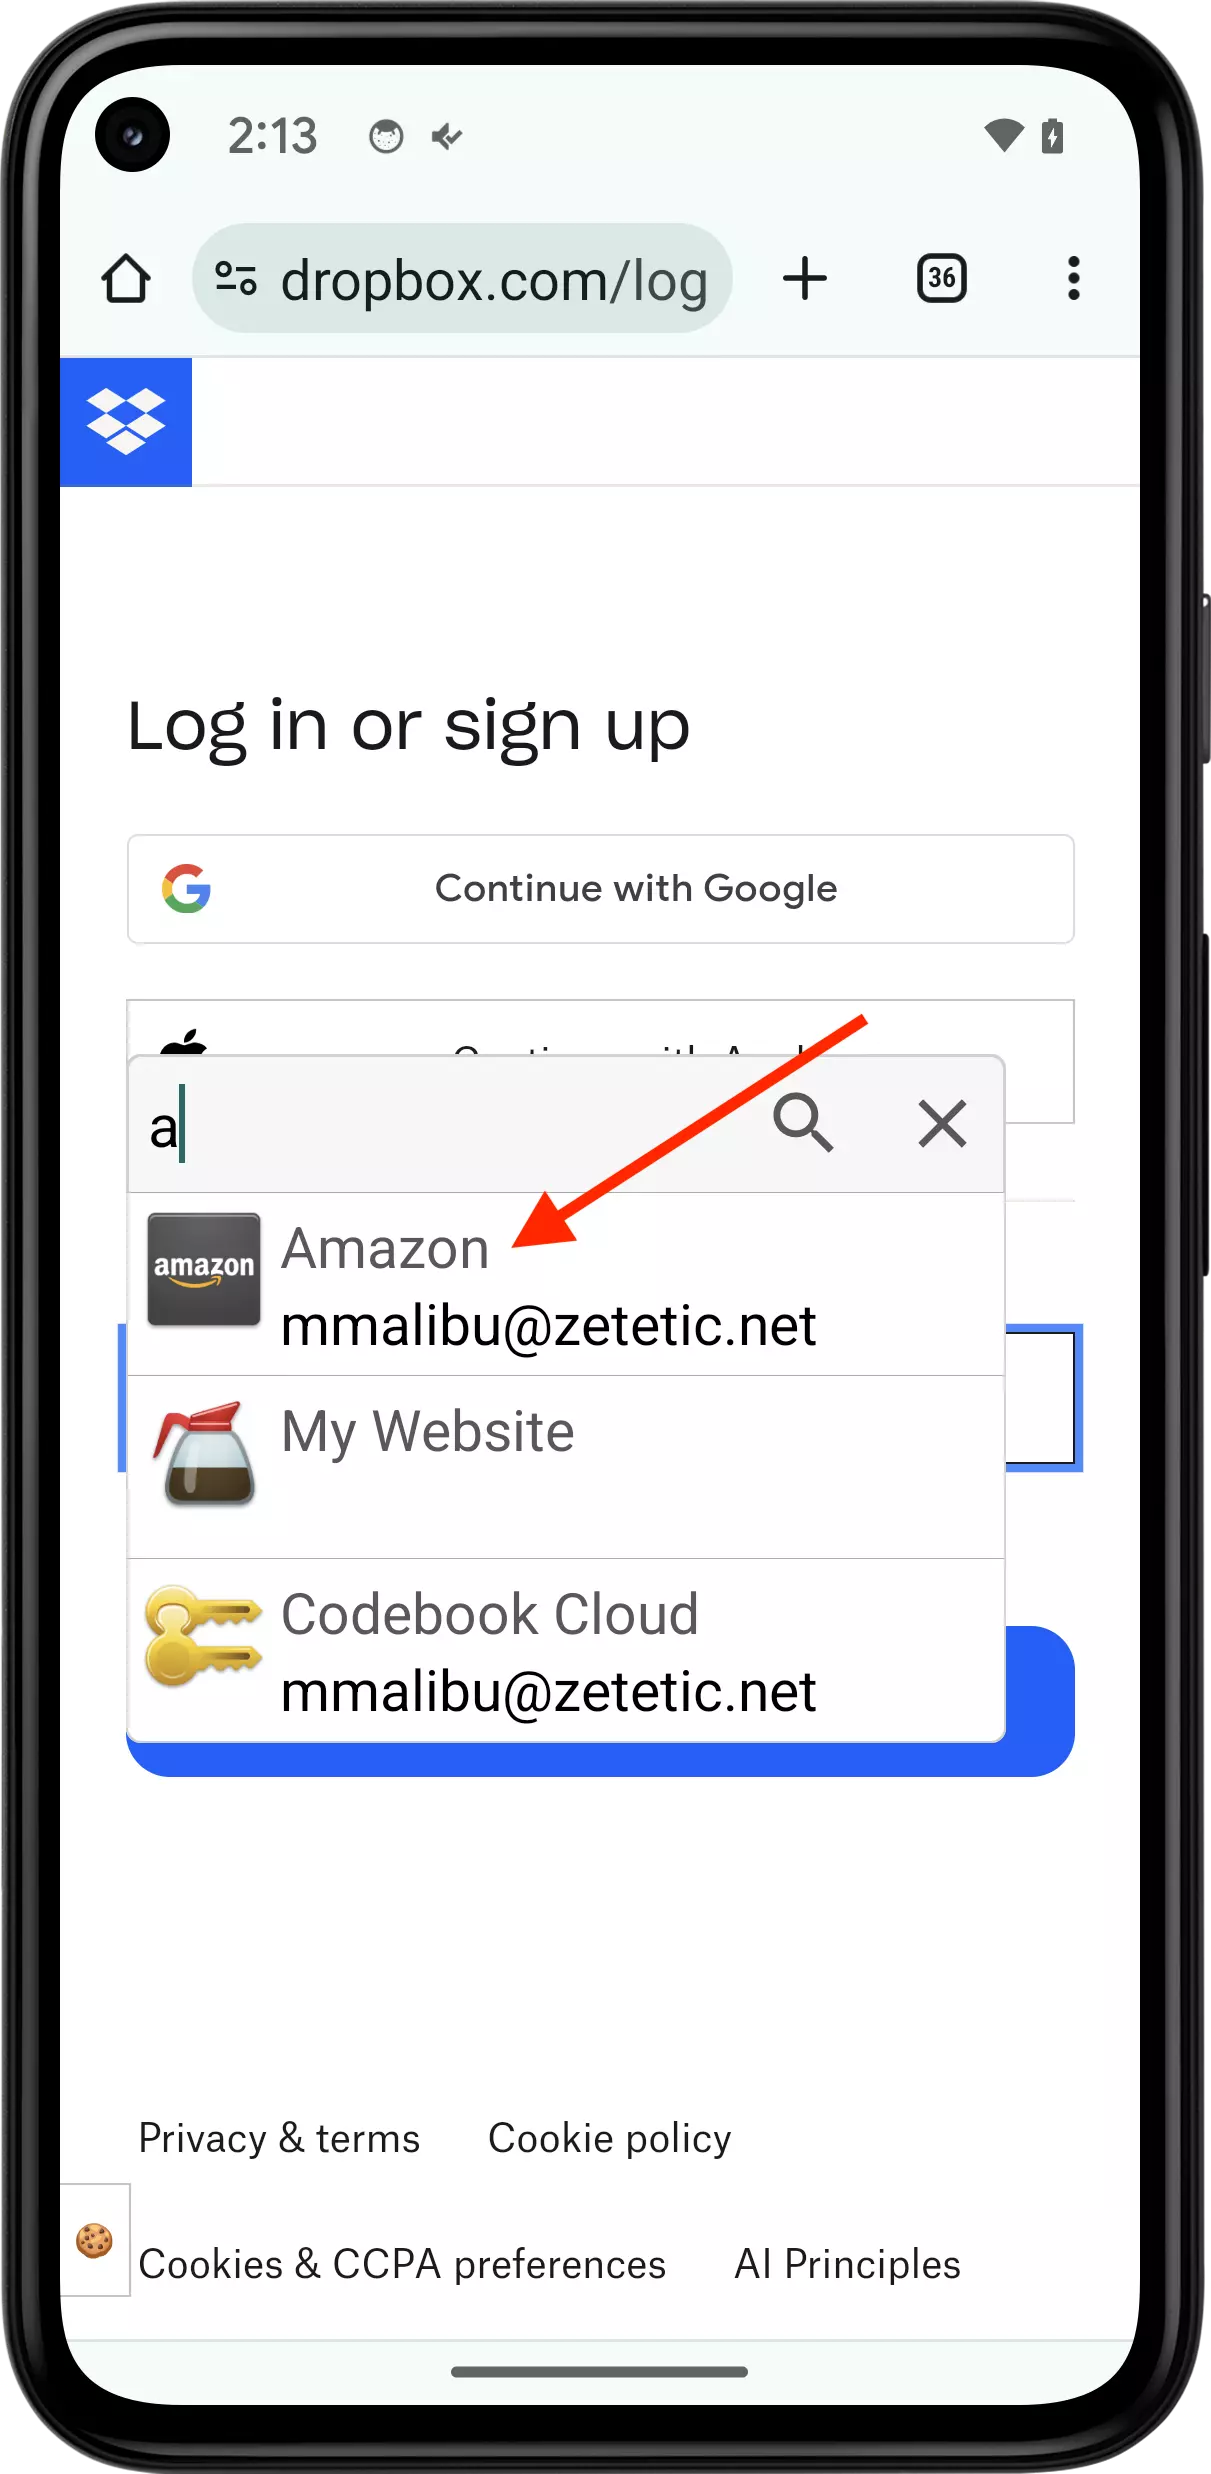
When we tap on the entry, the email address is filled in on the dropbox login screen. Codebook AutoFill returns us to Chrome, and the Email field is now filled in using the email on the Entry we selected.

First, you'll need to enable our Password AutoFill Extension for iOS in the Settings app. Please do that in order to follow along.
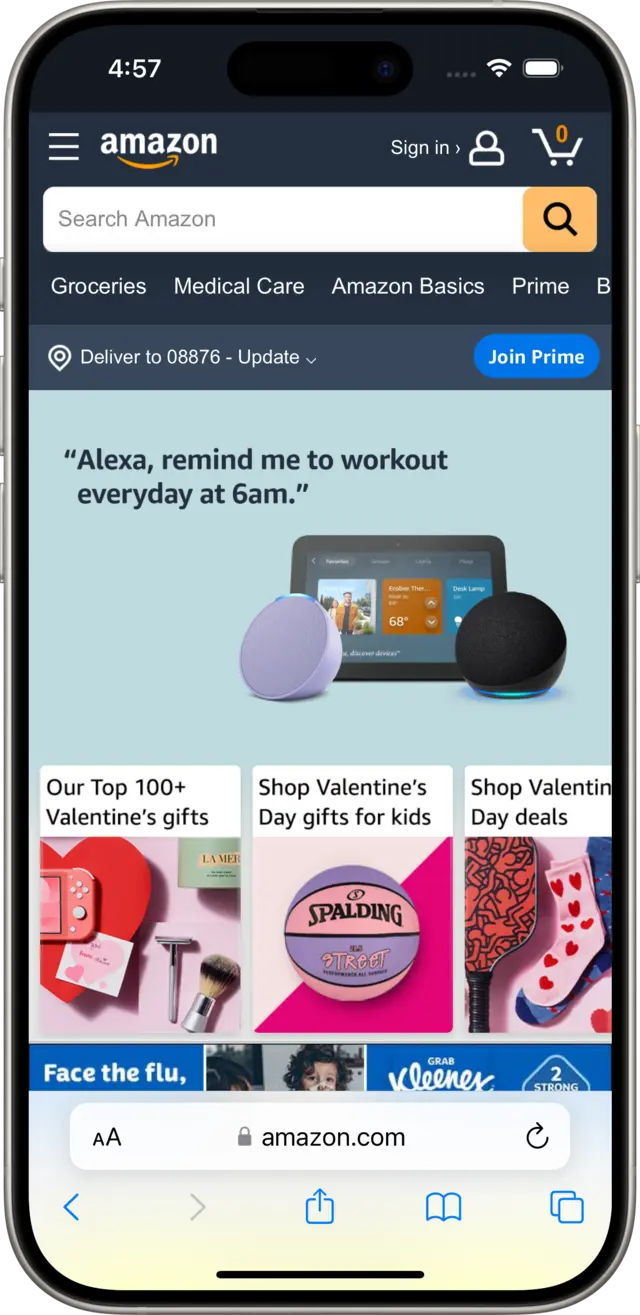
Now that you've enabled Codebook for AutoFill, it's time to try it out! Launch Safari on your iOS device, navigate to amazon.com, and tap on the Sign In link.
When the Sign In page loads, iOS should automatically present the option for you to sign in with the credentials you already set up in Codebook, with the AutoFill Passwords prompt.
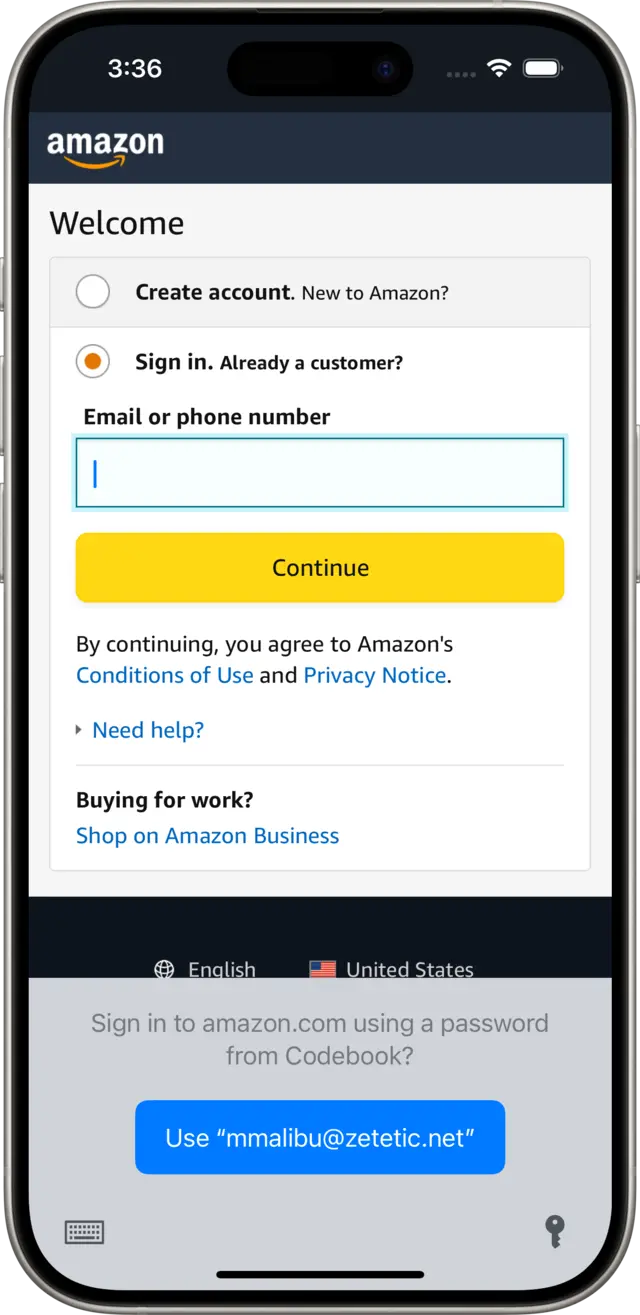
Tap on the button to use the credentials you've entered (in our case, "mmalibu@zetetic.net"), and you will be prompted to authenticate with Codebook using your Master Password. If you have Face ID or Touch ID Login enabled for Codebook, that will also be available when authenticating for AutoFill.
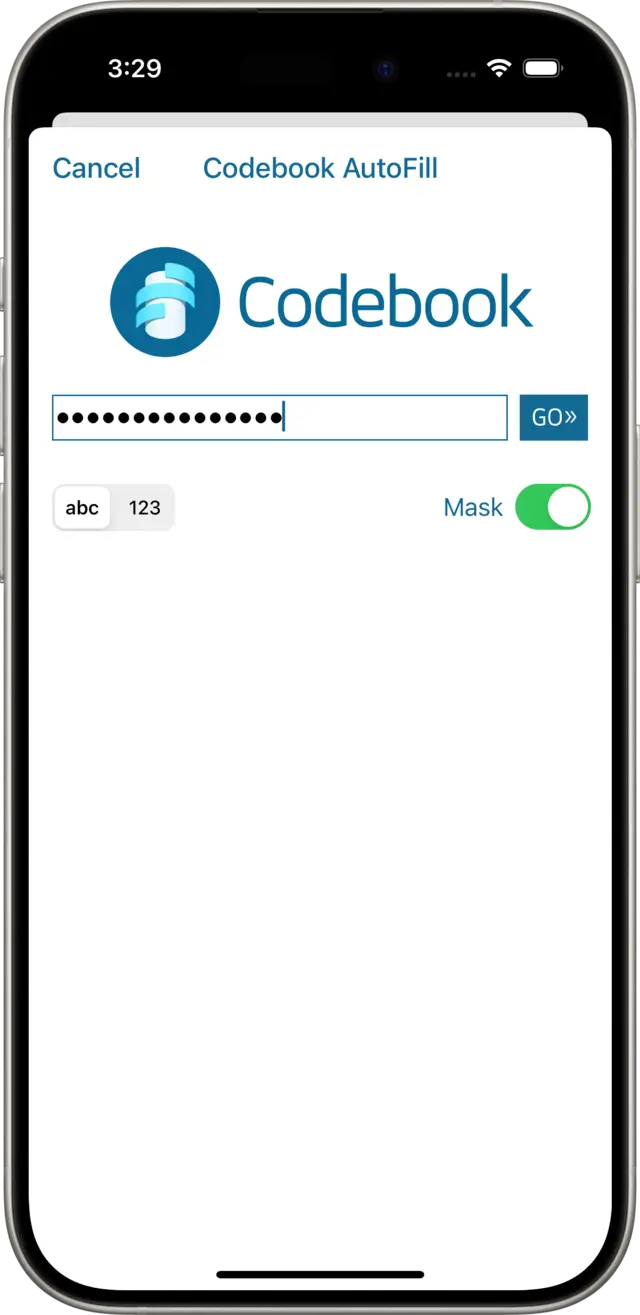
After authenticating, Codebook looks up the Password for the Amazon entry you set up, and passes it, along with the Email address to use, back to Safari and attempts to fill it into the login form.
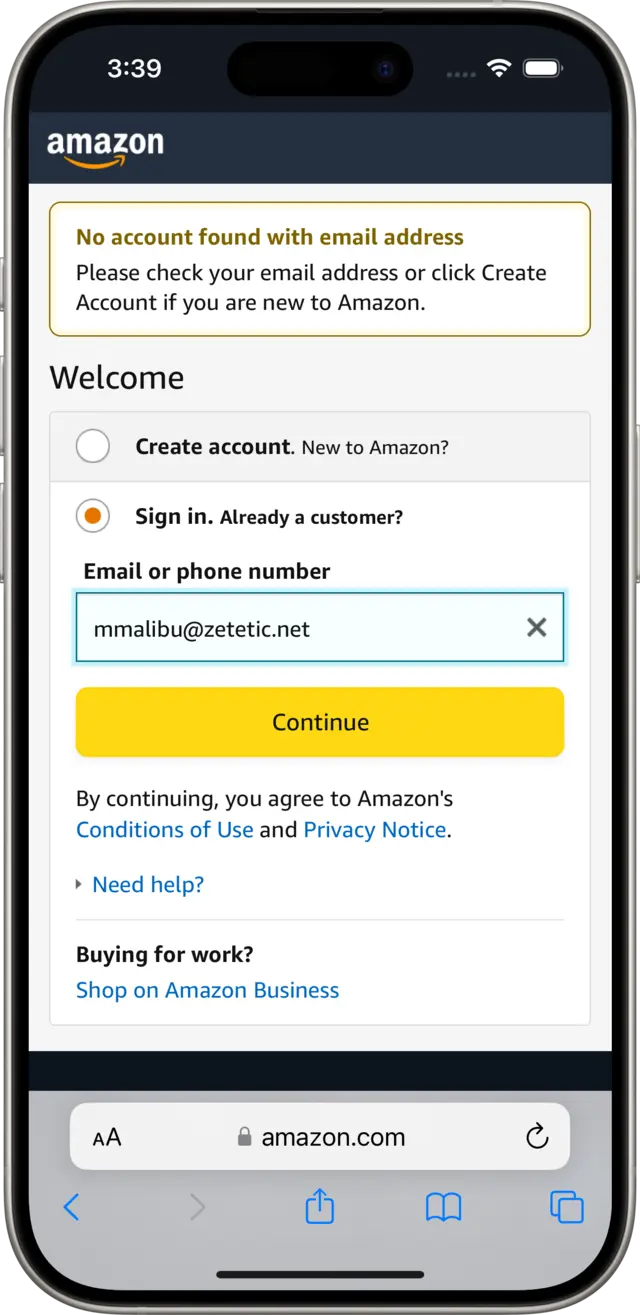
Whoops! Our example account, "mmalibu@zetetic.net" doesn't actually exist on Amazon, so we can't proceed further here, but we can see that Codebook has returned the information successfully to Safari.
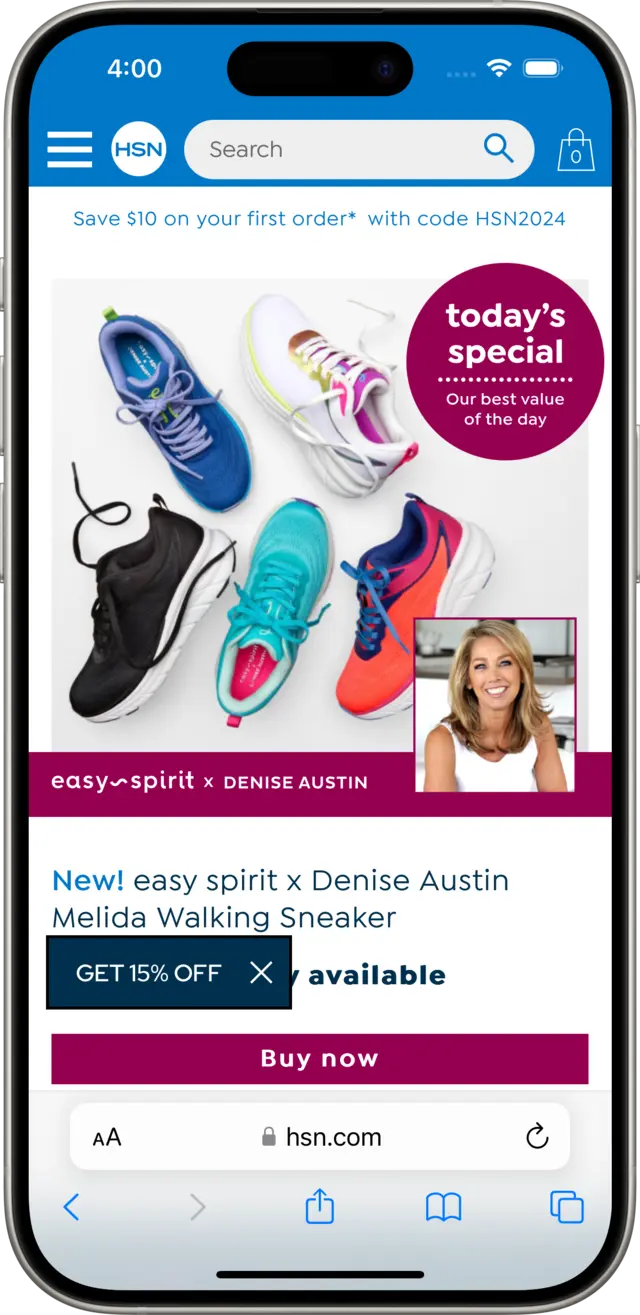
Let's try this login credential with another service. Navigate to hsn.com in Safari and click on the Sign In link.
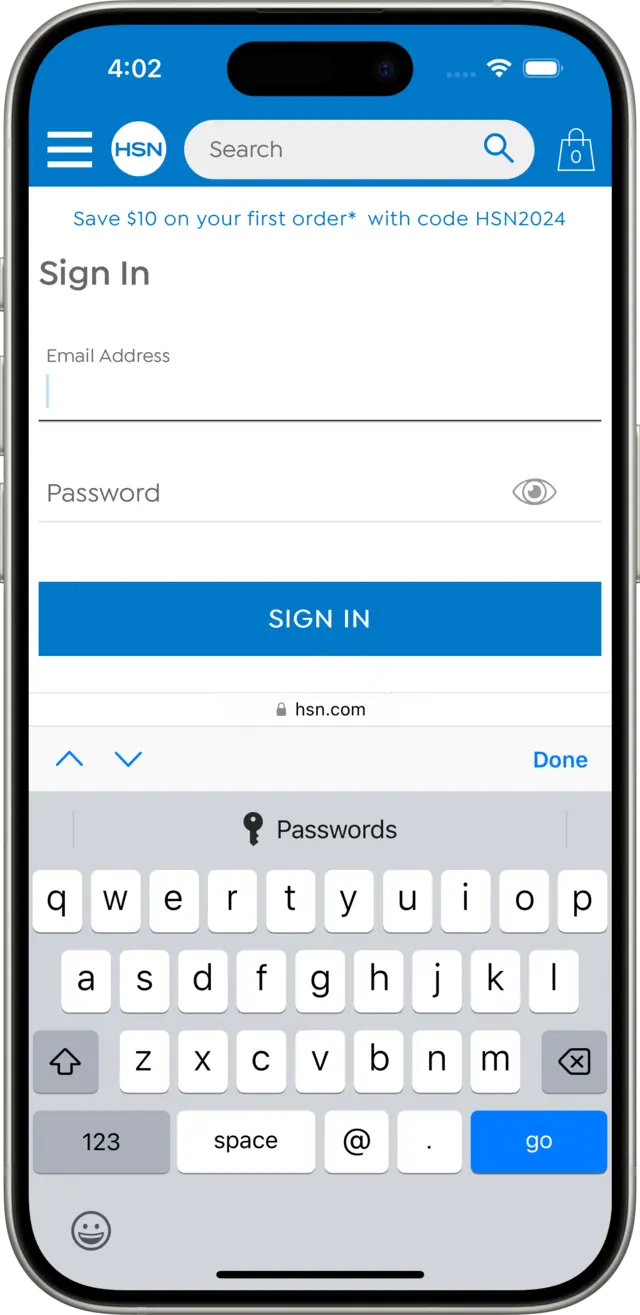
Notice we aren't automatically prompted with an account from Codebook to sign in. This is because we haven't set up an Entry in Codebook that has this Website in its fields. However, if we know that one of our Entries does have the password we need, we can still proceed. Focus on the Email field and you will see a Passwords button above the on-screen Keyboard. Tap on that button.
As before, we are prompted to authenticate with Codebook with our Master Password.
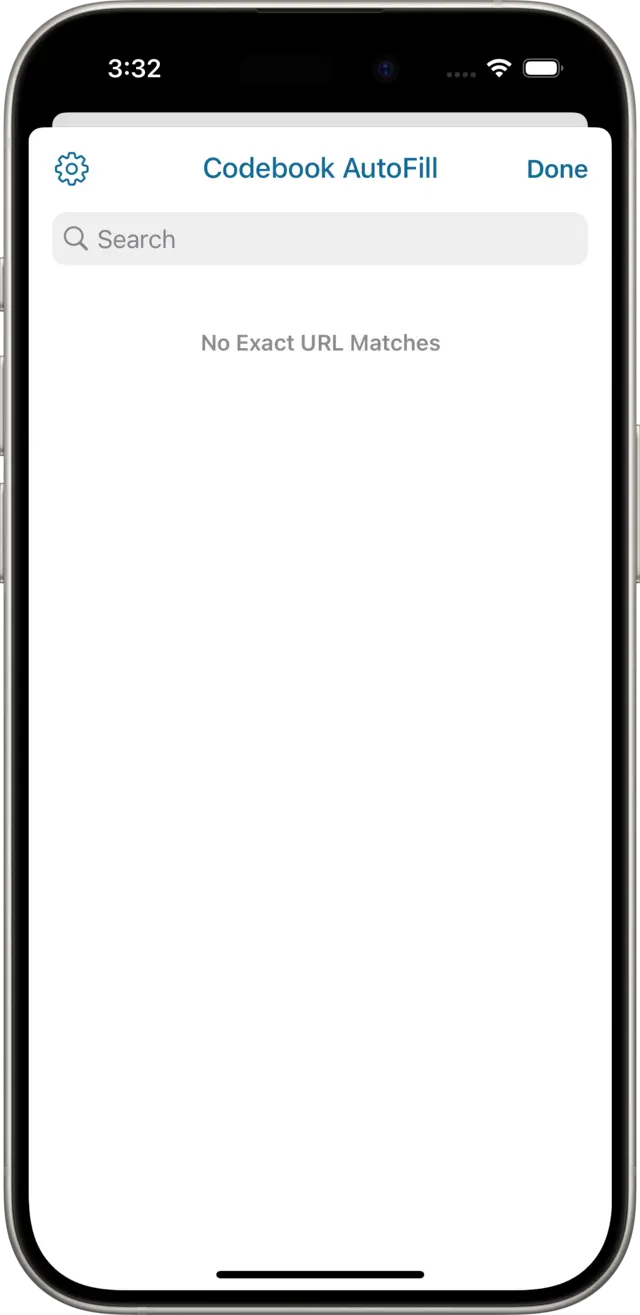
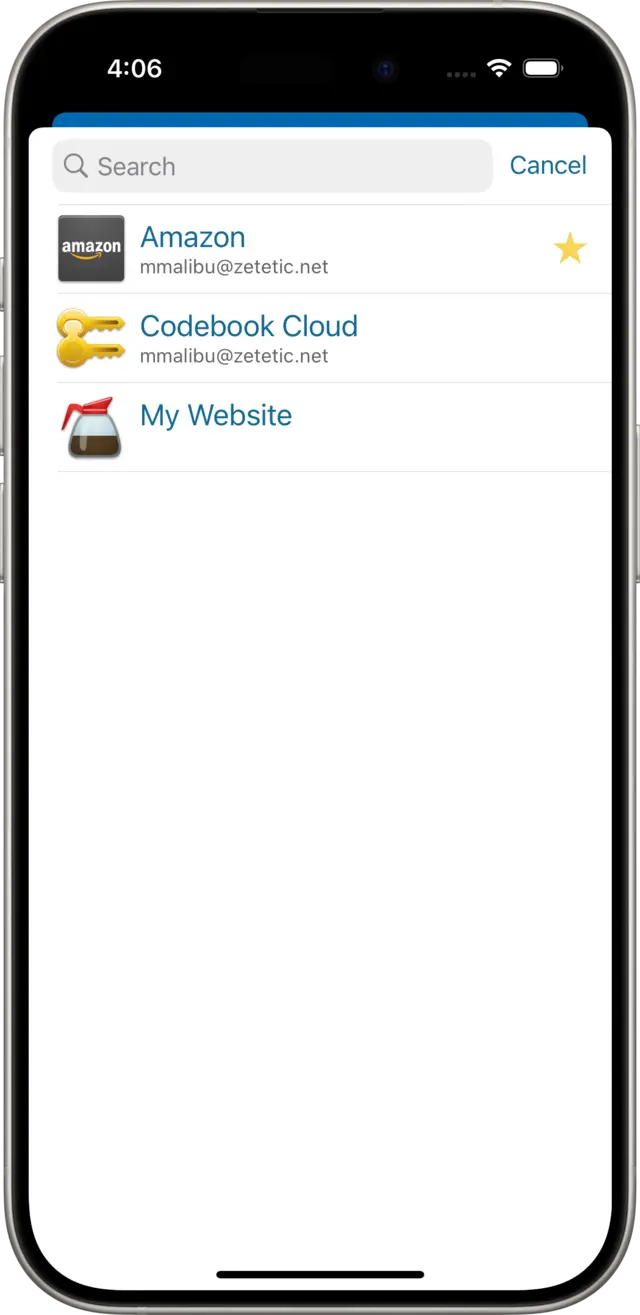
After authenticating, we see Codebook's AutoFill interface. There's not much to see here because Codebook doesn't know which Entry to suggest. However, if we tap on the Search field to look up the record we need, the record we created previously, "Amazon", is listed at the top of the view, since it's one of our Favorites. Tap on it.
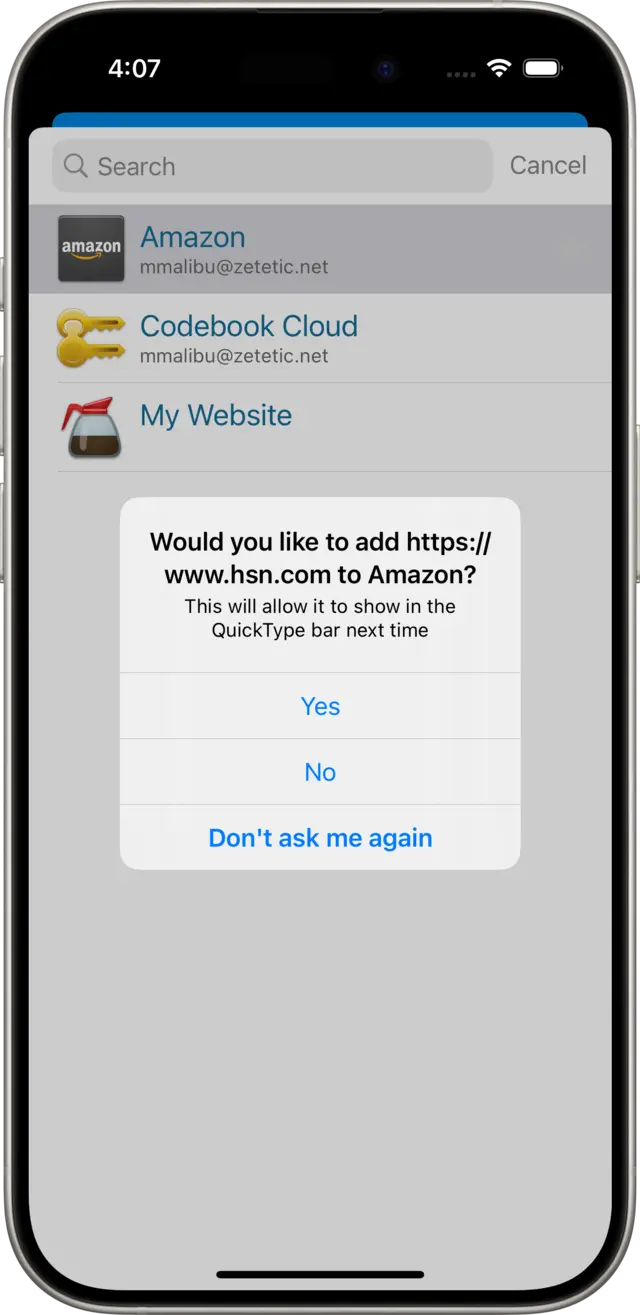
Codebook then prompts us to see if we want to associate this Entry with this Website later on. Tap on Yes.
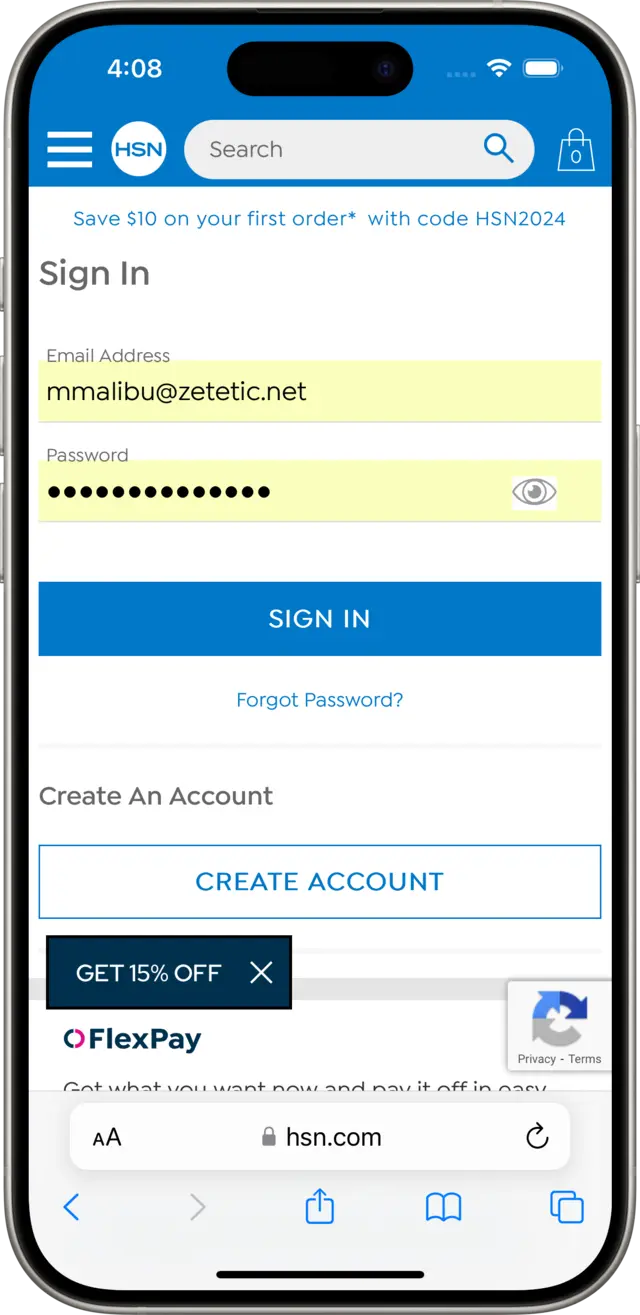
Codebook AutoFill returns us to Safari, and the Email and Password fields are now filled in using the Fields on the Entry we selected.
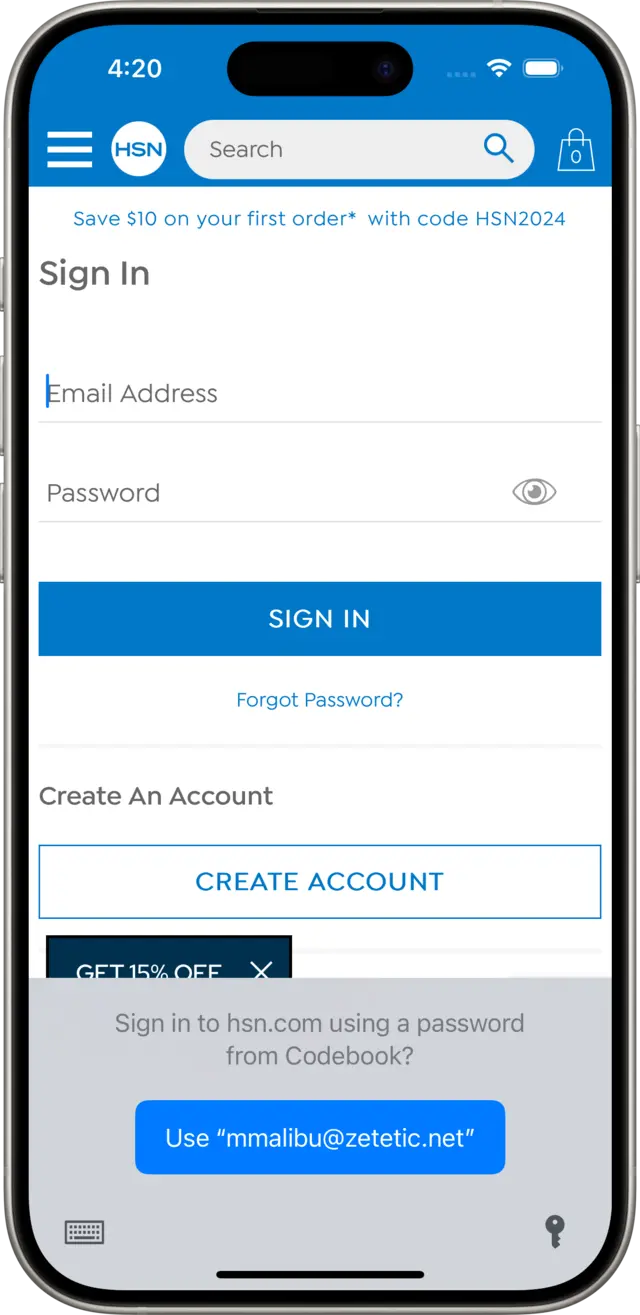
Now if we reload this login form and again focus on the Email field, AutoFill knows to offer the Entry we previously selected.
Codebook for macOS features two ways to use your passwords in other apps, Password AutoFill, and Secret Agent.
Password AutoFill is an Extension for macOS 11 Big Sur that allows Codebook to hook into macOS's built-in feature for auto-filling login forms on websites and in other Mac apps using the login IDs and passwords you store in Codebook. It's convenient and easy to use, and is focused on filling in login forms with username/email and password credentials.
Secret Agent is a global keyboard shortcut and helper window you can use to look up and insert your passwords and other fields into any app on your Mac. You can use it to insert one value at a time, or use its more advanced features to fill out multiple fields at once. It also works on every version of macOS that Codebook supports (macOS 10.12 and later).
For now we'll focus on Password AutoFill.
First, you'll need to enable the Extension on your Mac, in System Settings. Please do that in order to follow along.
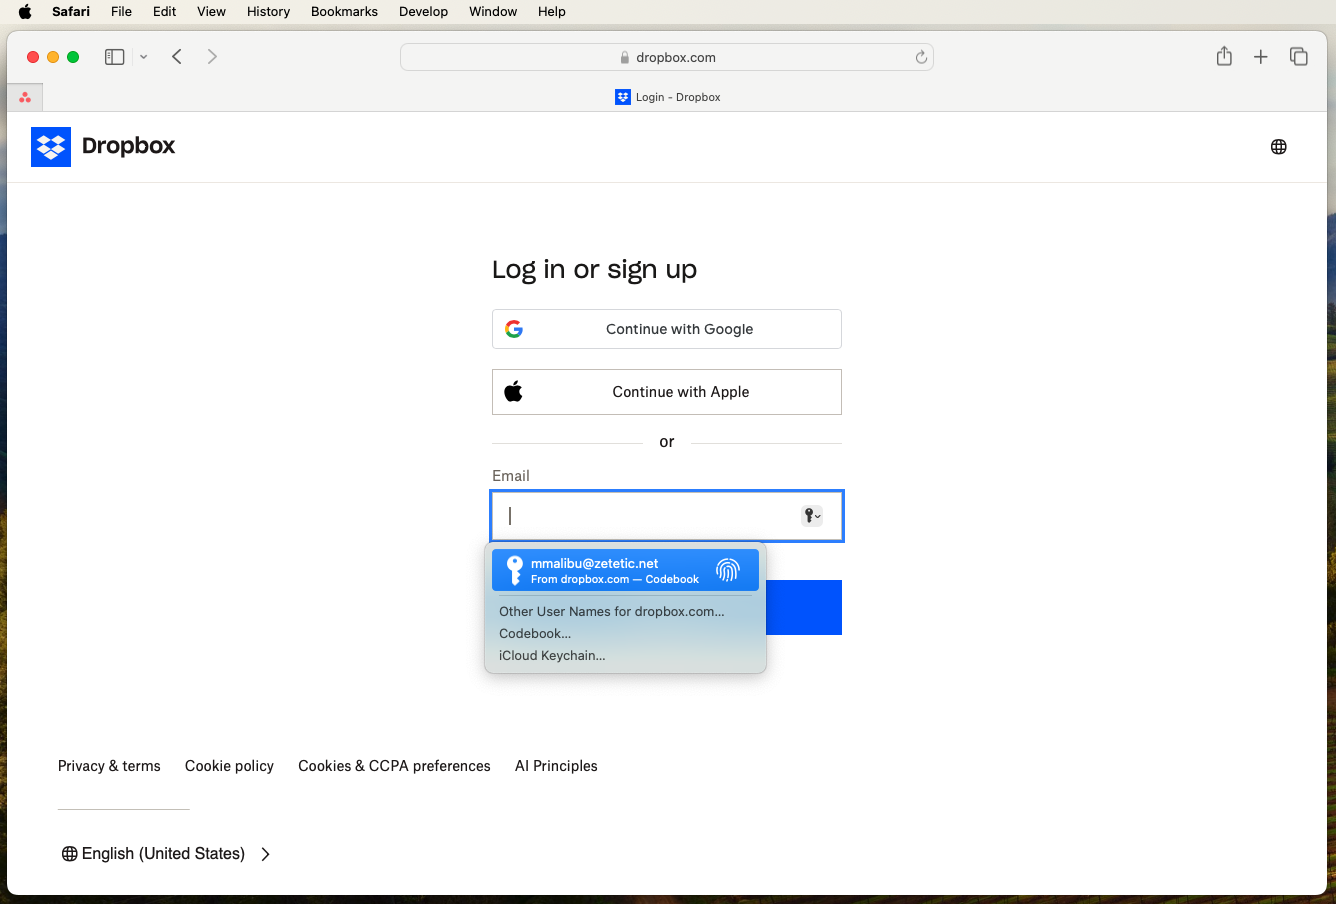
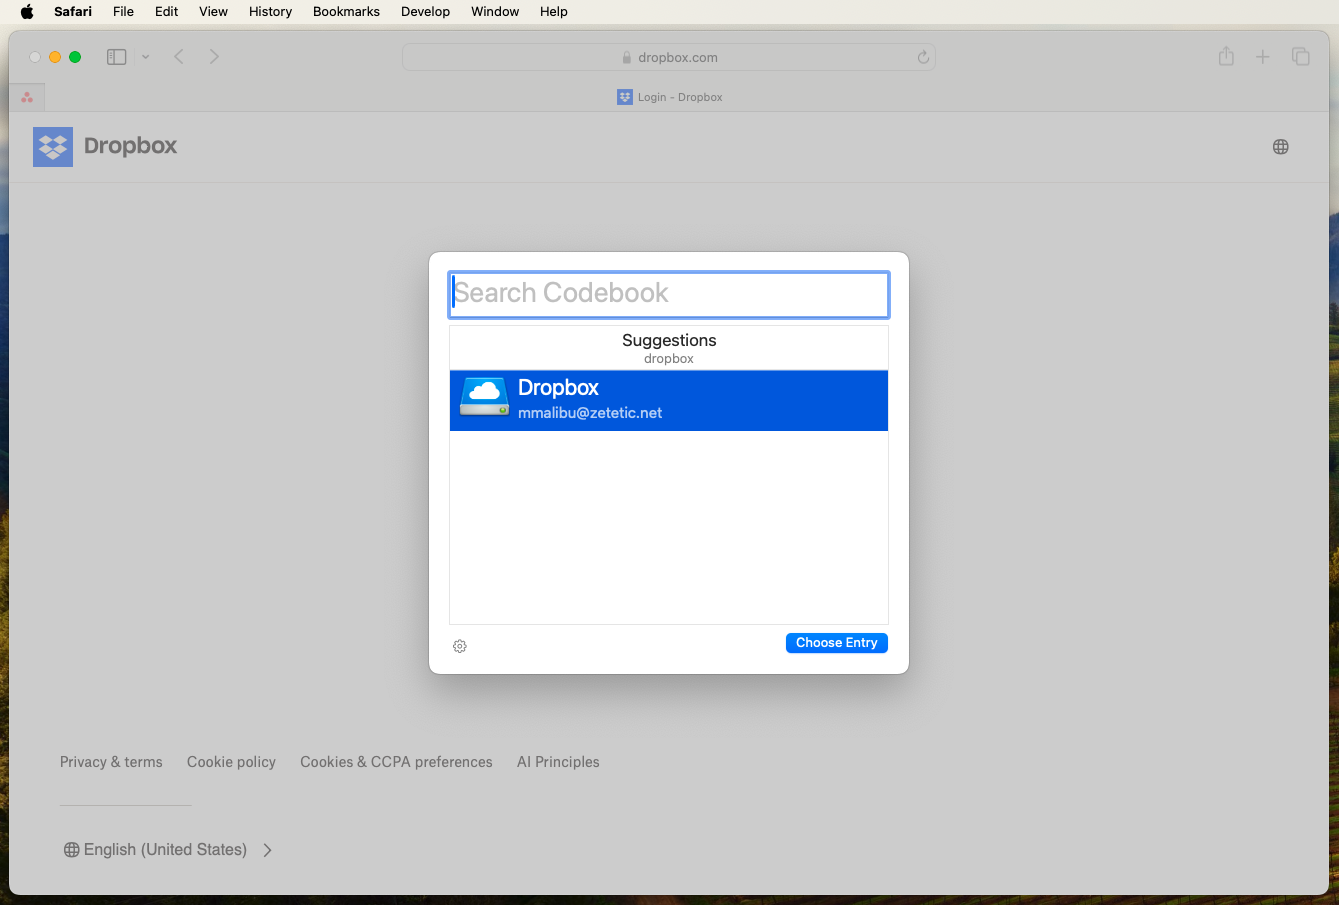
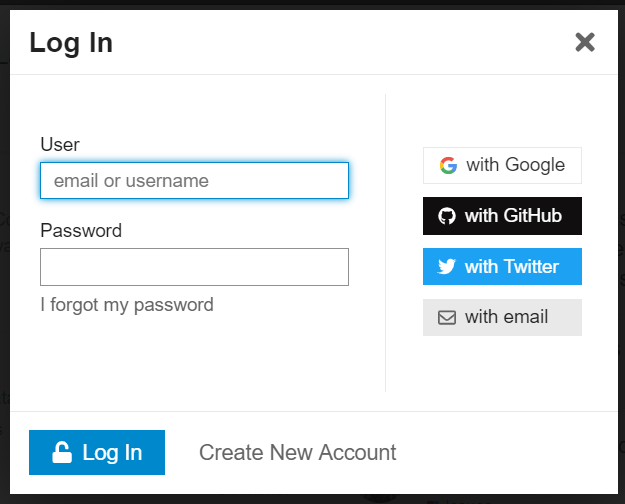
Launch Safari, and navigate to a website with a login form where you would like to login with the new password you've set up. Since we're using Dropbox in our example, we'll go to dropbox.com, and click on the Sign In link. This takes us to a login form at the URL https://dropbox.com/login. When we focus the keyboard on the Email field in the login form, macOS immediately presents the AutoFill menu, and suggests the Entry we just created in Codebook for Dropbox.
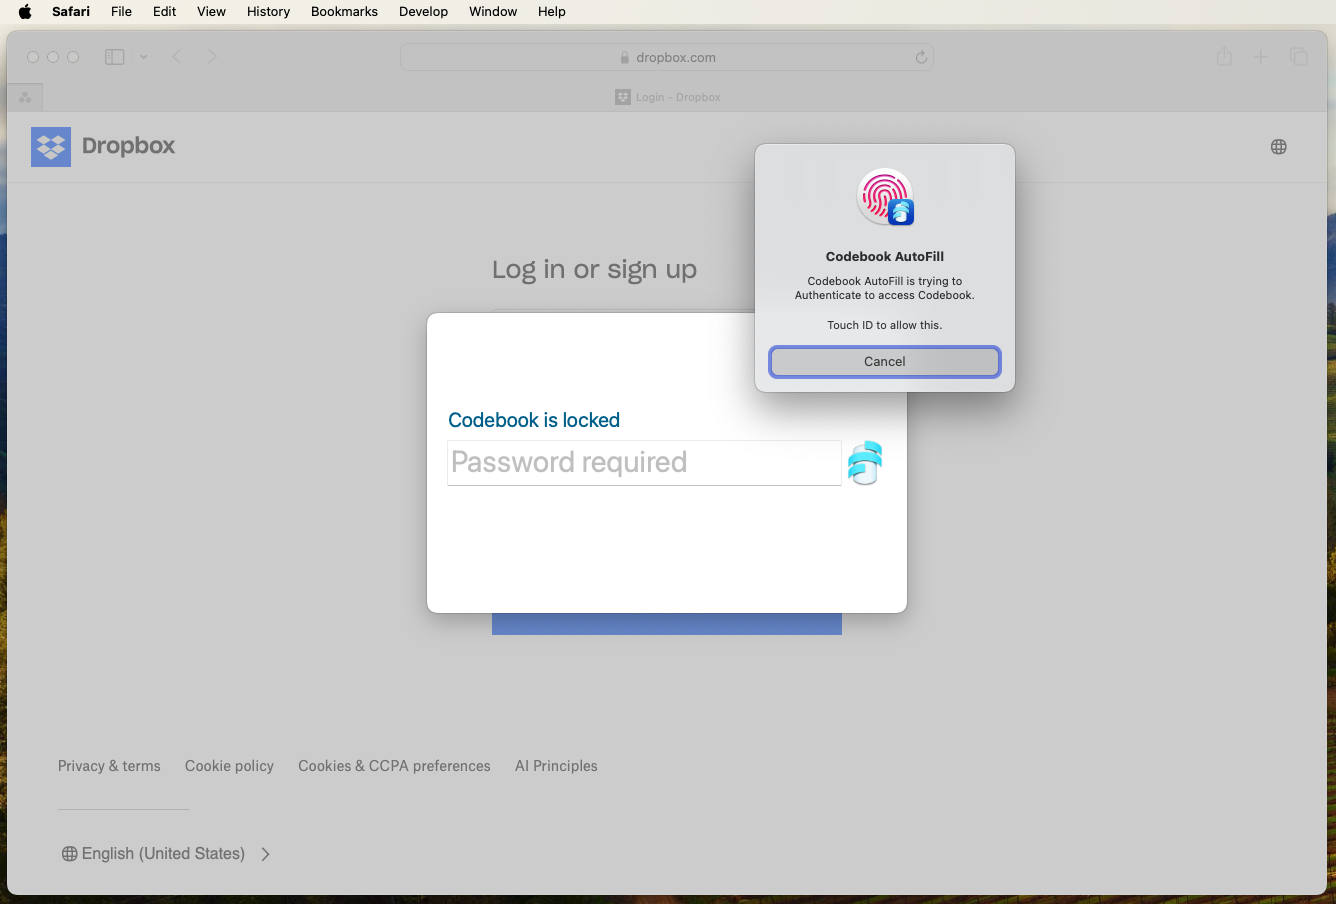
If we click on the suggestion we see there, we are asked to authenticate with Codebook with the Master Password (or Touch ID, if enabled).
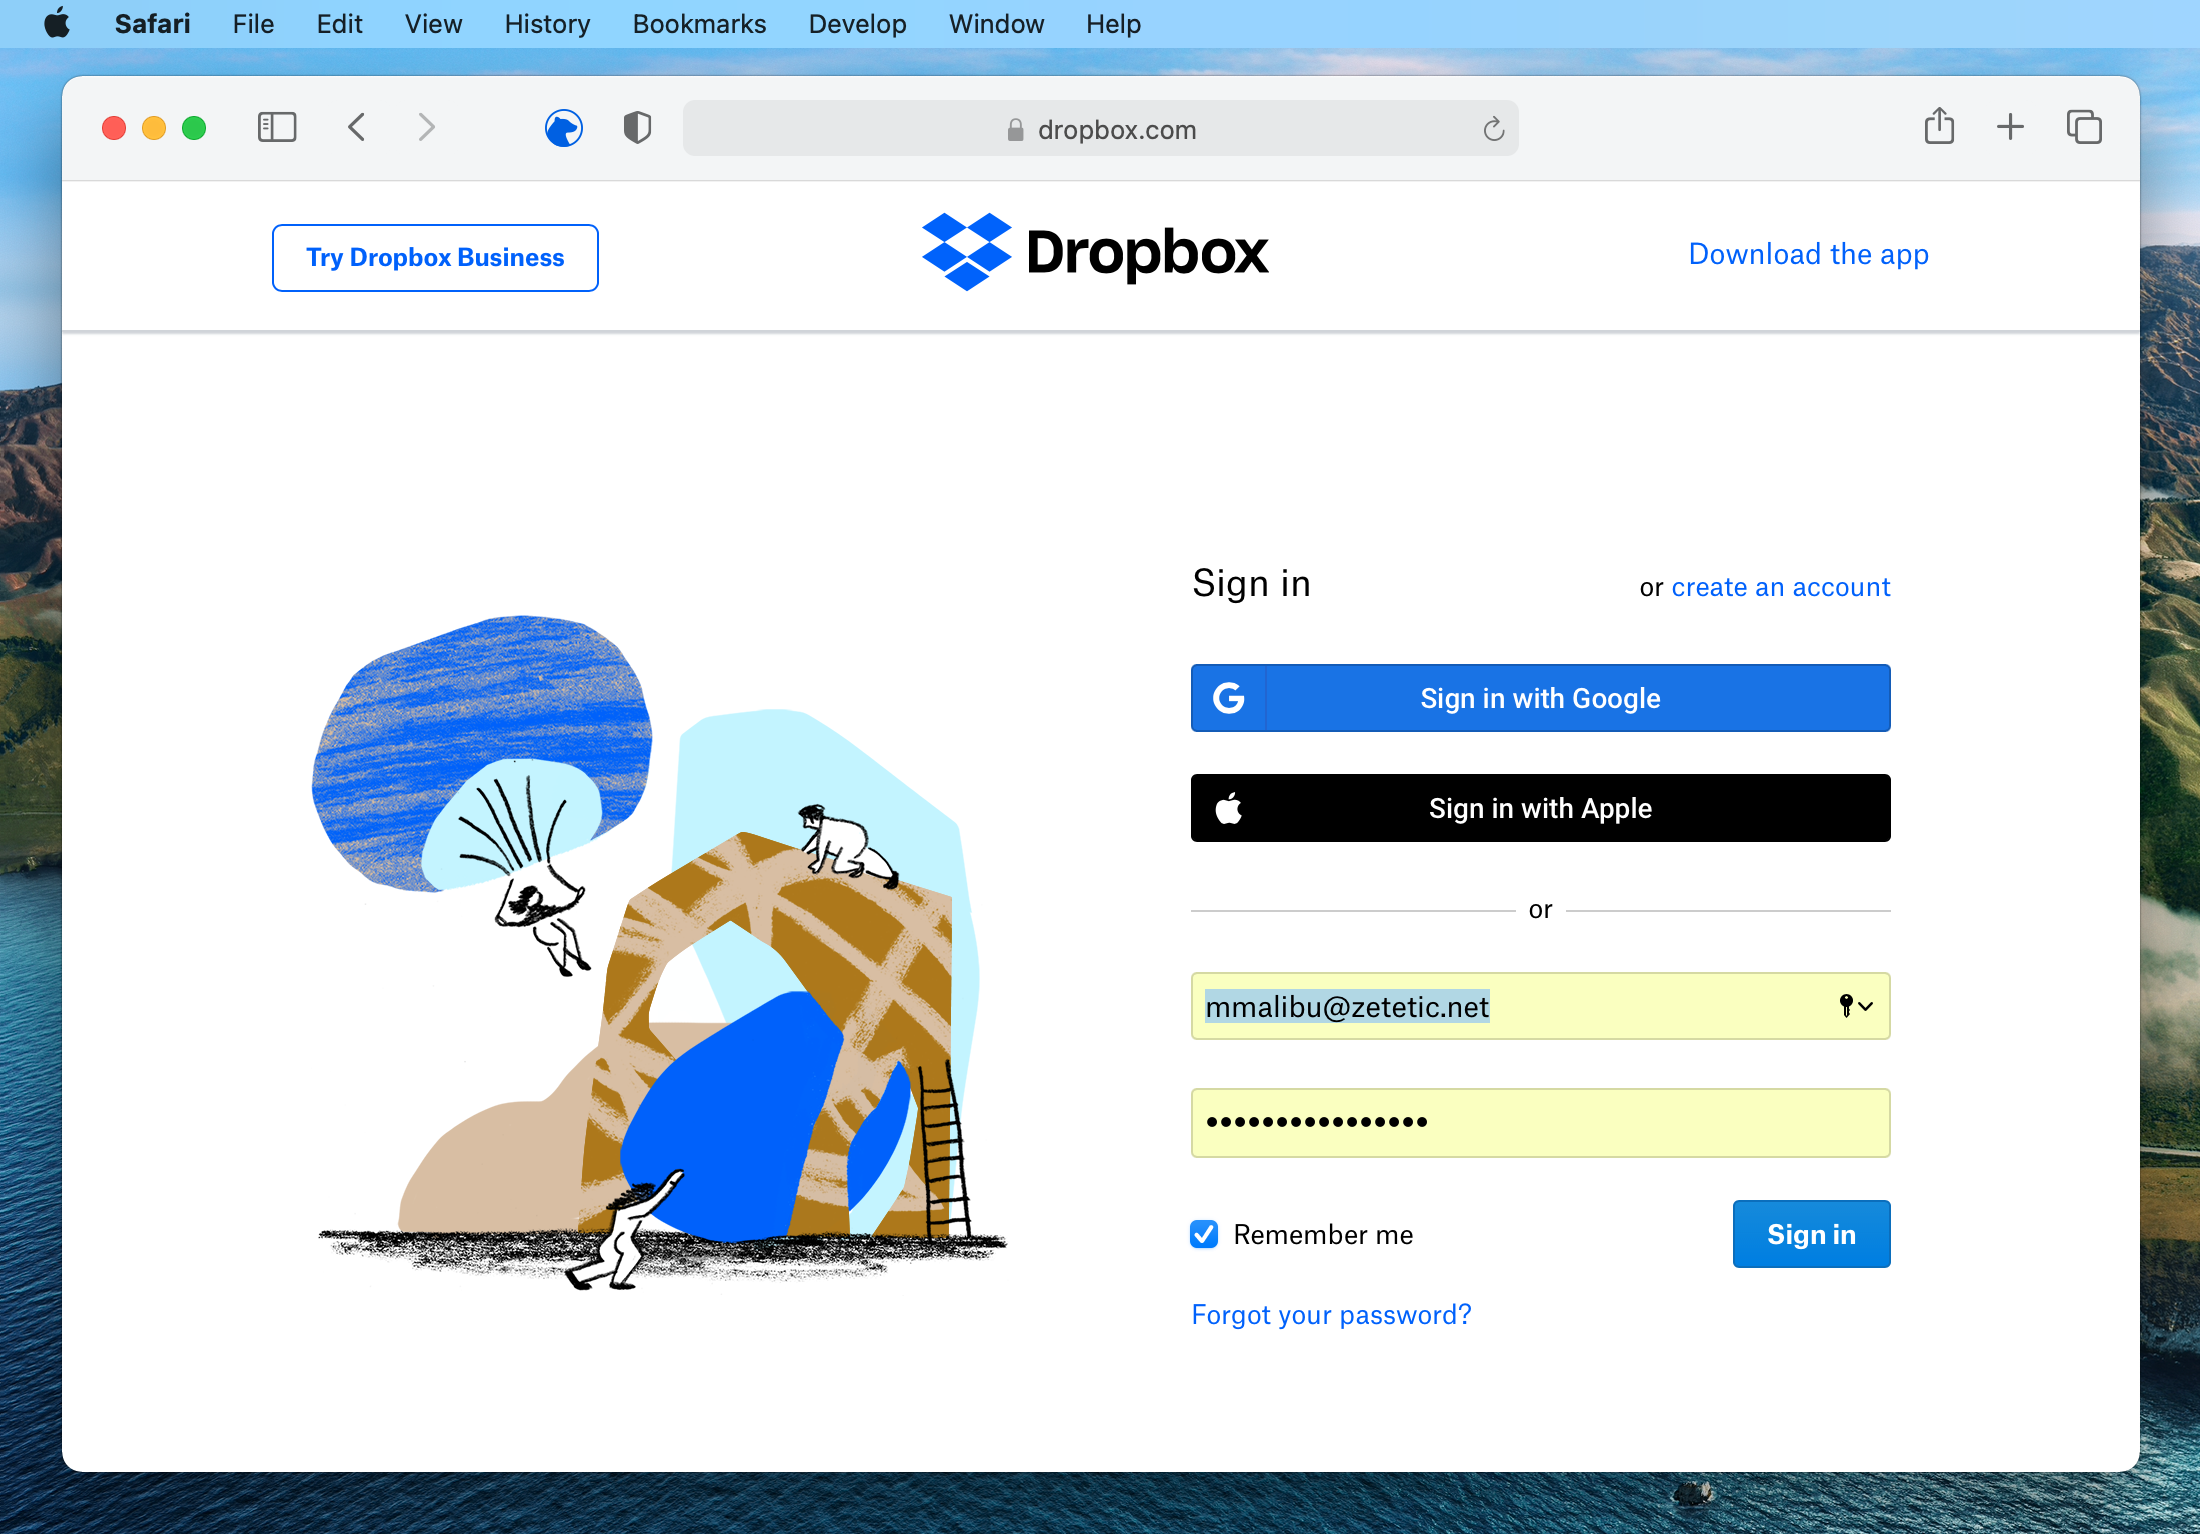
Codebook then decrypts the email for this account and passes it back to AutoFill which then fills out the form in Safari.
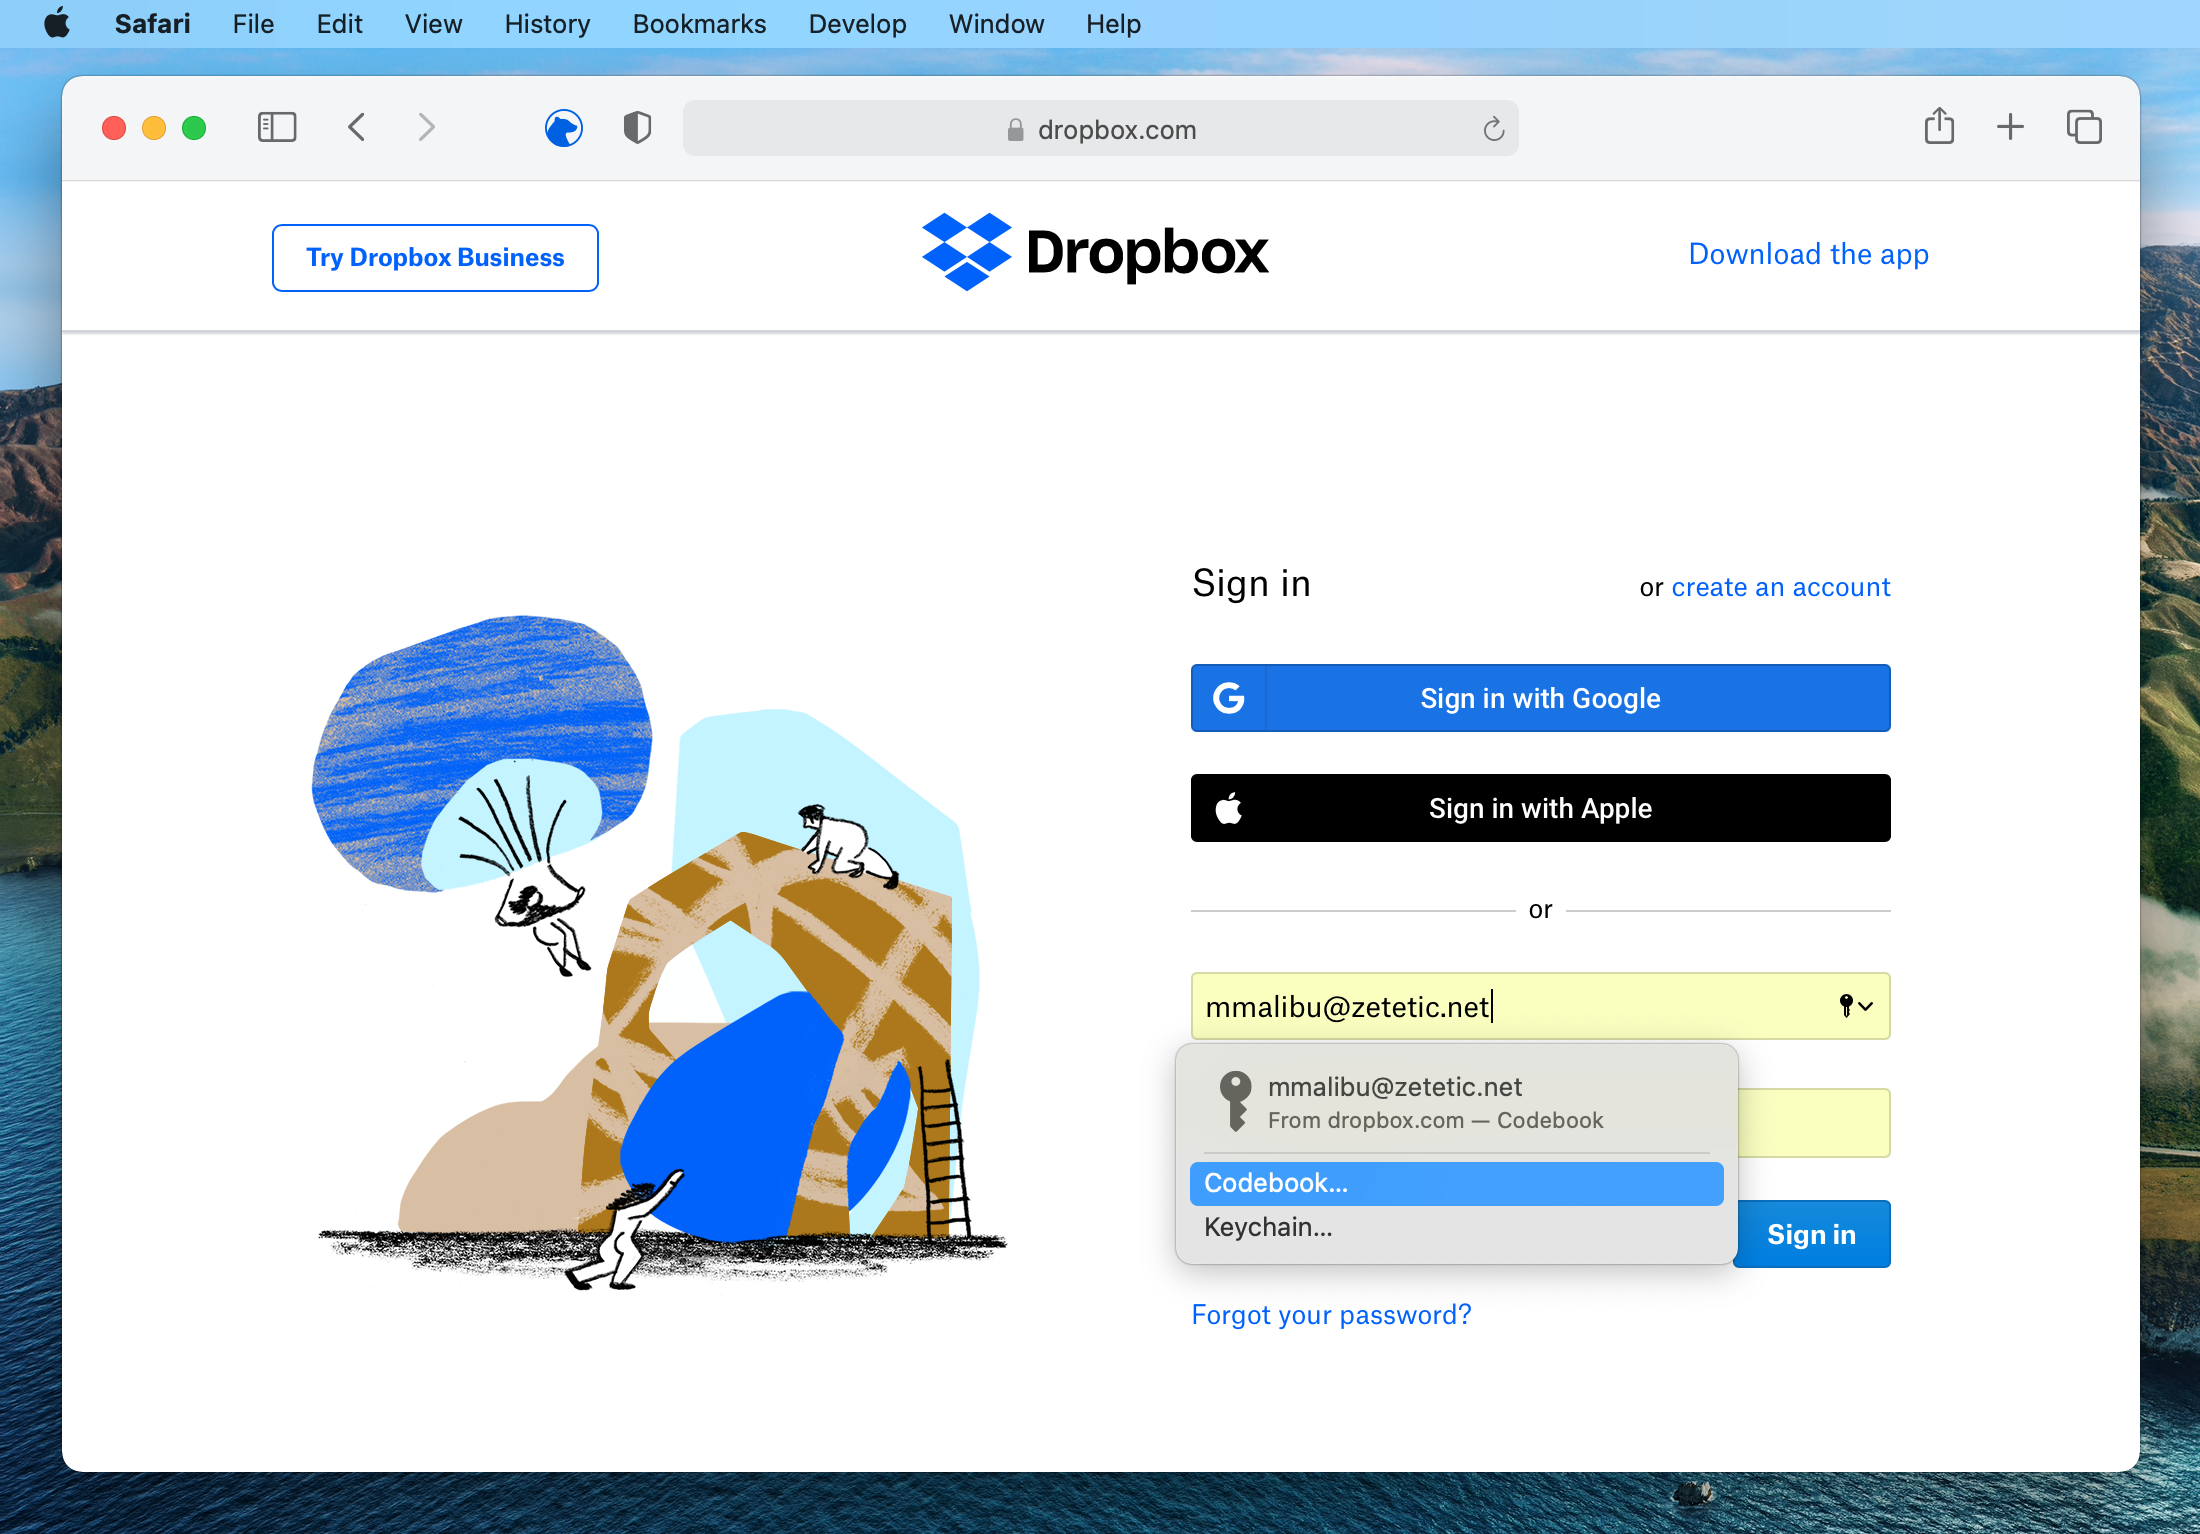
If a suitable Entry doesn't appear in the AutoFill suggestions, there's a menu item named "Codebook..." in the AutoFill menu. Click on this to display the Codebook AutoFill interface.
After logging in with the Master Password (or Touch ID) the Codebook AutoFill UI appears. It features a Search field at the top, for searching across all your Entries, and a list of suggested matching Entries for the current URL. In our case, it suggests the Dropbox Entry that we created:
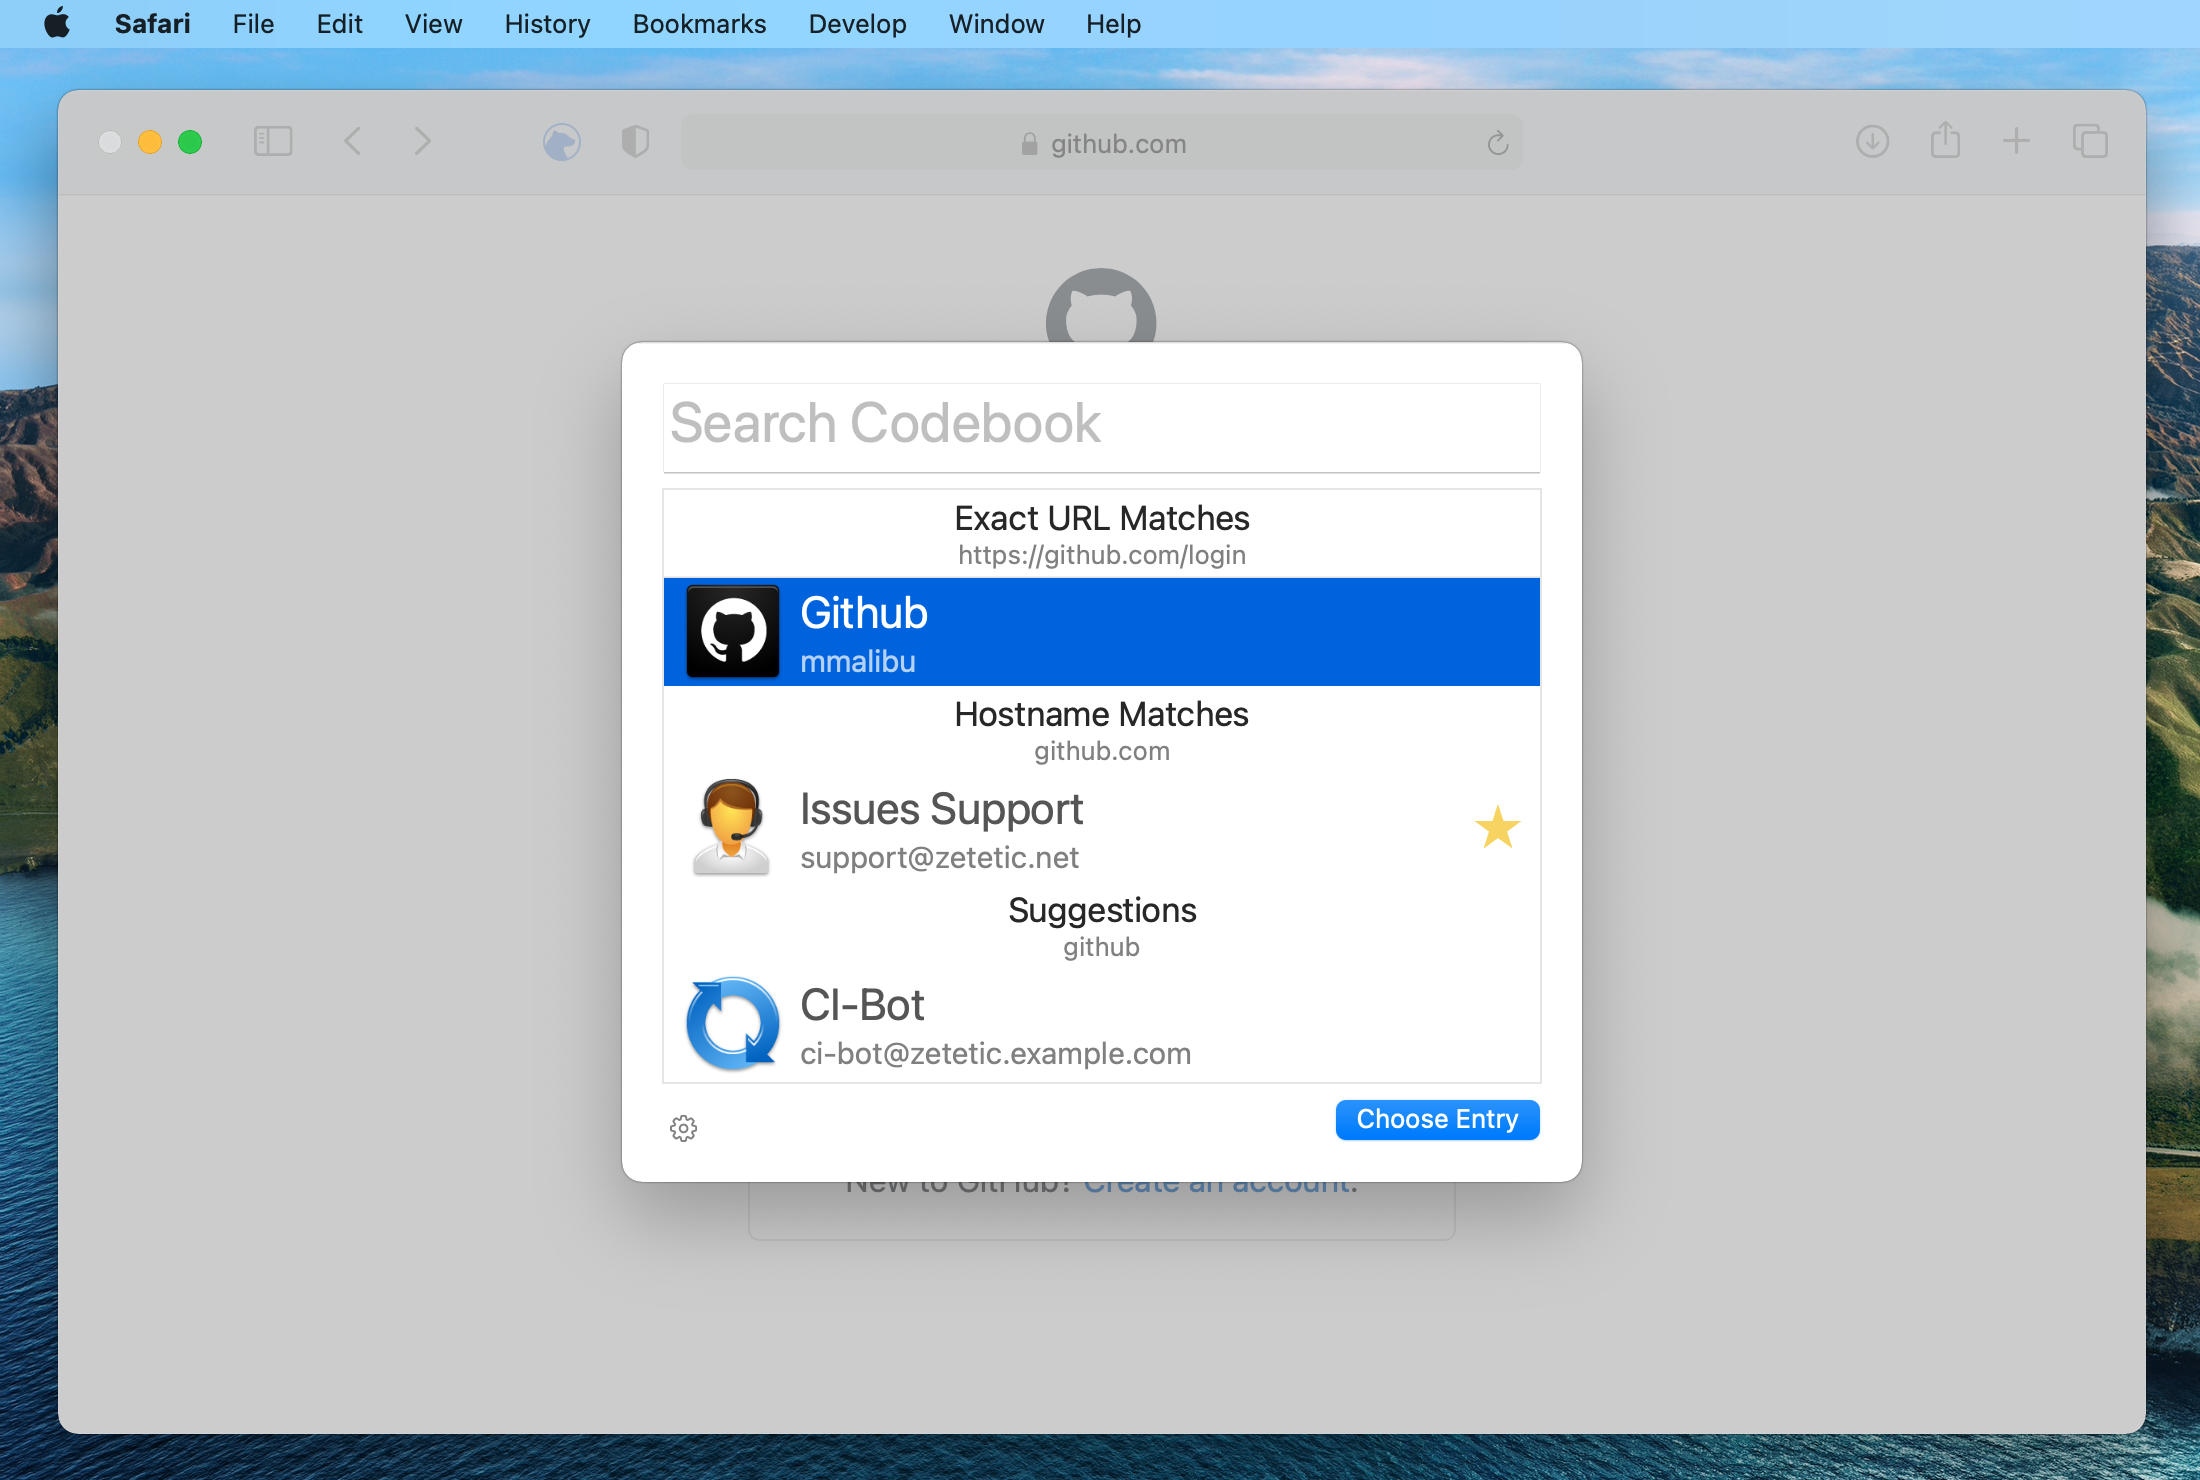
Here's an example of suggested matching Entries for the GitHub login page, with data from a sample database. Codebook provides suggestions for Entries that match the current URL exactly, the host name of the URL, or the domain name itself. It does this by searching across the Website / URL fields on your Entries, as well as Entry names.
When the Entry you need isn't in the list of suggestions, begin typing in the Search field and the list of suggestions will switch over to your Search results. The Search feature will display Entries that match the search string by name, as well as Entries that have Fields that match the search string.
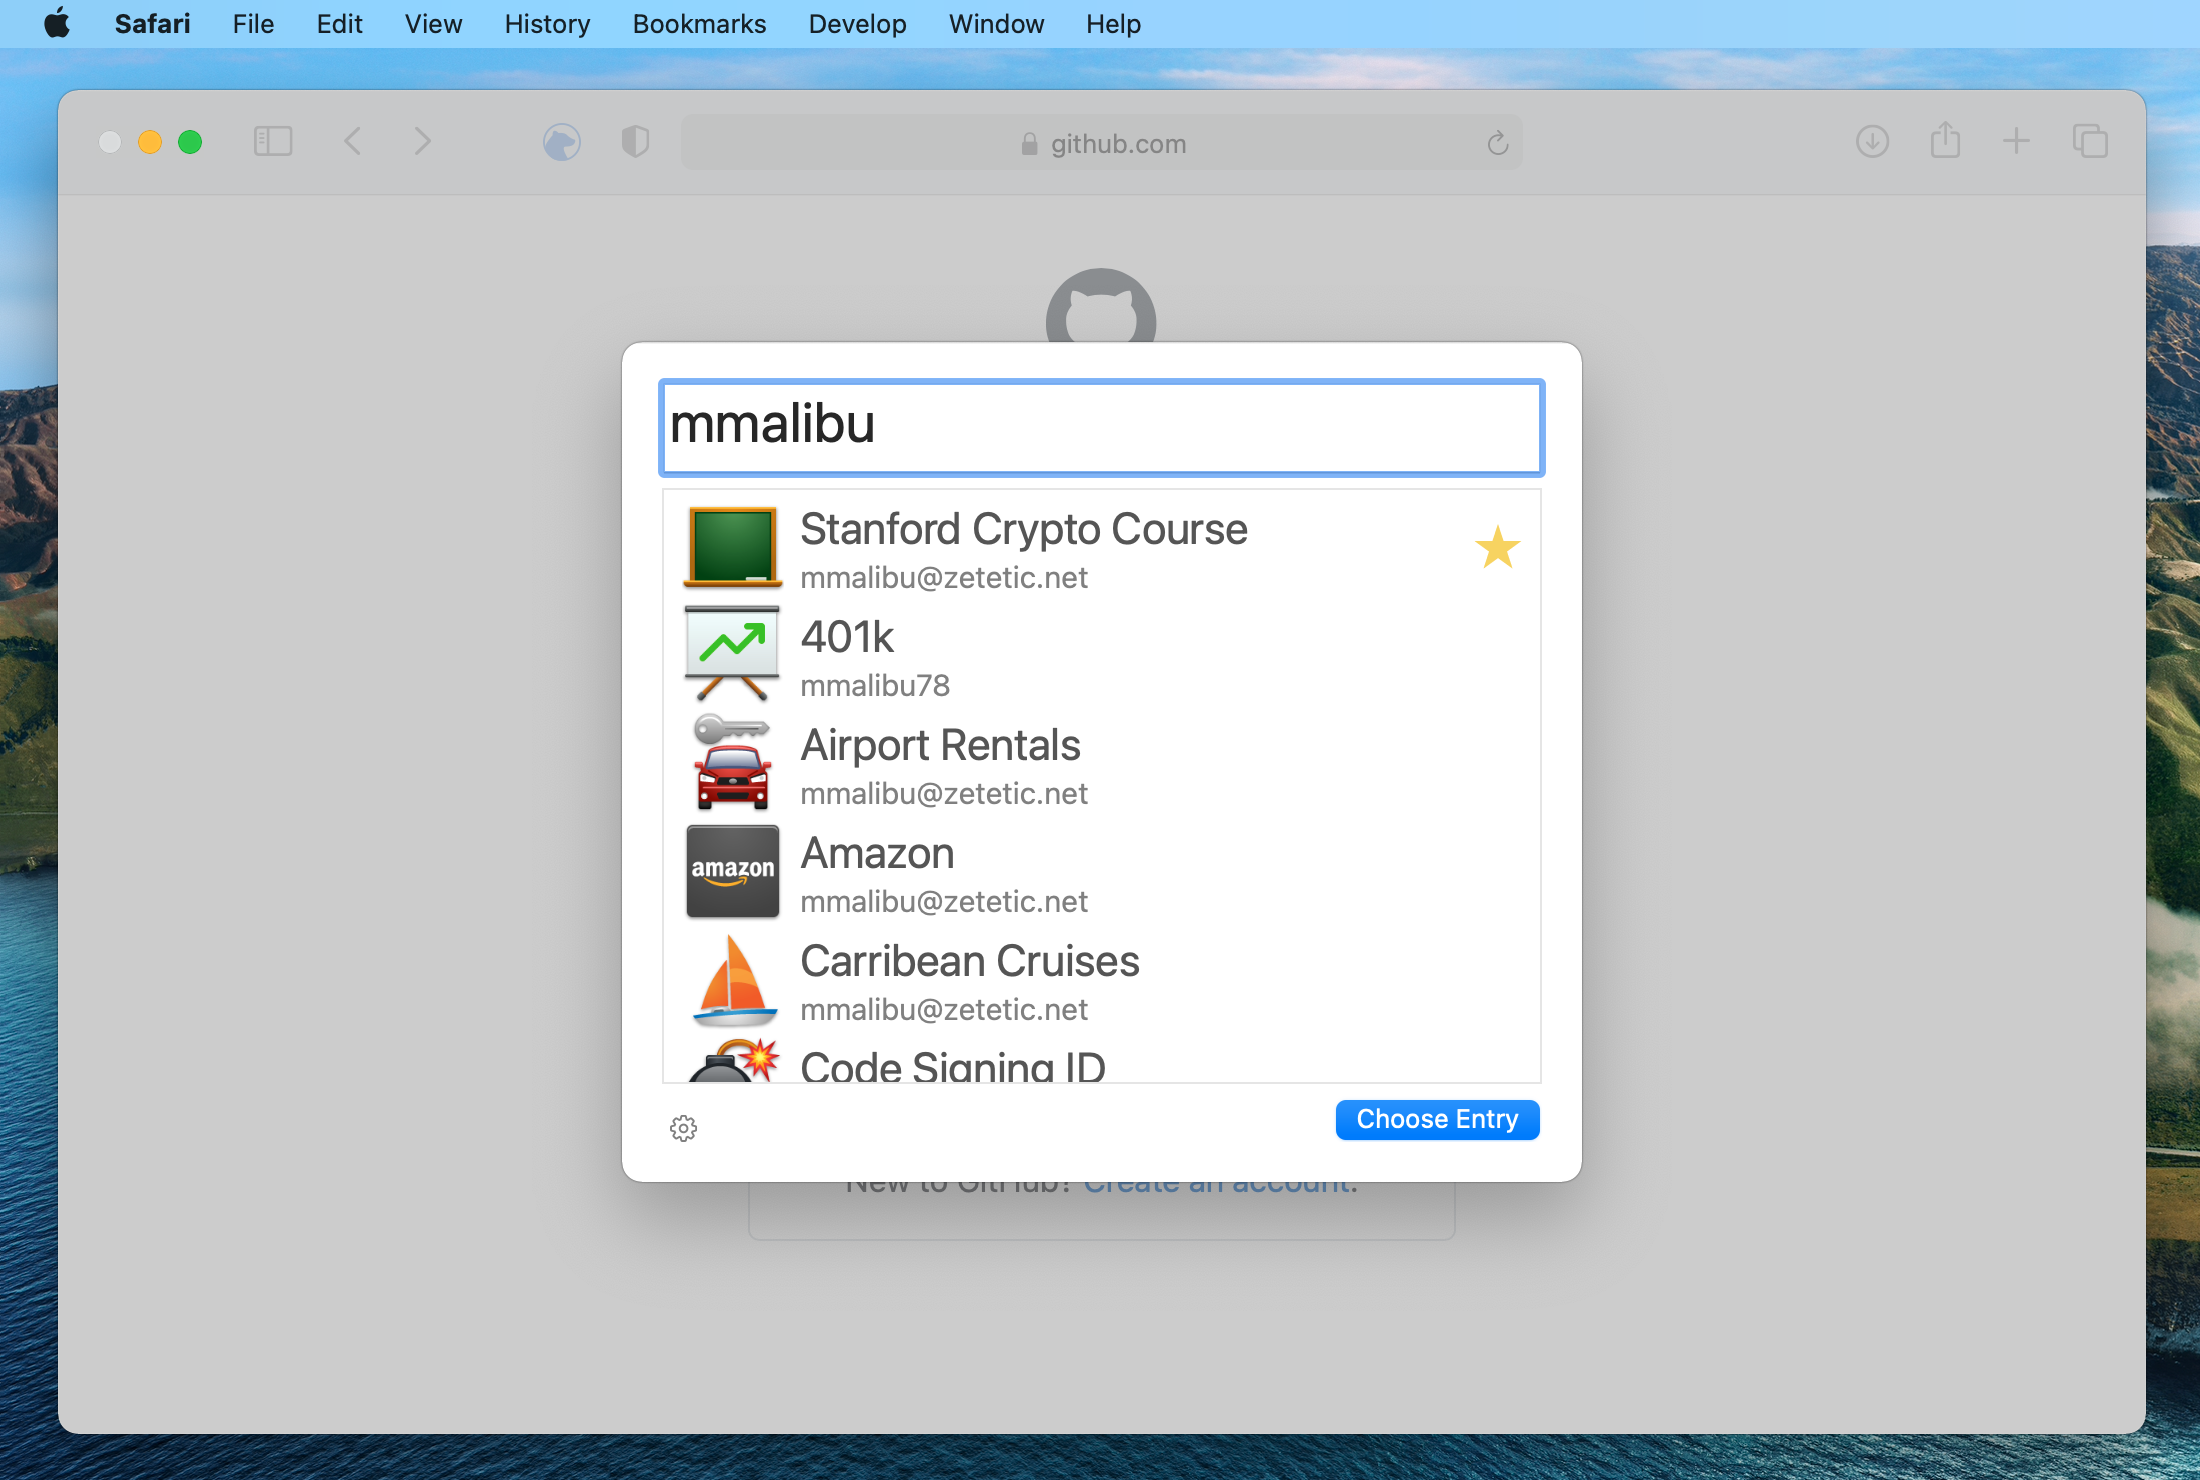
To select an Entry for AutoFill, double-click on it, or click on the Choose Entry button.
Codebook then passes the selected credentials back to AutoFill, which then fills out the form for us, just as it did above when we selected a suggestion from the AutoFill menu.
Secret Agent is a helper application which runs along side Codebook. It allows you to quickly access and insert your Codebook data into other applications and browsers using a global keyboard shortcut, without bringing up the main Codebook window. Secret Agent is not available on iOS and Android.
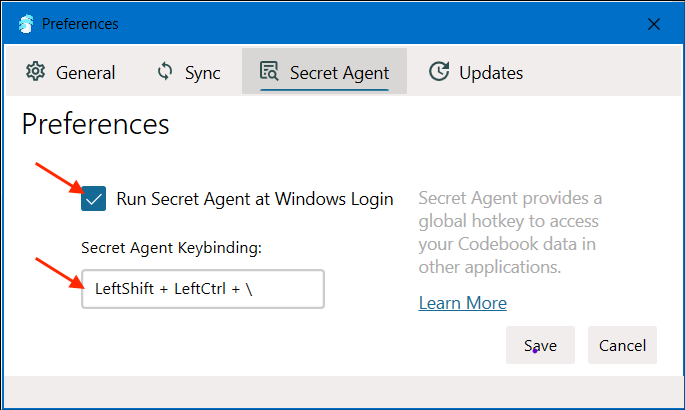
File -> Preferences -> "Run Secret Agent at Windows Login"
Adjust the Secret Agent Keybinding to your liking, or just leave it as the default.
Default hotkey combination: ⇧ + Ctrl + \
The simplest means of copying a password into another app is to activate the Secret Agent window, look up the password you need, and insert it into the active text field.
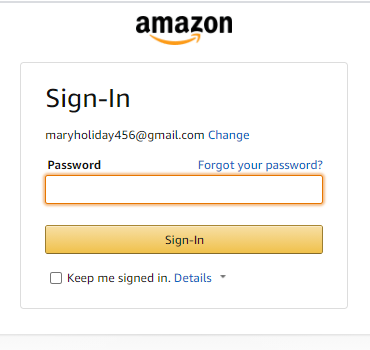
Place your cursor in the field which you'd like to fill (i.e. password field of a login screen) - our example uses Amazon.
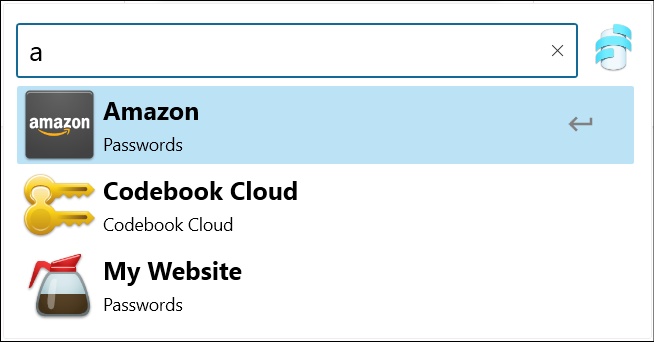
Launch Secret Agent using the global keyboard shortcut you specified in Preferences.

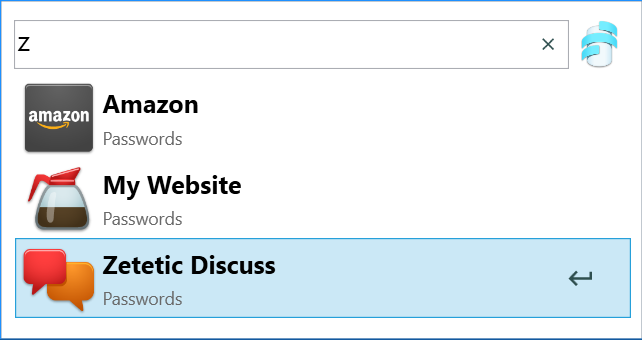
Search for the desired entry - begin typing the entry name.
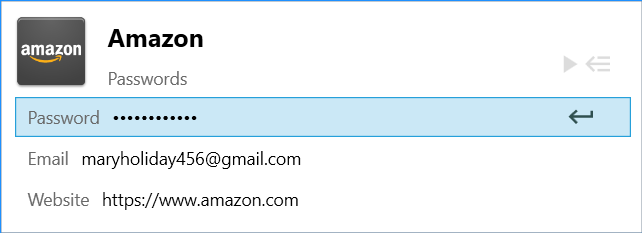
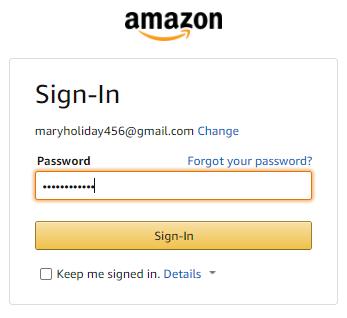
Select the entry and the desired field, then and press enter – the field will be inserted.
Run Default Action uses fields from Codebook to populate more than one field on a form, specifically the username/email and password. You access Secret Agent the same way, using the hotkeys. Select the desired Codebook Entry and then press the Play button or Control + R. The username/email and password fields will be inserted followed by enter/submit in the active application. (To enter a single field value, you press the enter key – see above.) It attempts to run a default action using the username/email and password fields from the entry and inserting them into the active application.
Select the entry then and press the Play button or Control + R – the username/email and password fields will be inserted followed by enter/submit in the active application. This will log you into the application.

Note: Codebook first looks to see if you have a Secret Agent Action field on the entry (see below). If you do, that will be run instead.
Custom Secret Agent Action allows you to perform one action to insert multiple data values. You can customized which fields in an Entry will be inserted into the active application. To make this feature more useful, you can also include commands between data values (tab, enter, space and wait).
(See Helpful Tips and Suggestions for more information.)
Creating your own Secret Agent Action involves two steps:
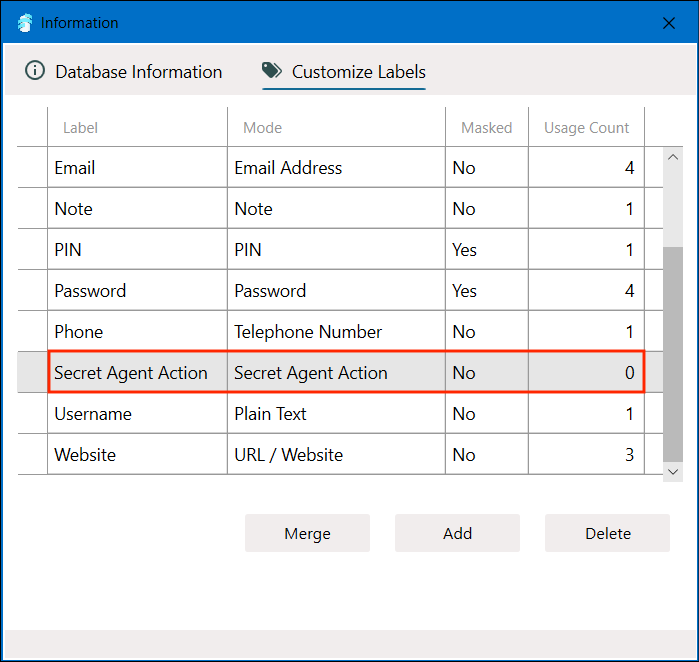
Note: new installations should have a "Secret Agent Action" field already installed by default.
Open Customize Labels: File > Customize Labels
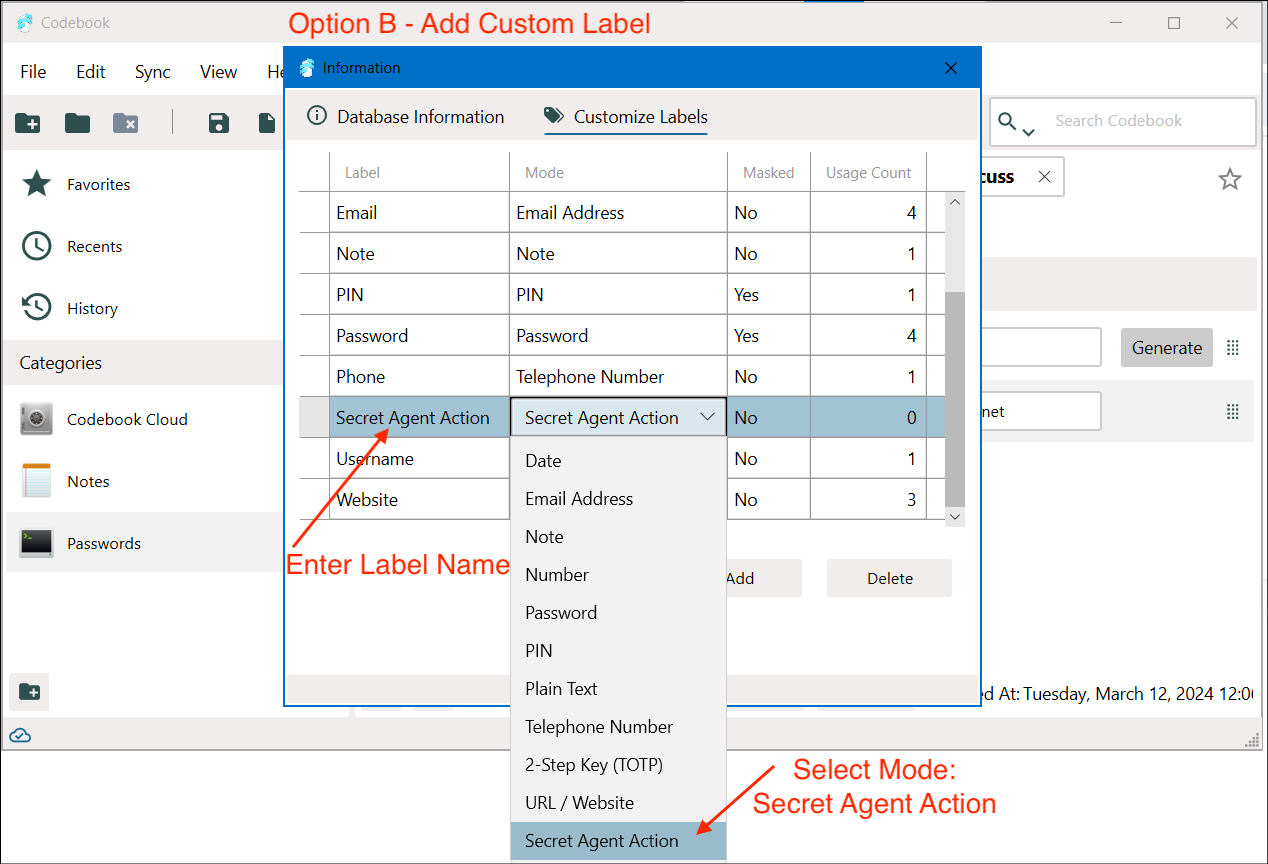
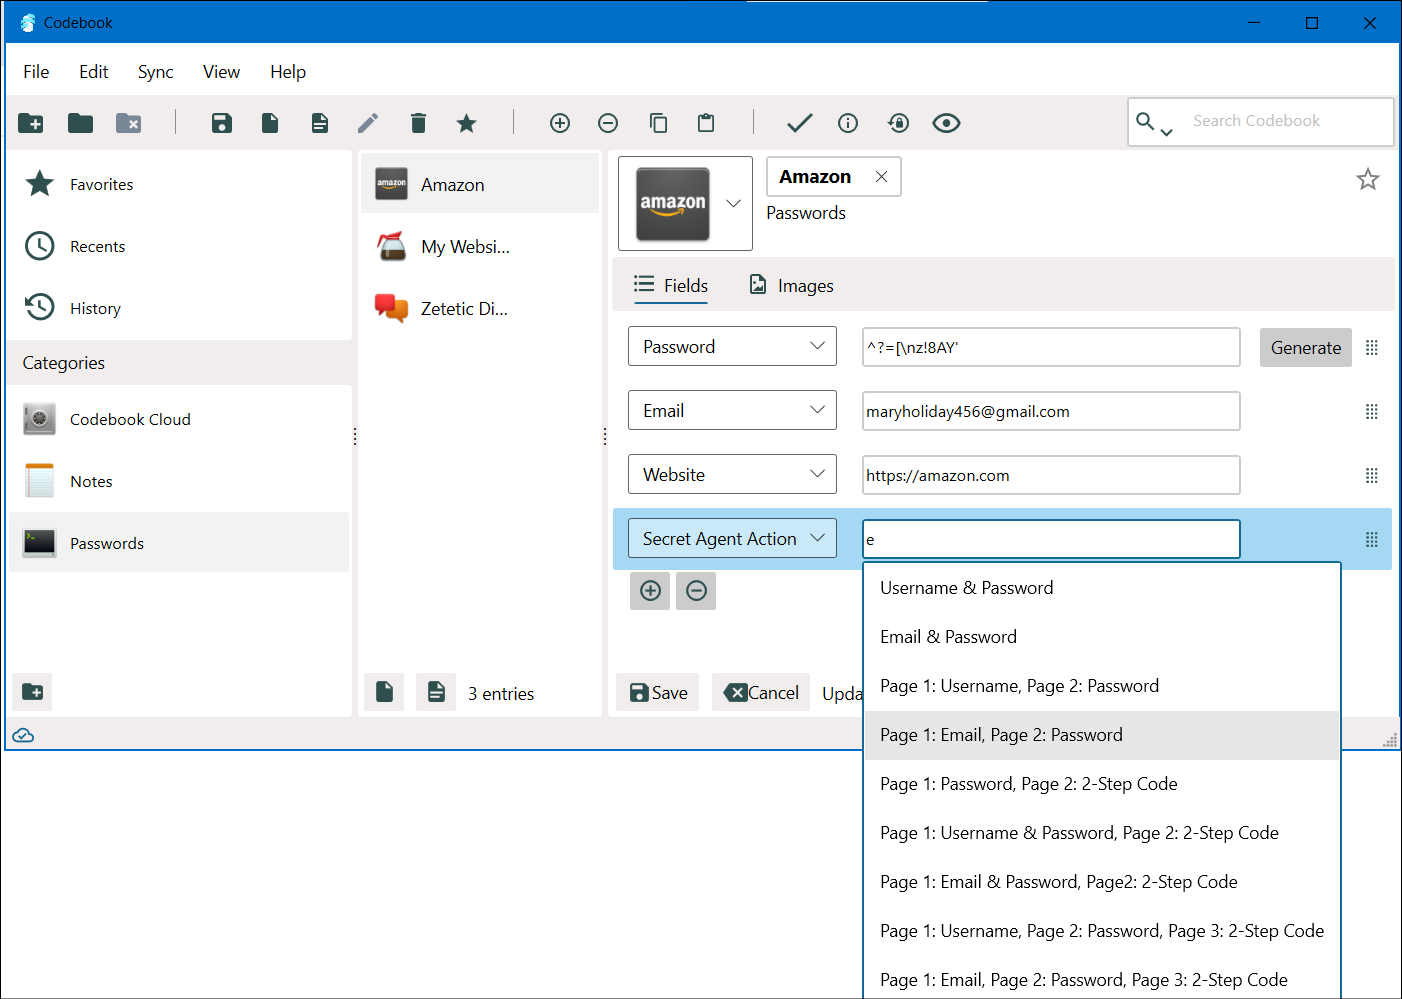
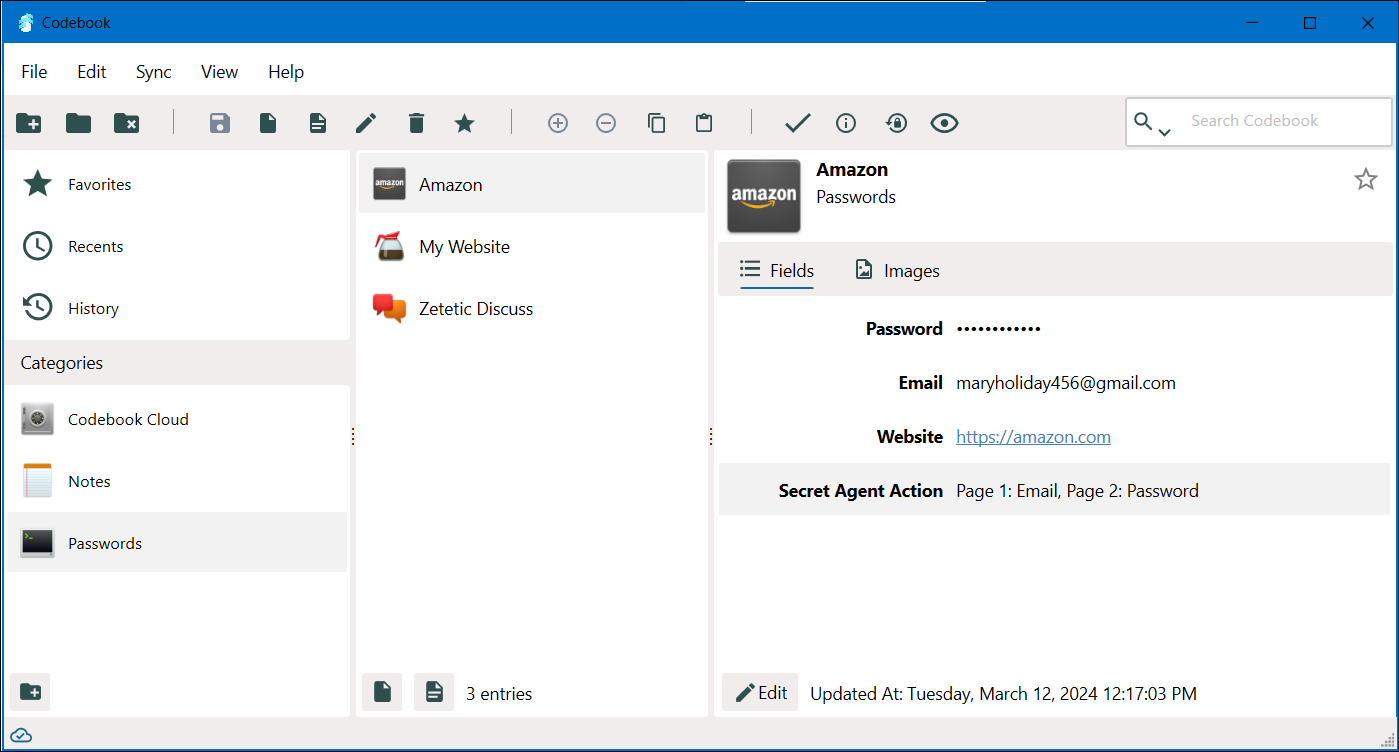
Open an existing entry or create a new entry. Add a field, and set the label to Secret Agent Action. Start typing in the field, you'll notice a list of suggestions are provided up in a drop down list. You can arrow down or up (or click) to cycle through the suggestions to see what their representative commands are. Once you find one that you'll think will be suitable for the site or form you're trying to fill, hit enter, and save the entry.
In this example, we're logging into our Amazon account, this time, using Custom Secret Agent Action to perform both steps of the login process (i.e. populating the email on the first page and the password on the second). So, the custom Secret Agent Action to choose from the suggestion list is: Page 1: Email, Page 2: Password. This will be displayed as: #[email]<tab>wait2#[password]<enter> in the Secret Agent Action field on the Amazon entry.
We recommend filling the target form once manually (without using the mouse) to determine what commands are necessary. As you're filling it, note which keys you're using to navigate between fields and submit the form. This should directly parallel with the available commands: <tab>, <enter>, <waitN> (where N is the number of seconds to wait) <space> (we've found this one handy for toggling those "Remember me" check boxes).
We've pre-populated the Secret Agent Action suggestions table with, what we believe to be, the most common scenarios. The available suggestions are:
        Username & Password
        Email & Password
        Page 1: Username, Page 2: Password
        Page 1: Email, Page 2: Password
        Page 1: Password, Page 2: TOTP
        Page 1: Username & Password, Page 2: TOTP
        Page 1: Email & Password, Page2: TOTP
        Page 1: Username, Page 2: Password, Page 3: TOTP
        Page 1: Email, Page 2: Password, Page 3: TOTP
The scripts themselves actually look like this, and you’ll see these displayed as the Command field’s value once selected:
        #[username]<tab>#[password]<enter>
        #[email]<tab>#[password]<enter>
        #[username]<enter><wait2>#[password]<enter>
        #[email]<enter><wait2>#[password]<enter>
        #[password]<enter><wait2>#[totp]<enter>
        #[username]<tab>#[password]<enter><wait3>#[totp]<enter>
        #[email]<tab>#[password]<enter><wait3>#[totp]<enter>
        #[username]<enter><wait2>#[password]<enter><wait3>#[totp]<enter>
        #[email]<enter><wait2>#[password]<enter><wait3>#[totp]<enter>
As the syntax suggests, you can enter your own command matching your own custom label names, for instance:
#[groupid]<tab>#[login]<enter><wait3>#[password]<enter>
The <waitN> command is useful after <enter> when you have to fill out multiple forms in succession, and need to allow time for the next form to load. As always, if you have questions, suggestions or feedback, please let us know at support@zetetic.net.
If you are having trouble enabling or using Secret Agent to insert your passwords in other apps we have a troubleshooting document available listing known issues and work-arounds. And as always, feel free to contact us directly for help.
