Now that you've got a password manager, it's time to generate some new, strong, random passwords and put them to use! It's nearly impossible to think up truly random passwords on your own, and doing so, especially ones that are easy to remember, makes your passwords easier for an attacker to guess. Use Codebook to create and remember strong random passwords for you.
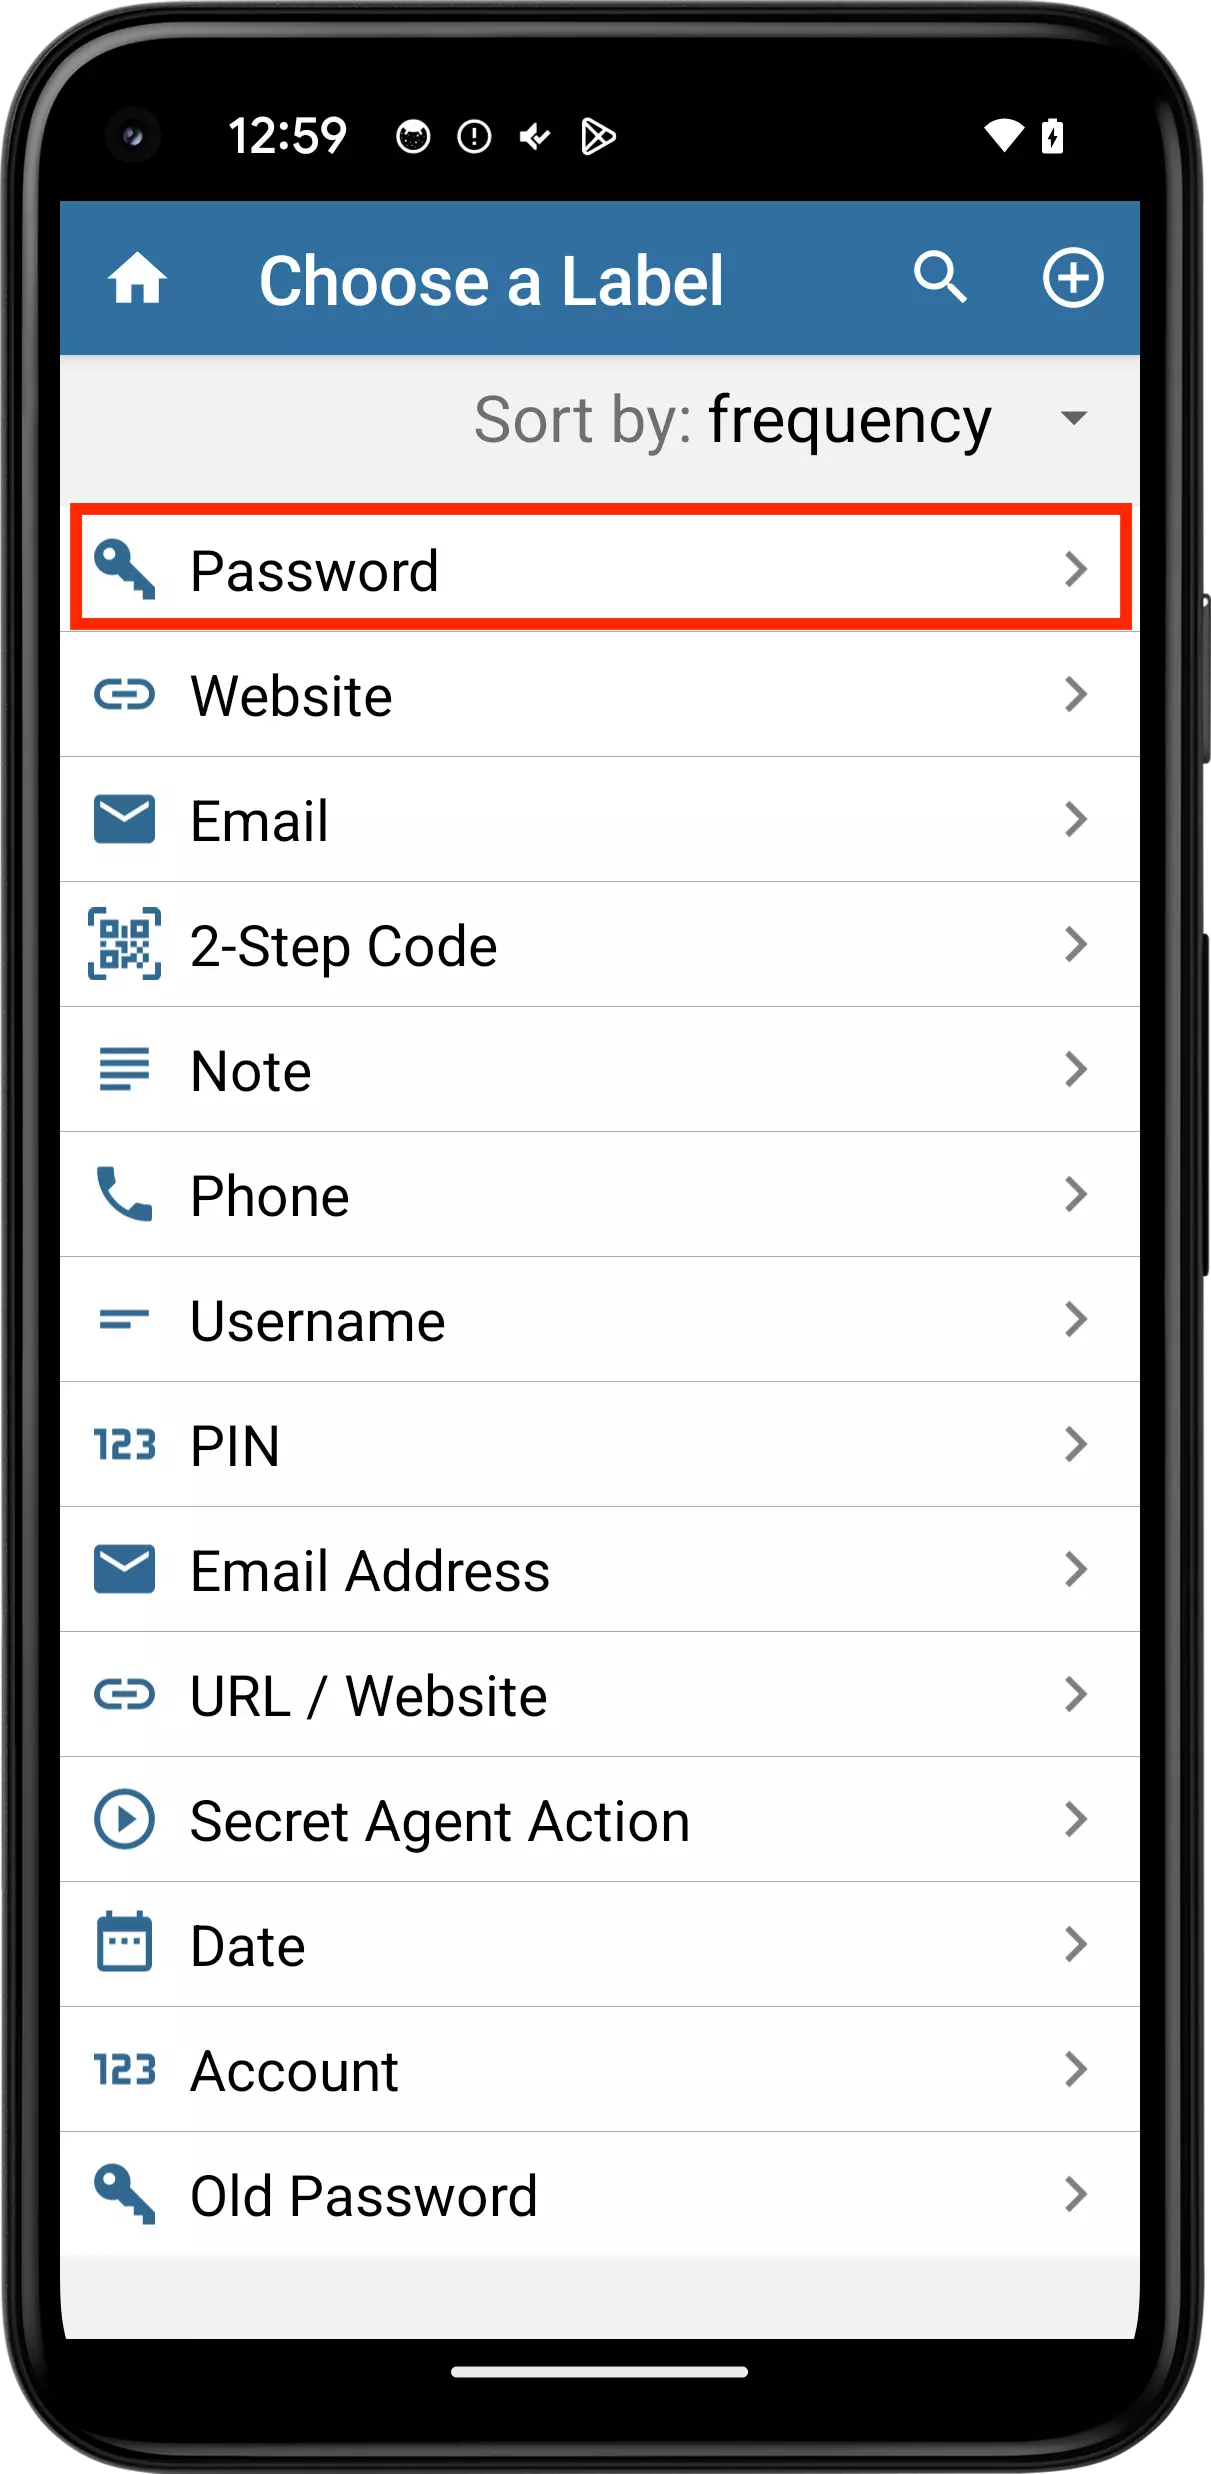
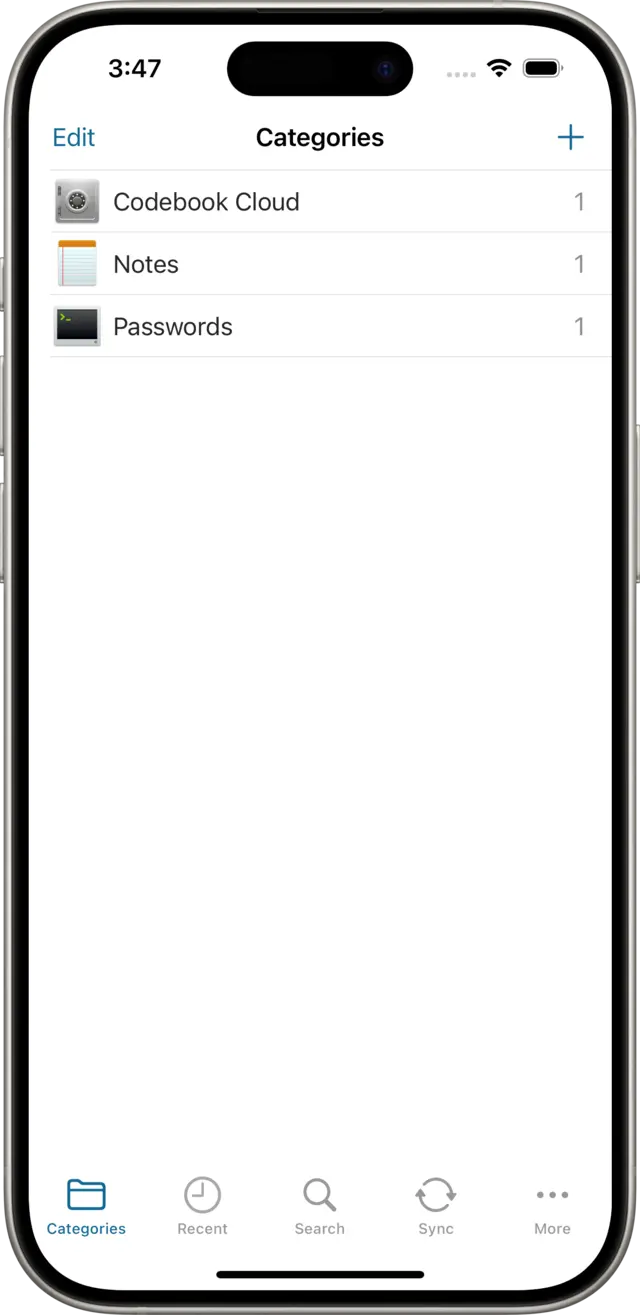
First, log into Codebook on your android device, and make sure the Categories tab is showing. Tap on the last row in Categories, labeled "Passwords".
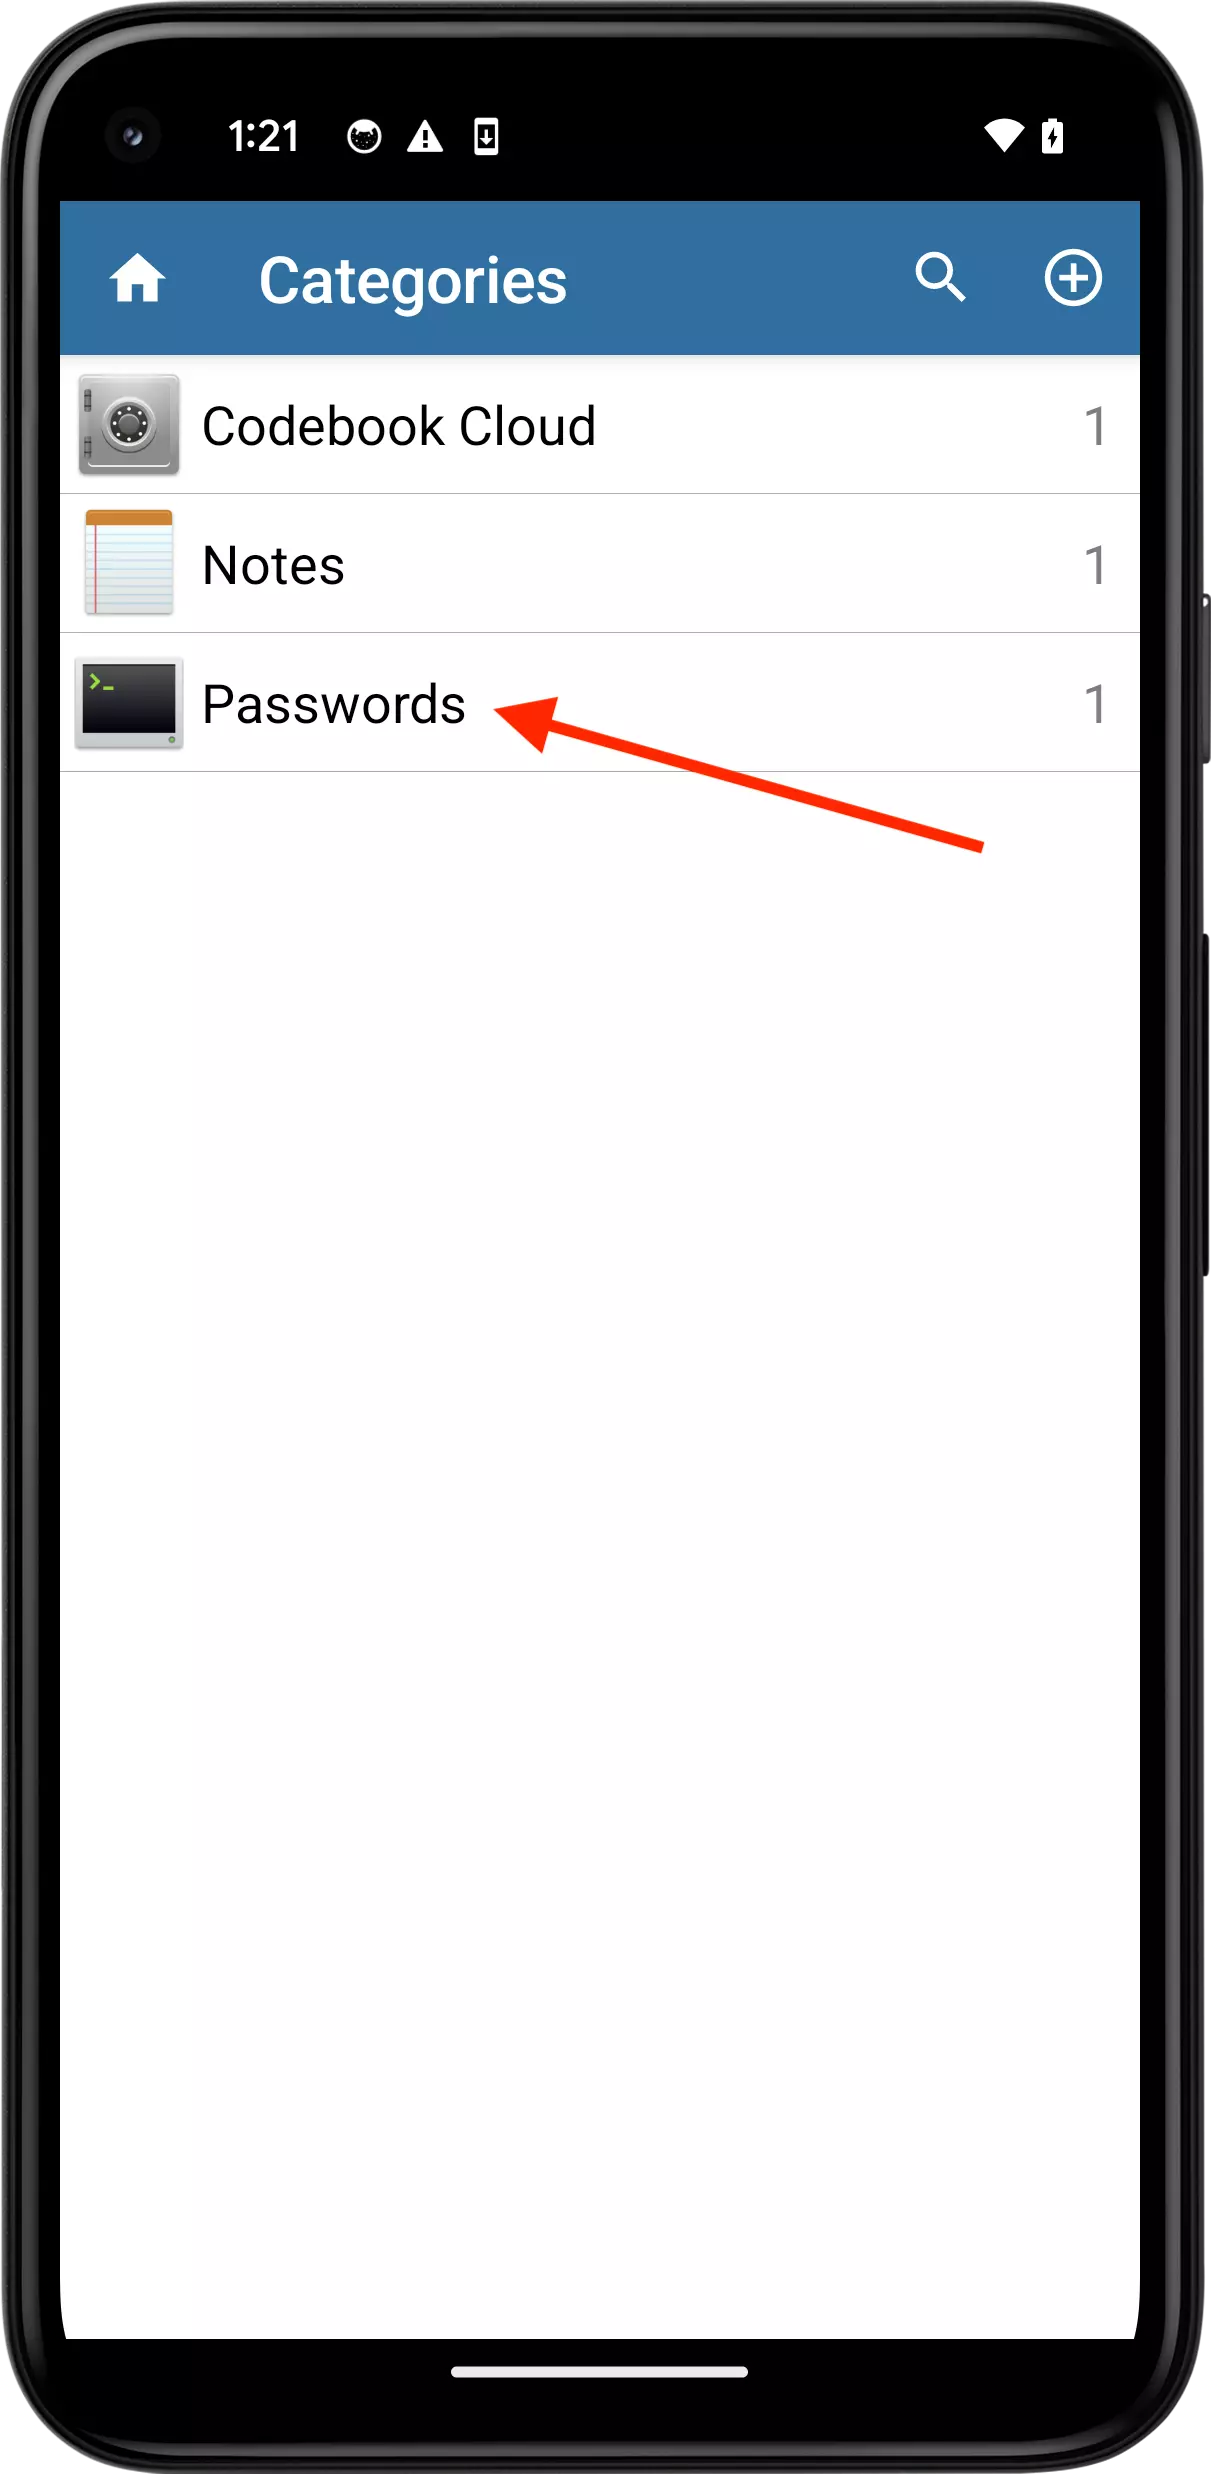
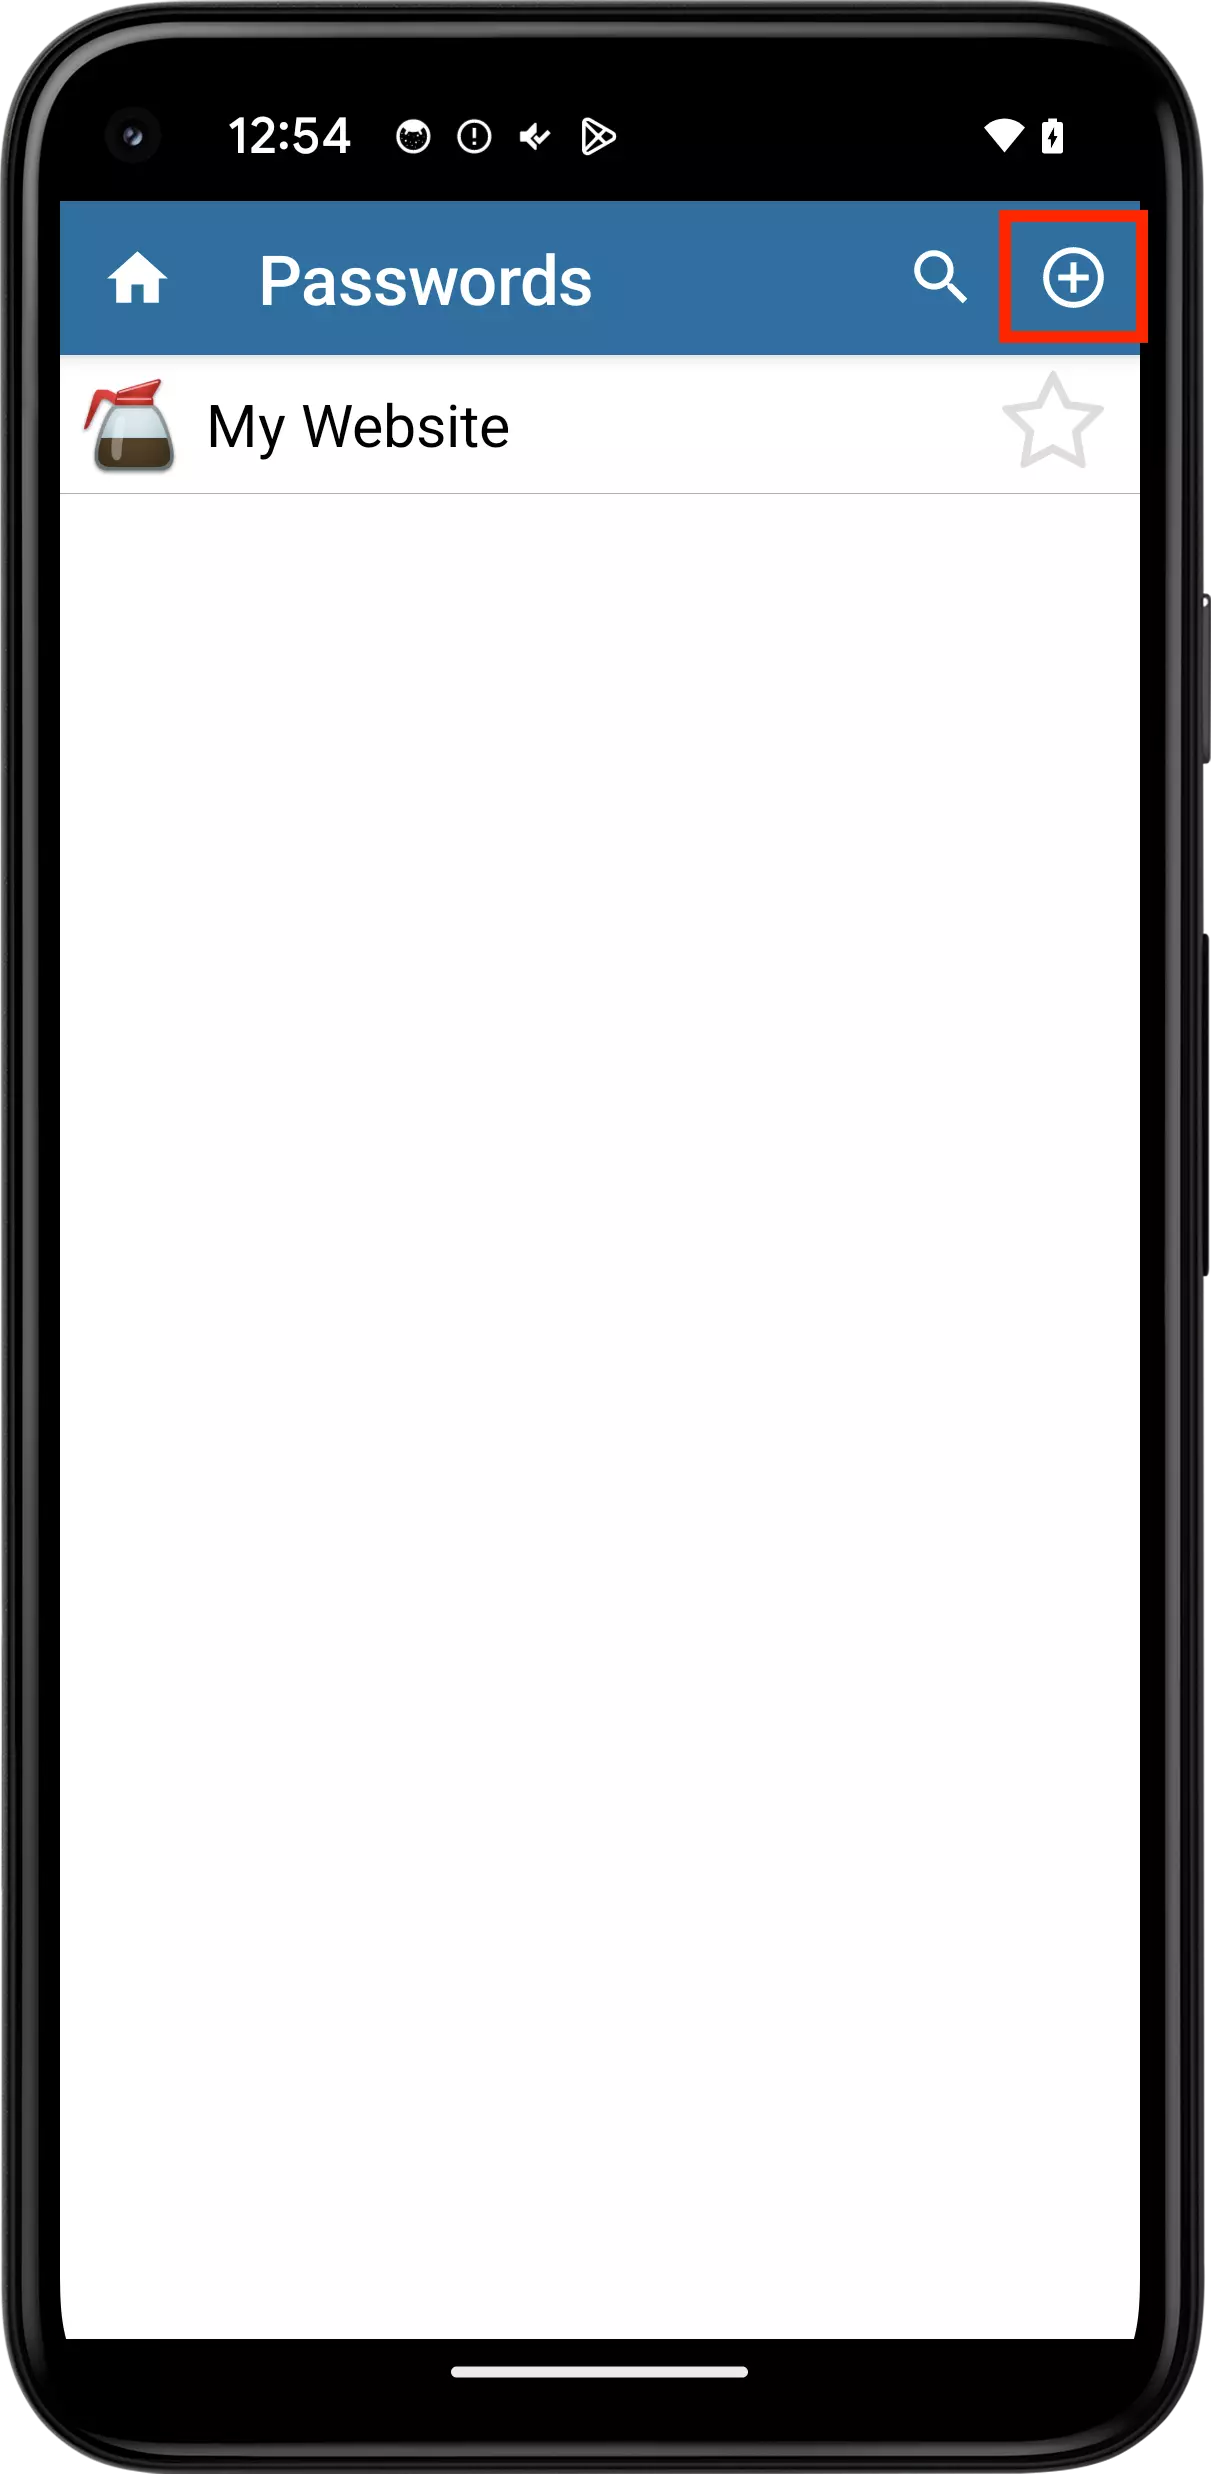
This displays the list of Entries in the Passwords category. There we see an example Entry record called "My Website" that Codebook created for you during setup. Let's ignore that for now and create a new Entry: tap on the plus button at the top of the list. You'll see a prompt asking you to choose a record type; select "Add Entry".

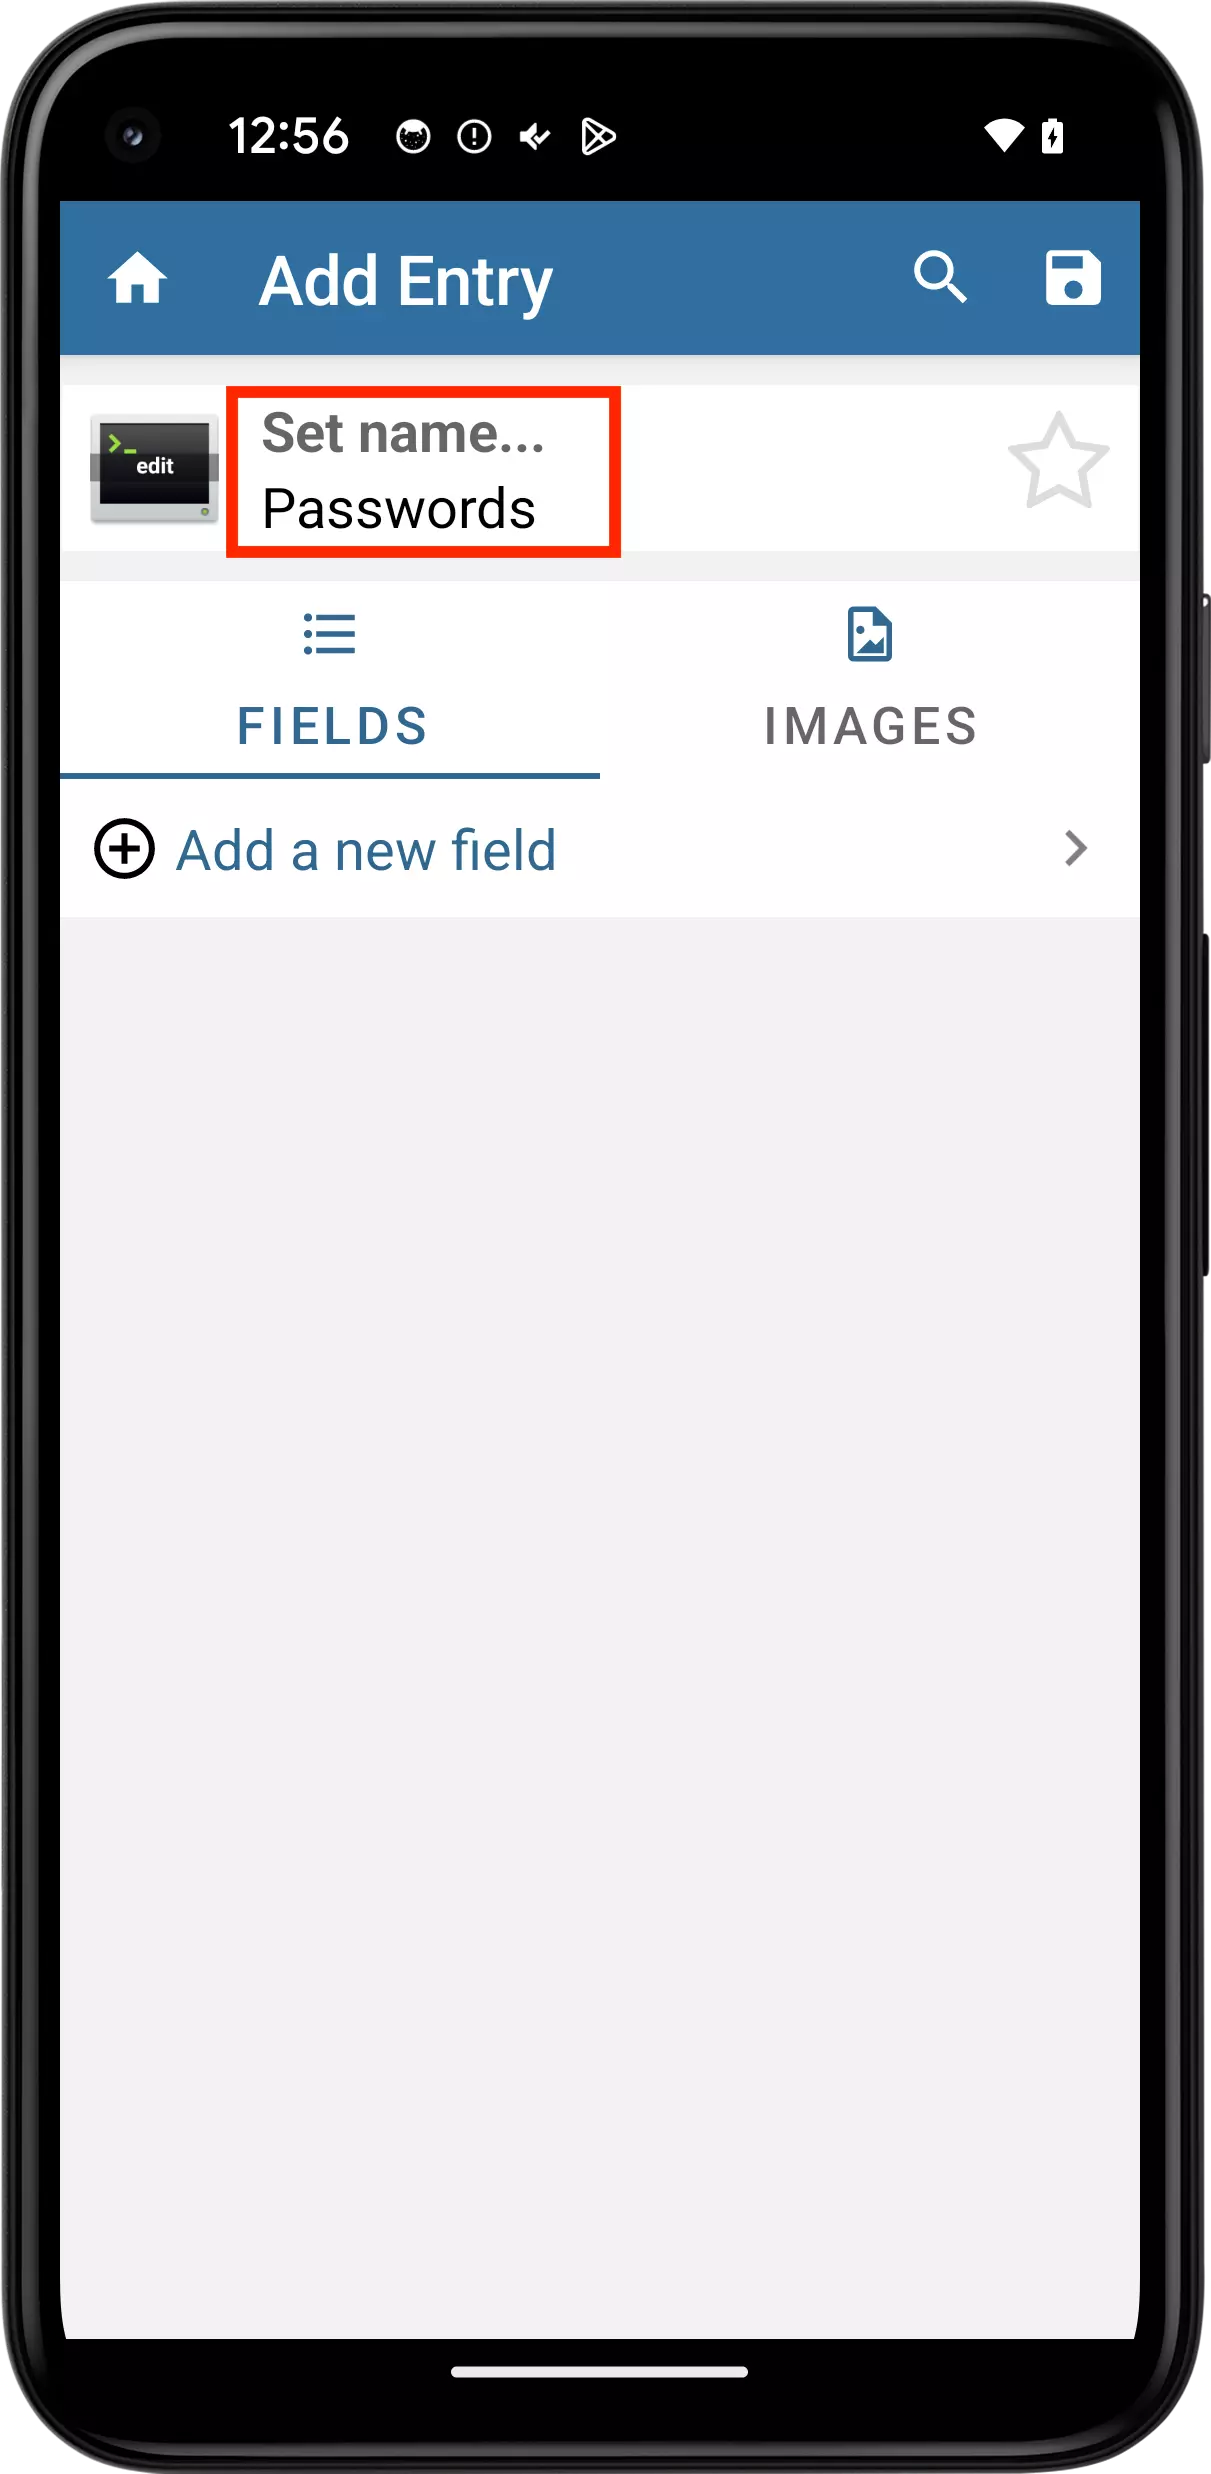
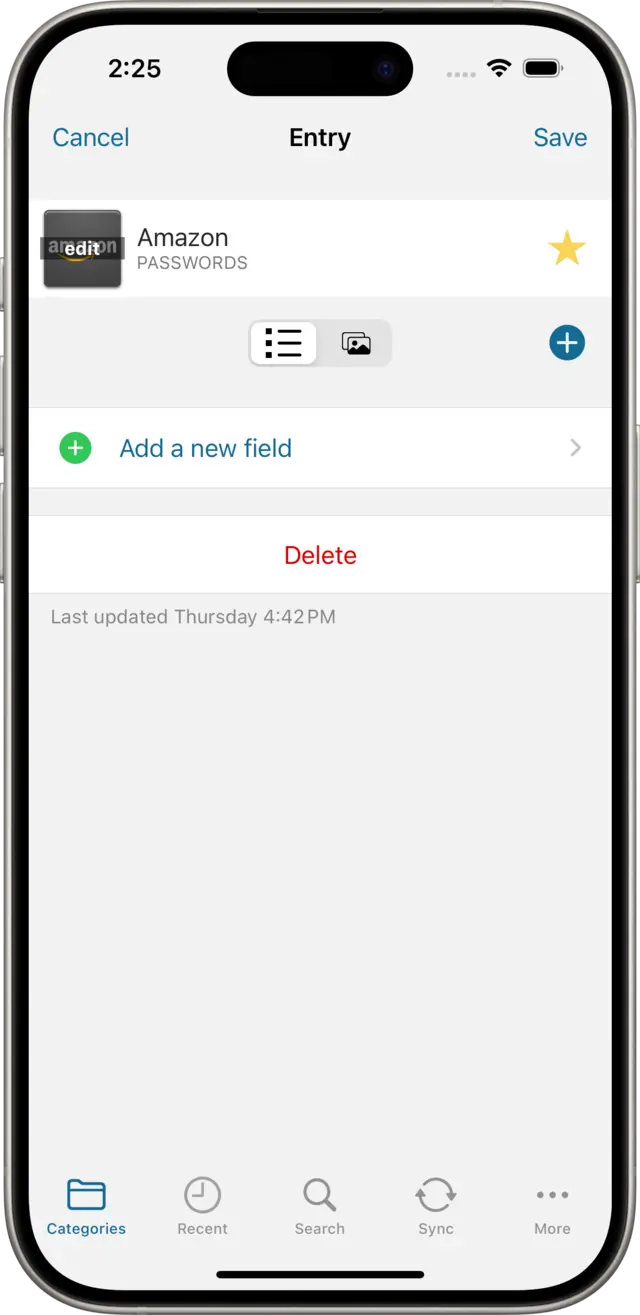
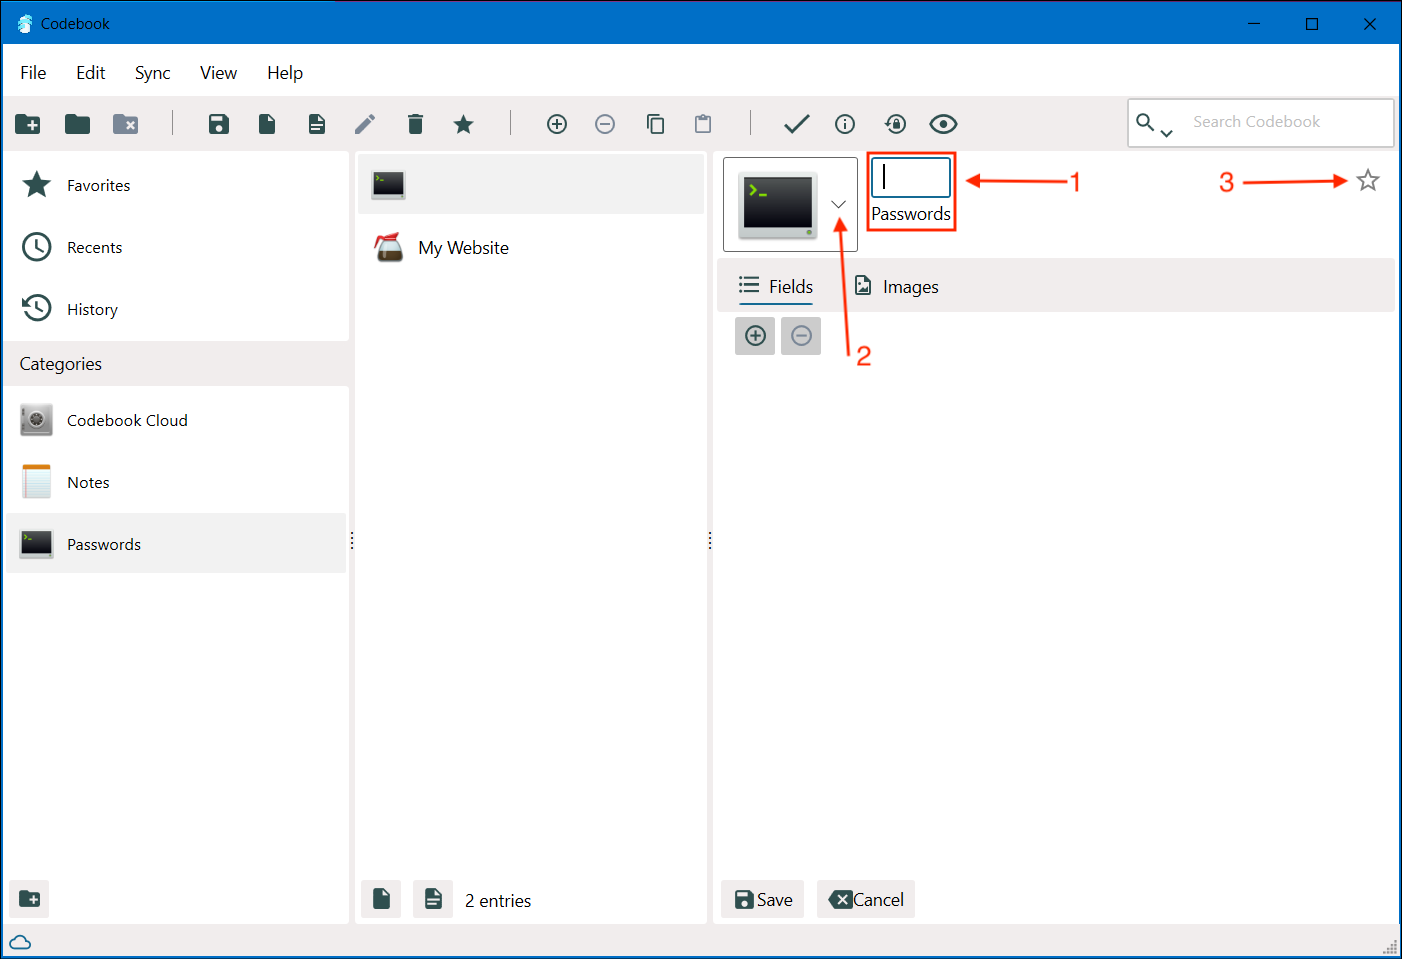
This brings us to the Add Entry view. Tap in the top row (set name...) to display the Entry Name view where you enter the name. Type Amazon and tap ✓ to return us to the Entry view. Tap on the icon Edit button to choose a different icon. You can also tap on the star button to mark this record as a Favorite.

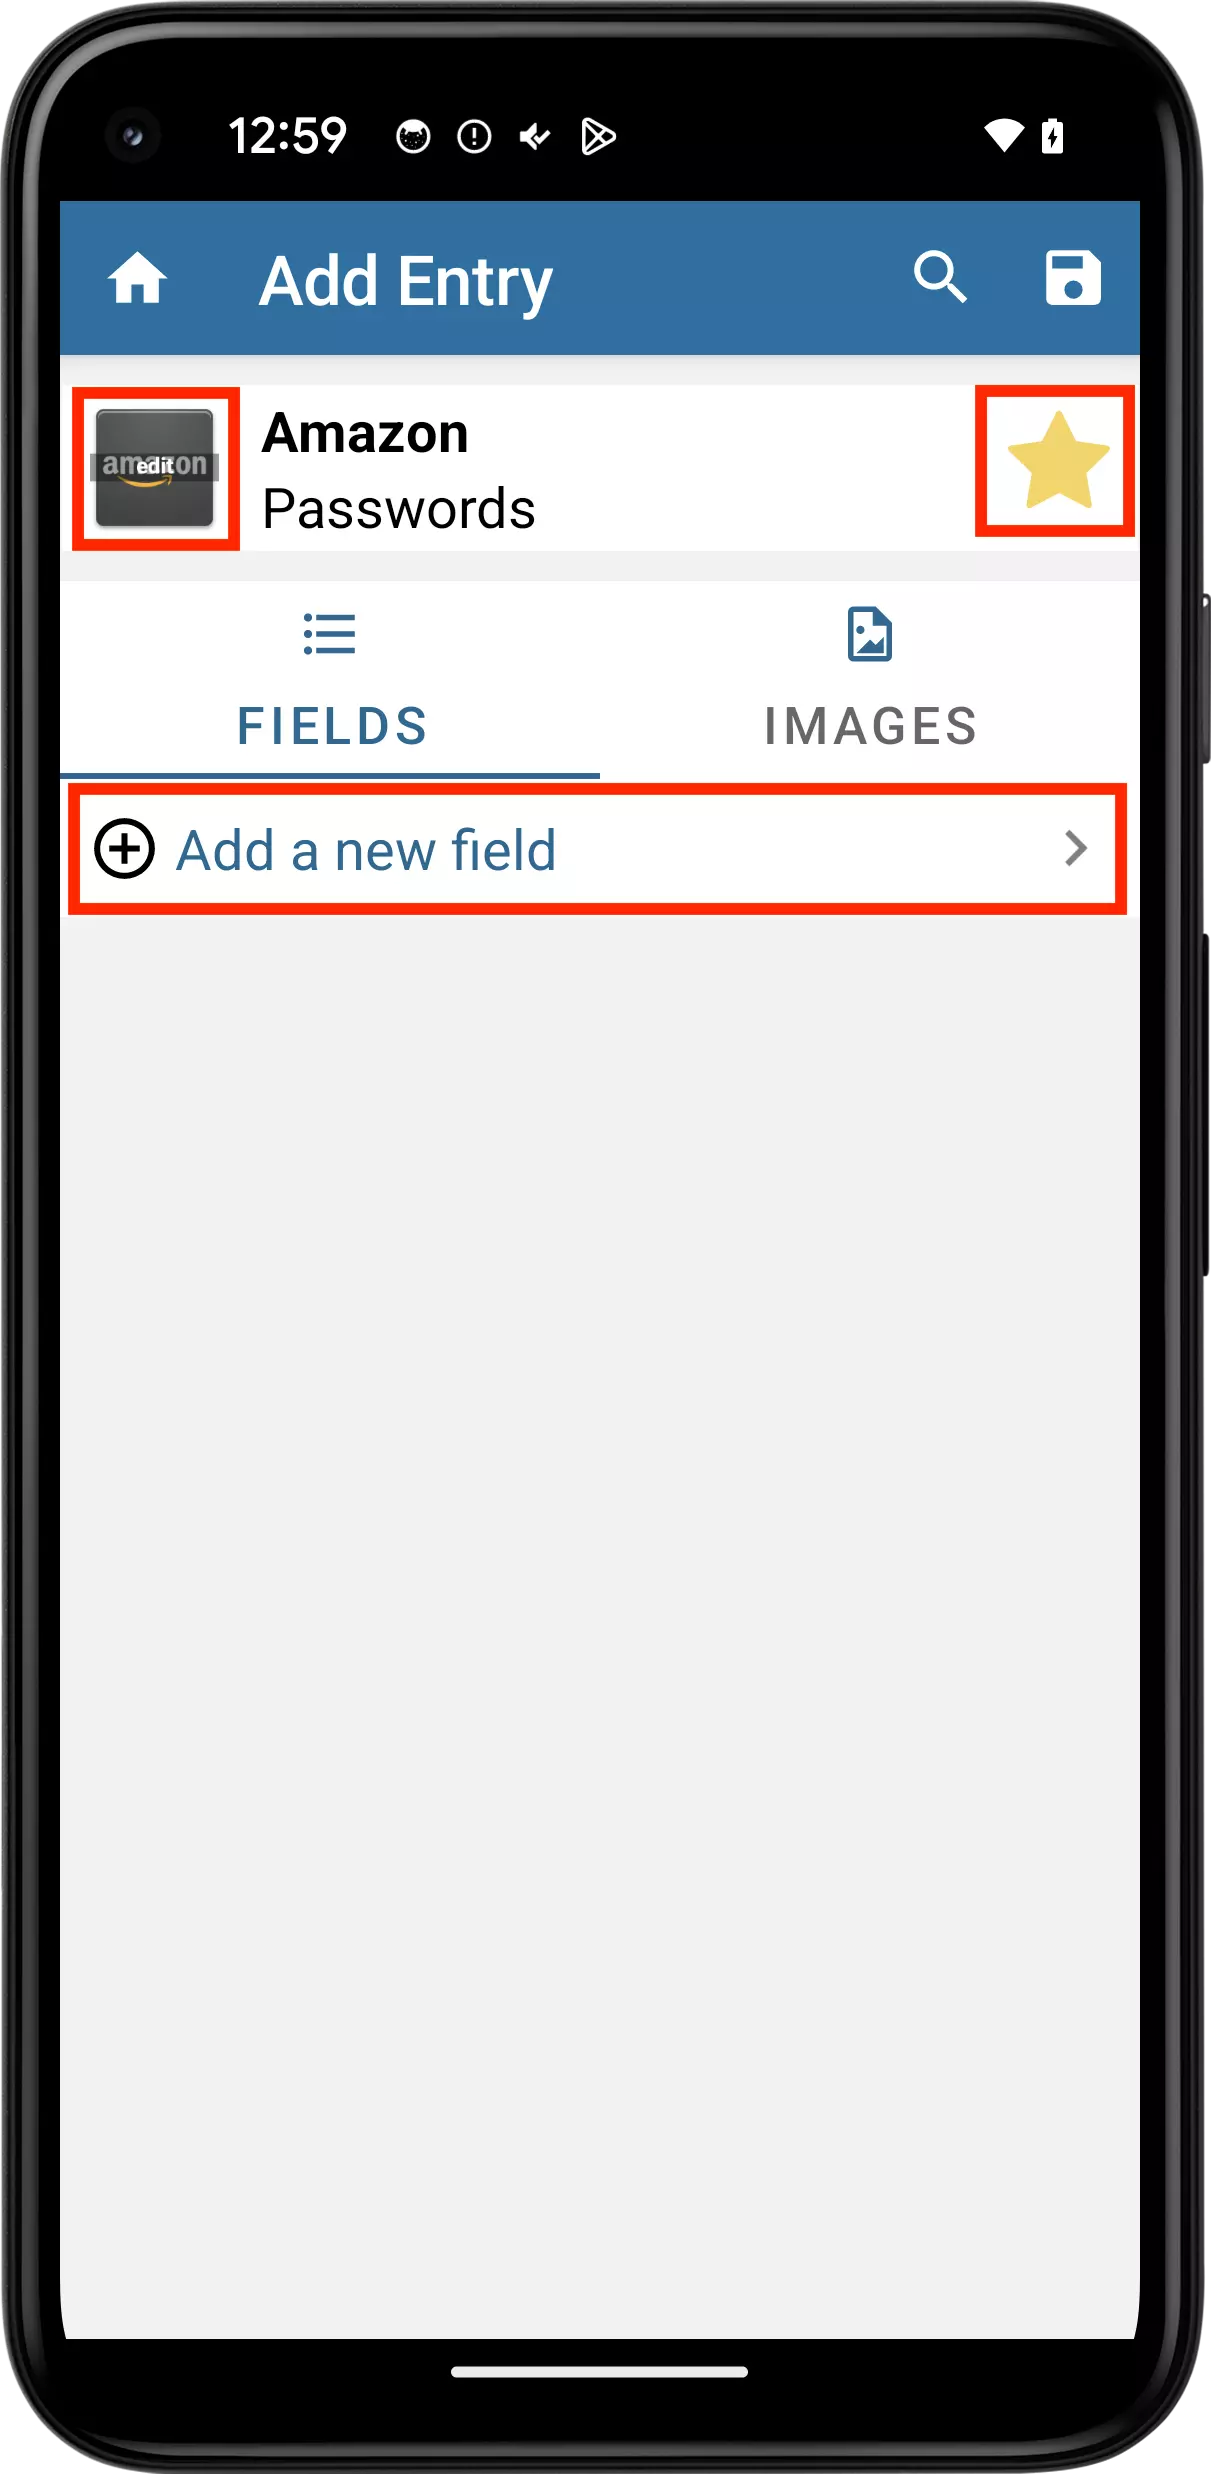
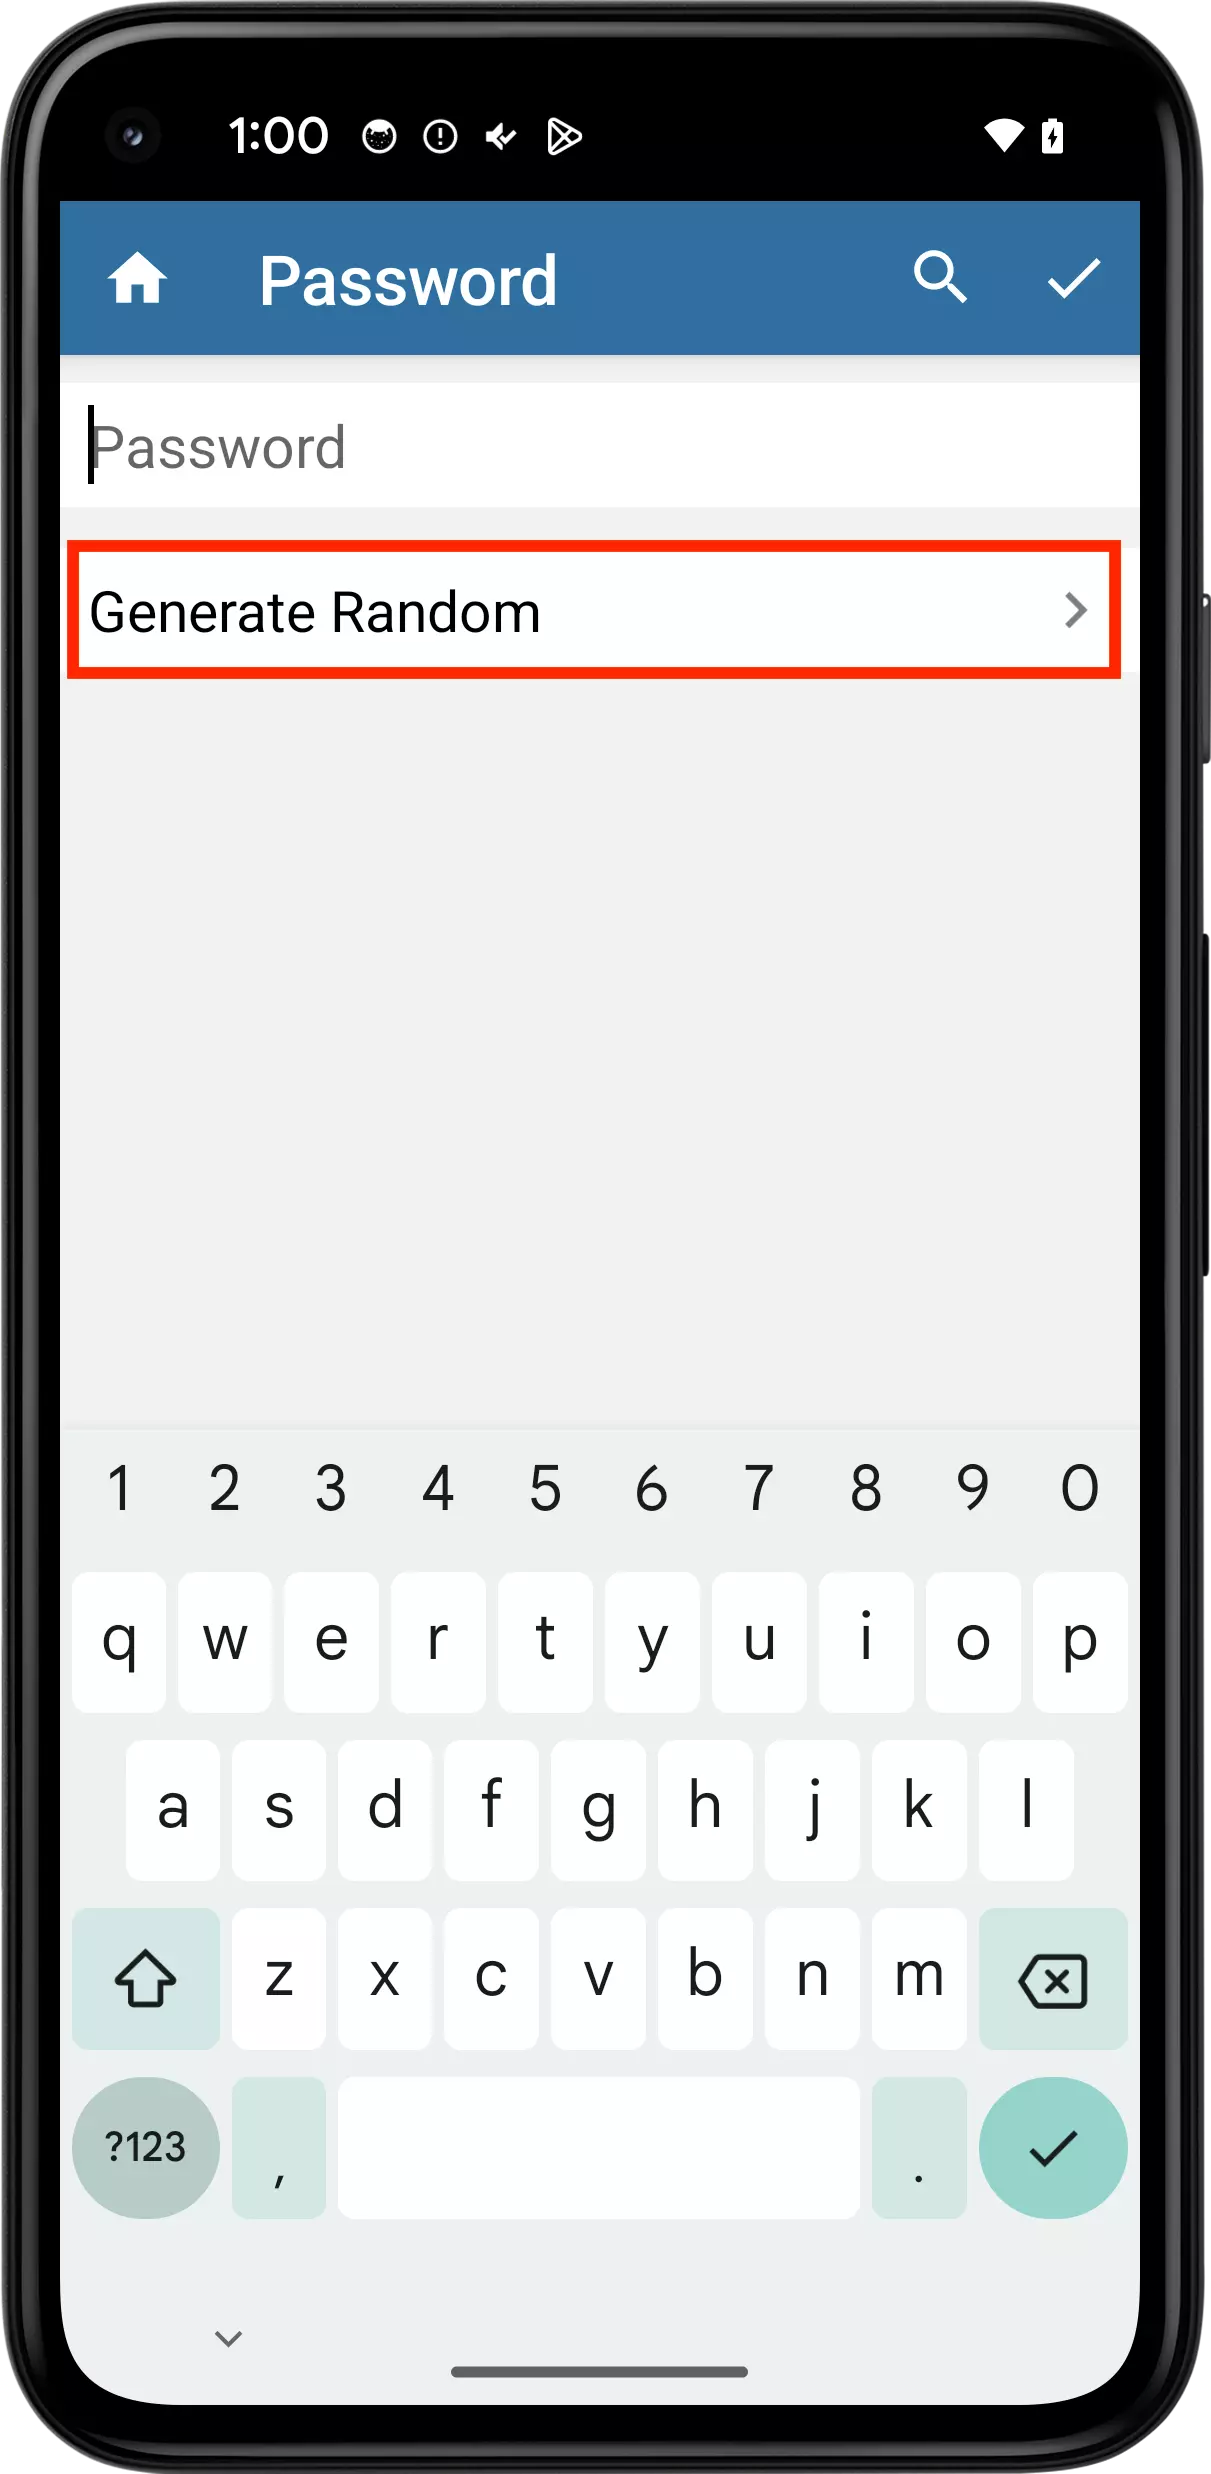
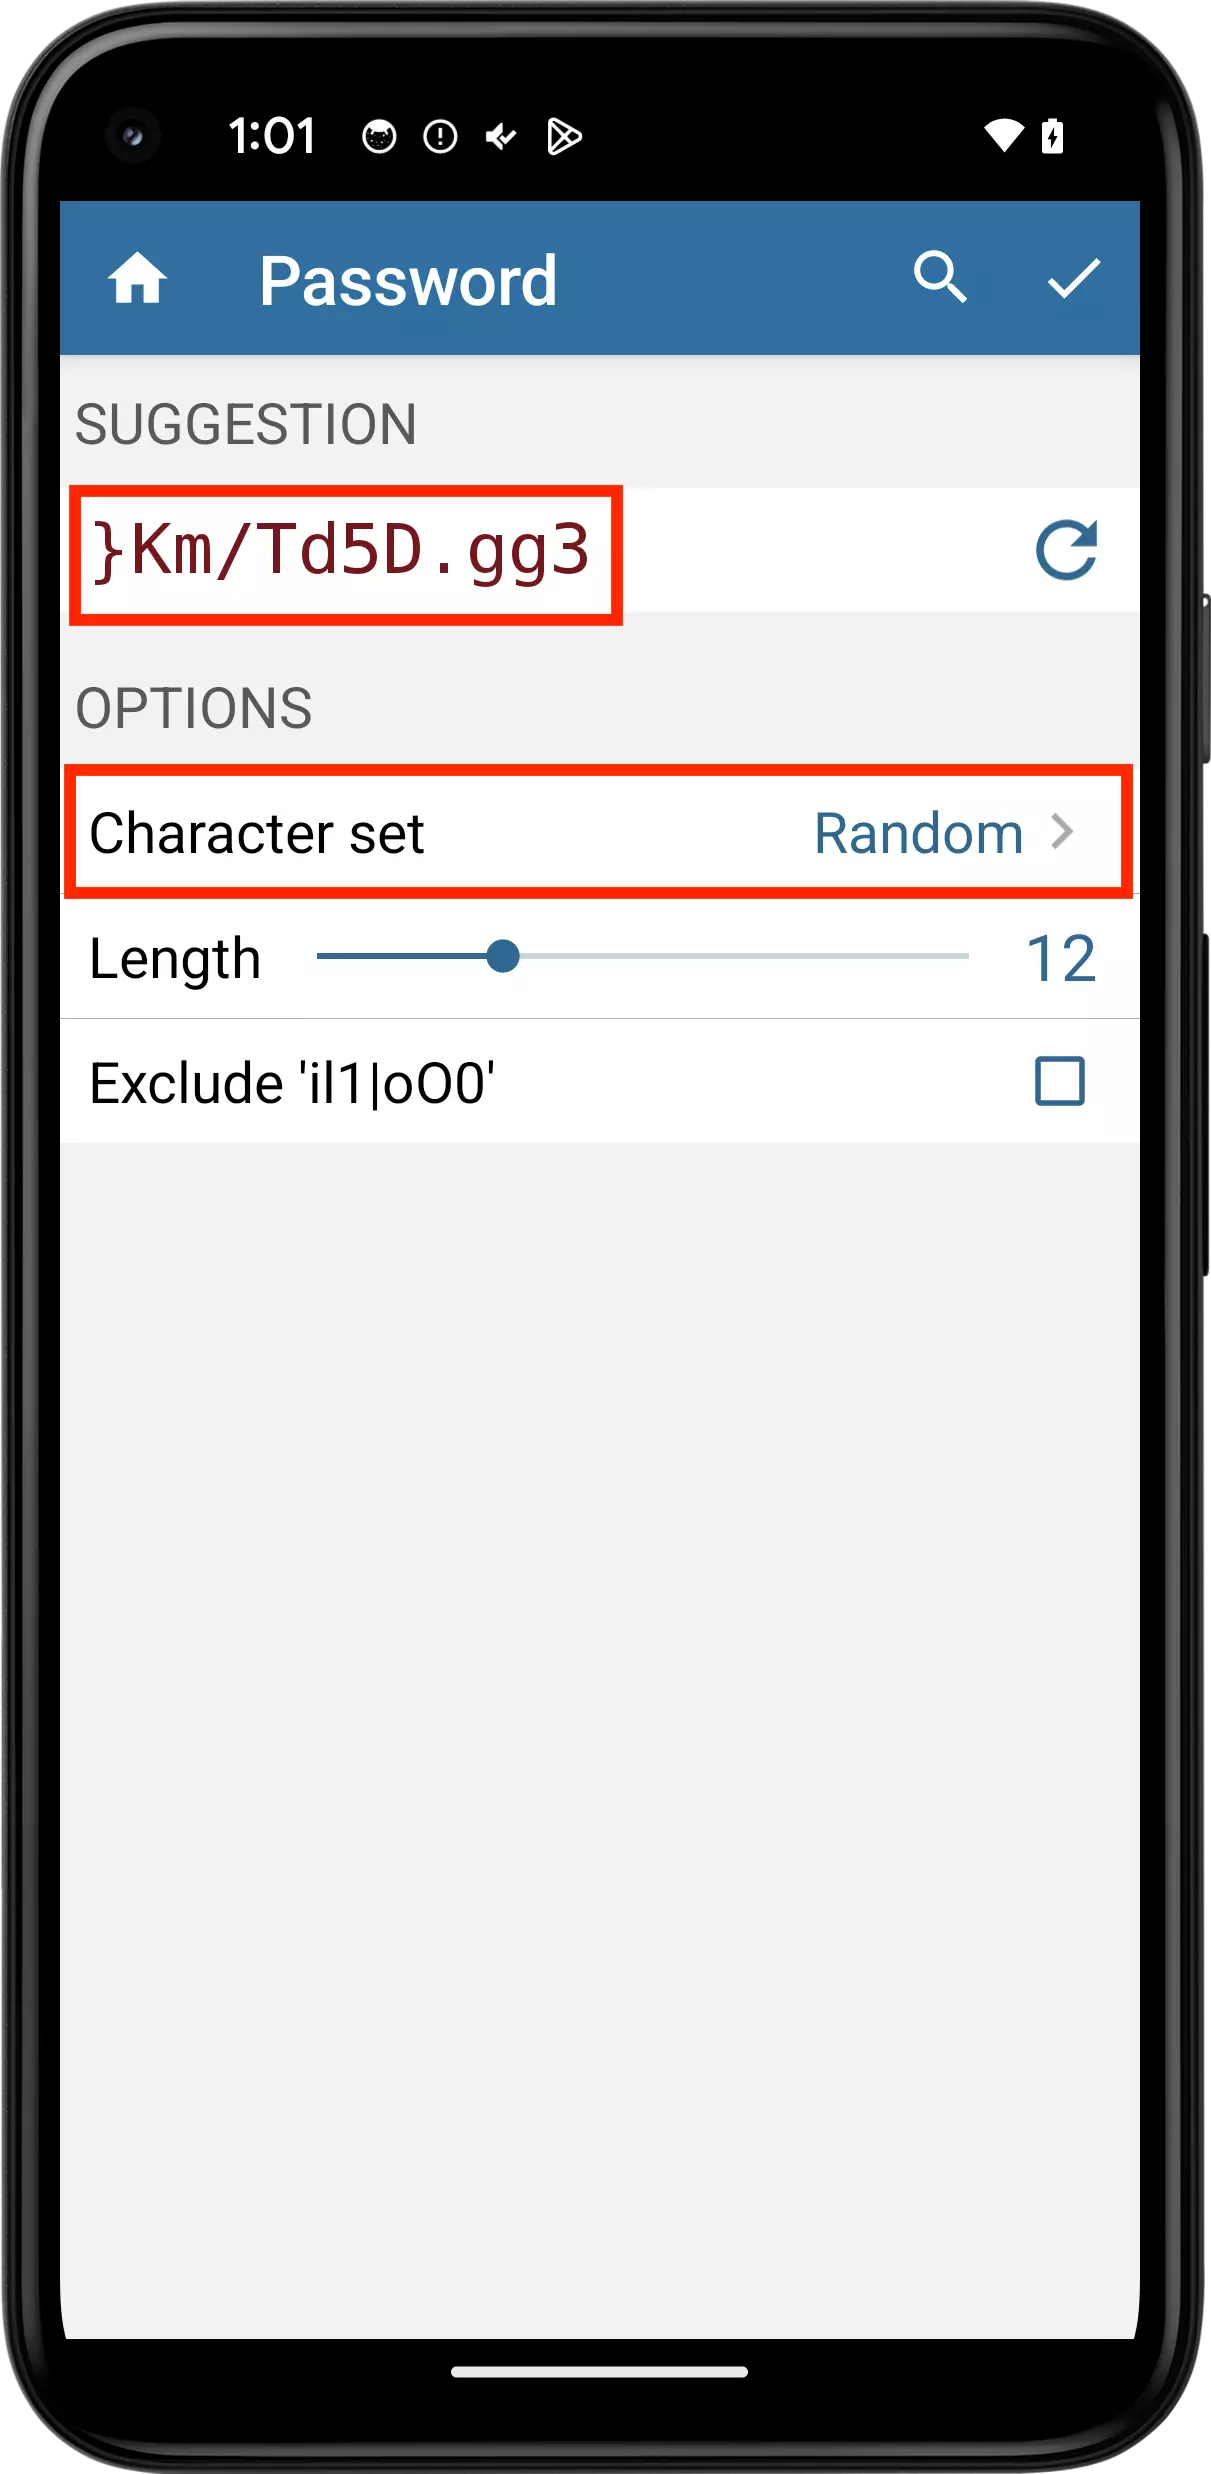
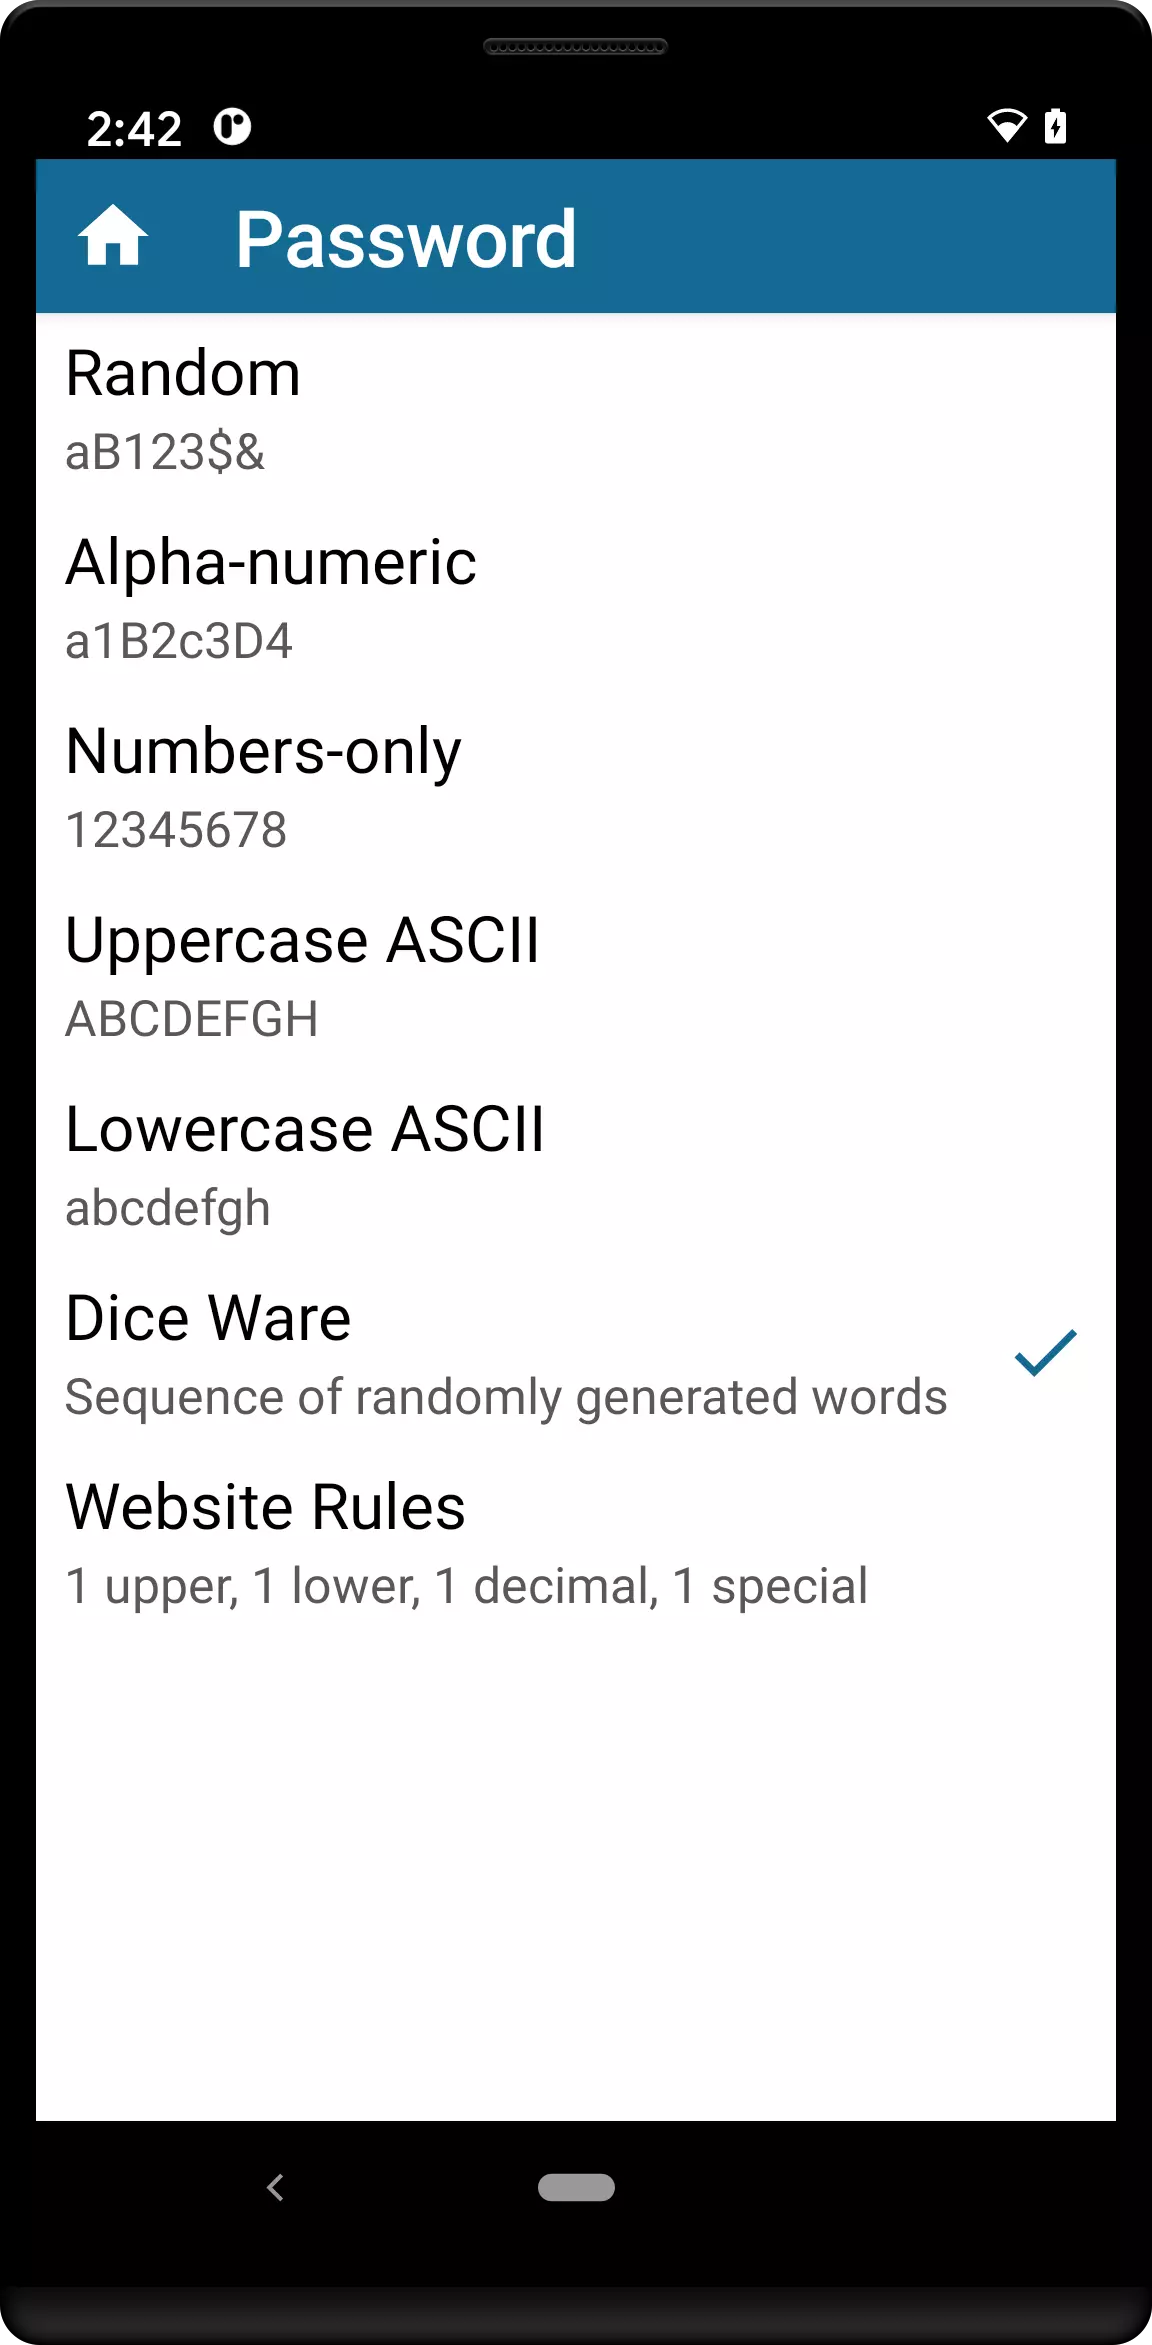
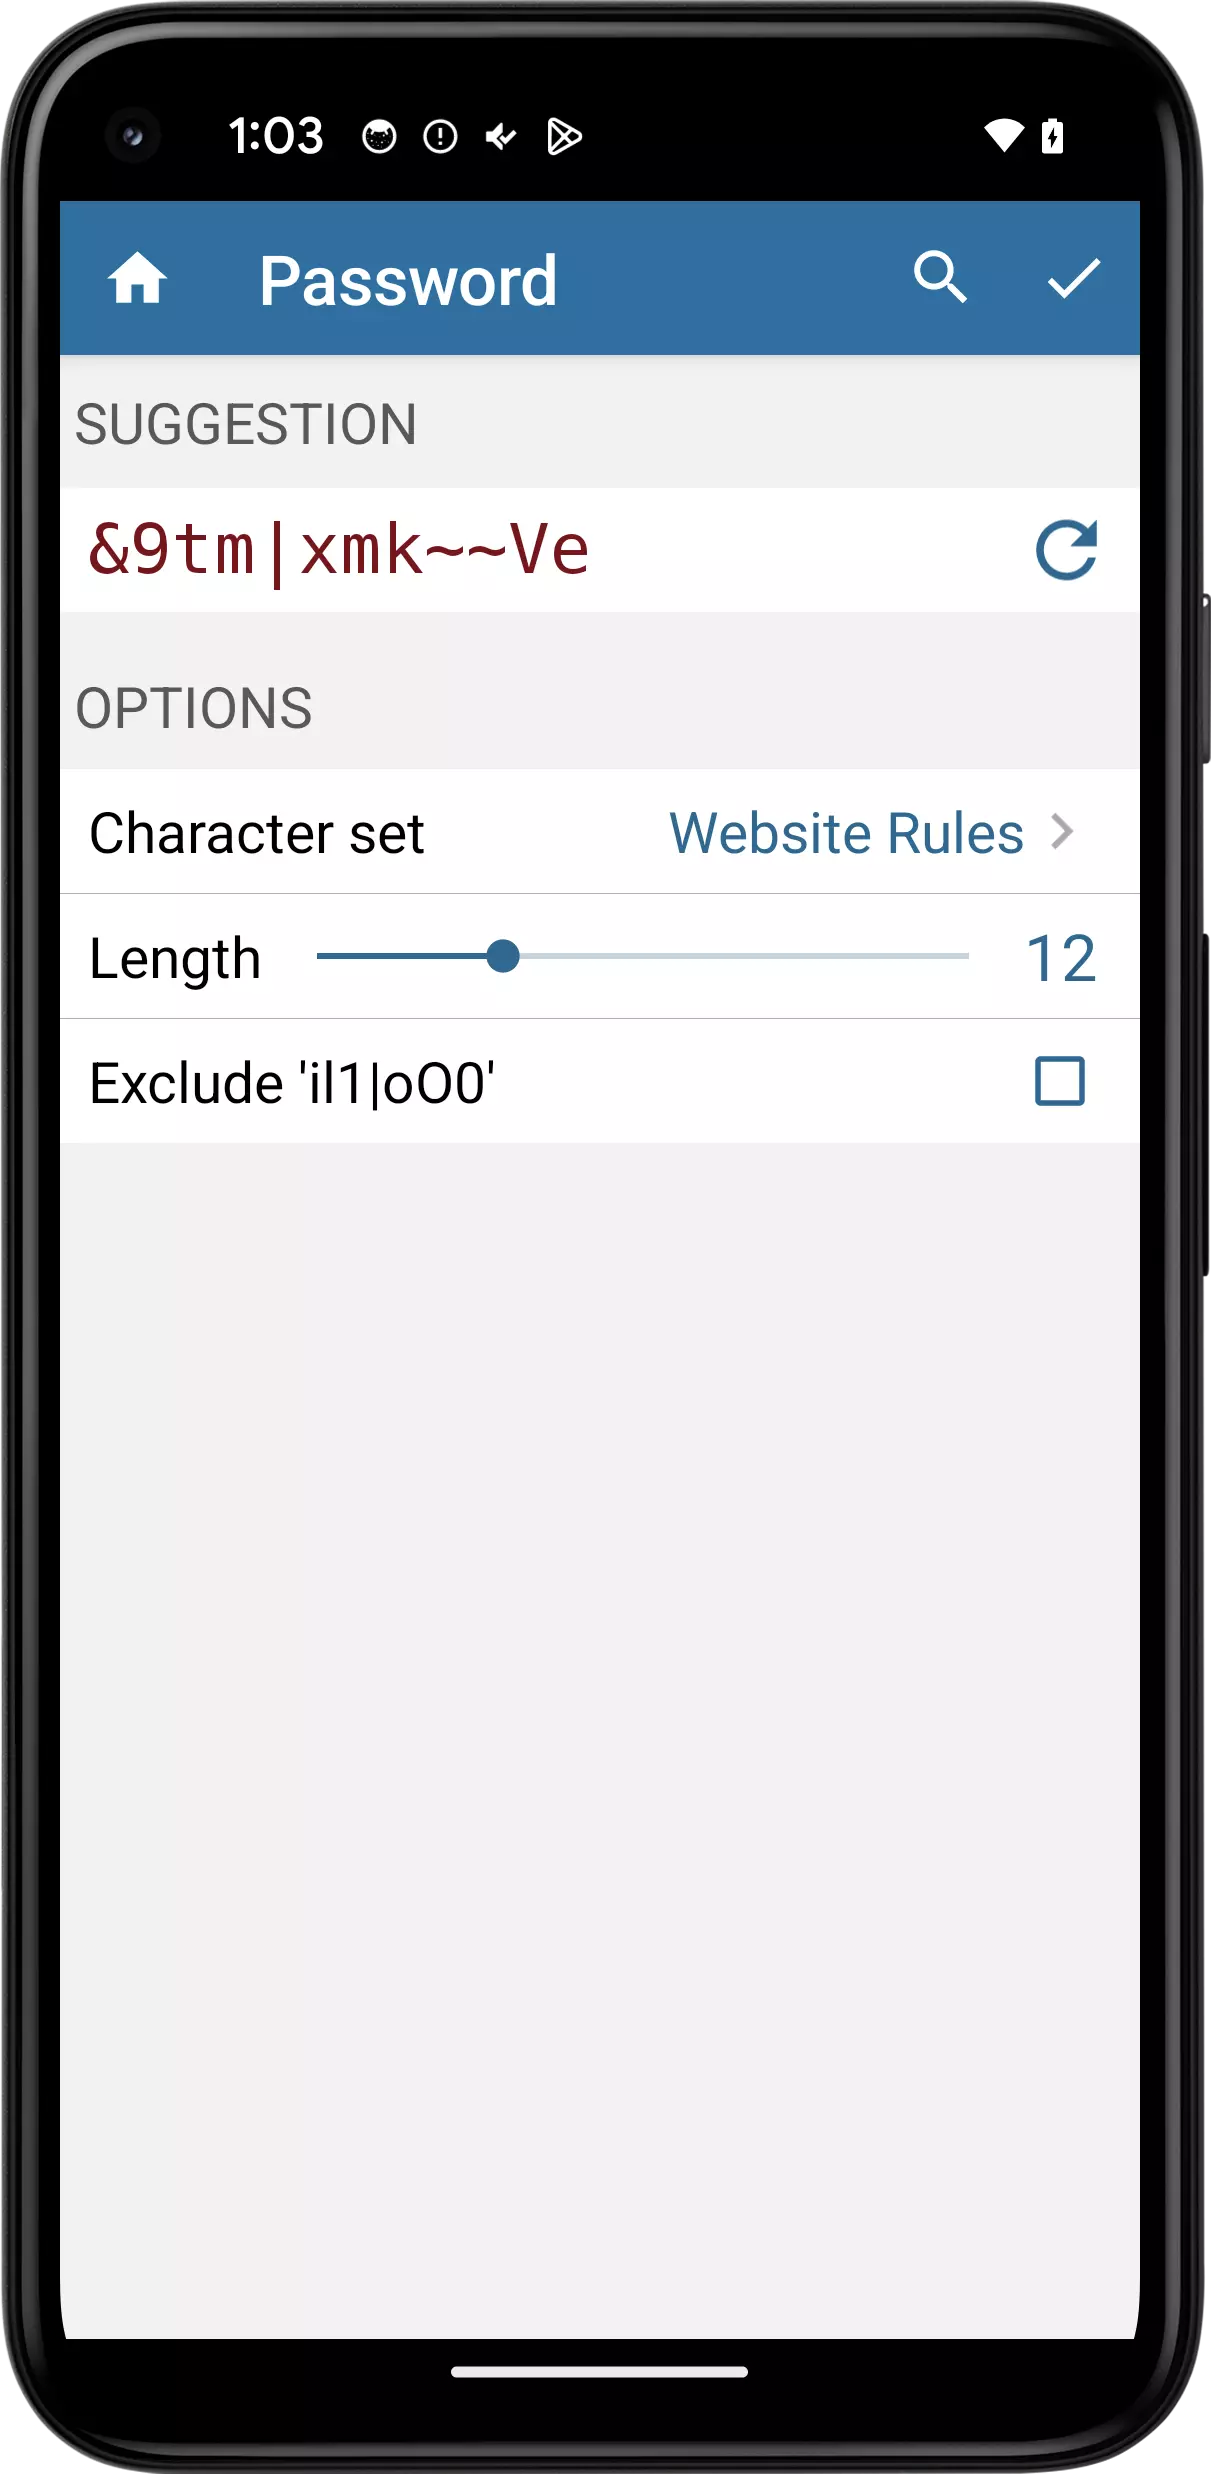
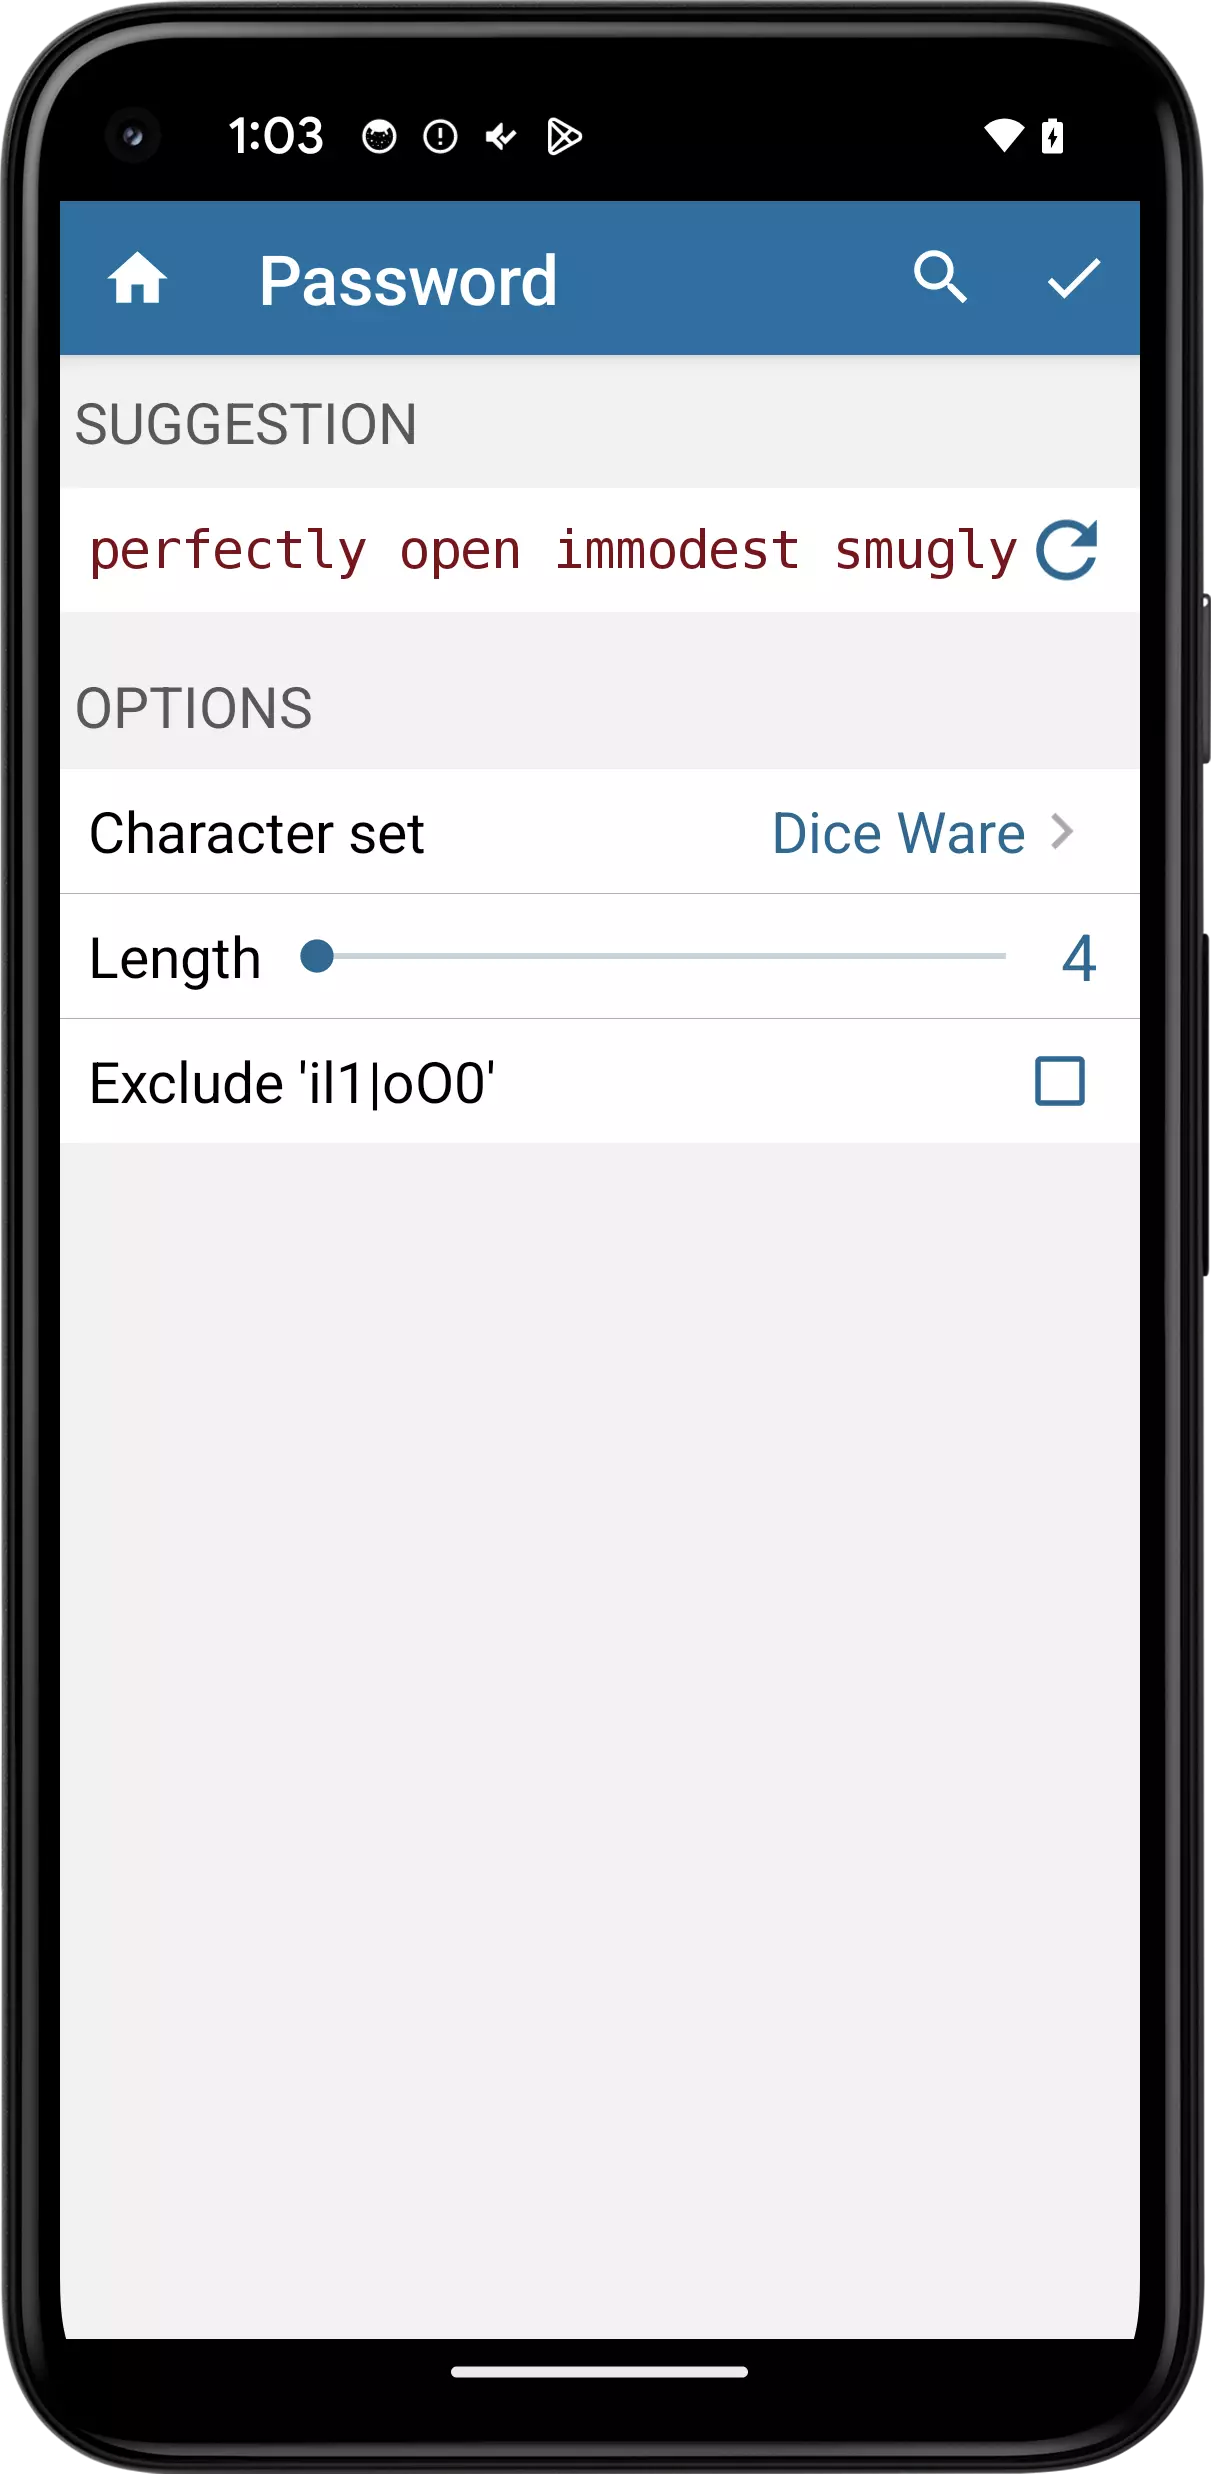
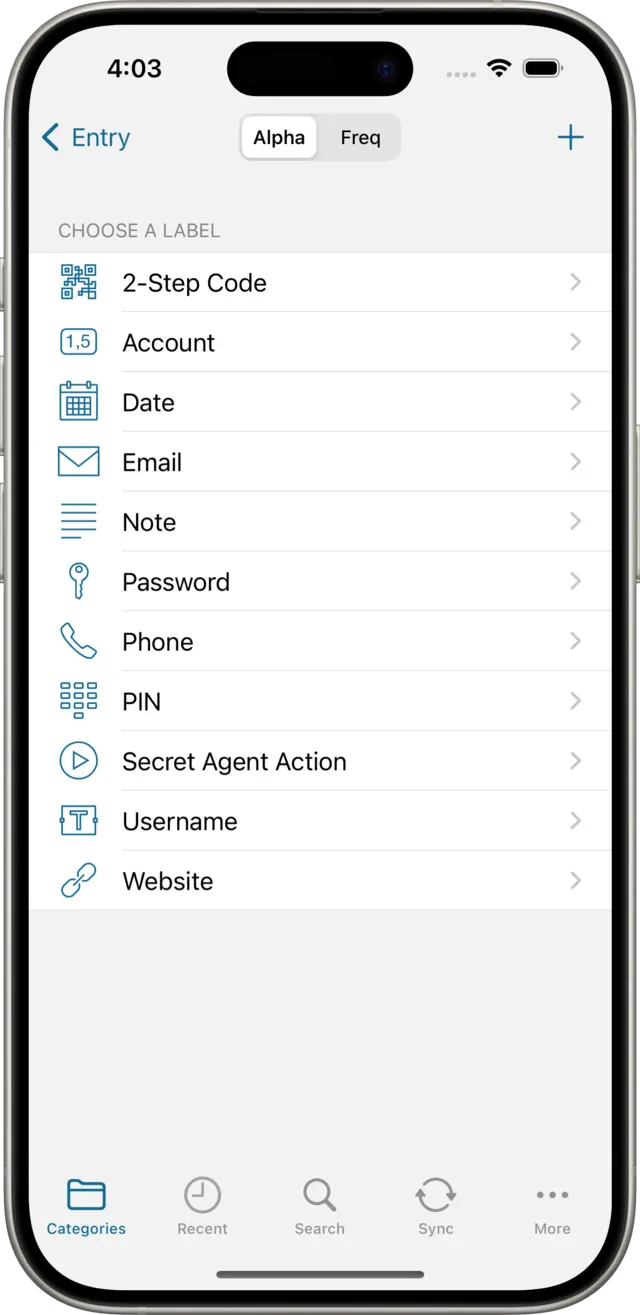
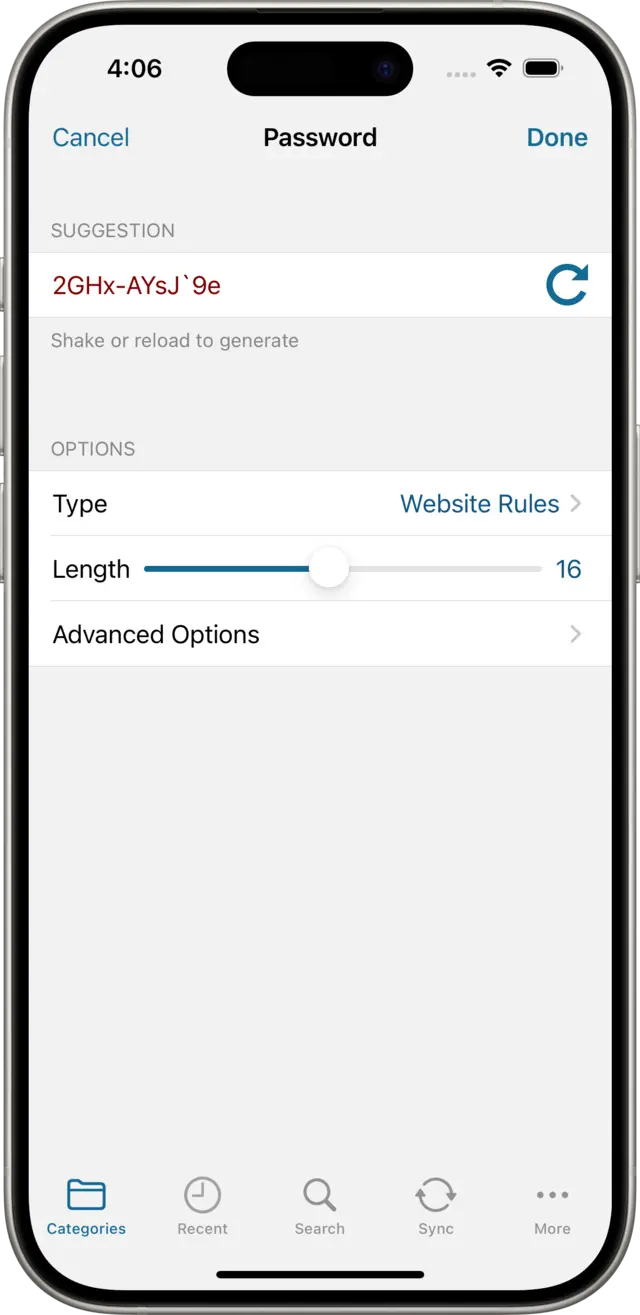
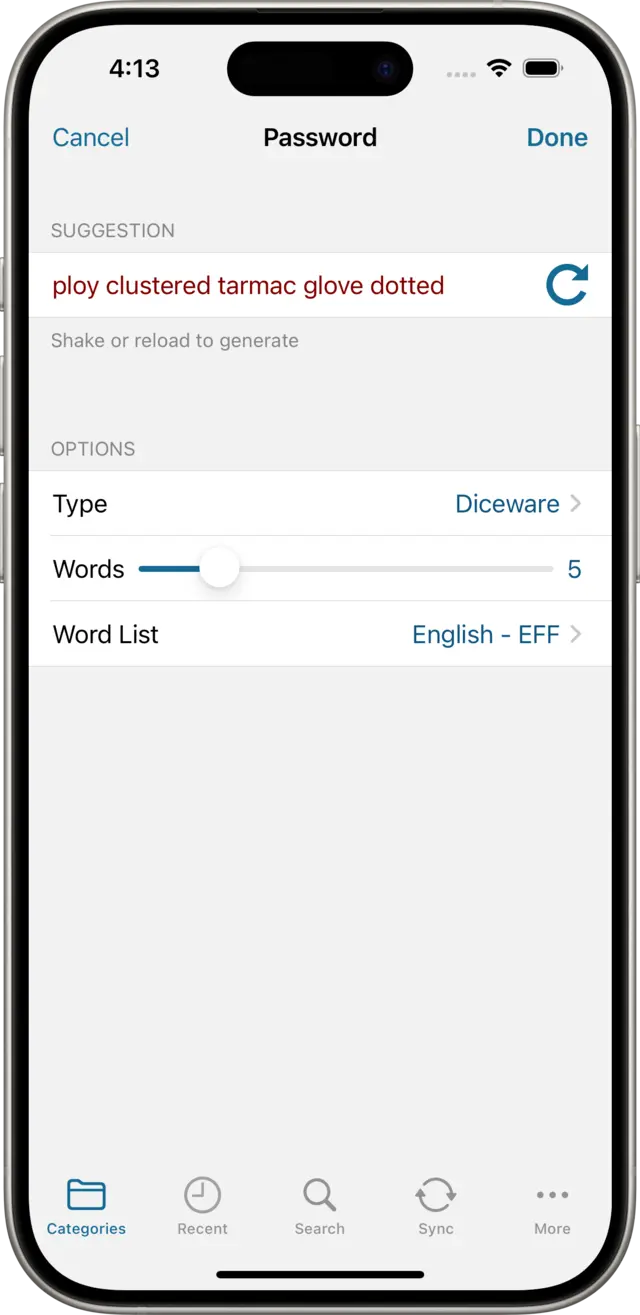
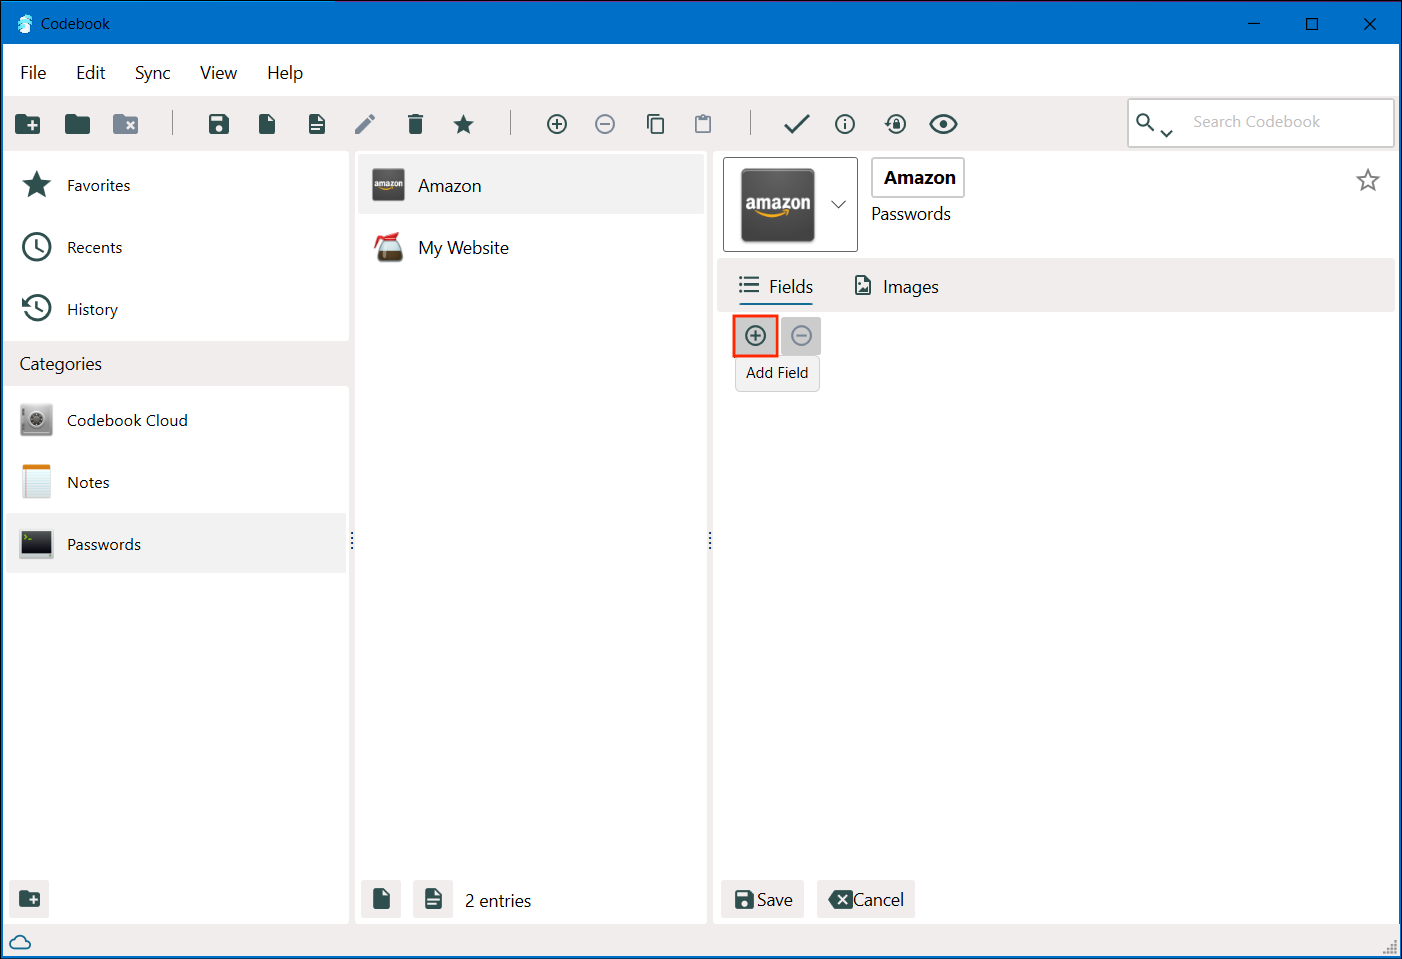
Now we've got an Entry record, we're ready to create our first password! Passwords are stored in what Codebook calls Fields: tap on the Add a new field row (see above). This will display a list of labels to choose from: tap on the Password row to display the Password field editor. Here we can type in a password, but let's tap on Generate Random to show the Password Generator instead. The Suggestion shows a randomly generated password created using the options specified. Under options, you can choose a different Character set. Tap on the character set row to display them.
Here are examples of a few of the password generator options:
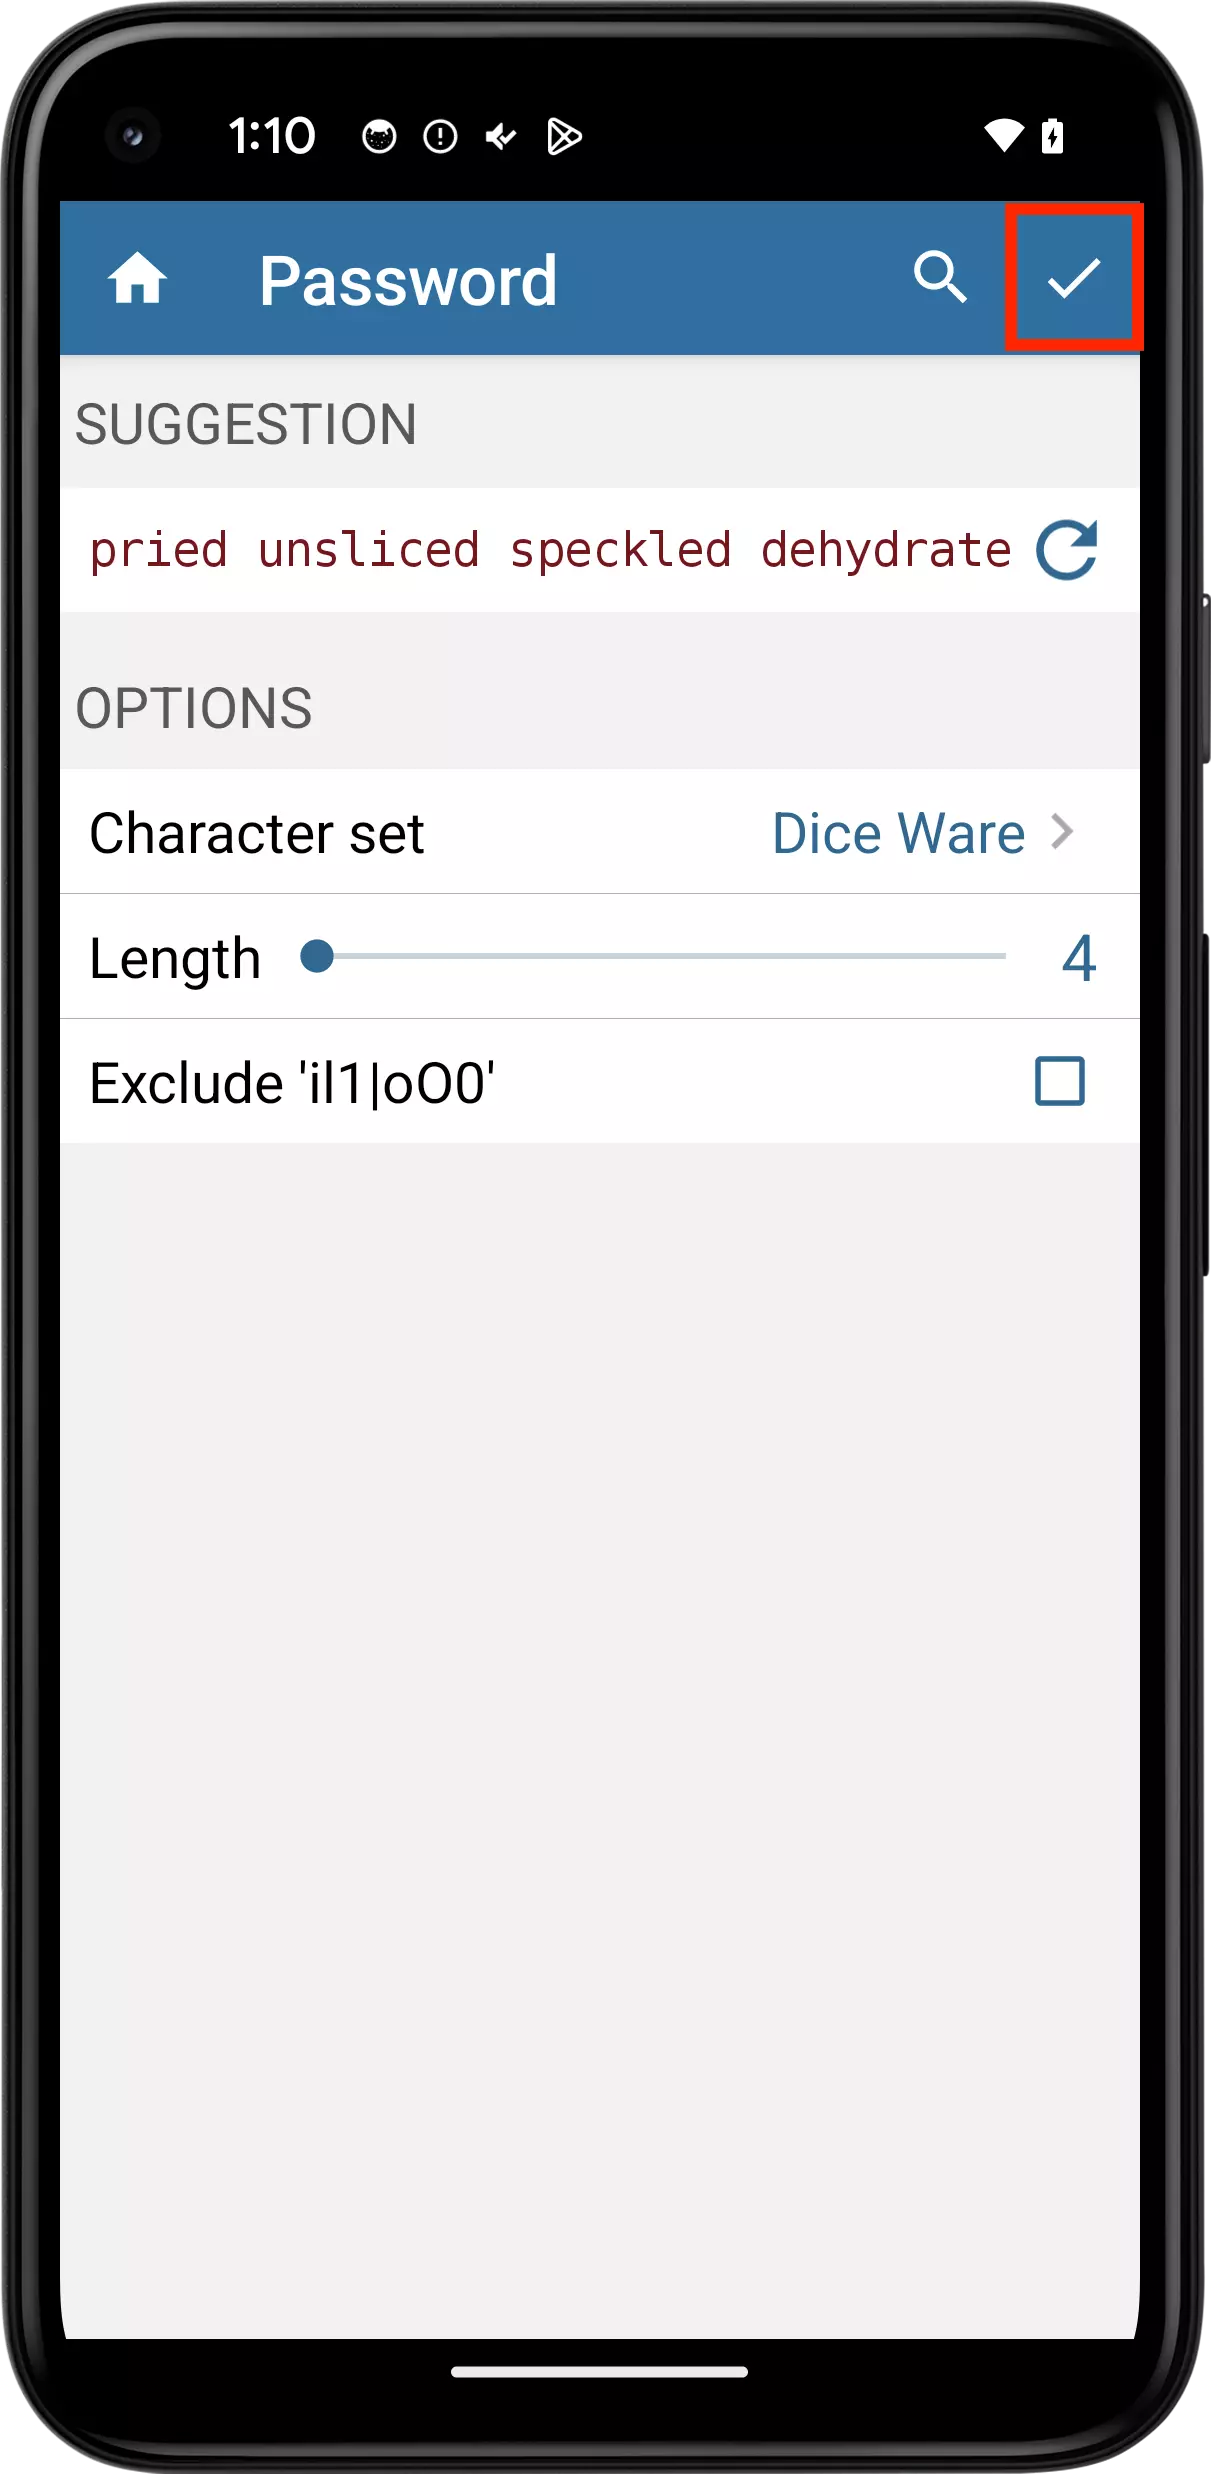
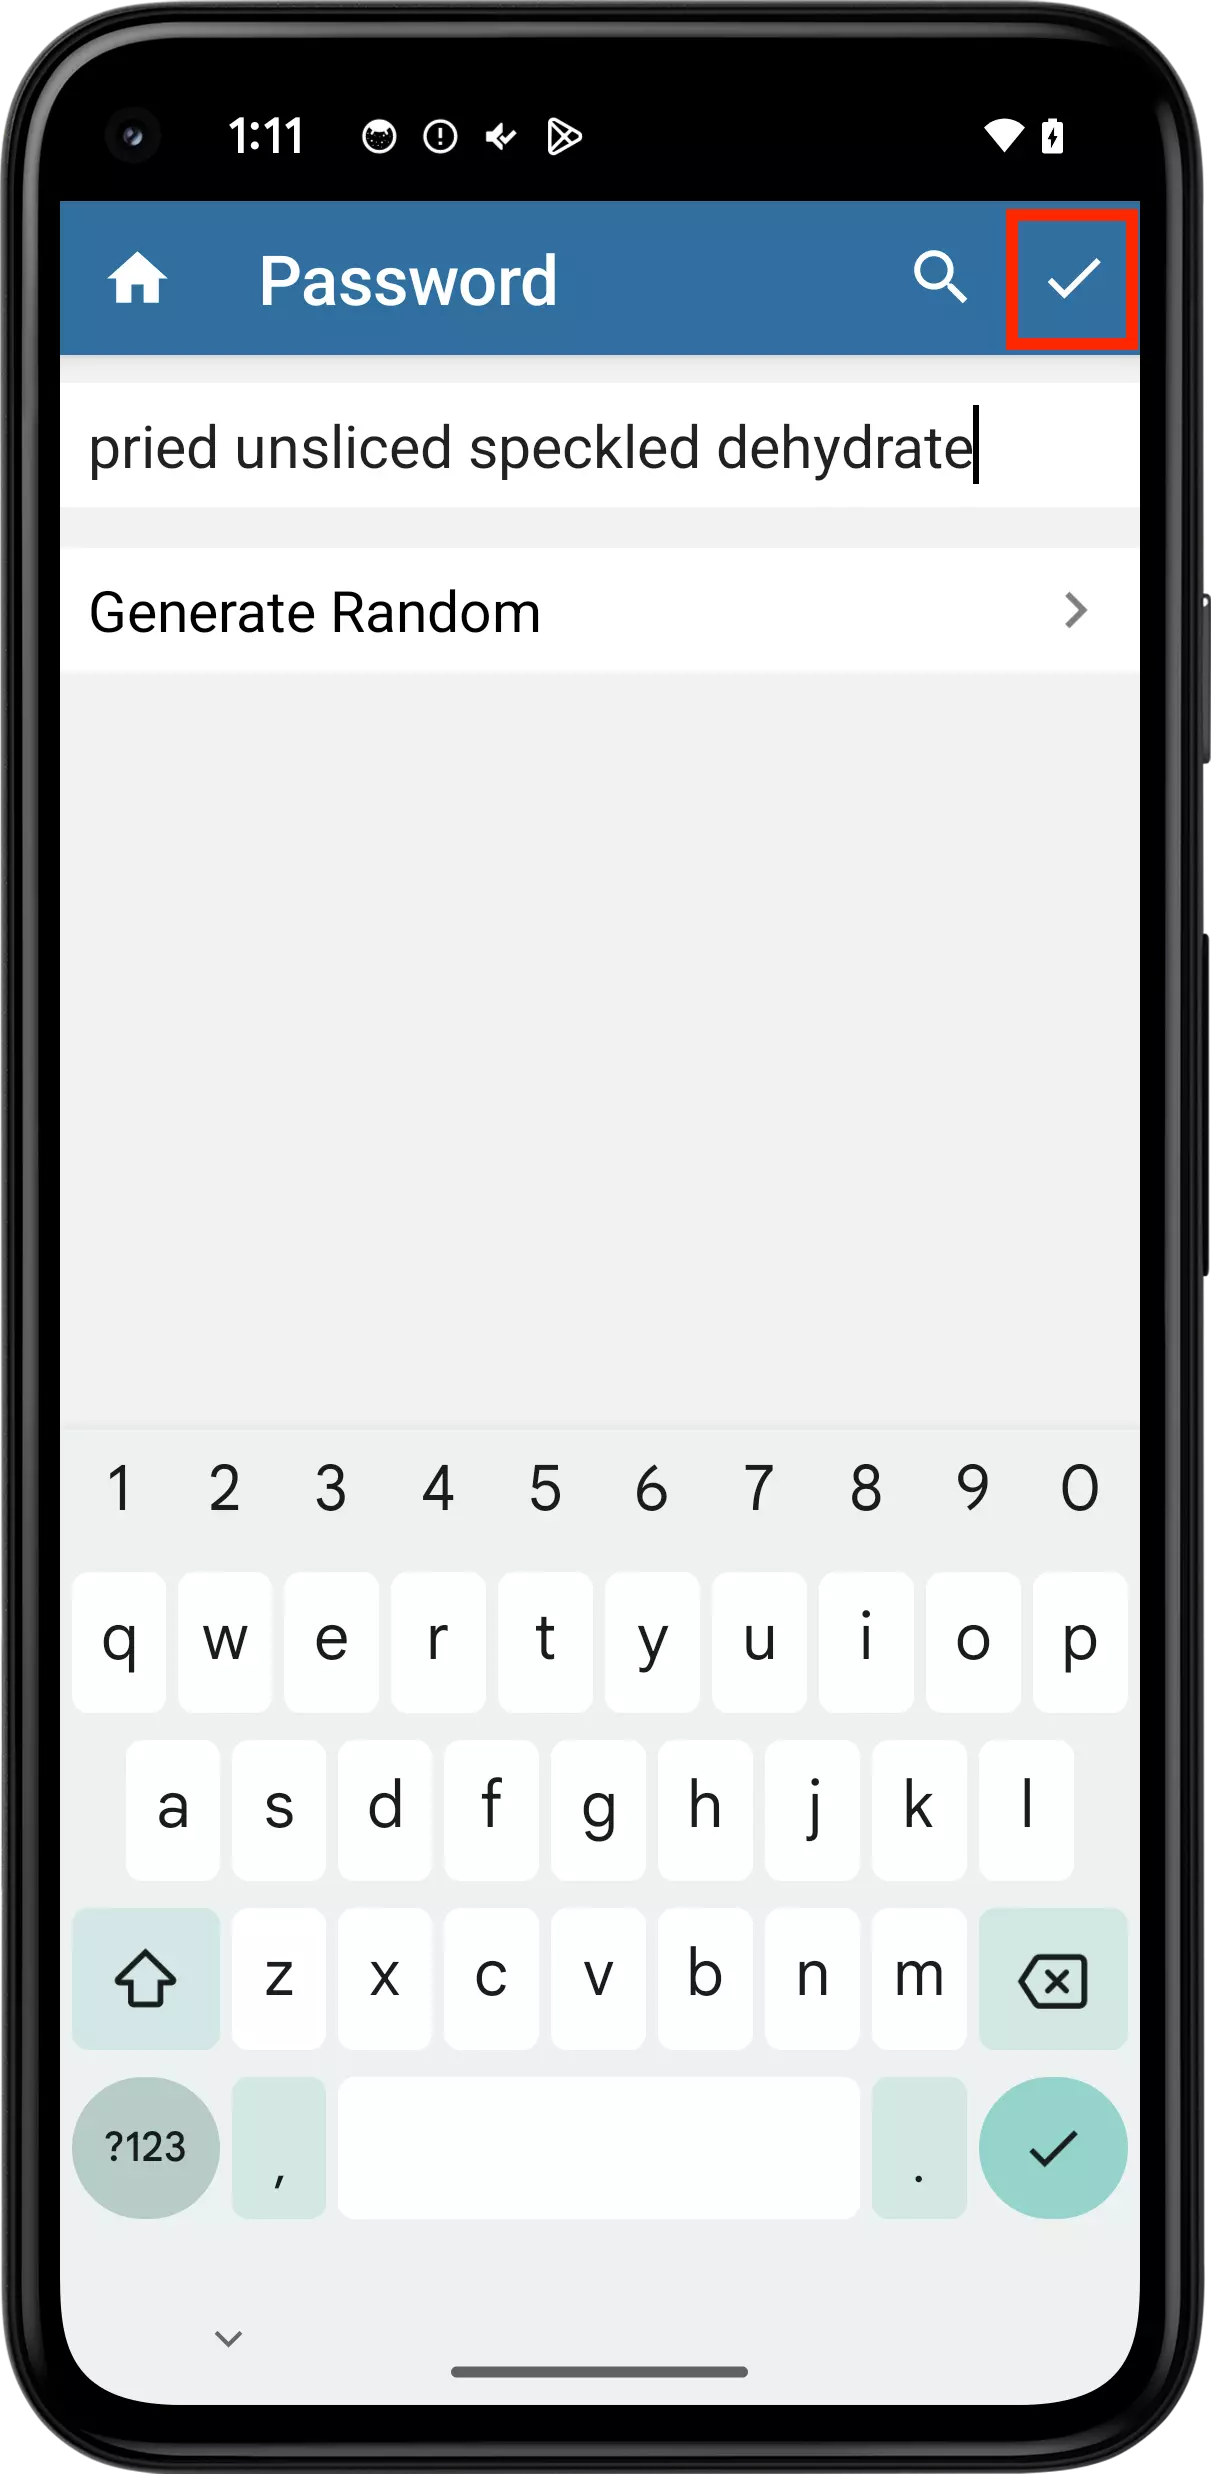
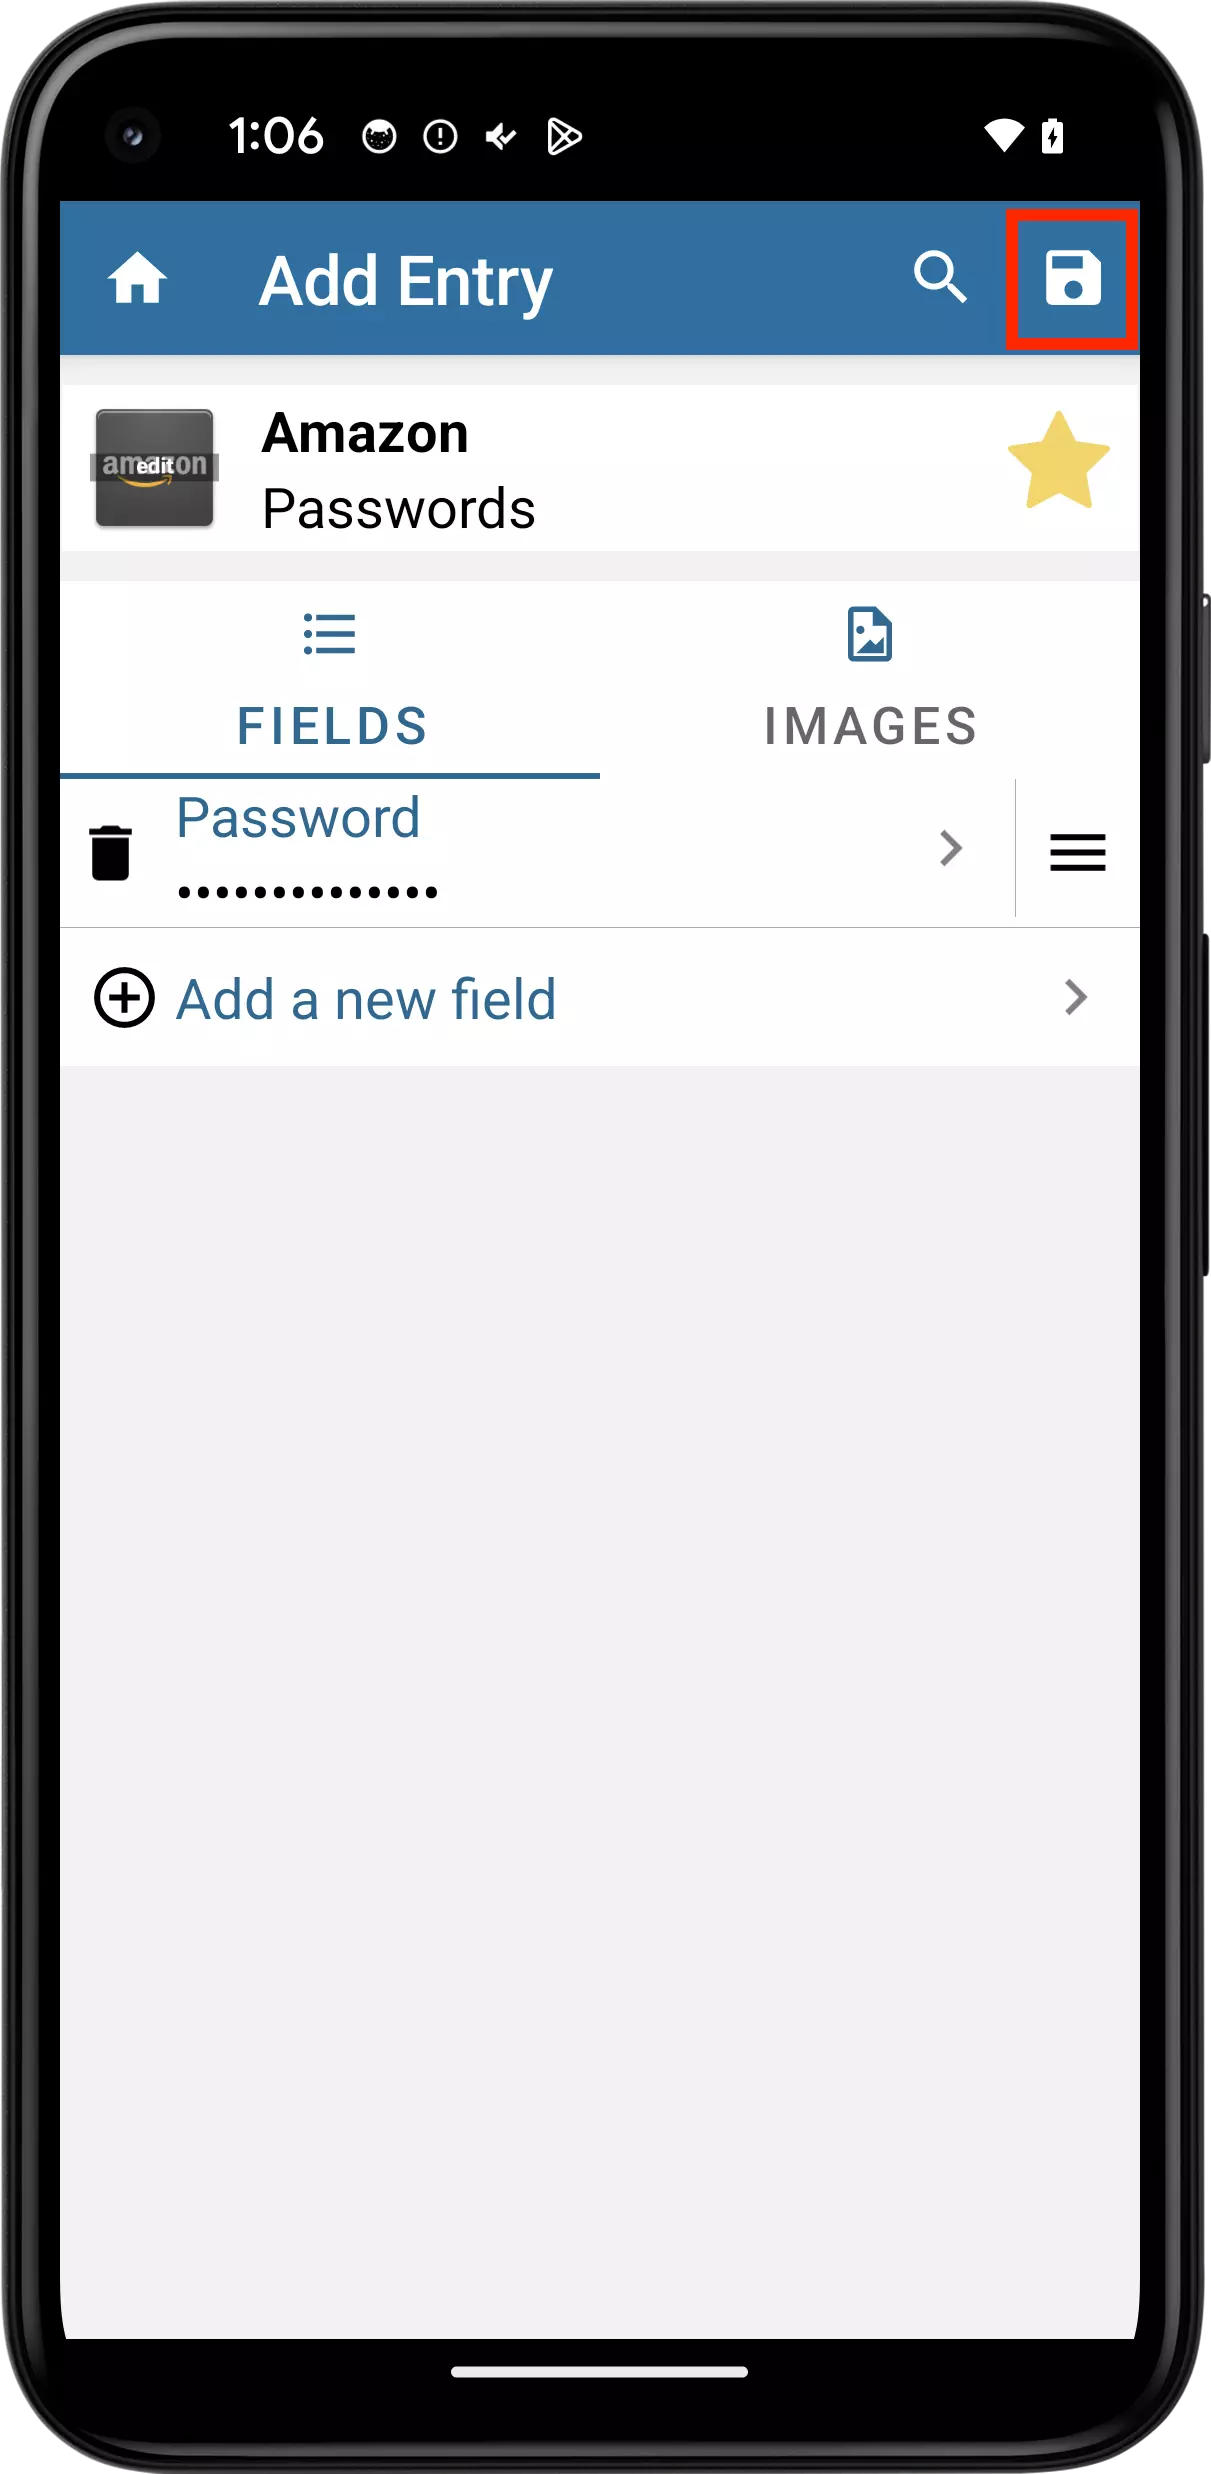
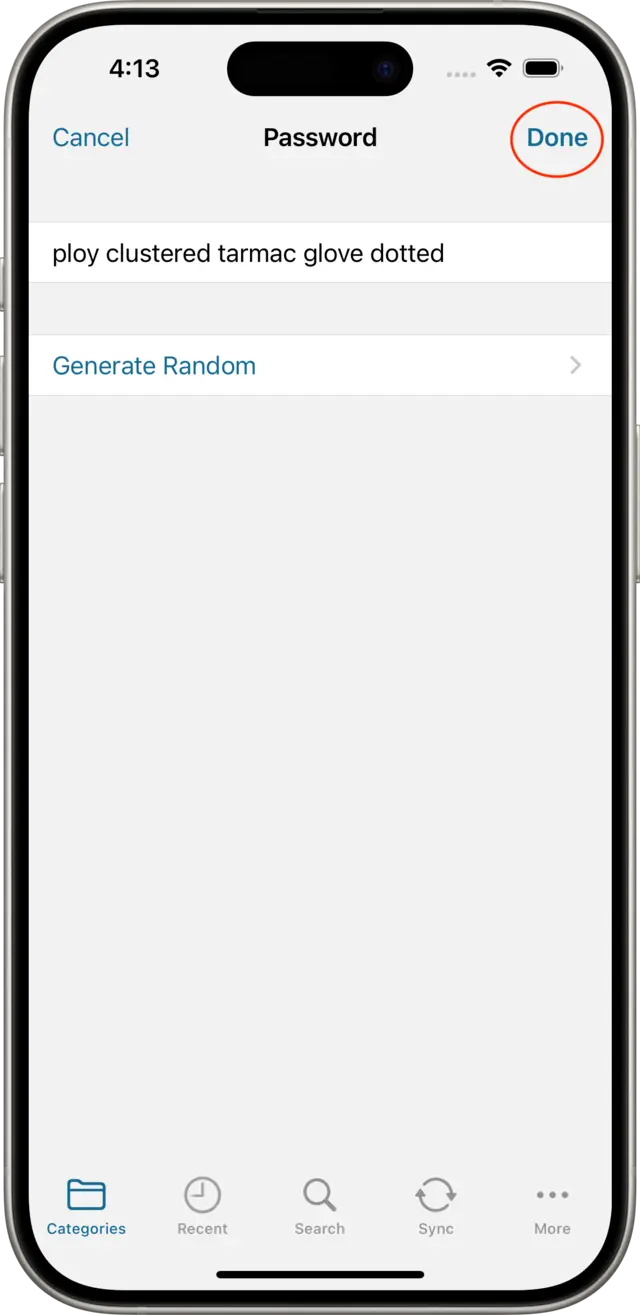
Use the Options on the Password Generator to adjust the types of suggestions the Generator creates for you until you've got one you want to keep, then tap on ✓. This will bring you back to the Password field edit view, tap ✓ again. Now back on the Entry view, tap on the save button to persist the password to the database.
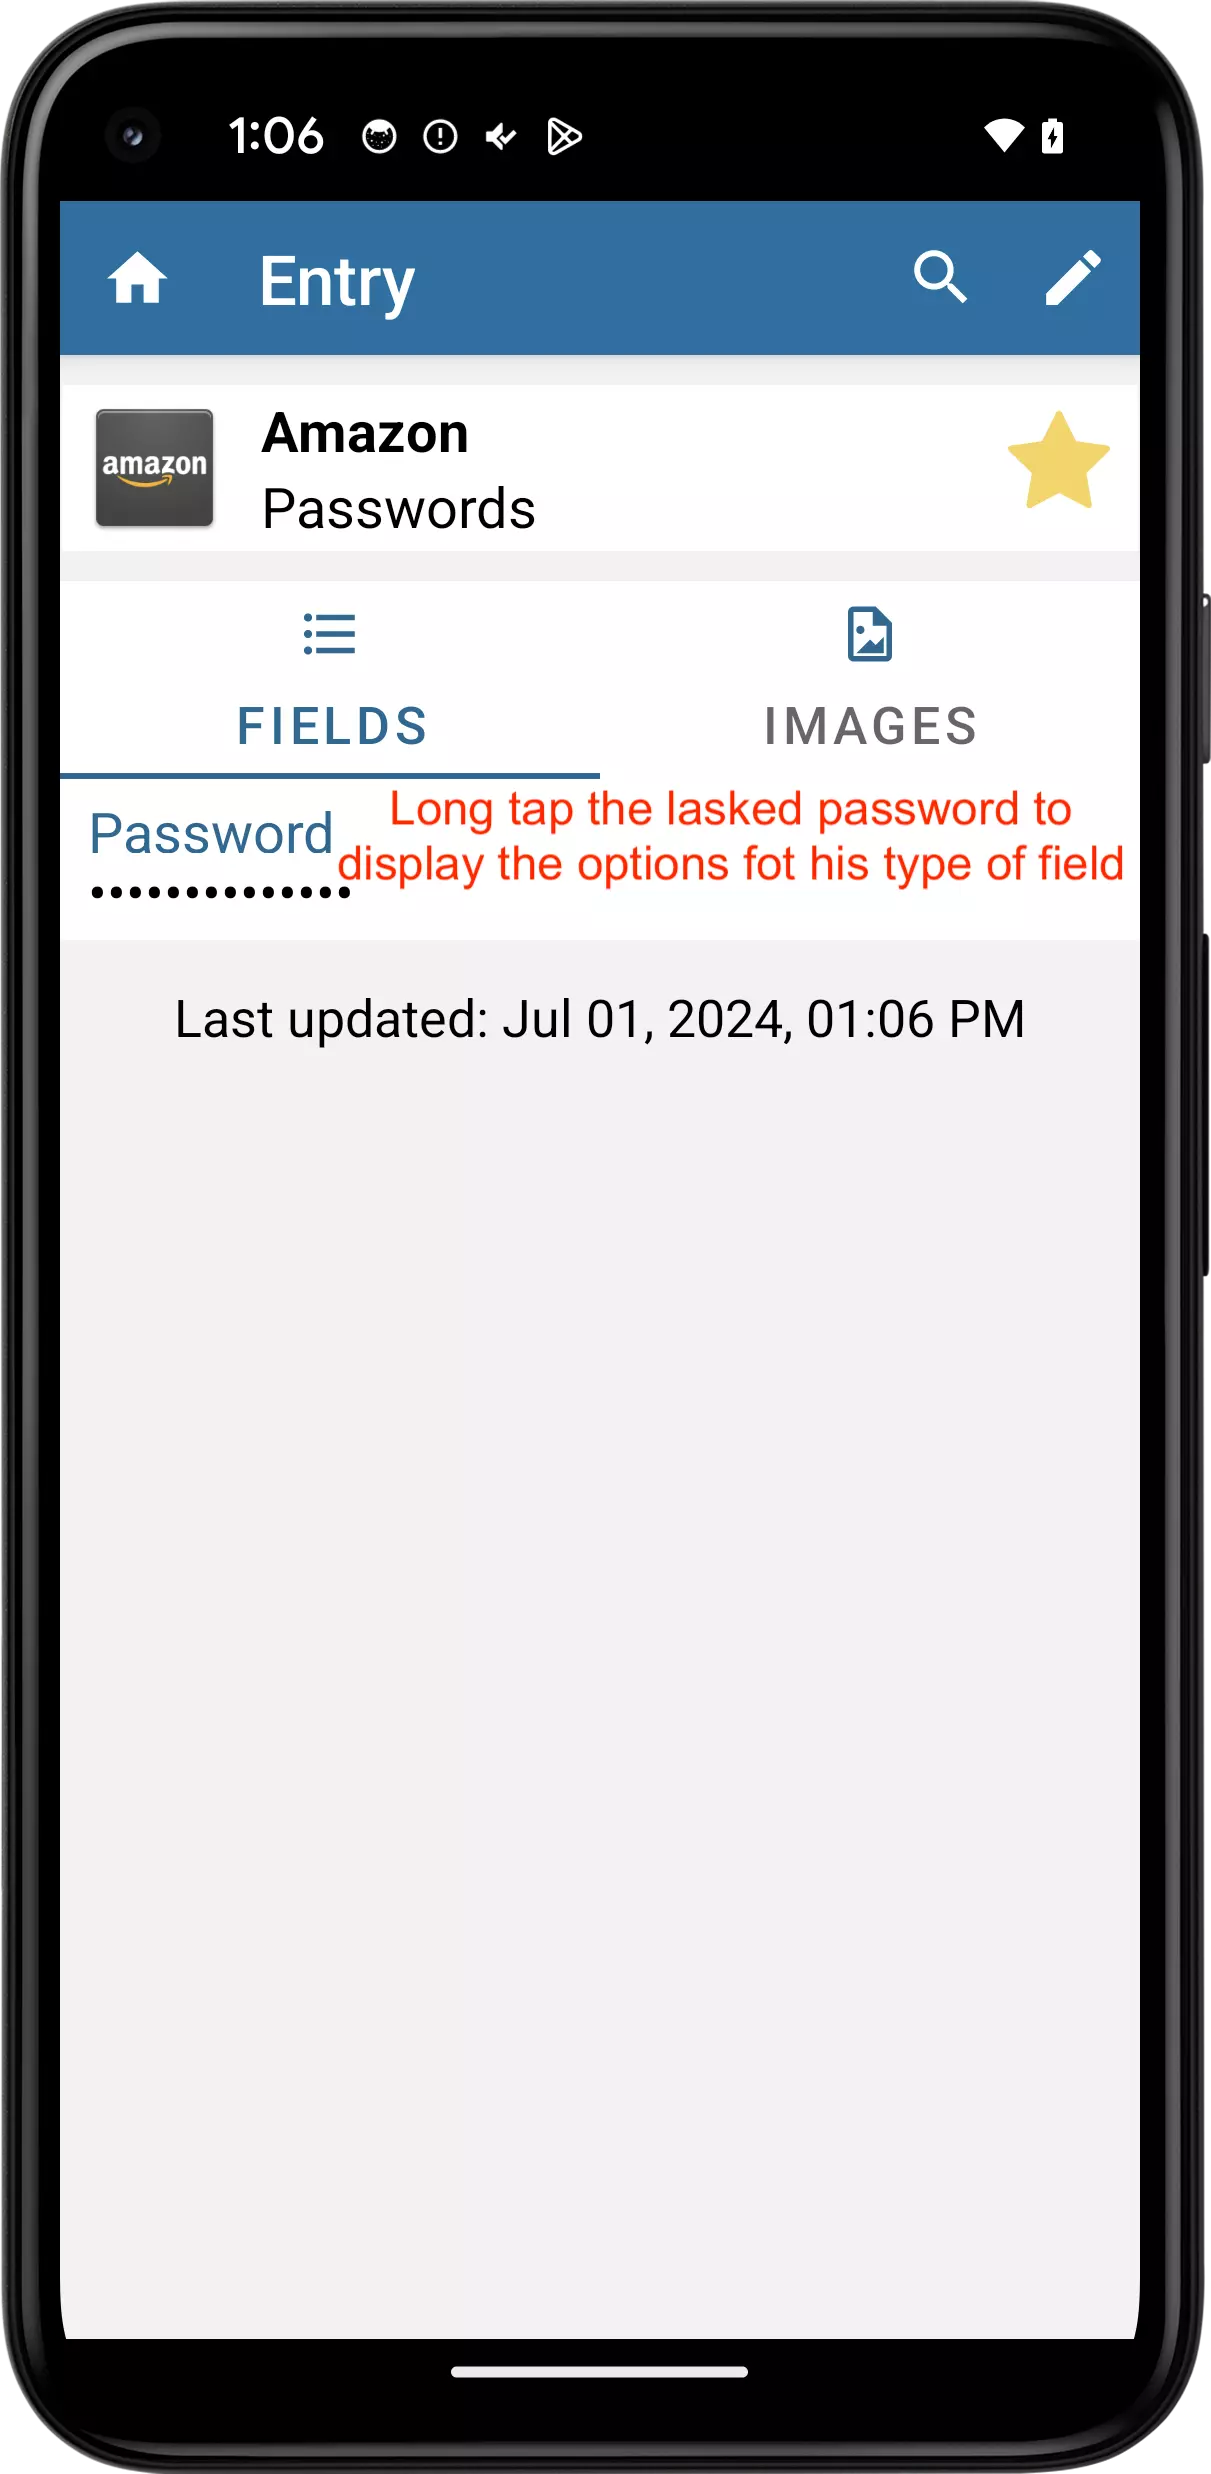
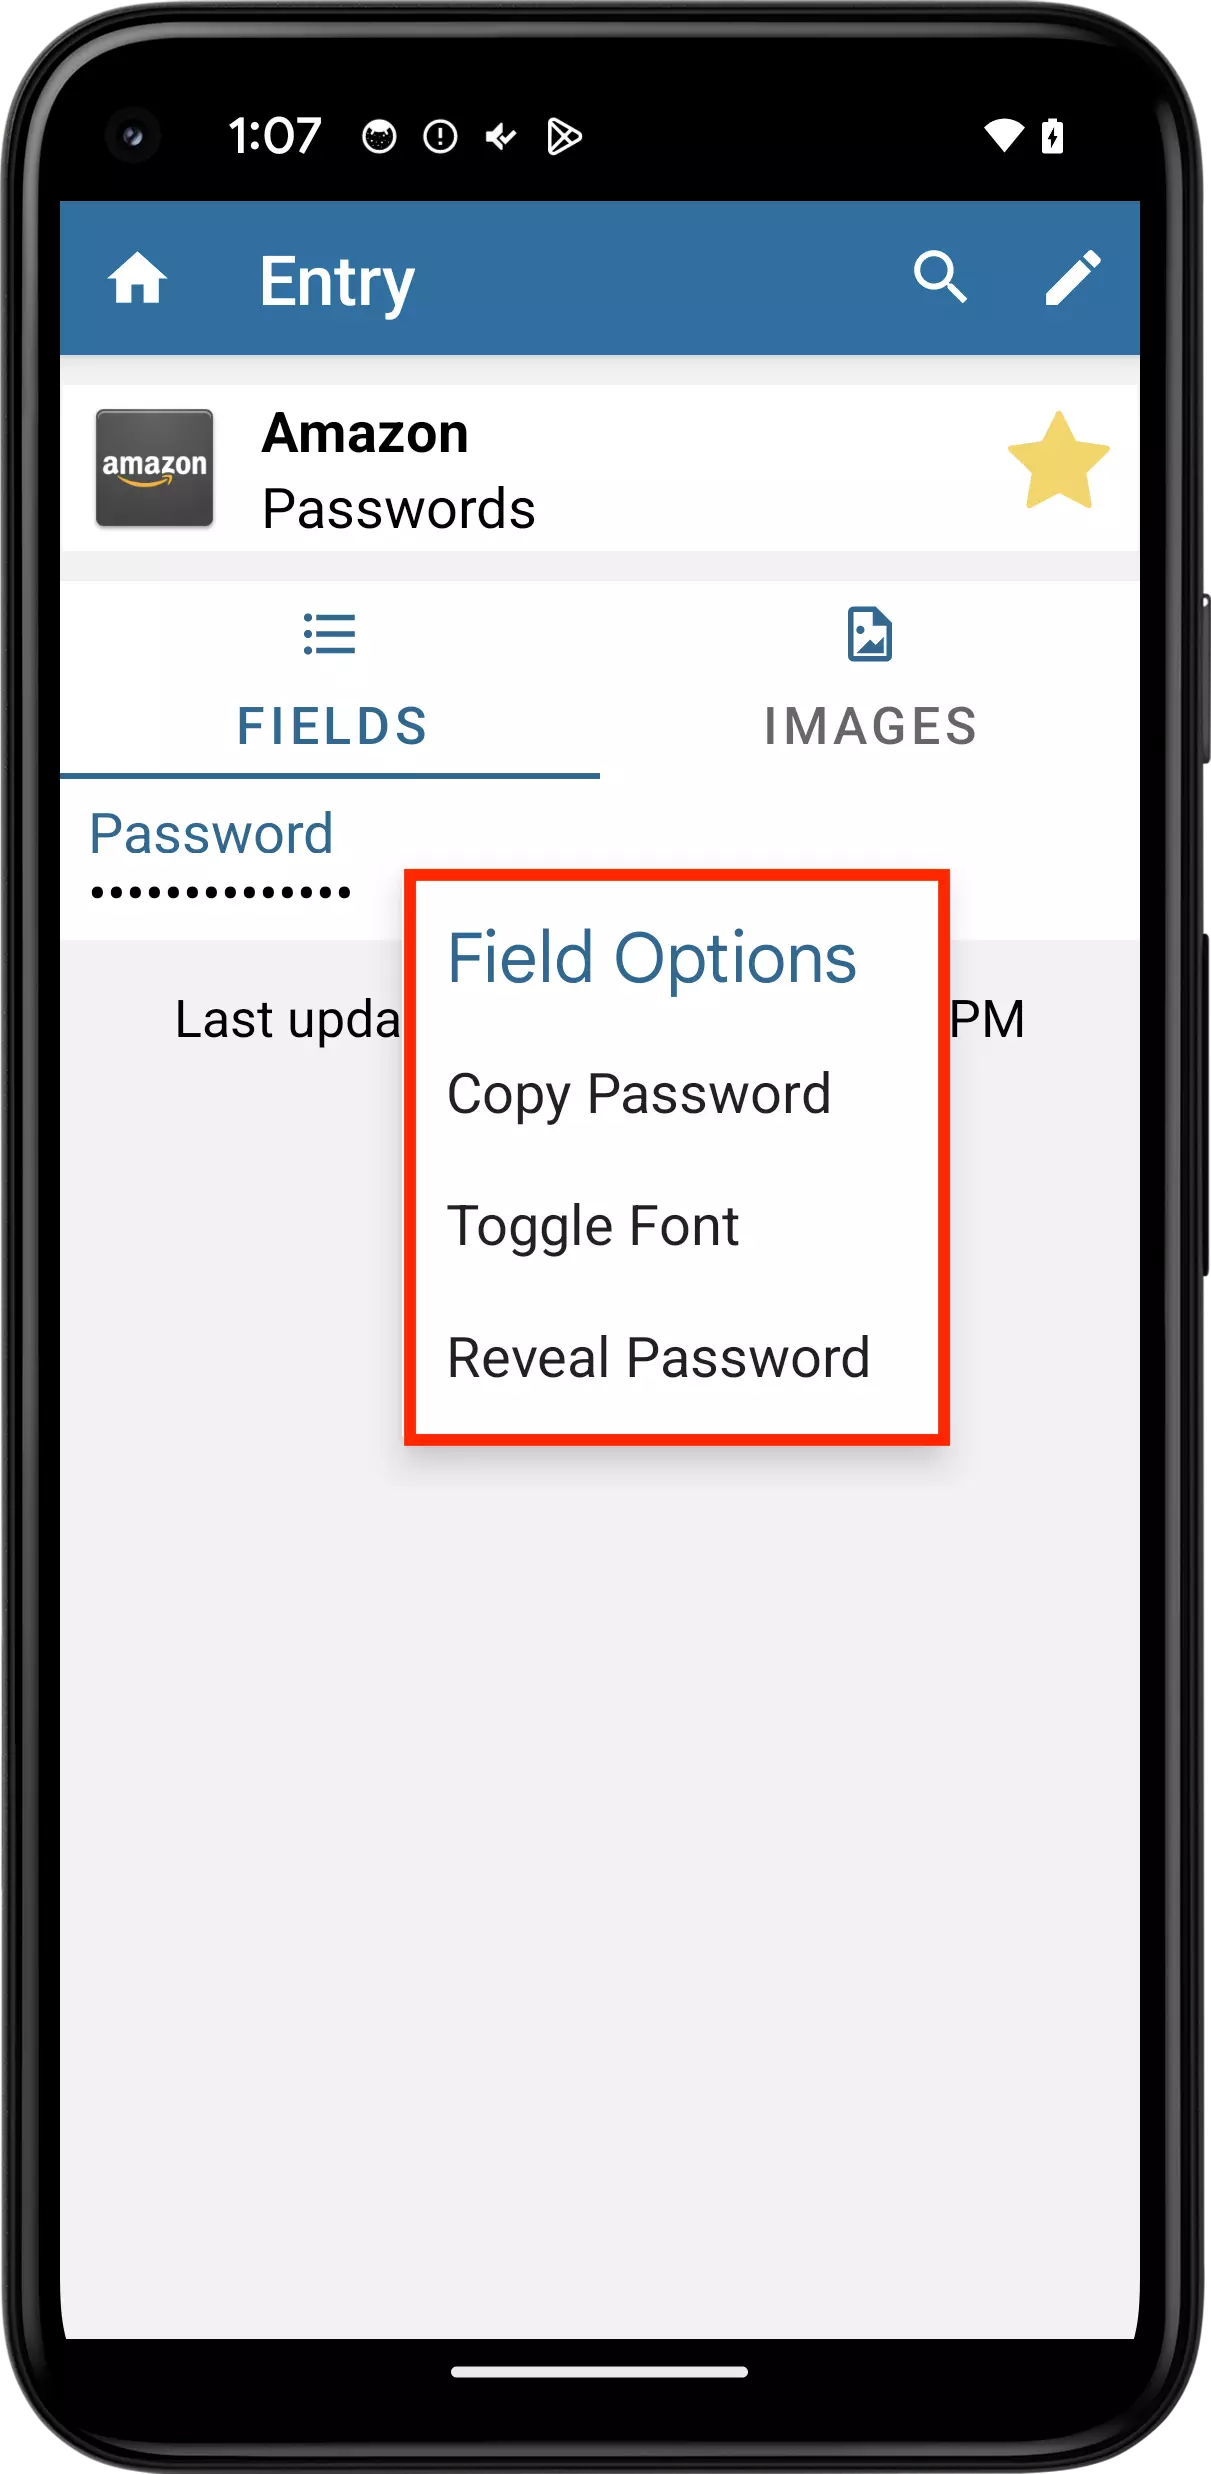
Once saved, your new password is displayed "masked", that is as dots instead of letters, to obscure it from any onlookers. You can tap on it at any time to view or copy it, in addition to accessing some other options specific to Password fields:
A few things to note here:
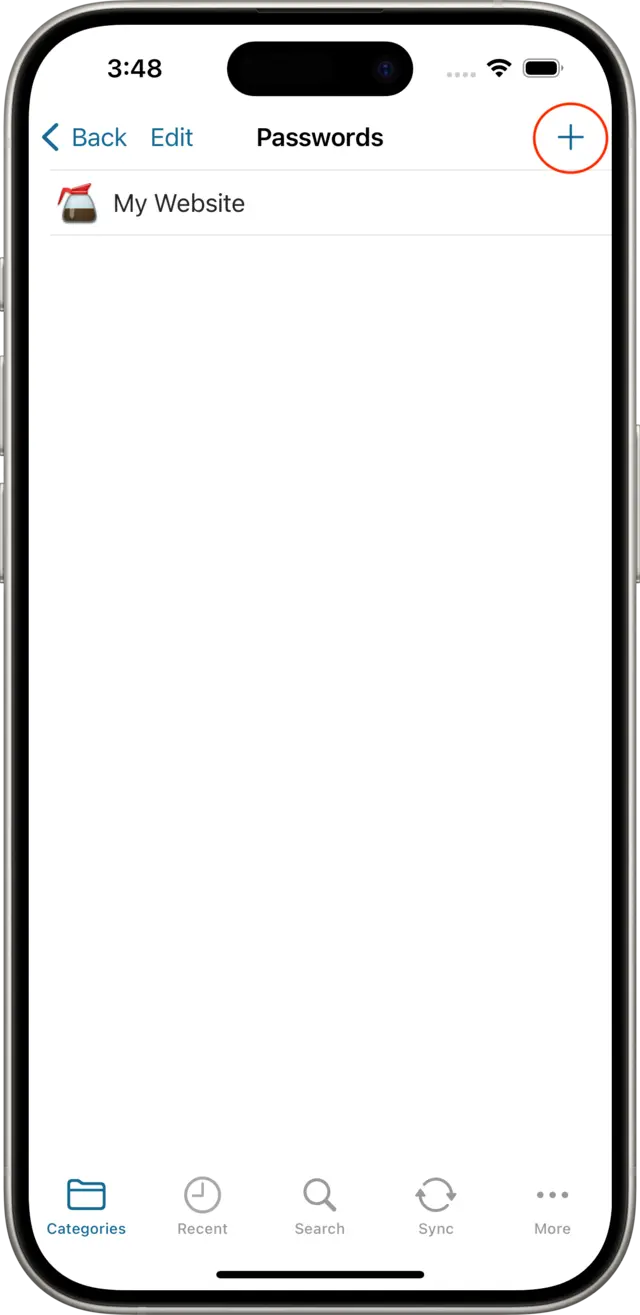
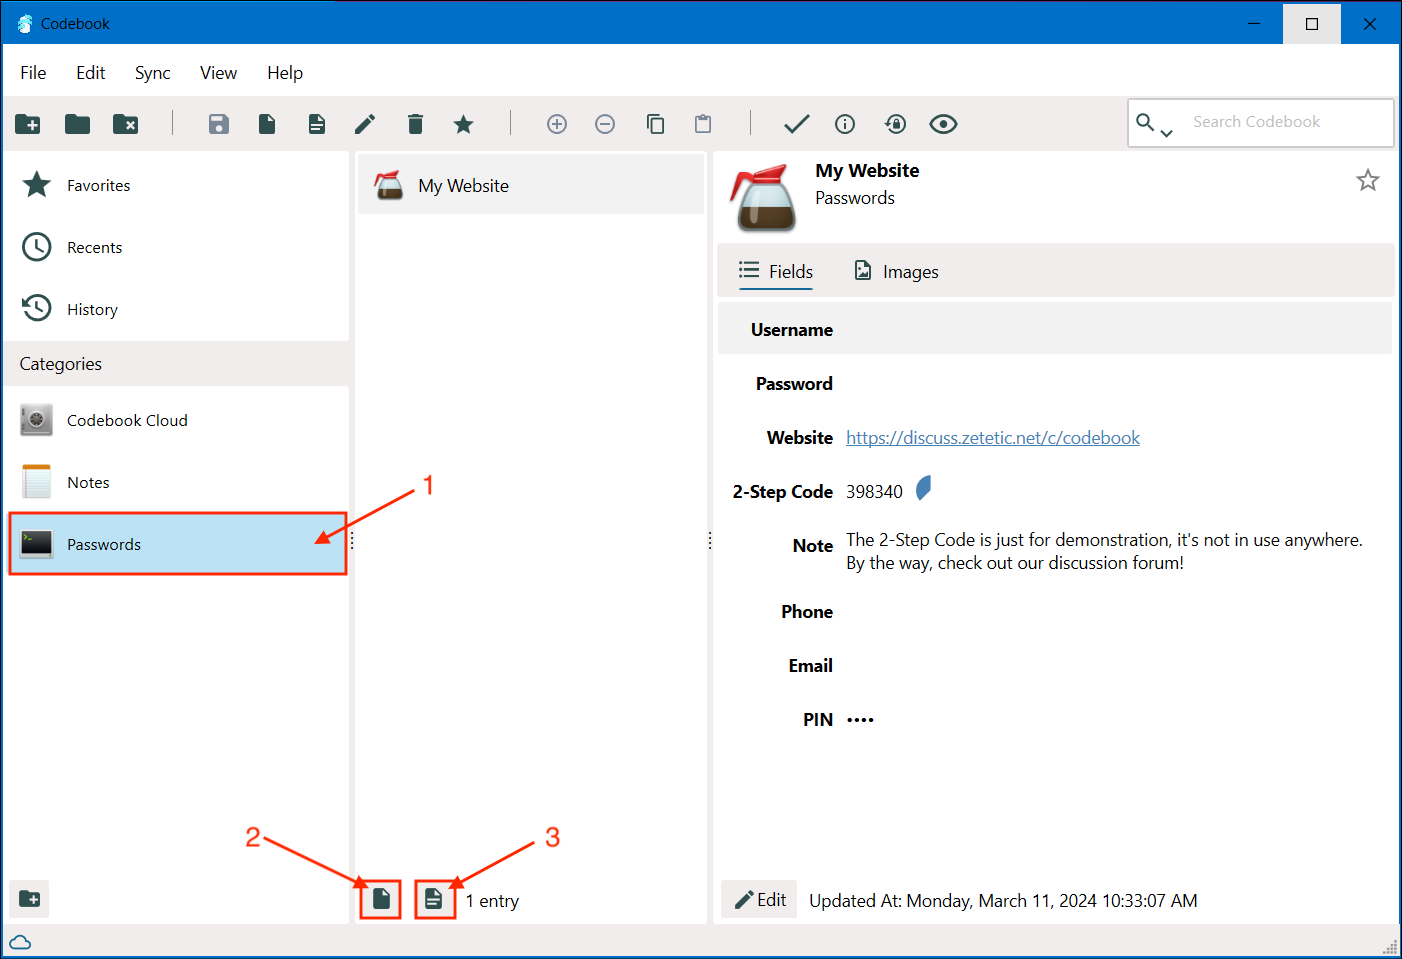
First, log into Codebook on your iOS device, and make sure the Categories tab is showing. Tap on the third row in Categories, labelled "Passwords".
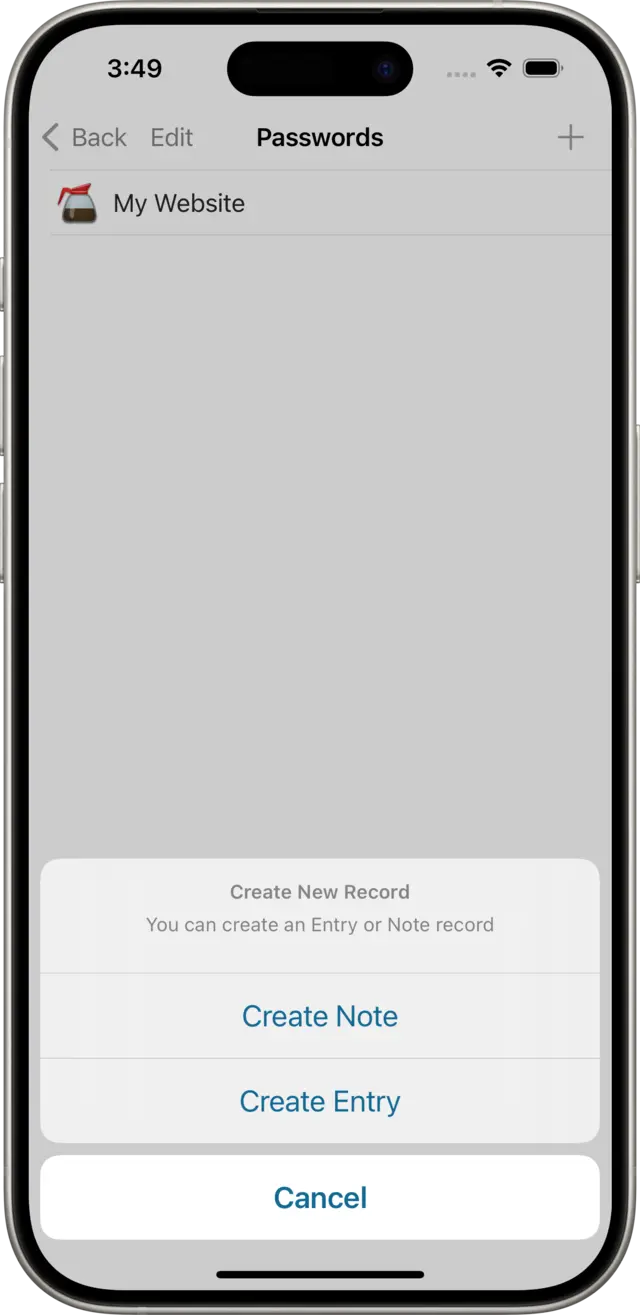
This displays the list of Entries in the Passwords category. There we see an example Entry record called "My Website" that Codebook created for you during setup. Let's ignore that for now and create a new Entry: tap on the plus button at the top of the list. You'll see a prompt asking you to choose a record type; select "Create Entry".
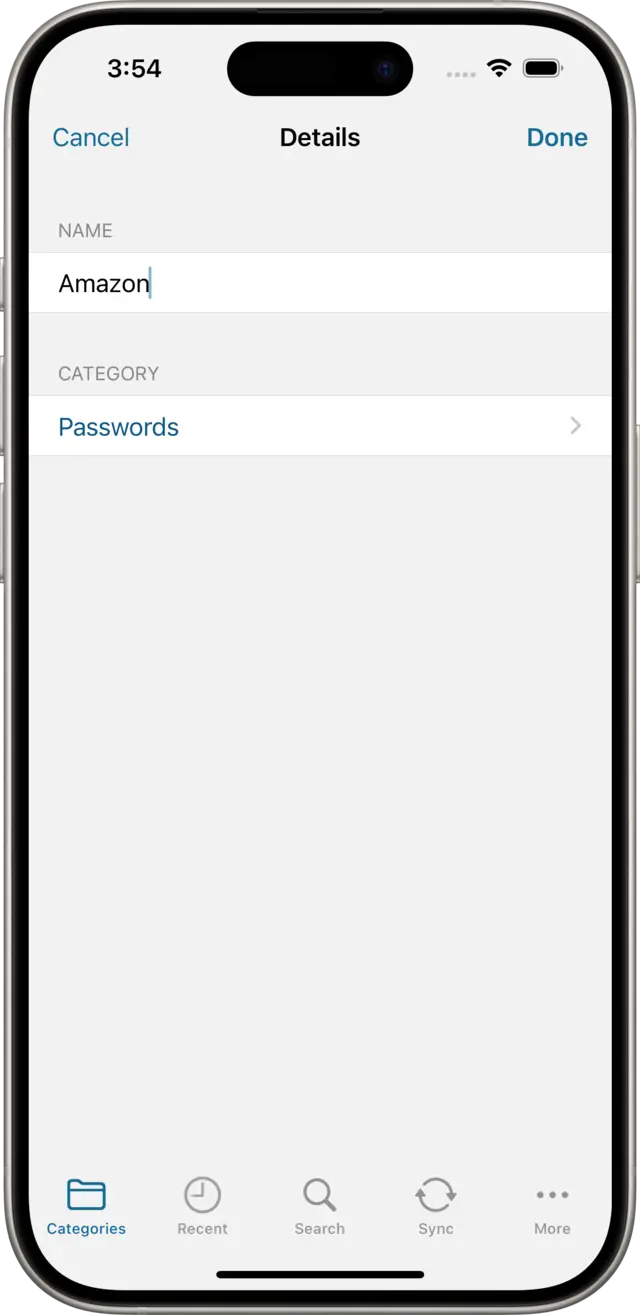
This brings us to the new Entry view. Tap in the top row to set its name, and on the icon Edit button to choose a different icon. You can also tap on the star button to mark this record as a Favorite.
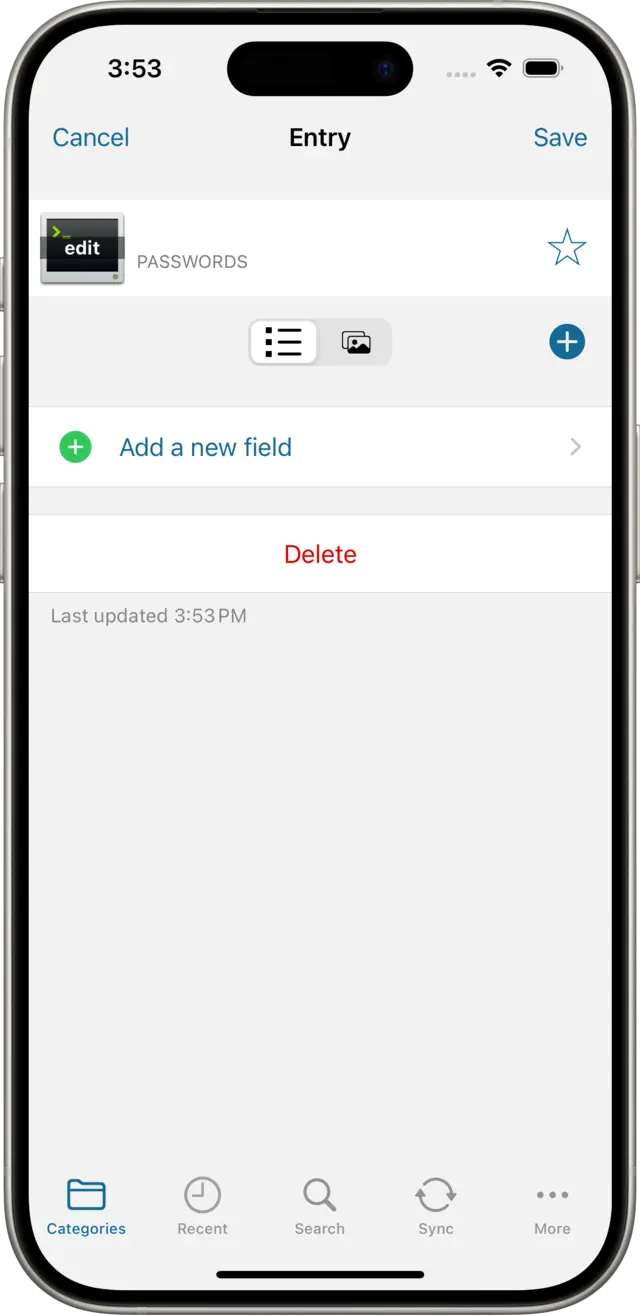
Now we've got an Entry record, we're ready to create our first password! Passwords are stored in what Codebook calls Fields: tap on the Add a new field row. This will display a list of labels to choose from: tap on the Password row to display the Password field editor.
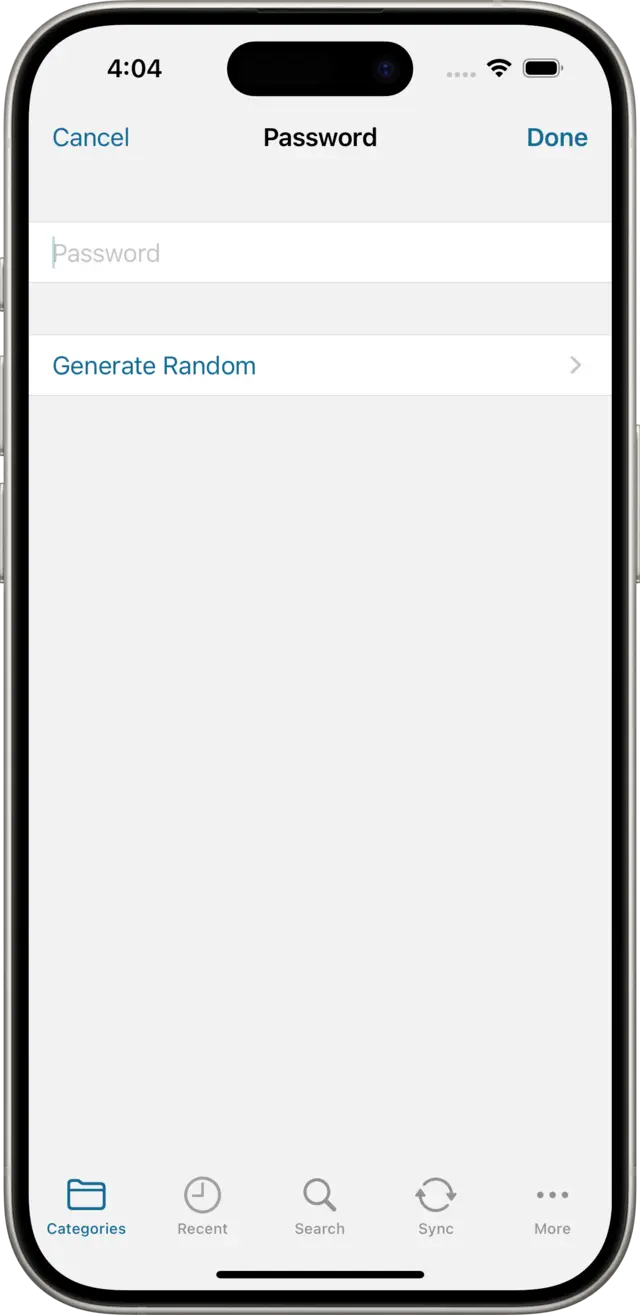
Here we can type in a password, but let's tap on Generate Password to show the Password Generator instead.
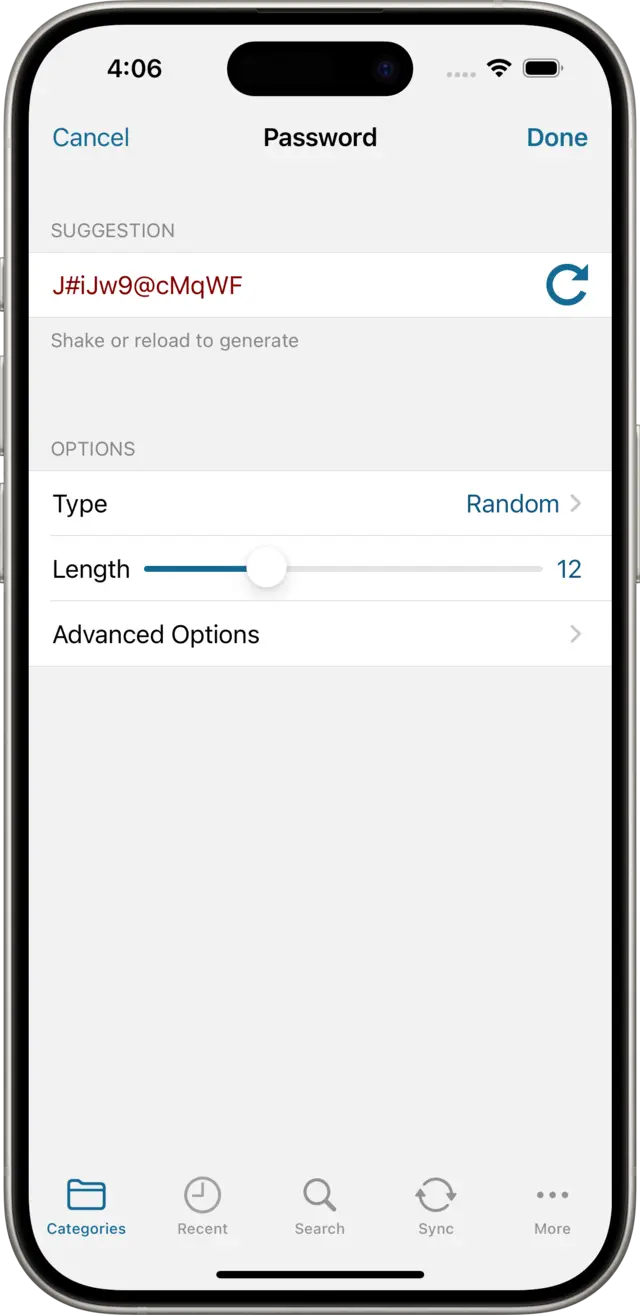
Use the Options on the Password Generator to adjust the types of suggestions the Generator creates for you until you've got one you want to keep, then tap on Done. This will bring you back to the Password field edit view, tap Done again. Now back on the Entry view, tap on Save to persist the password to the database.

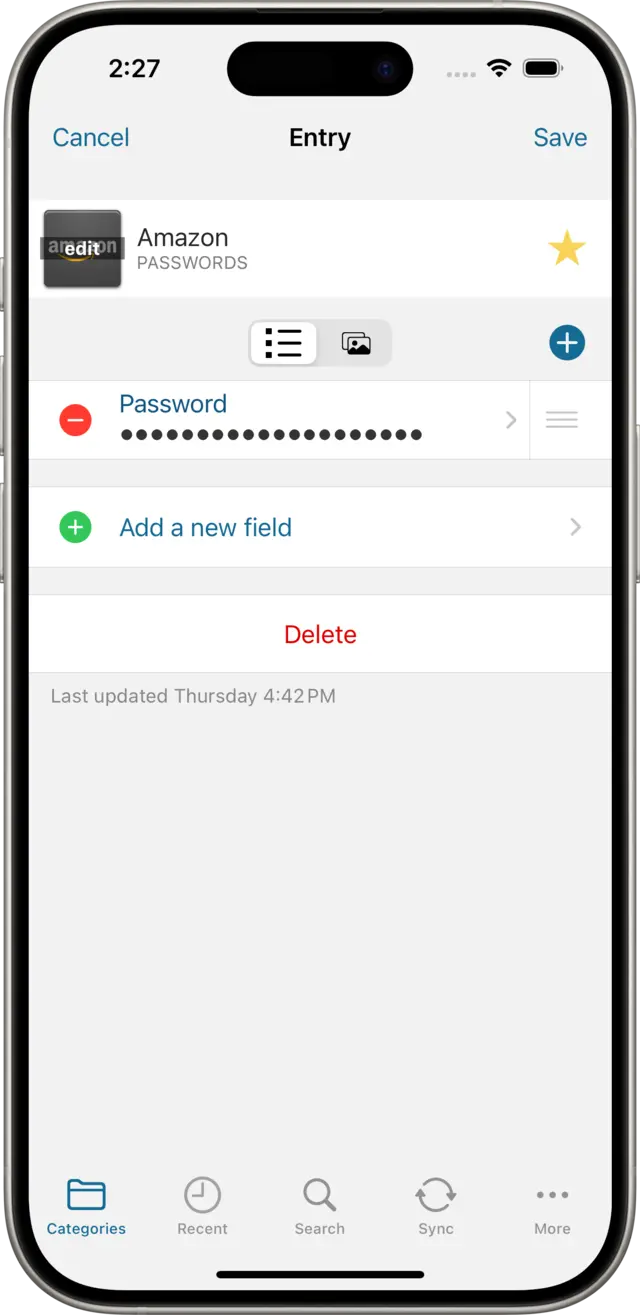
Once saved, your new password is displayed "masked", that is as dots instead of letters, to obscure it from any onlookers. You can tap on it at any time to view or copy it, in addition to accessing some other options specific to Password fields:
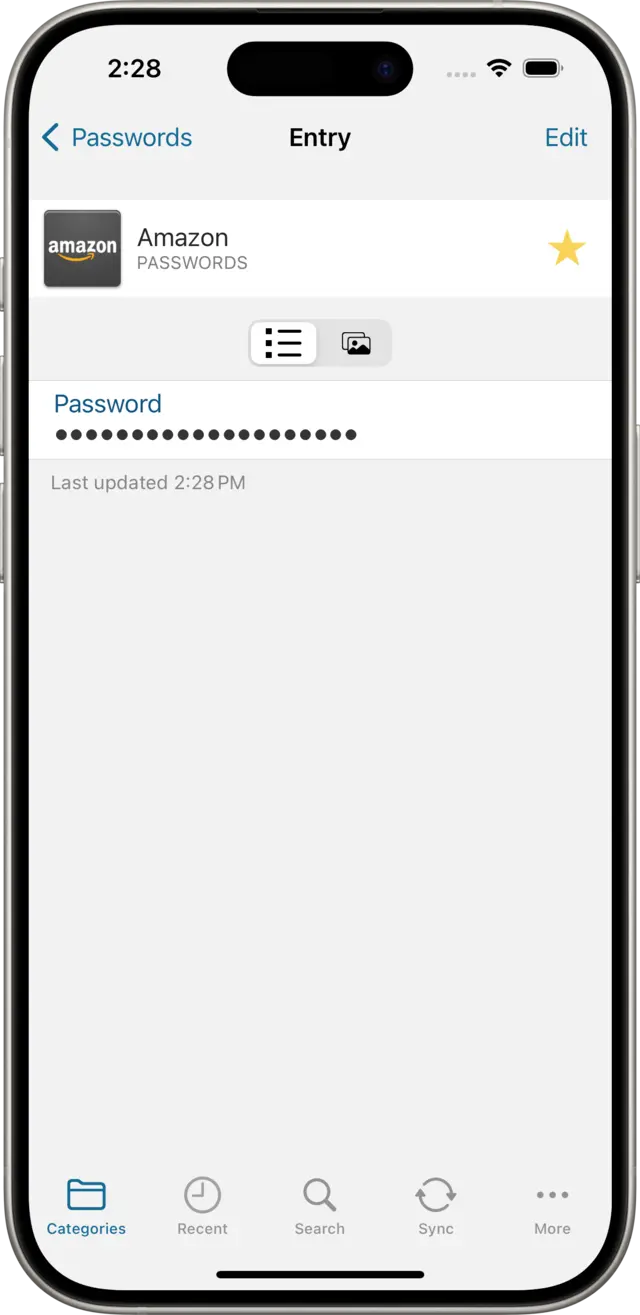
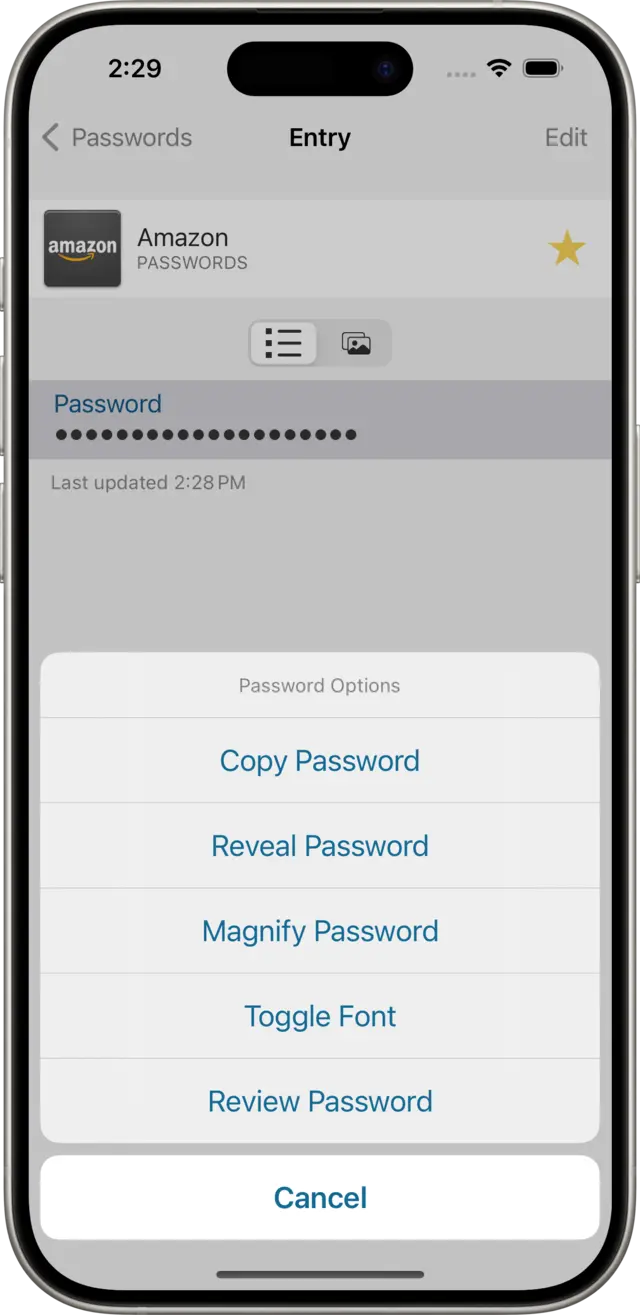
A few things to note here:
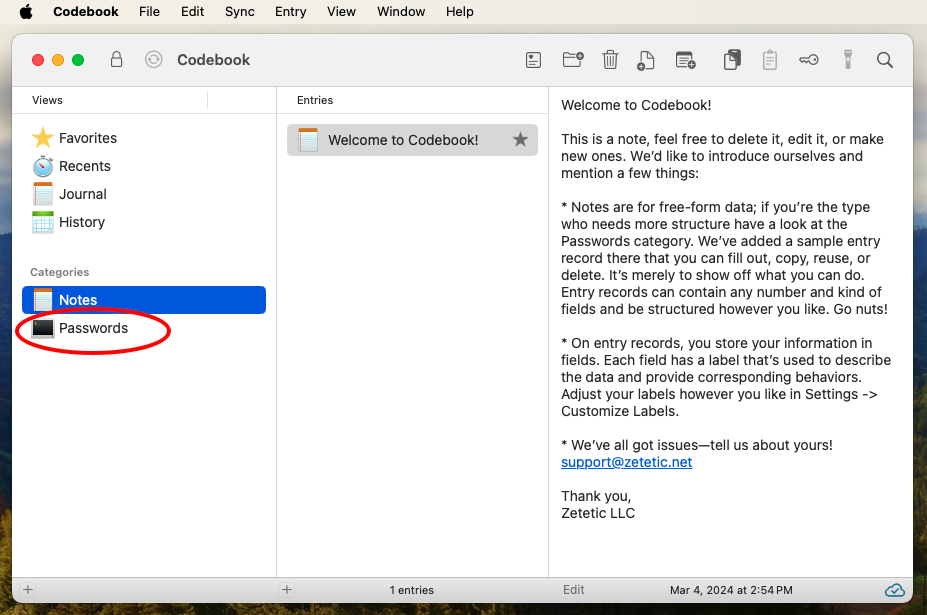
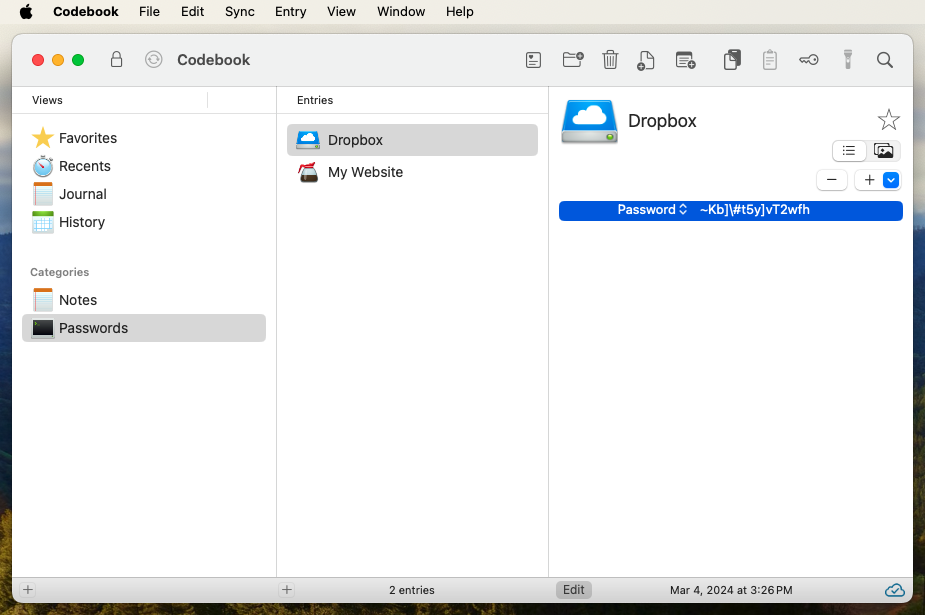
Launch Codebook on your Mac, sign in, and then have a look at the Categories list in the left-most pane of the Main Window. If you just set up Codebook you should see a category named Notes (with a welcome note inside from us!), and another category named Passwords.
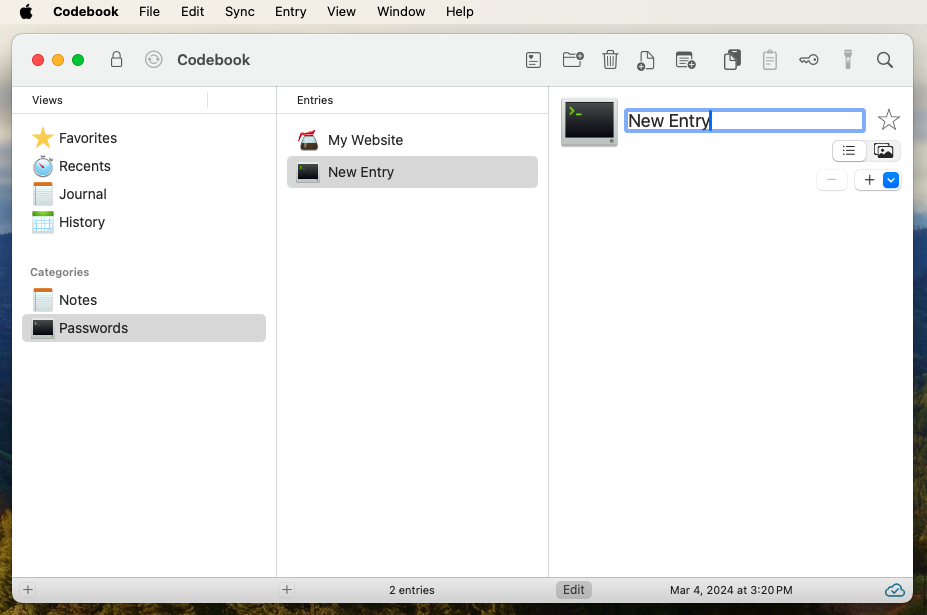
Click on the Passwords category and you should see an entry named "My Website" appear in the Entries list and in the Entry View in the right-most pane of the Main Window. Like the welcome note, this is just an example record created for you during installation. Let's ignore that for now and create a new Entry. Click on the plus button at the bottom of the Entries list, or use the keyboard shortcut ⌘ N.
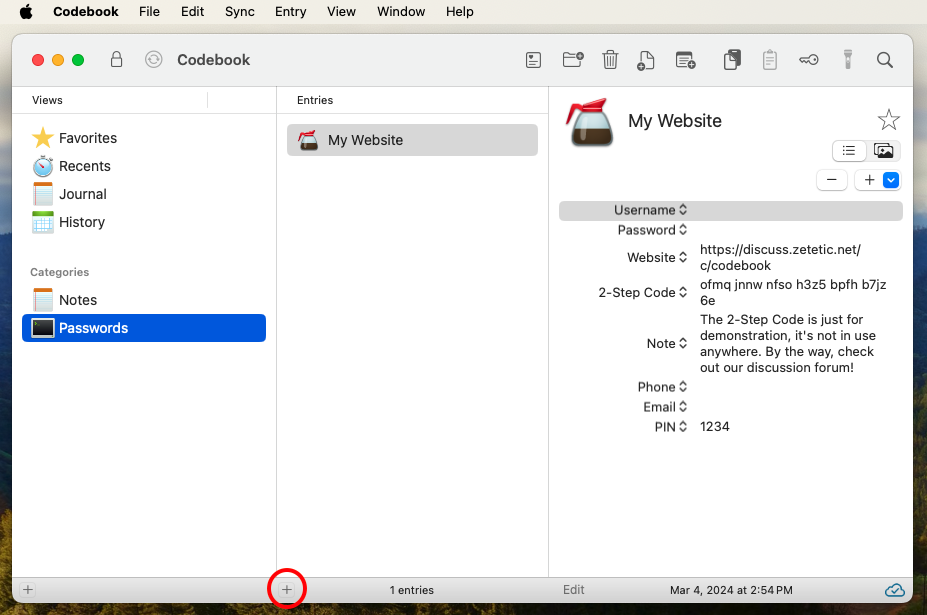
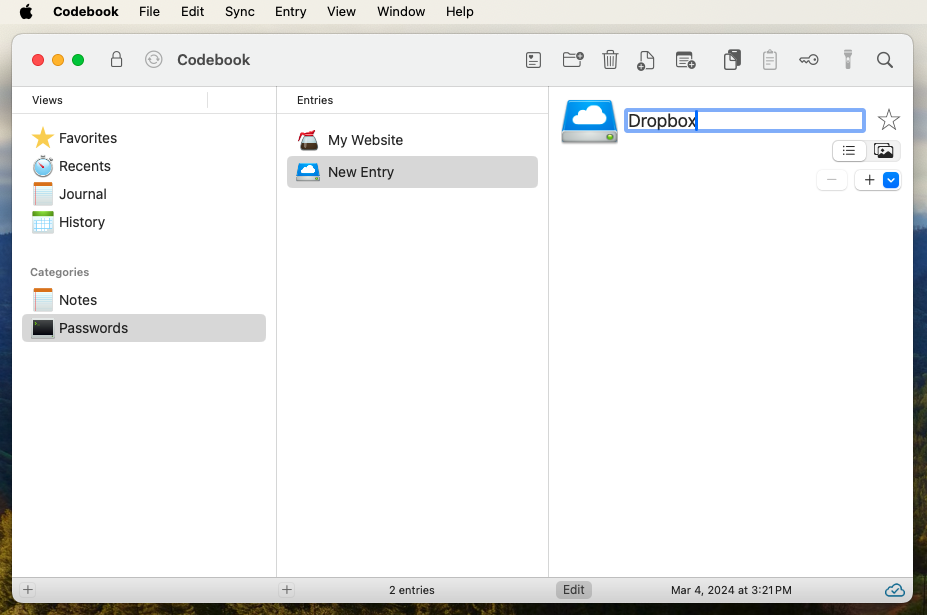
When we add a new Entry it will appear in the Entry View, in Edit mode, with keyboard focus on the Name field. Typically we name the Entry after the account where we plan to use our new password, e.g "Dropbox", "Google", "GitHub", etc.
To the left of the Name field is an icon button for changing the Entry's icon in the interface (it defaults to the current Category's icon). To the right of the Name field is a star-shaped toggle button, allowing you to mark this record as a Favorite.
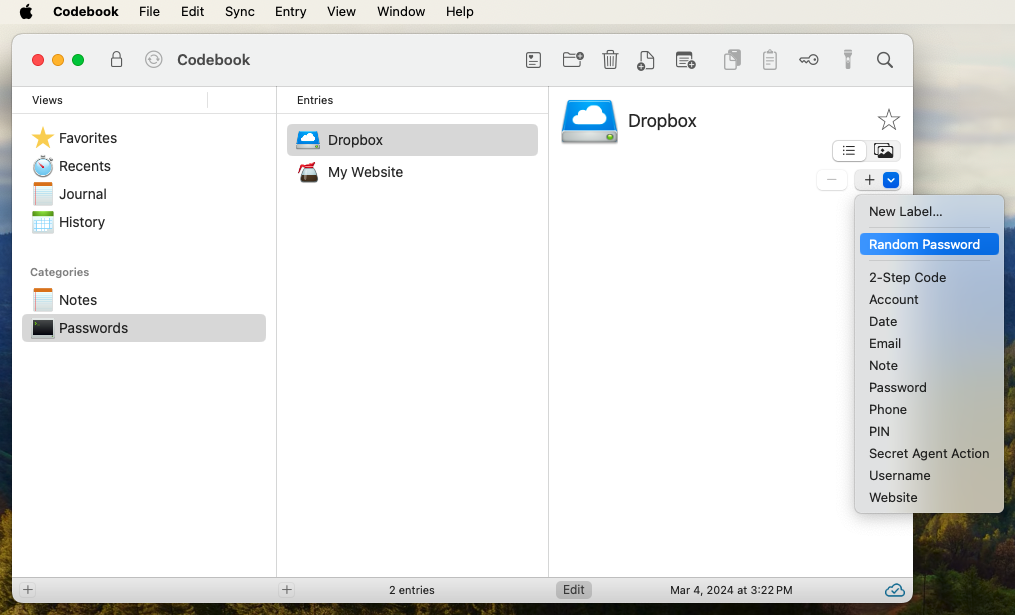
Now that we've got an Entry record, we're ready to create our first password! Passwords are stored in what Codebook calls Fields. The drop-down button with the plus icon (below the Favorite star button) is called the Add Field button. Clicking on it will display a list of options for adding fields to your Entry. Select the Random Password menu item from the Add Field button.
A new Password field should appear in the Fields list of the Entry view, with a new, random password!
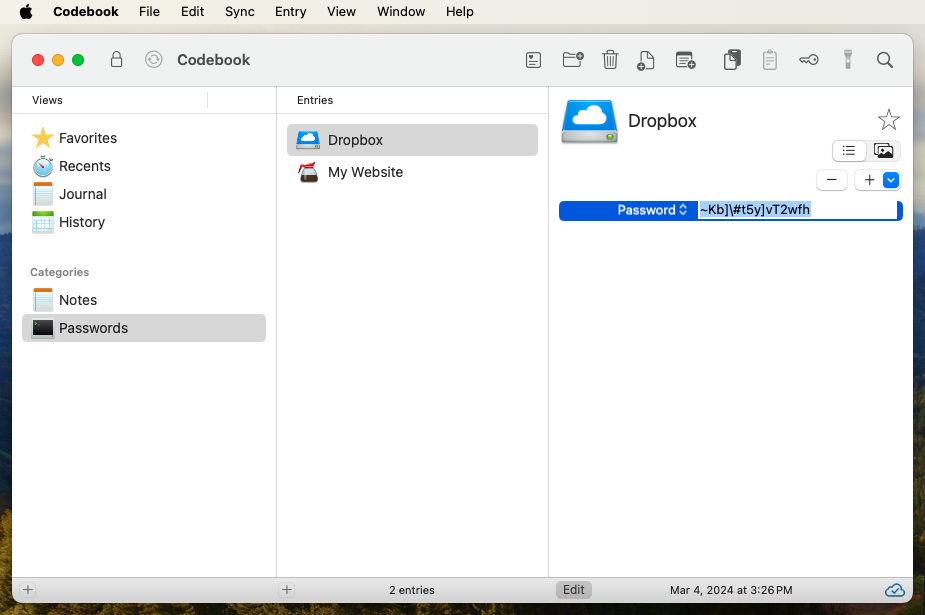
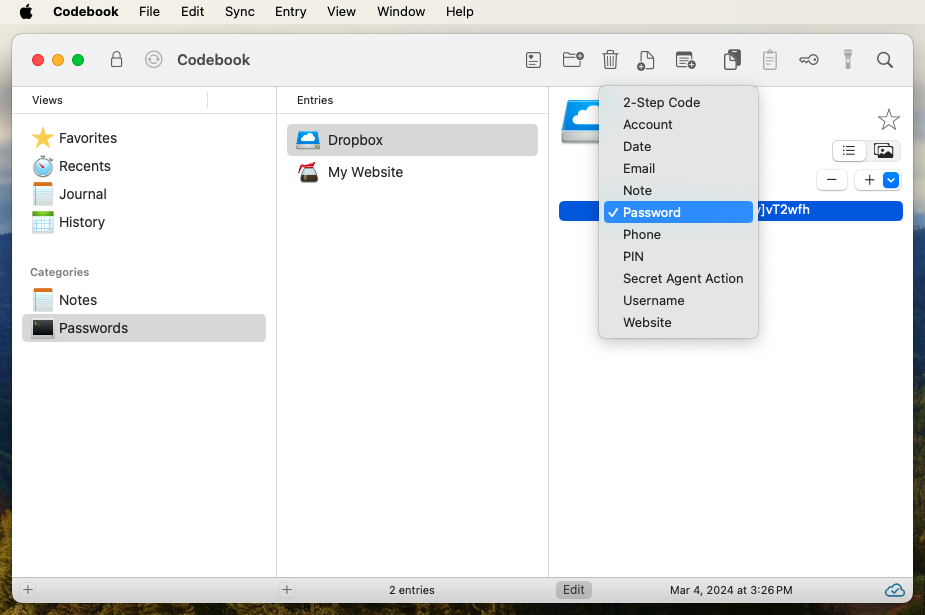
When you add a Field to an Entry, it's displayed as a row in a list of Fields on the Entry. The row is selected and put into Edit mode, with the keyboard focus on the value of the field, in this case our new random password. Press tab or enter to confirm and keep the selected value.
On the left side of the Field's row is the Label that describes how the Field should behave in Codebook. In Edit mode this becomes a pop-up button with a menu of other Labels to choose from. To learn more about Labels or to create your own, see Customize Labels. For now leave the Label button set to Password.
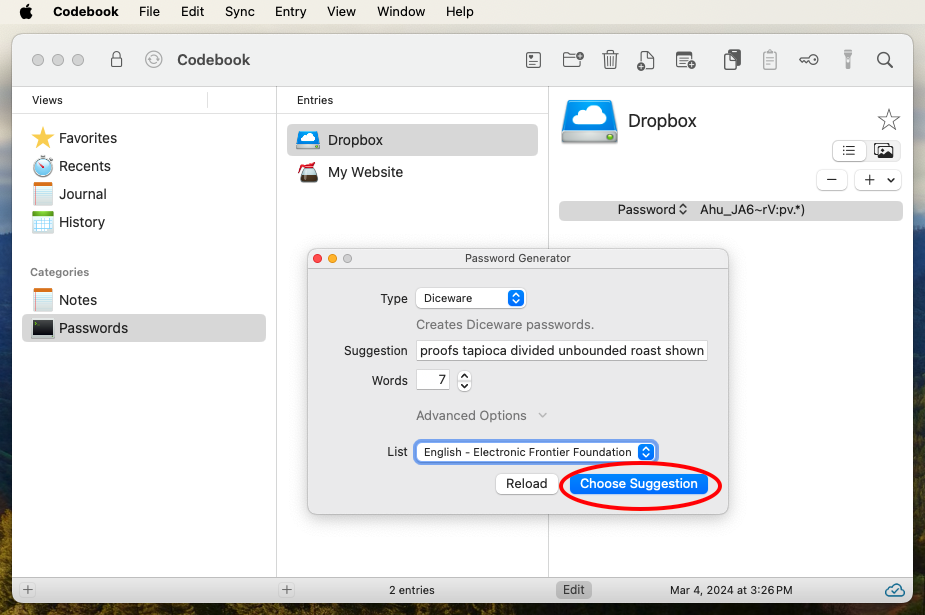
So where did this password come from? Let's have a look at the Password Generator. With the Password row still selected in the Fields list, click on the Password Generator button in the Toolbar, above the Entry view (it has a key icon).

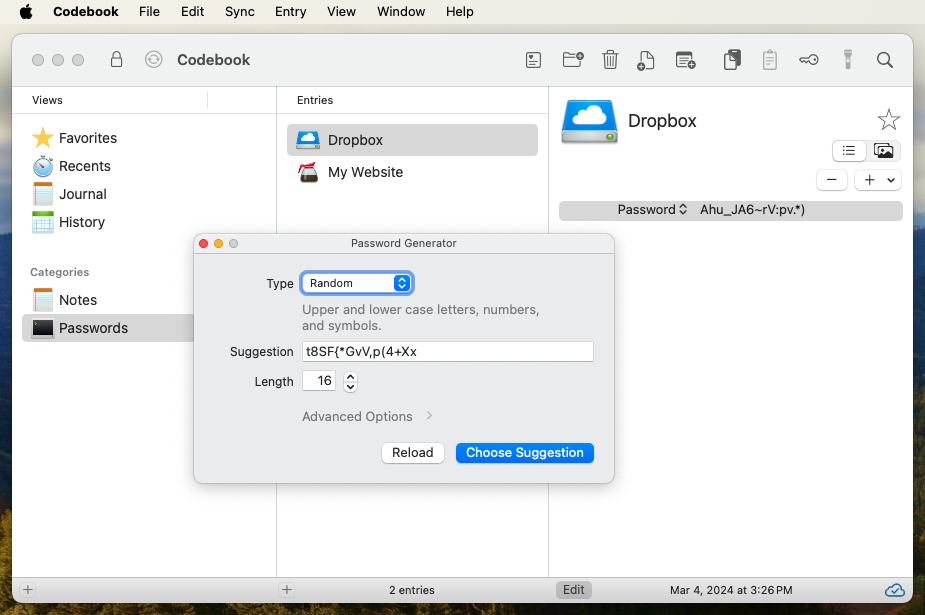
This will display the Password Generator in a floating panel window. It has various character sets and other options to help you generate random passwords that must comport to various rules and limitations. These settings are also used when you click on Random Password in the Add Field menu.
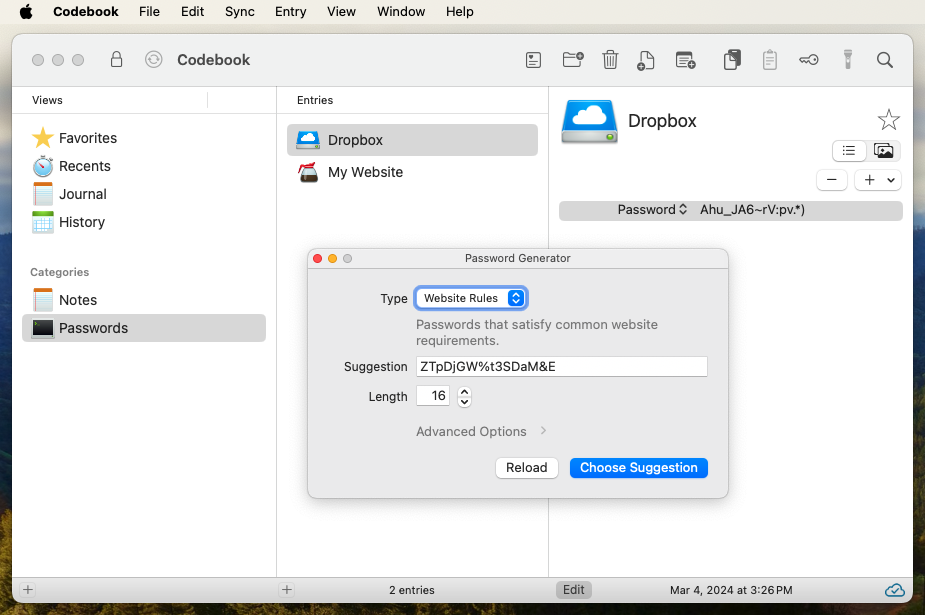
Try out some of the options, and use the Reload button until you're satisfied with the suggested password. Click on the Choose Suggestion button, and this new password will replace the value in the currently selected Field.
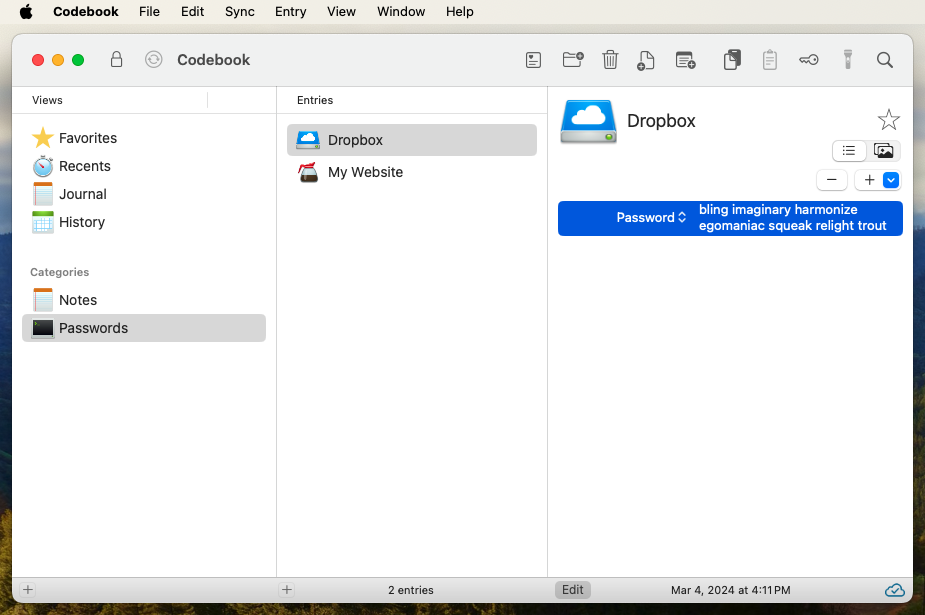
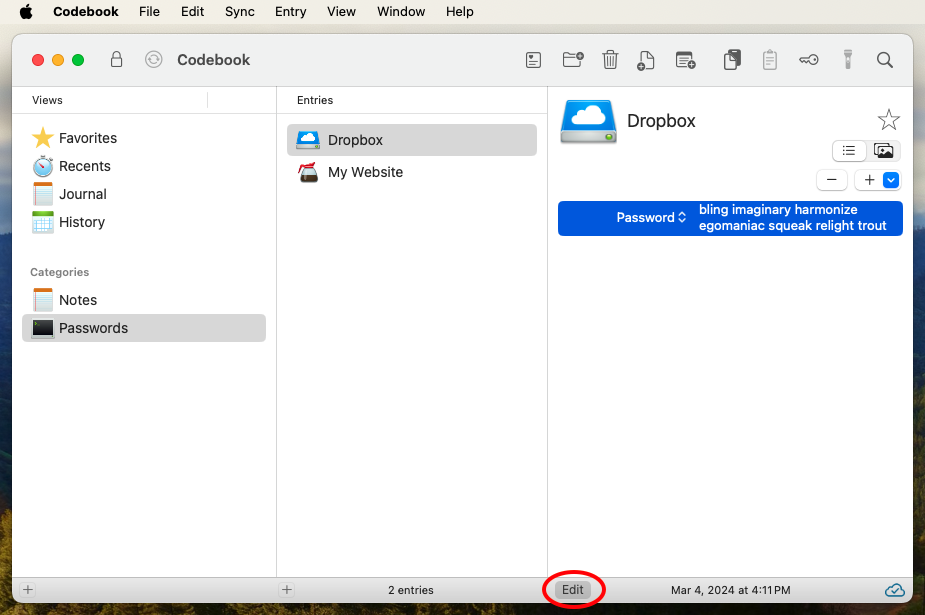
We can finish editing our Entry by exiting Edit mode. Click on the Edit push button at the bottom of the Entry View, or use the keyboard shortcut ⌘ E.
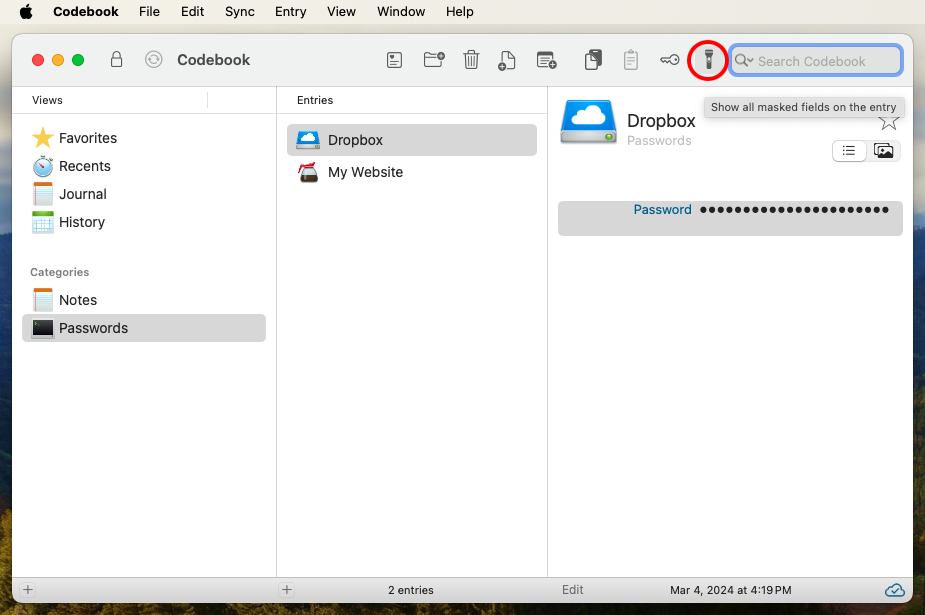
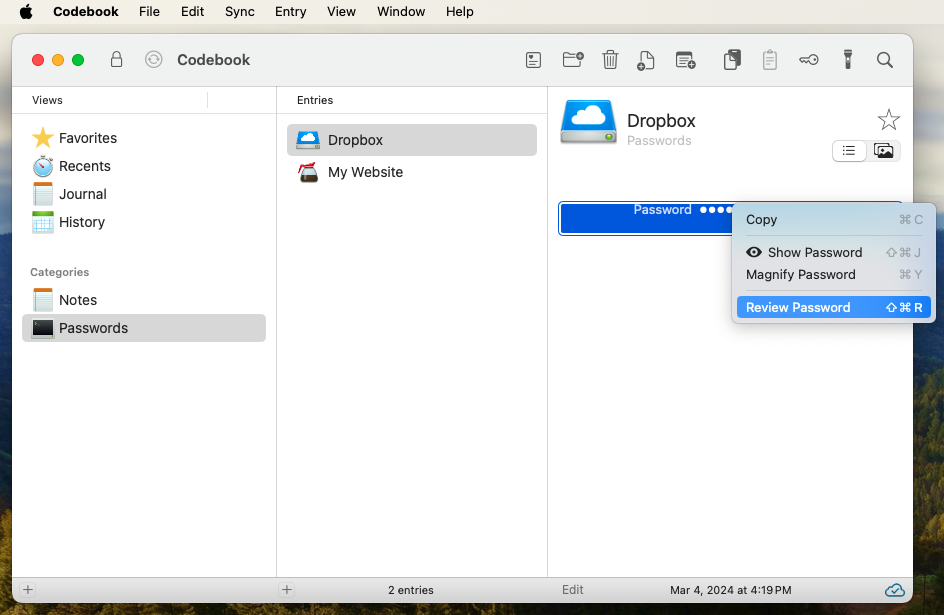
When we do this we see that the editing controls disappear and our new password is displayed "masked", that is as dots instead of letters, to obscure it from any onlookers. Unmasking it easy: click on the Show Masked button in the Toolbar (it has a flashlight icon), or use the keyboard shortcut ⇧⌘ M. Repeat the command to turn masking back on. This affects all masked fields displayed on an entry at once.
Let's look at some of the other properties of a Password field. Right-click on it and a context menu will appear. The options on this menu are determined by the Field's Label. All Fields provide the options to show and hide the value, display it in large type (Magnify), and copy its value. But because we have the Label set to Password, there's an additional option called Review Password (⌘ R), that allows you to check it for potential weaknesses and optionally for presence in known password data breaches.
A few things to note here:
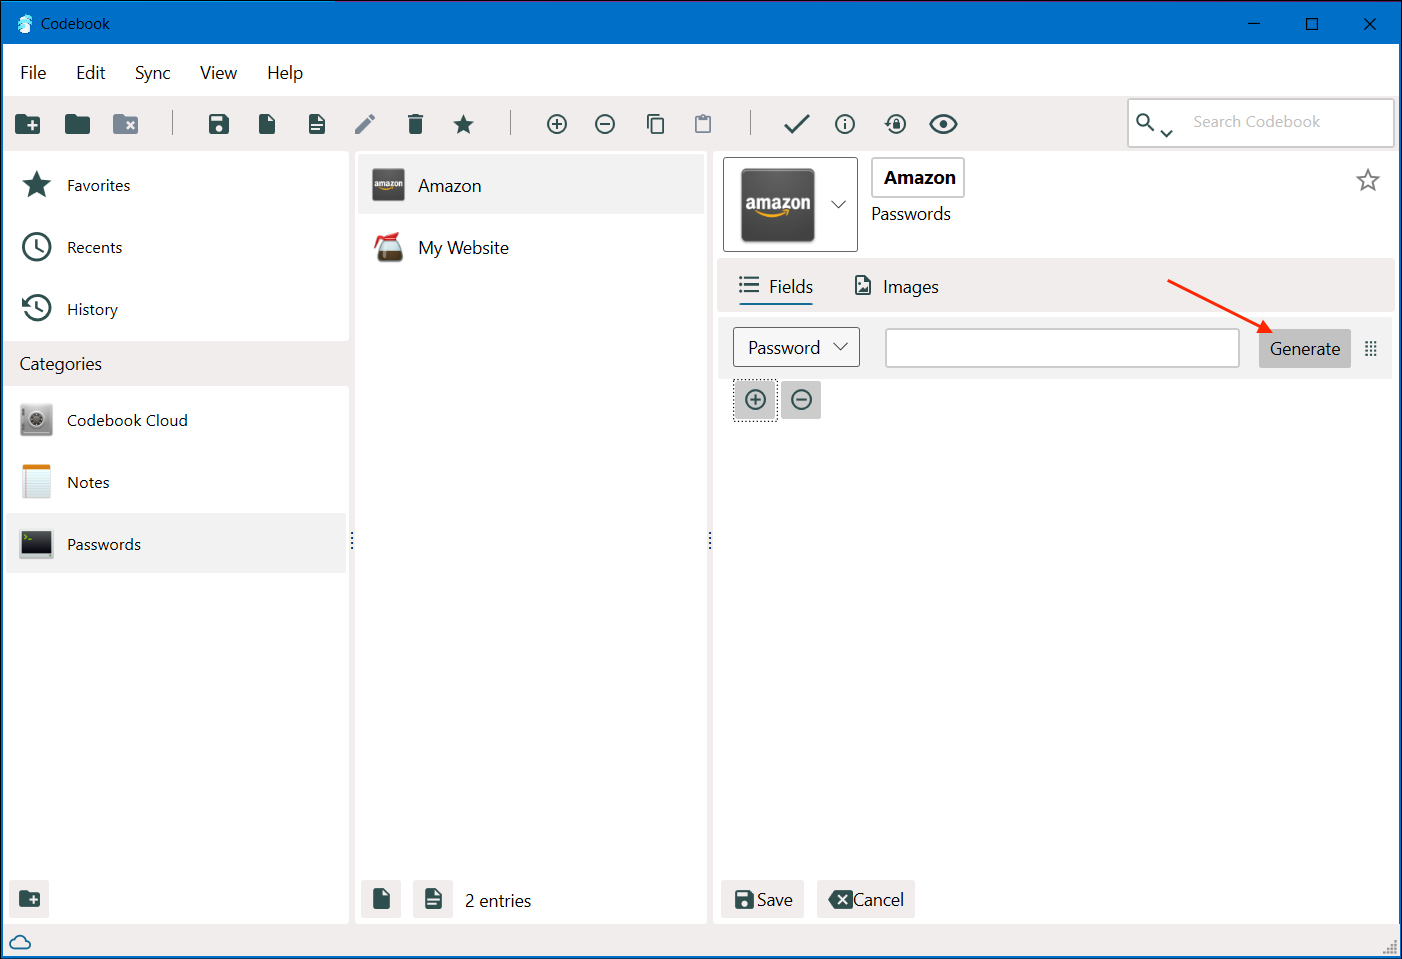
First, log into Codebook on your Windows device, and make sure the second row in Categories, labeled "Passwords" (1) is selected. This displays the list of Entries in the Passwords category. There we see an example Entry record called "My Website" that Codebook created for you during setup. Let's ignore that for now and create a new Entry: click on the Add Entry button (2) at the bottom of the entry section.
Note: The button to the right of Add Entry is Add Note (3). Use this button to add a note entry which is simply a multi-line text area.
This brings us to the new Entry view. Type the name in the Name Text Box (1) to set its name. To change the entry icon, click on the icon Edit button (2) to choose a different icon. You can also click on the star (3) to mark this record as a Favorite. In our example, Amazon is the entry name and the corresponding icon was selected from the Codebook icon options.
Now that we have an Entry record, we're ready to create our first password! Passwords are stored in what Codebook calls Fields: click on the plus sign (+) to display a field editor for adding a password.
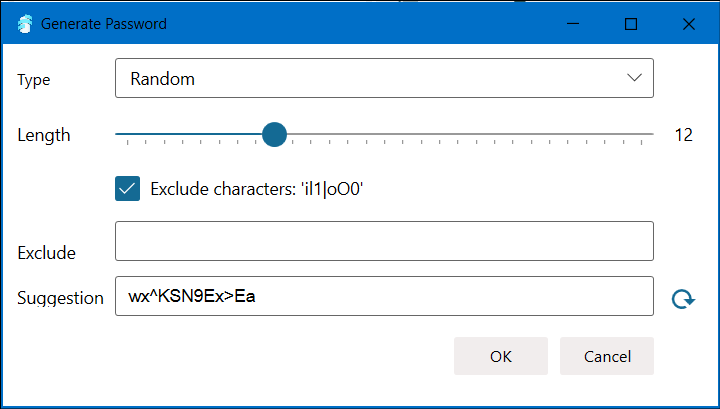
Here we can type in a password, but let's click on Generate to show the Password Generator instead.
Use the Options on the Password Generator to adjust the types of suggestions the Generator creates for you until you've got one you want to keep, then click Ok. This will bring you back to the Password field edit view.
Click Save to persist the password to the database.
Once saved, your new password is displayed "masked", that is as dots instead of letters, to obscure it from any onlookers. You right-click on it at any time to show, copy or magnify it.

A few things to note:
