Earlier in this series we covered how Passwords and other details for your accounts are stored on Entries, and how Entries are stored in Categories. In this tutorial we will take a look at how we can move Entries into other Categories to rearrange them, as well as copy them to create entirely new Entries.
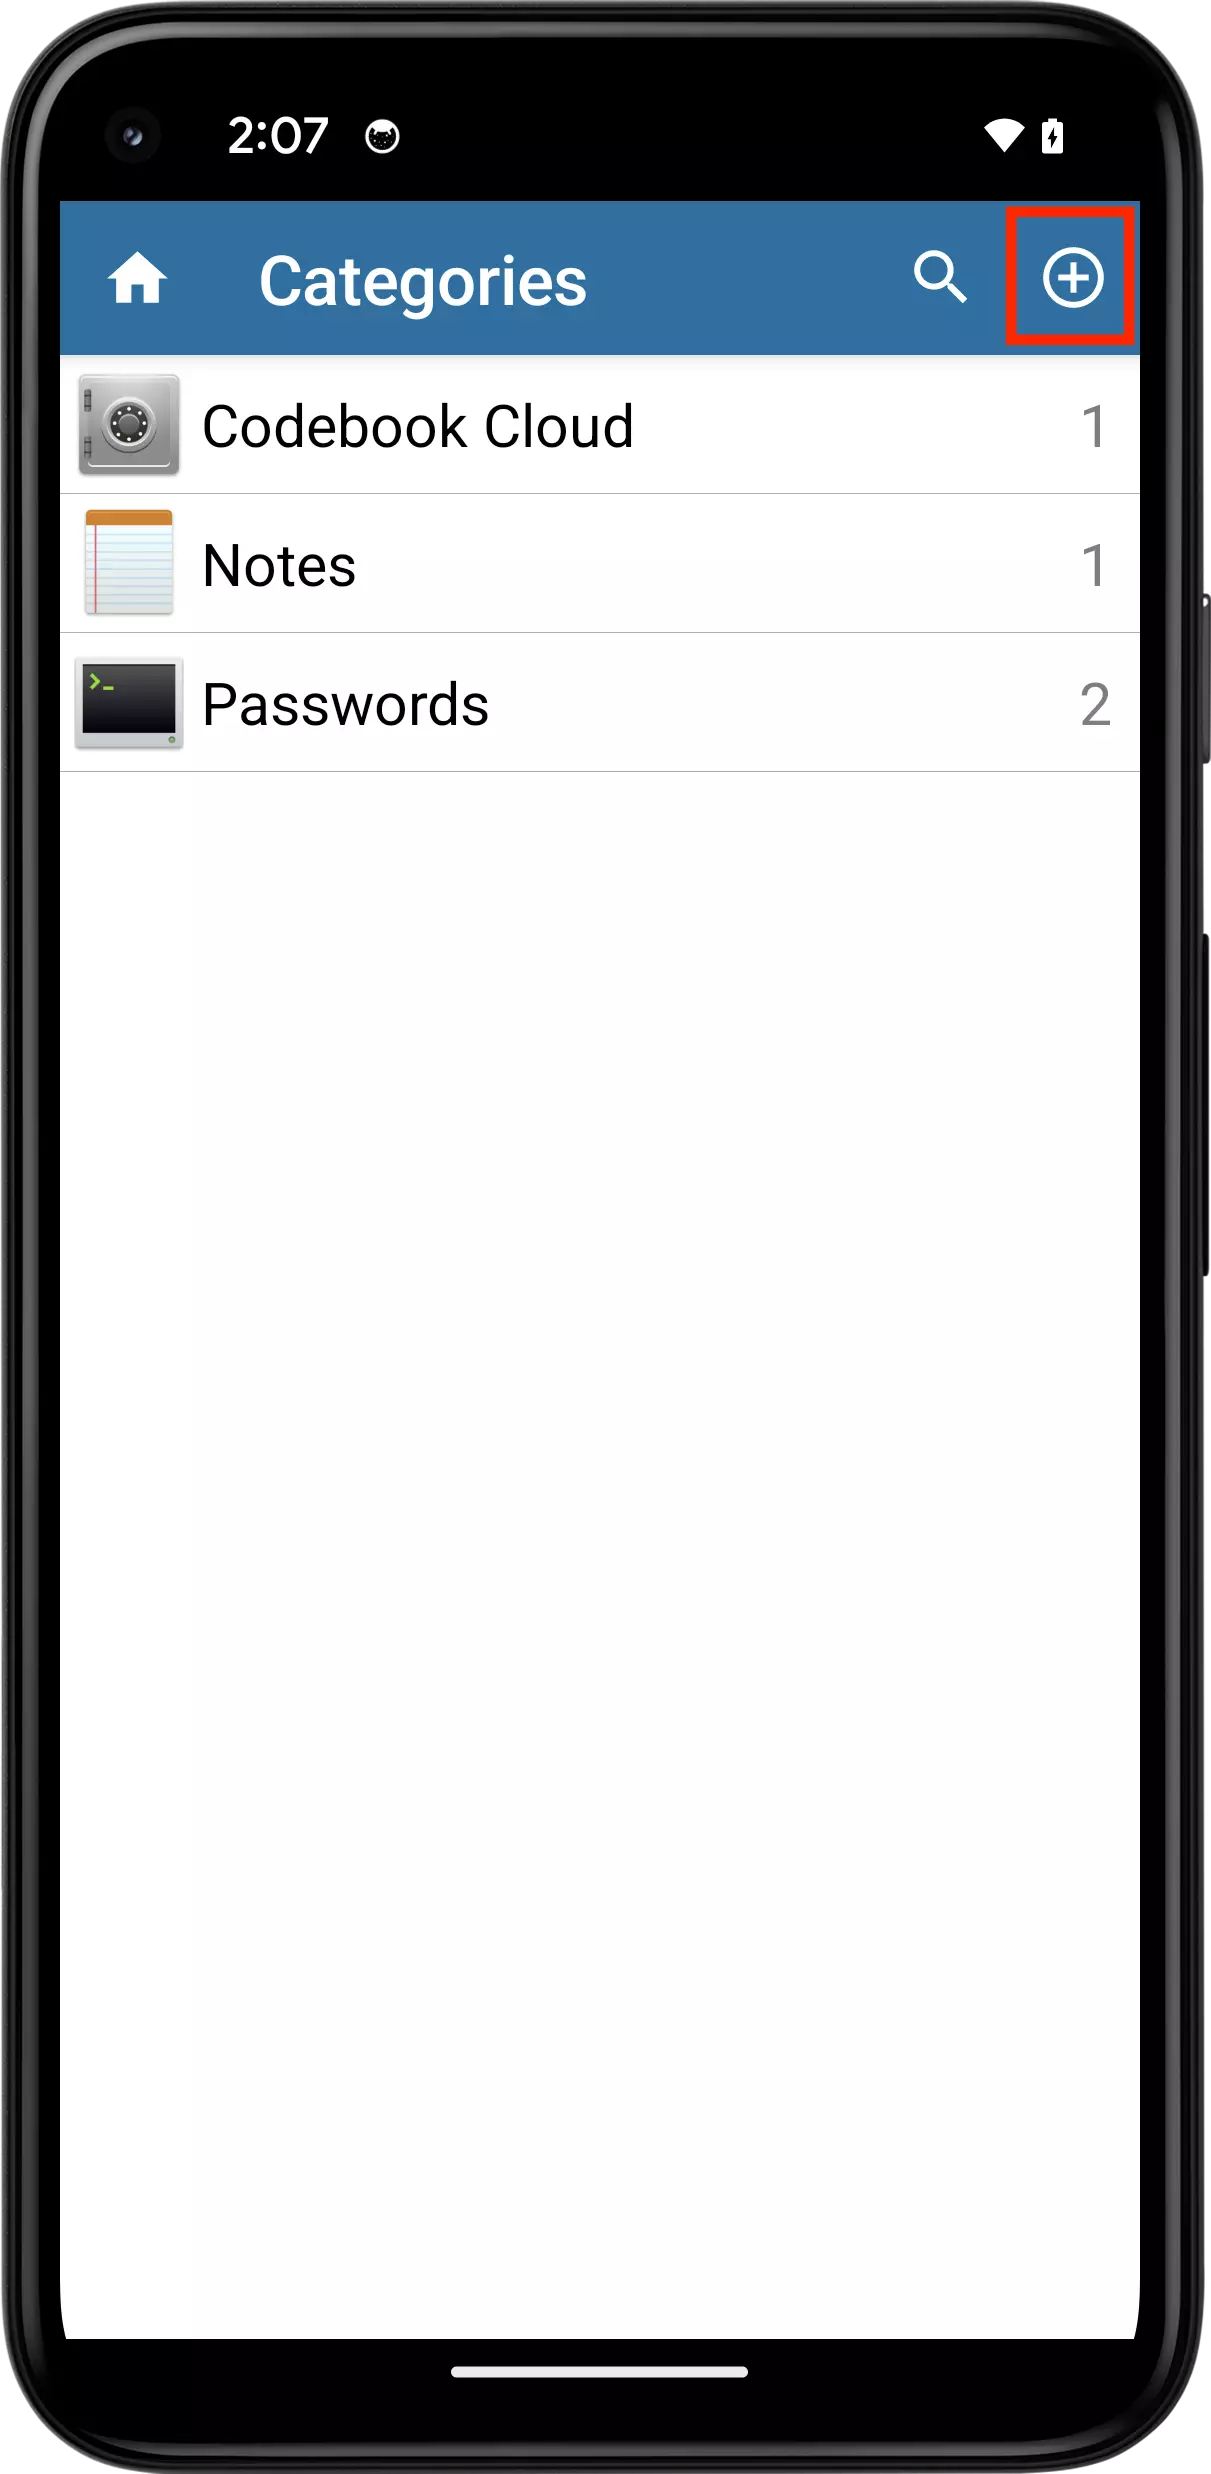
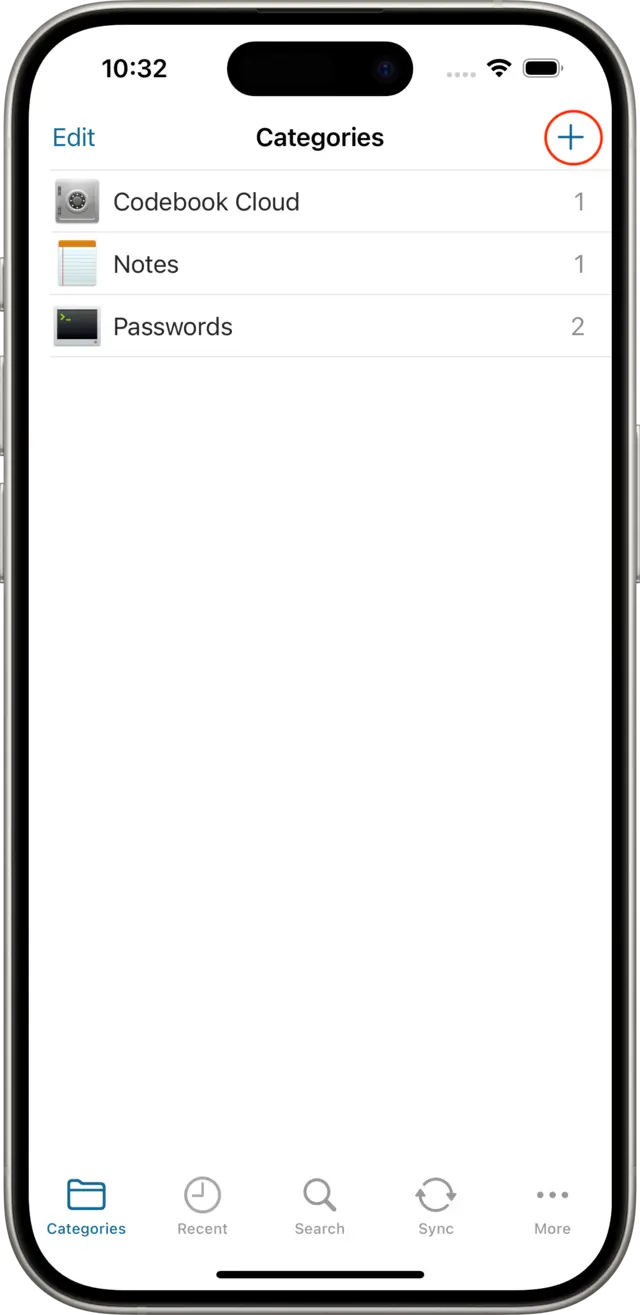
Let's start by creating a new Category. Tap on Home > Categories to display your list of categories. Tap on the plus button in the navigation bar to add a category..
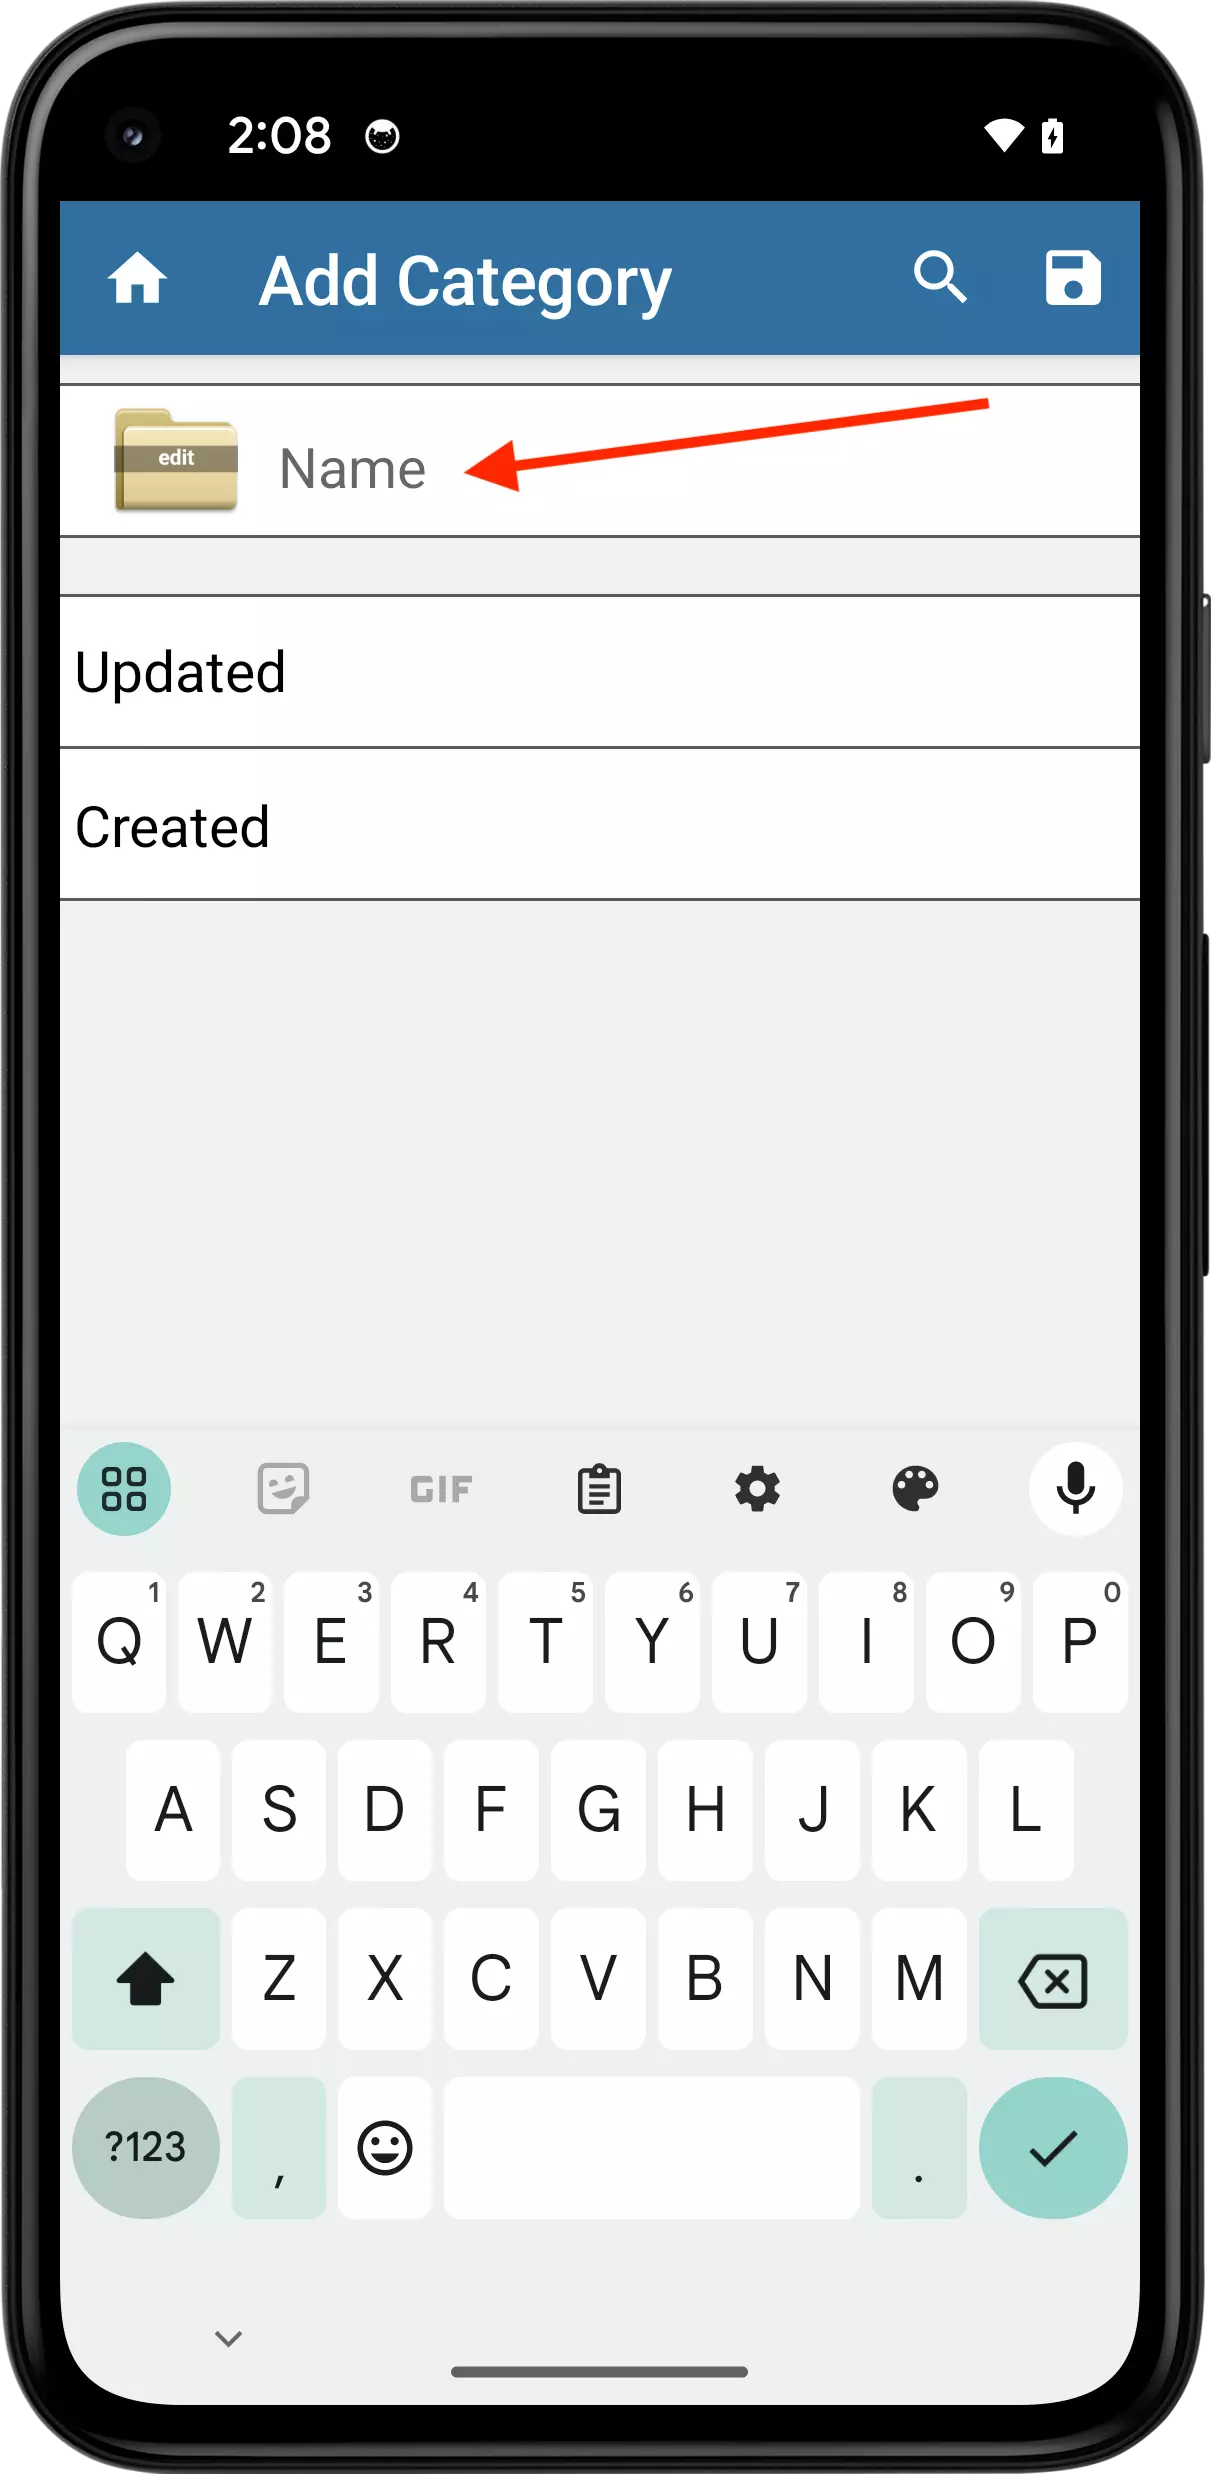
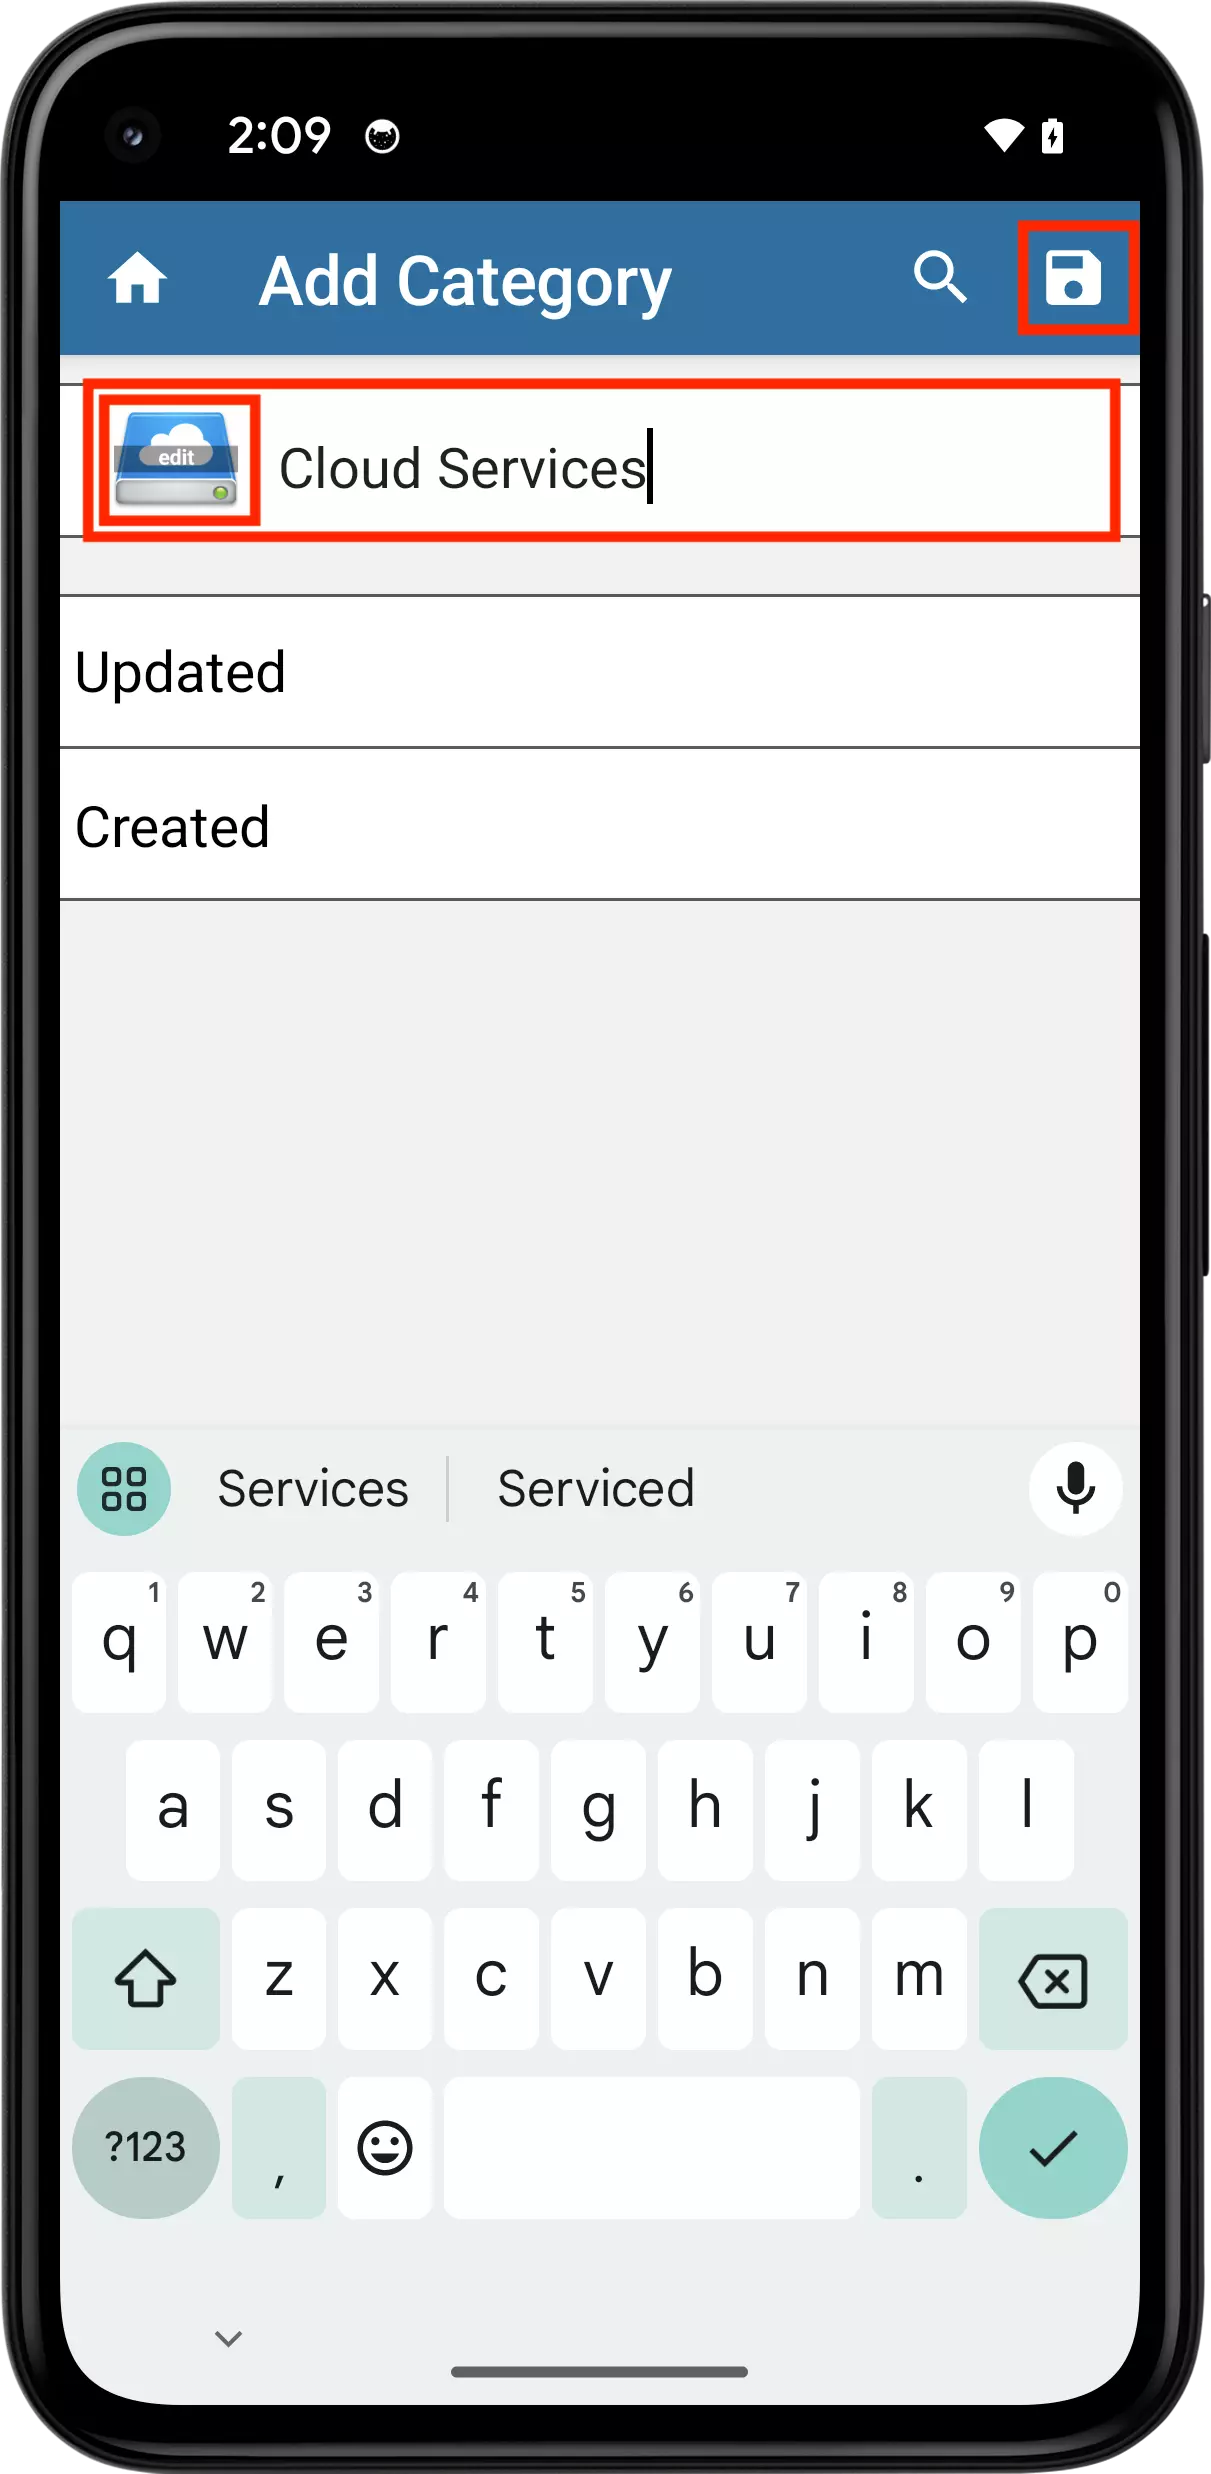
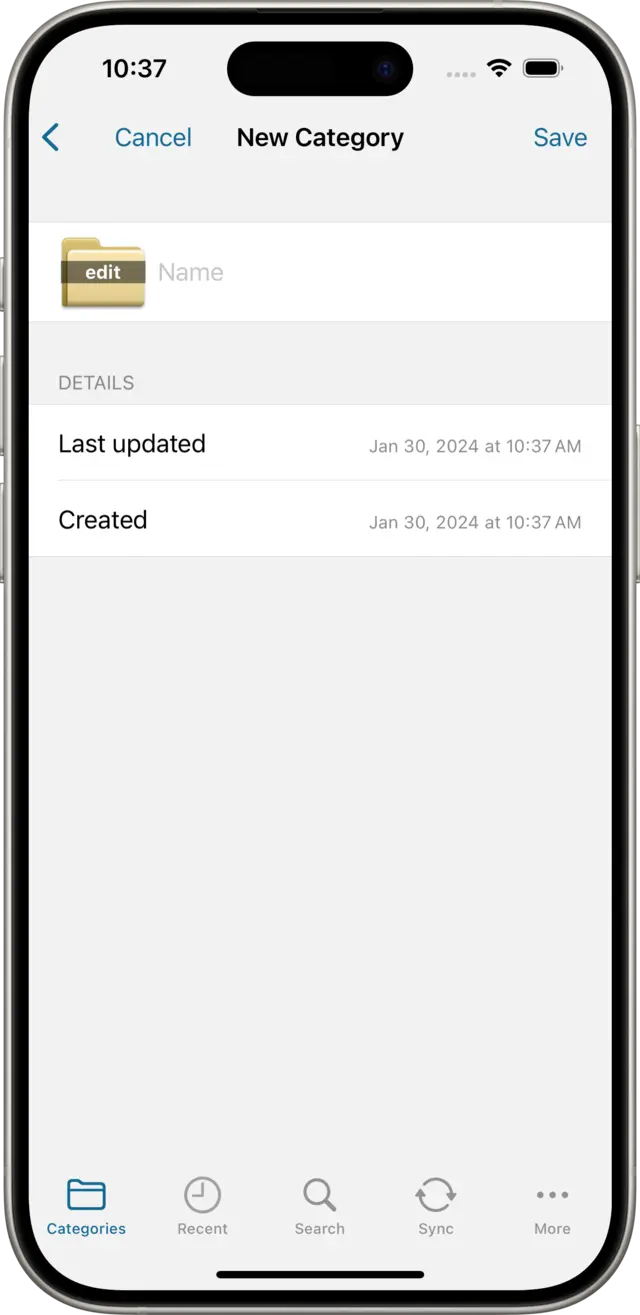
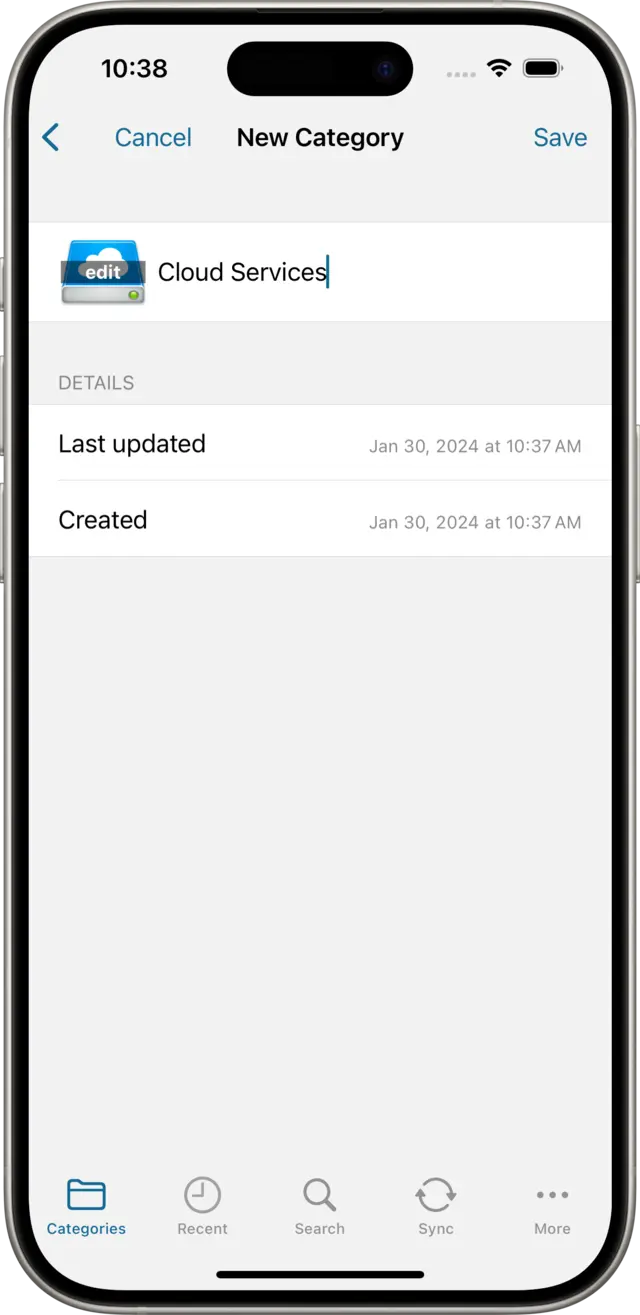
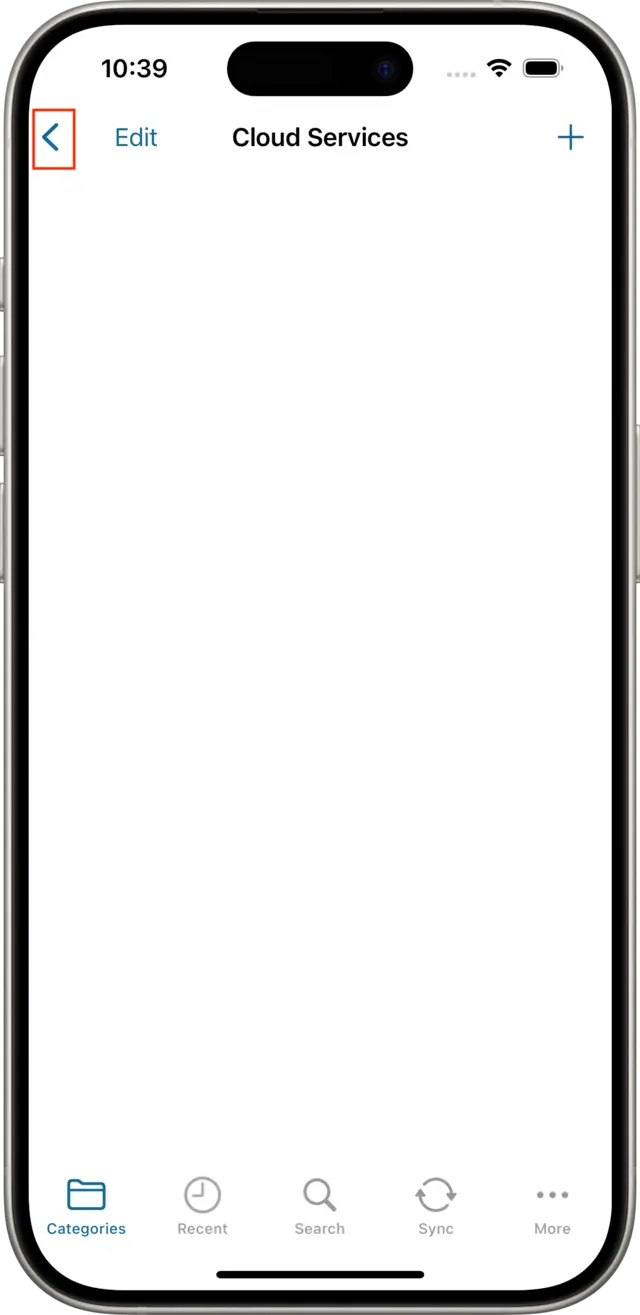
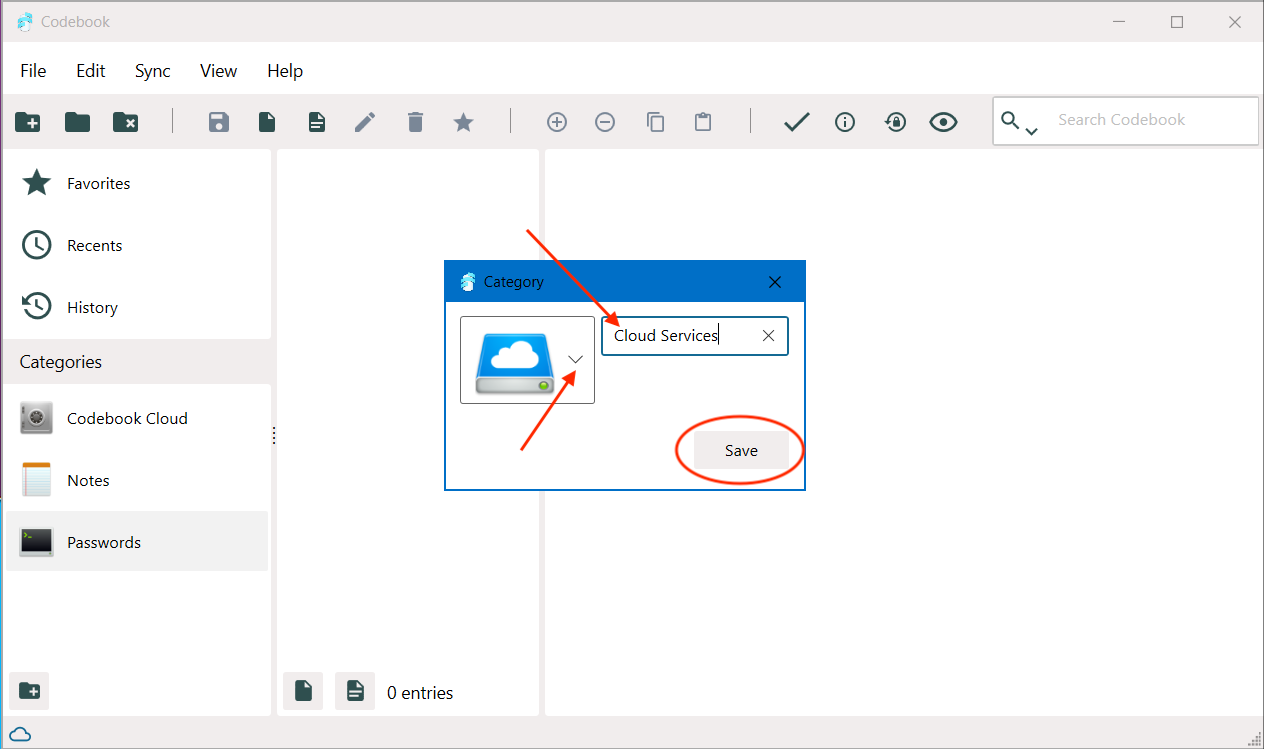
The New Category view is displayed. Type in a name for the new Category (we'll use "Cloud Services"), tap on the folder icon to change its icon, and then tap on the Save button.
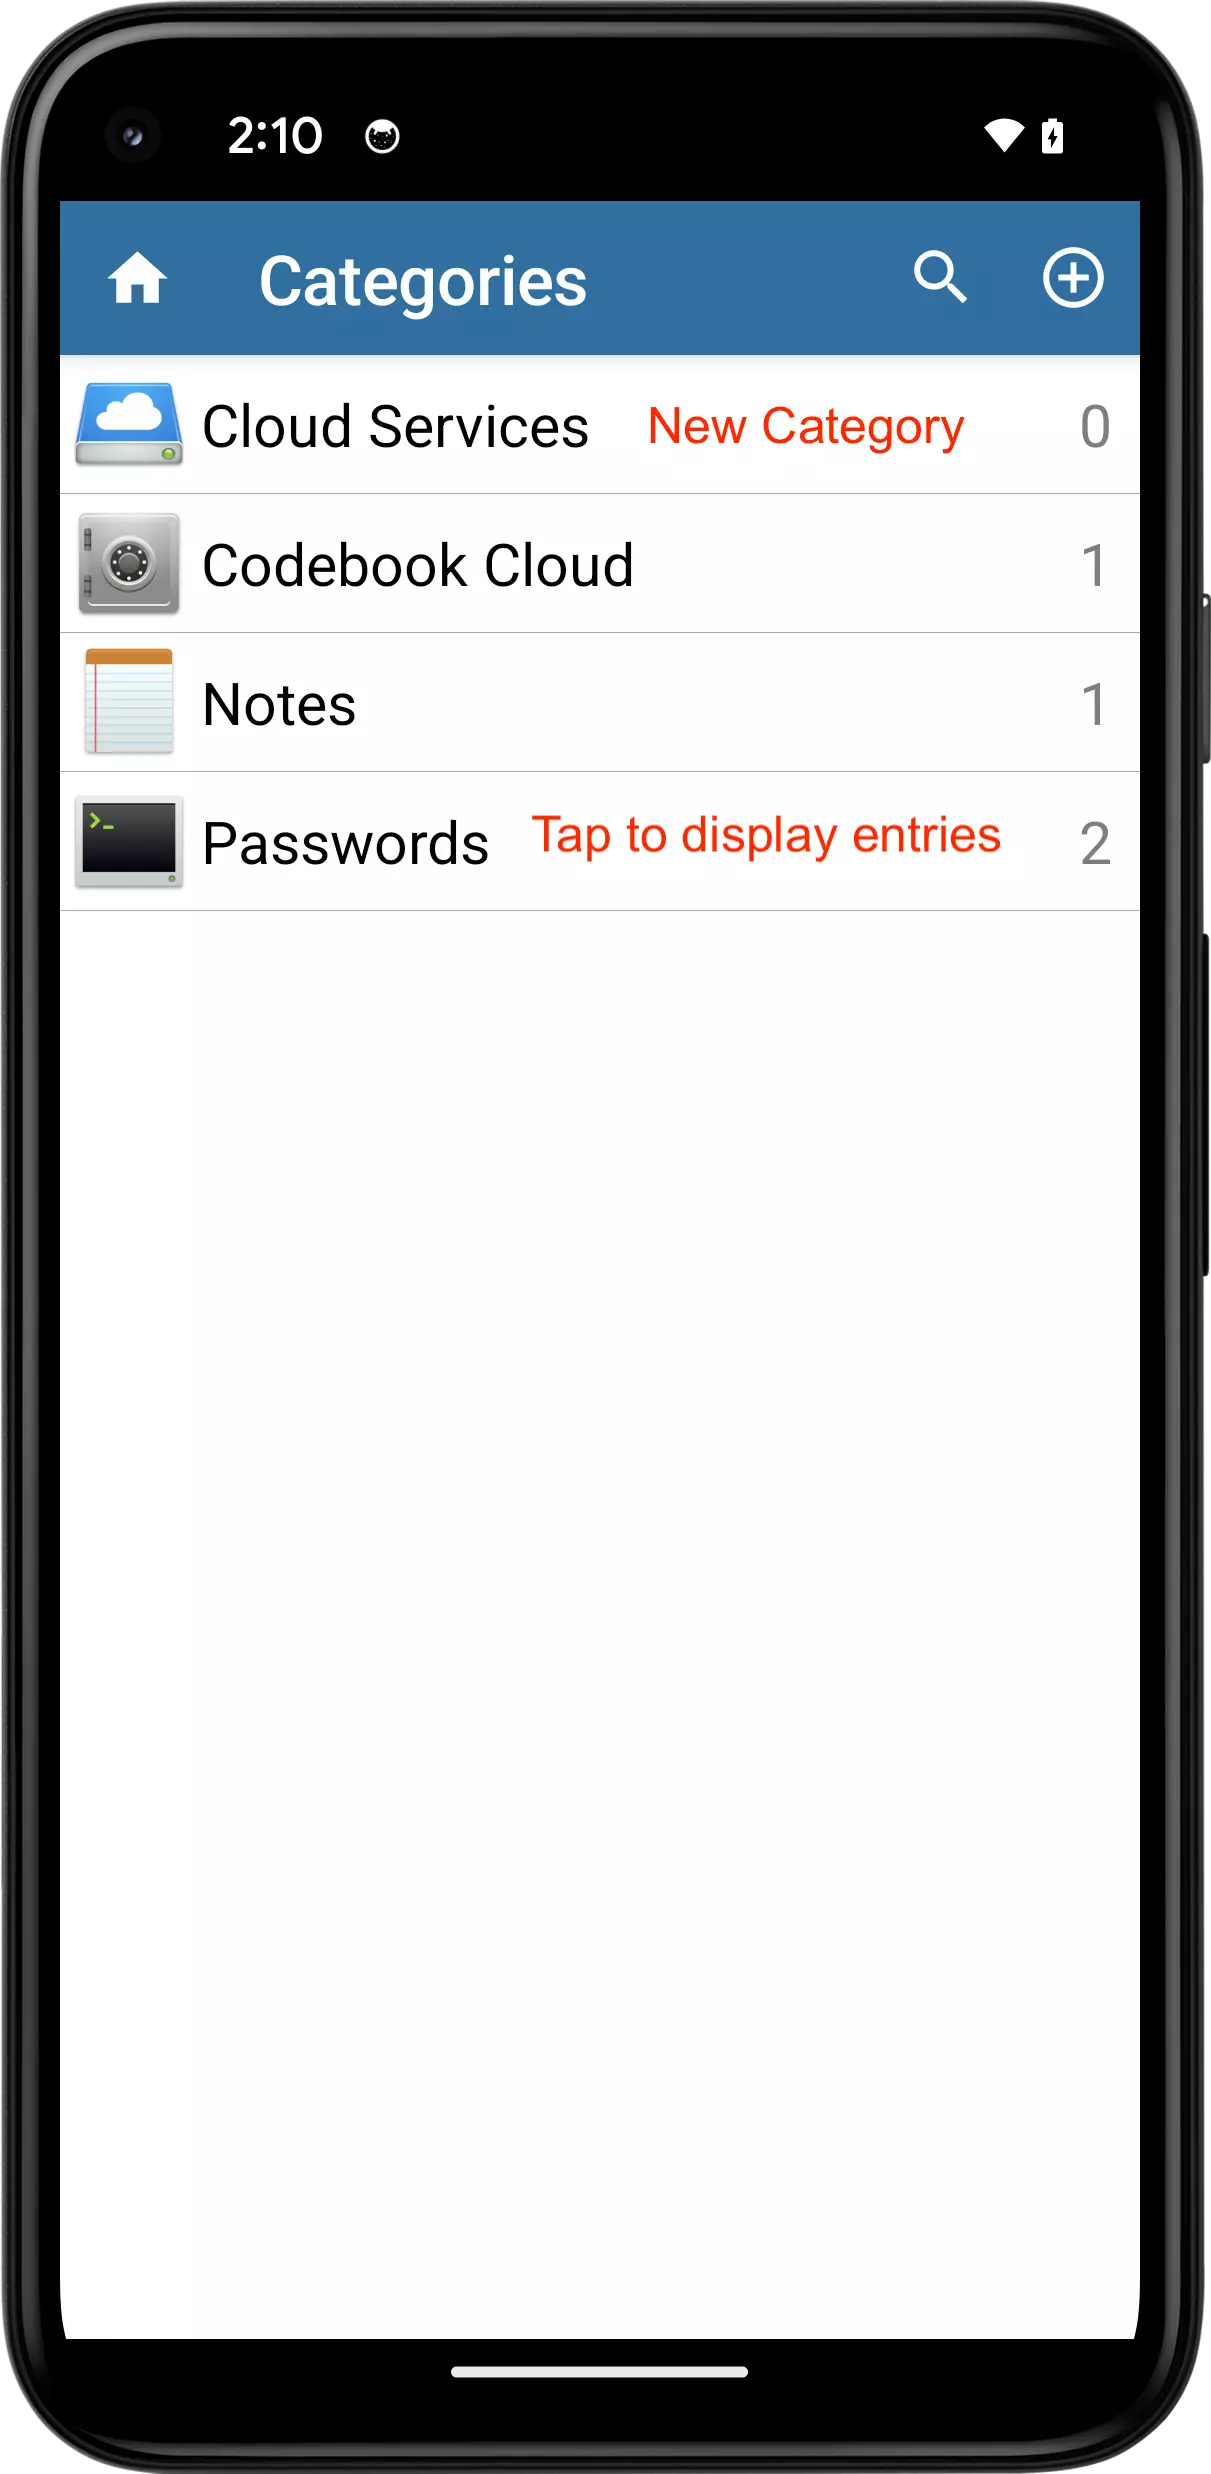
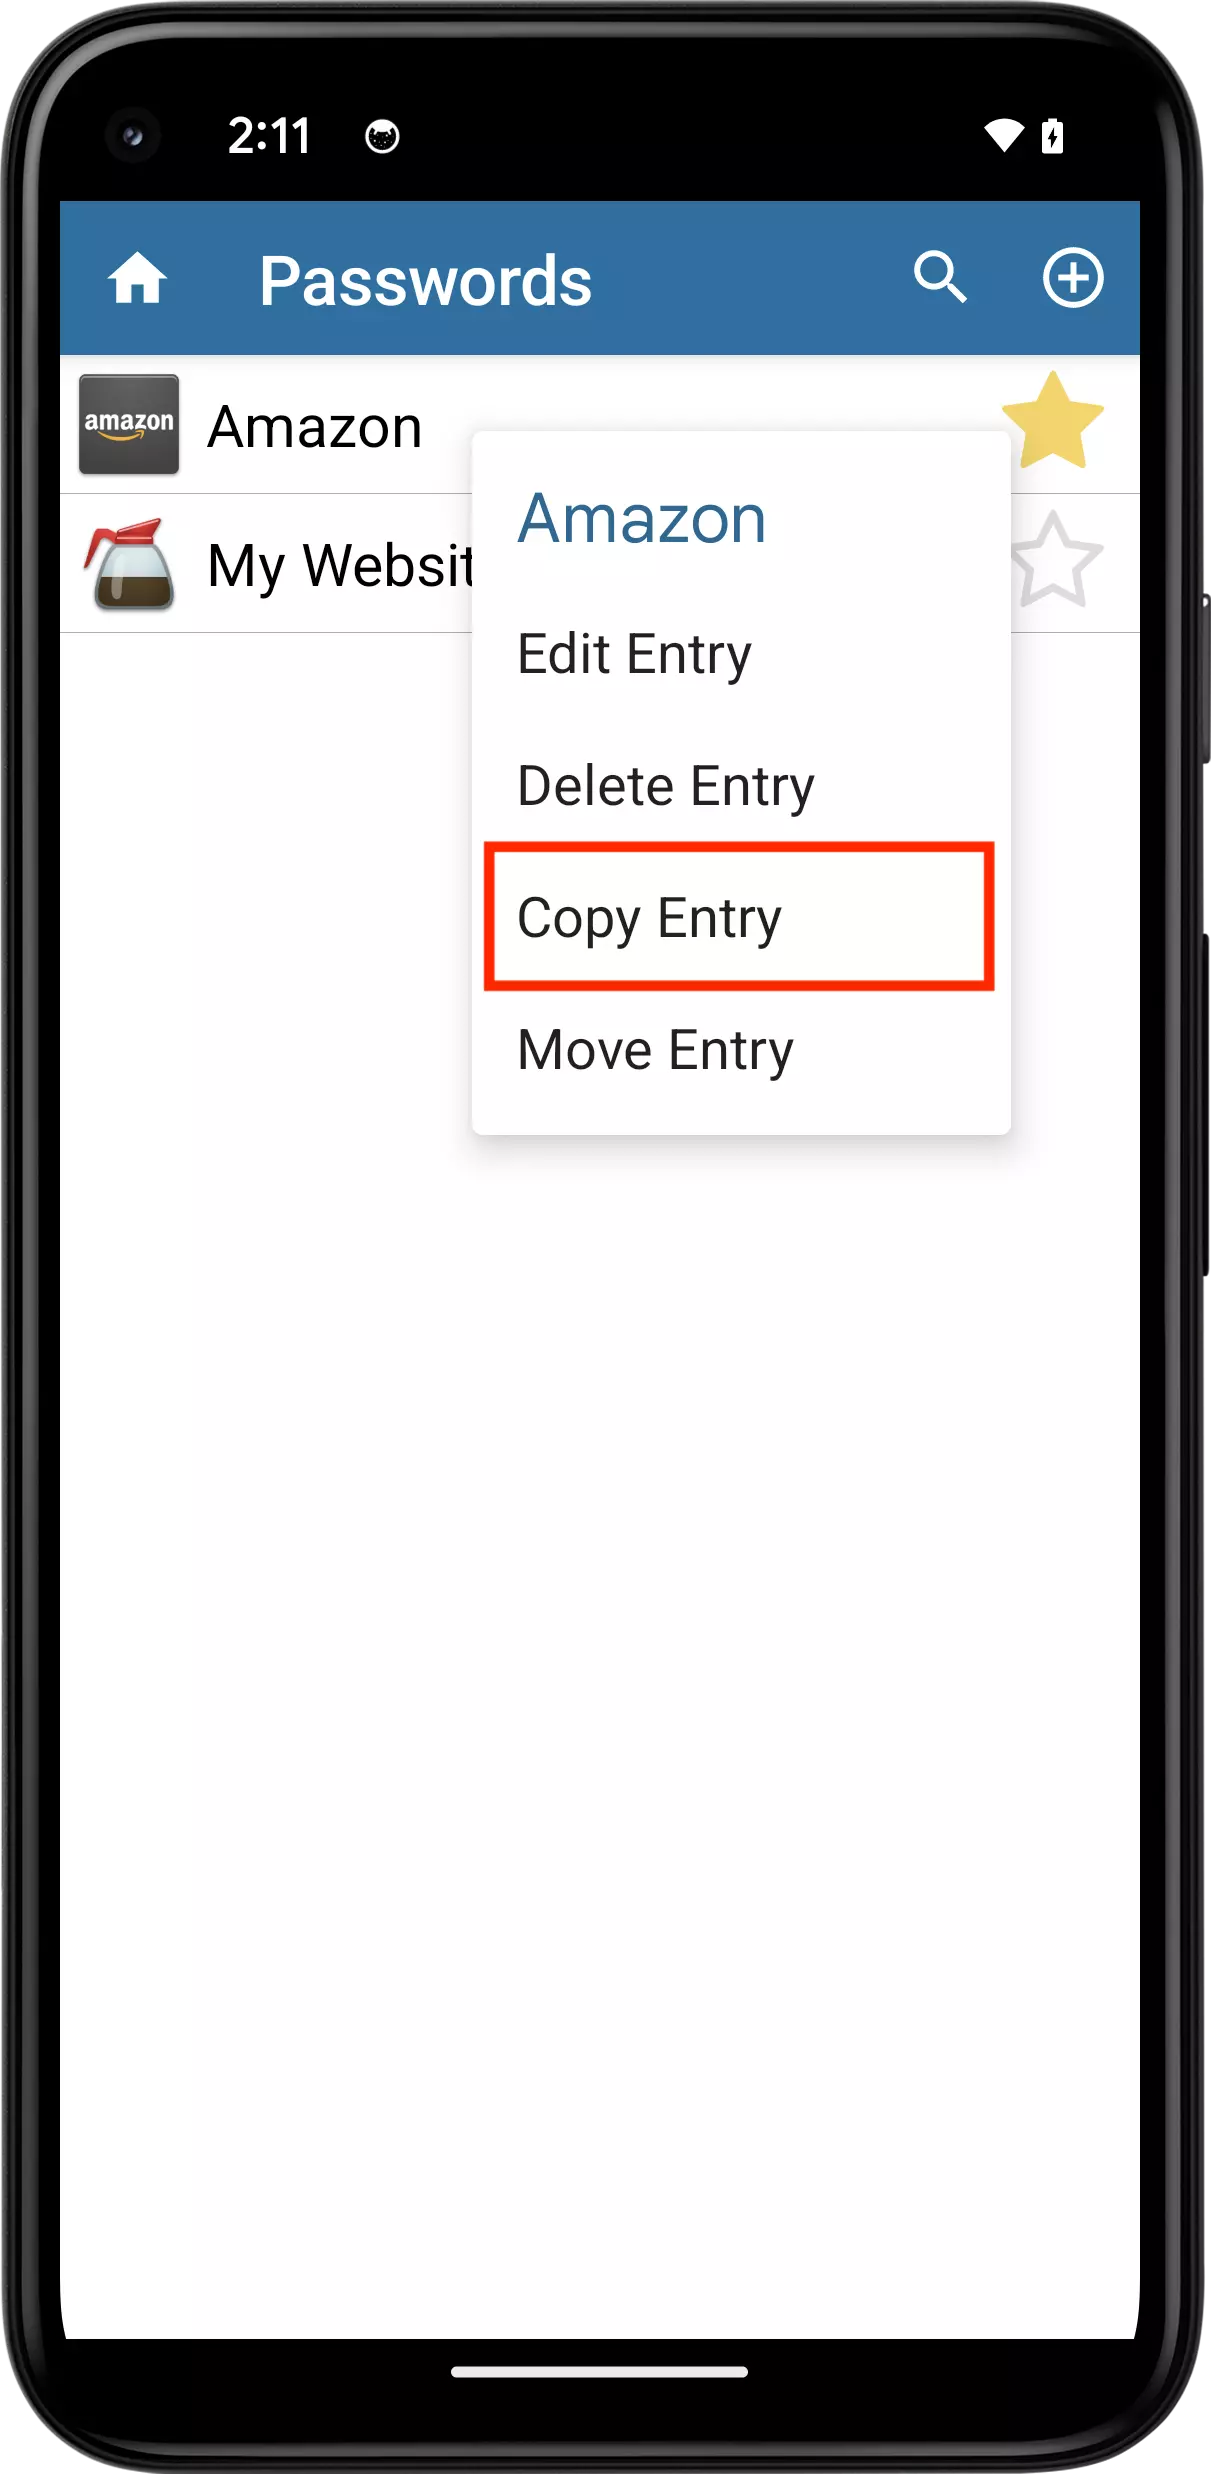
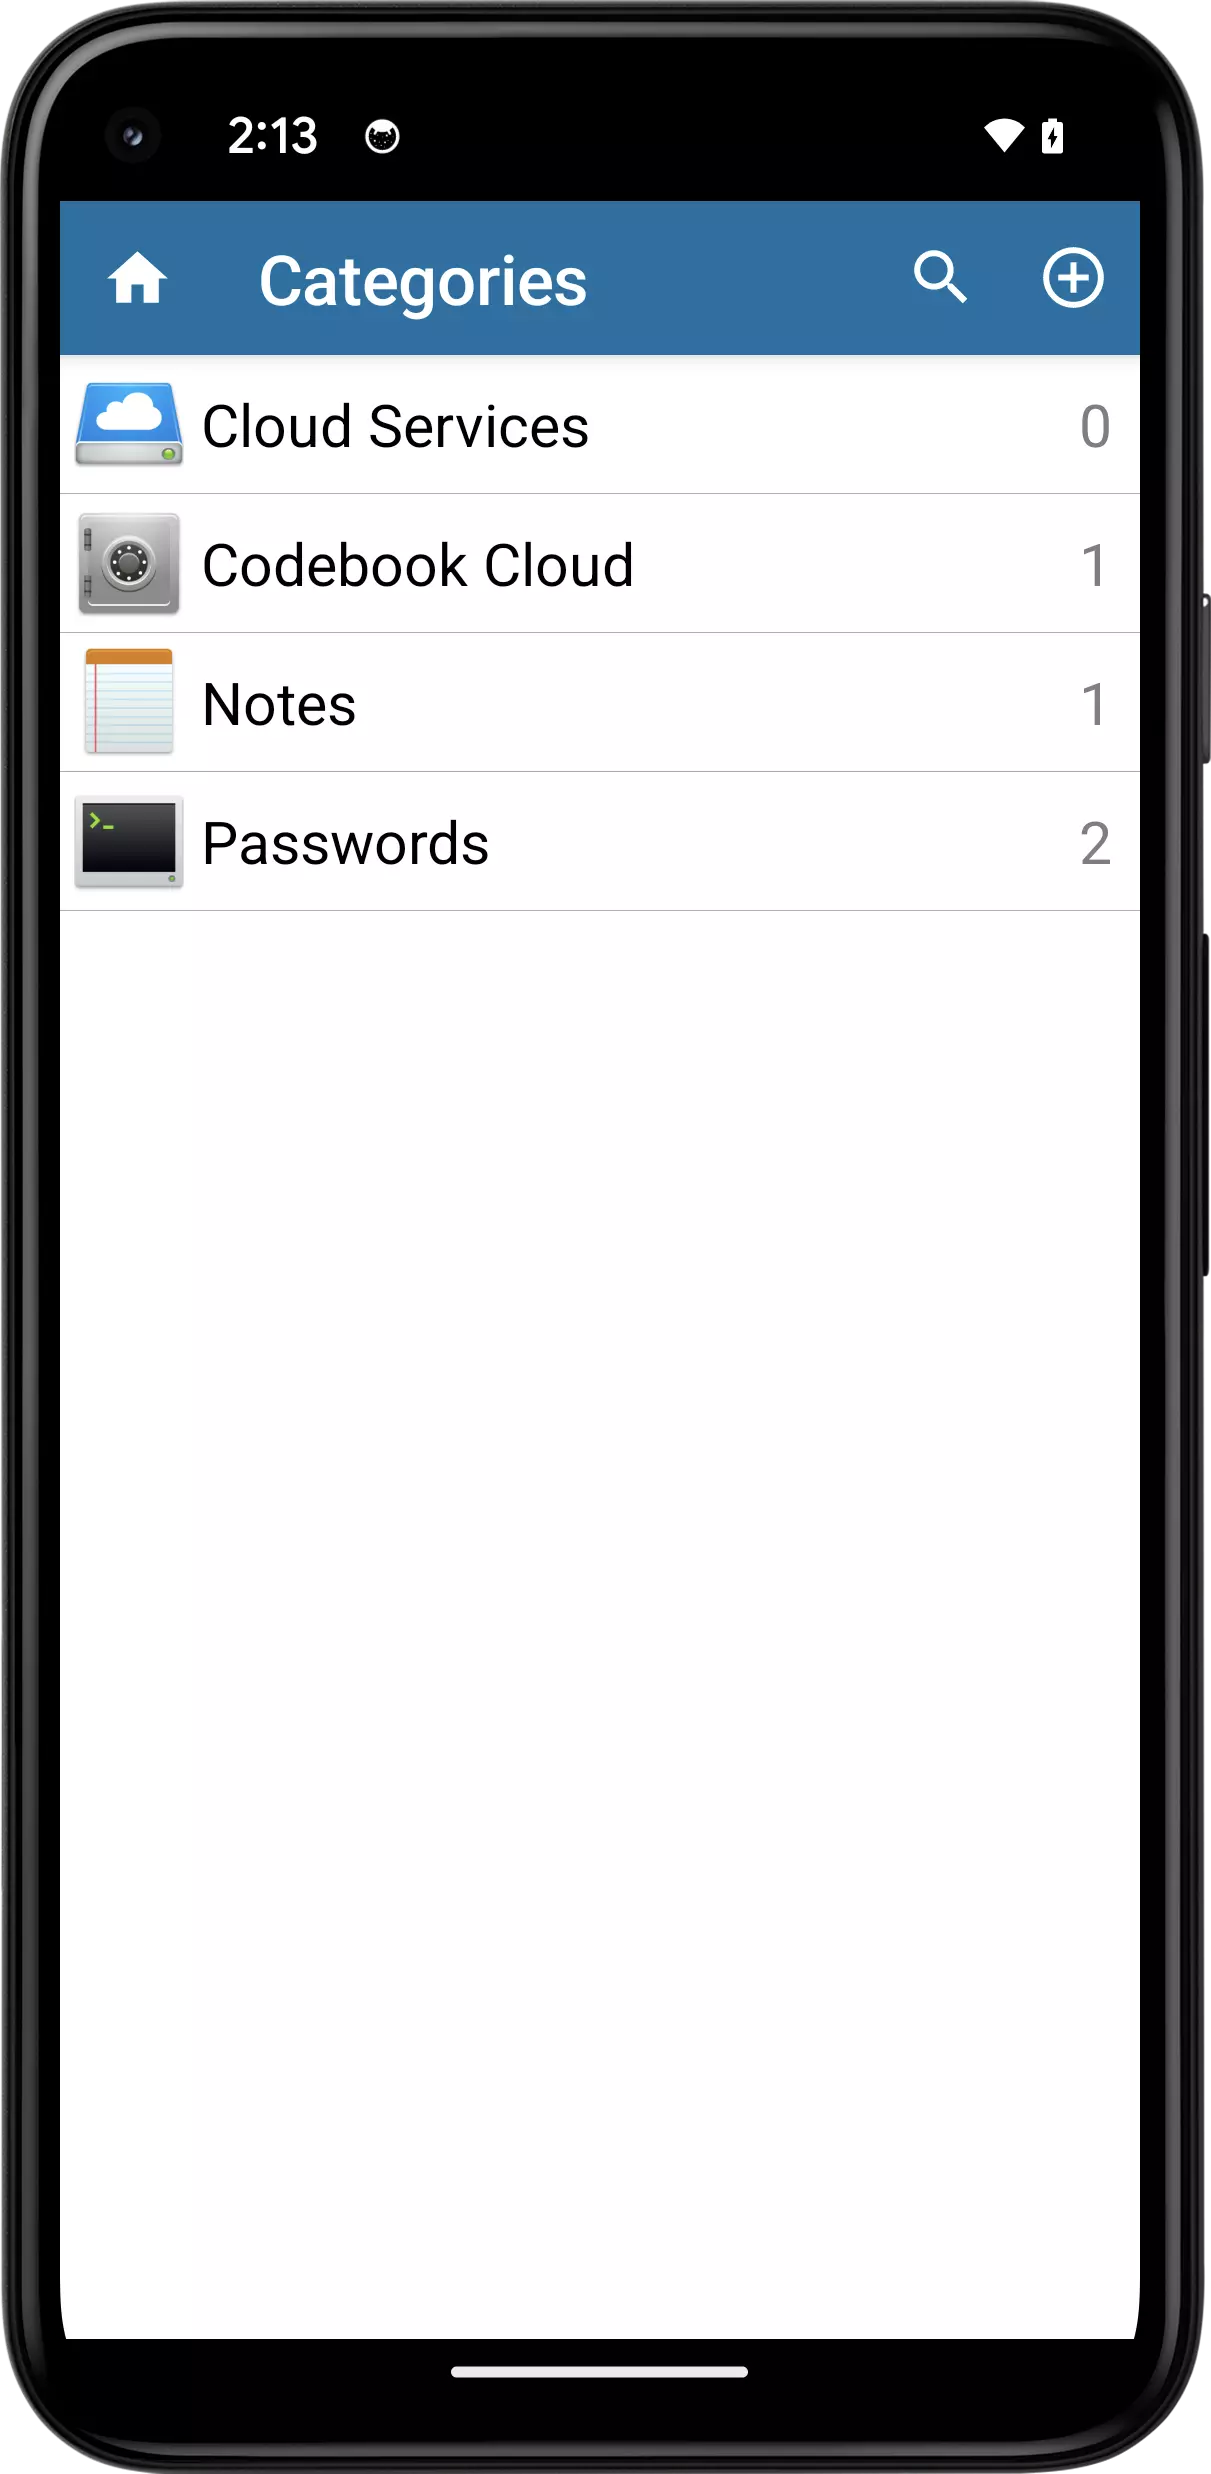
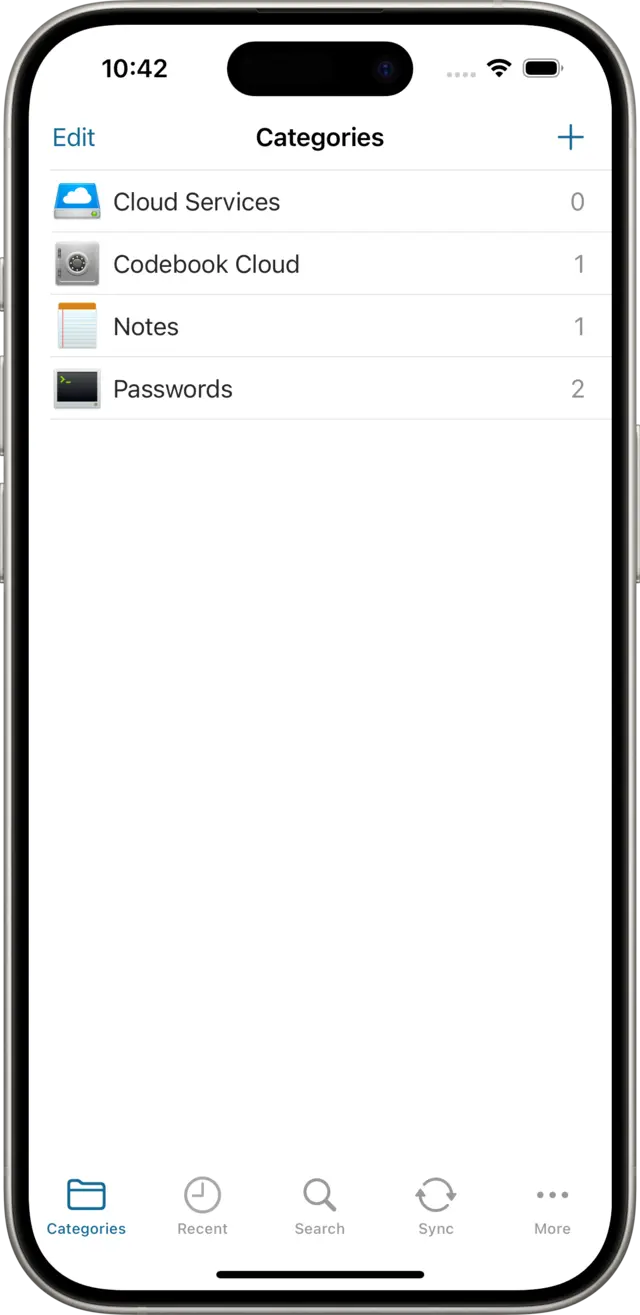
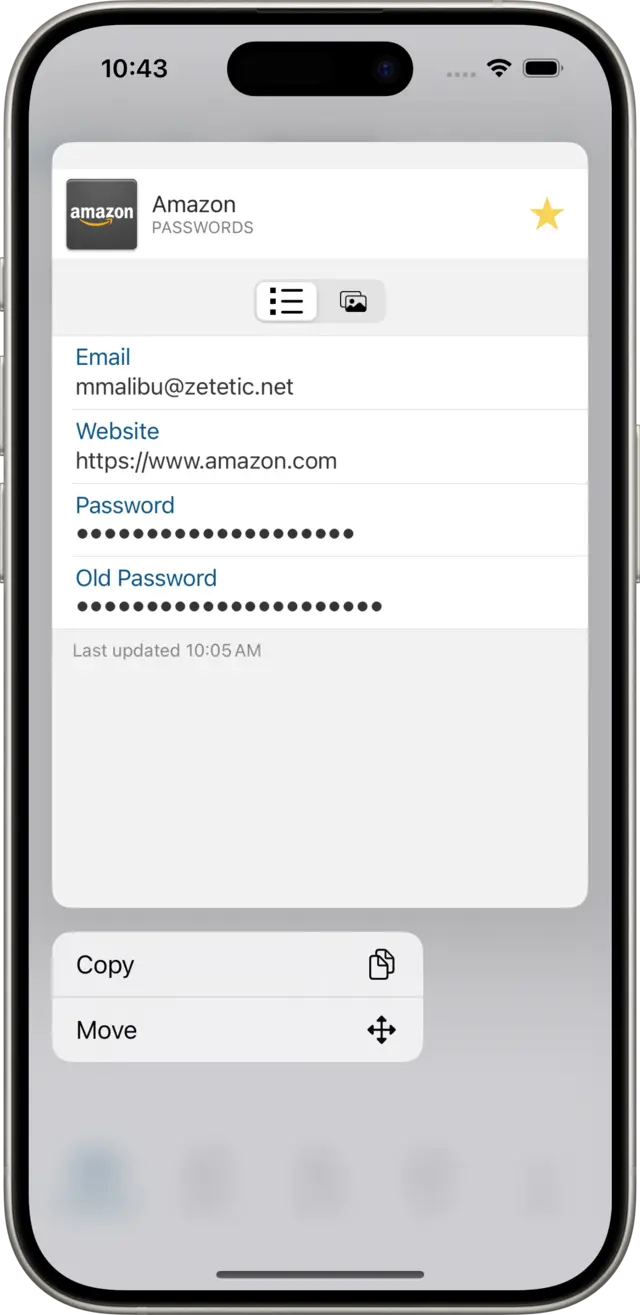
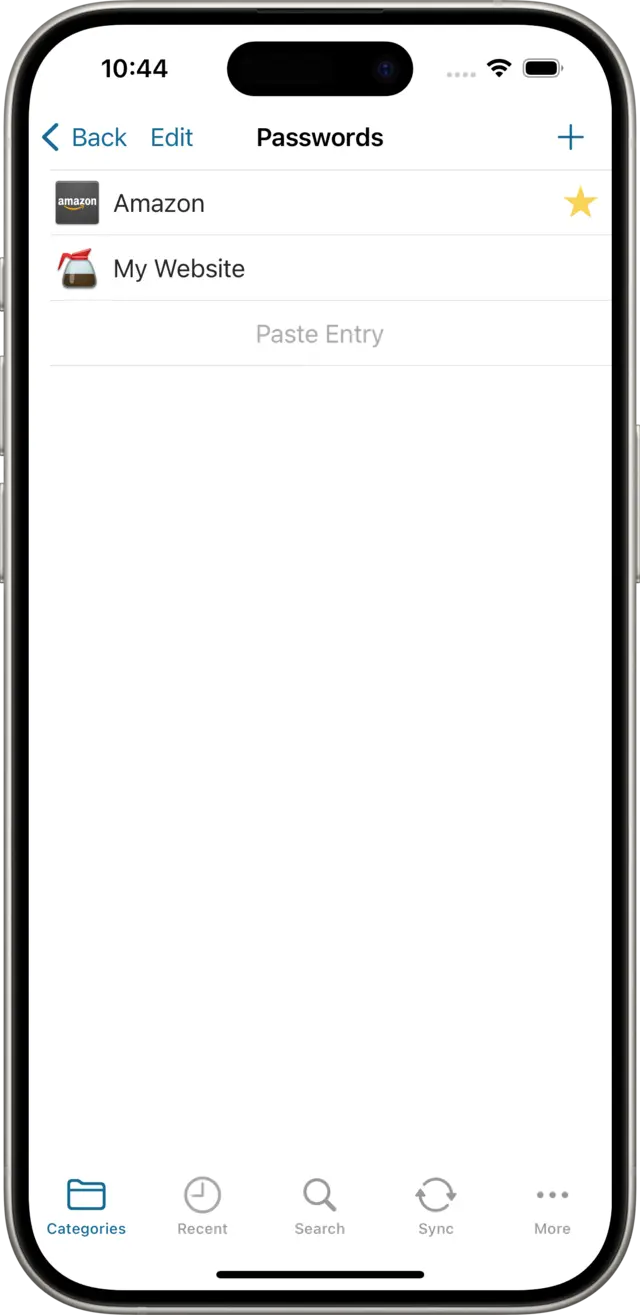
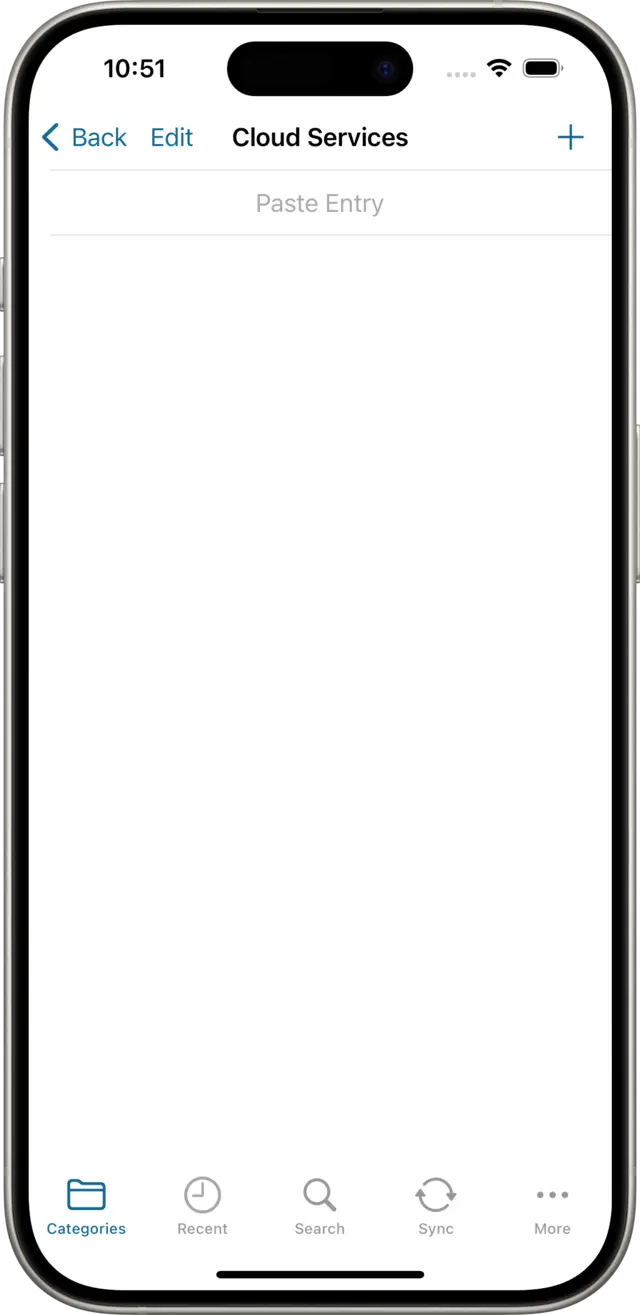
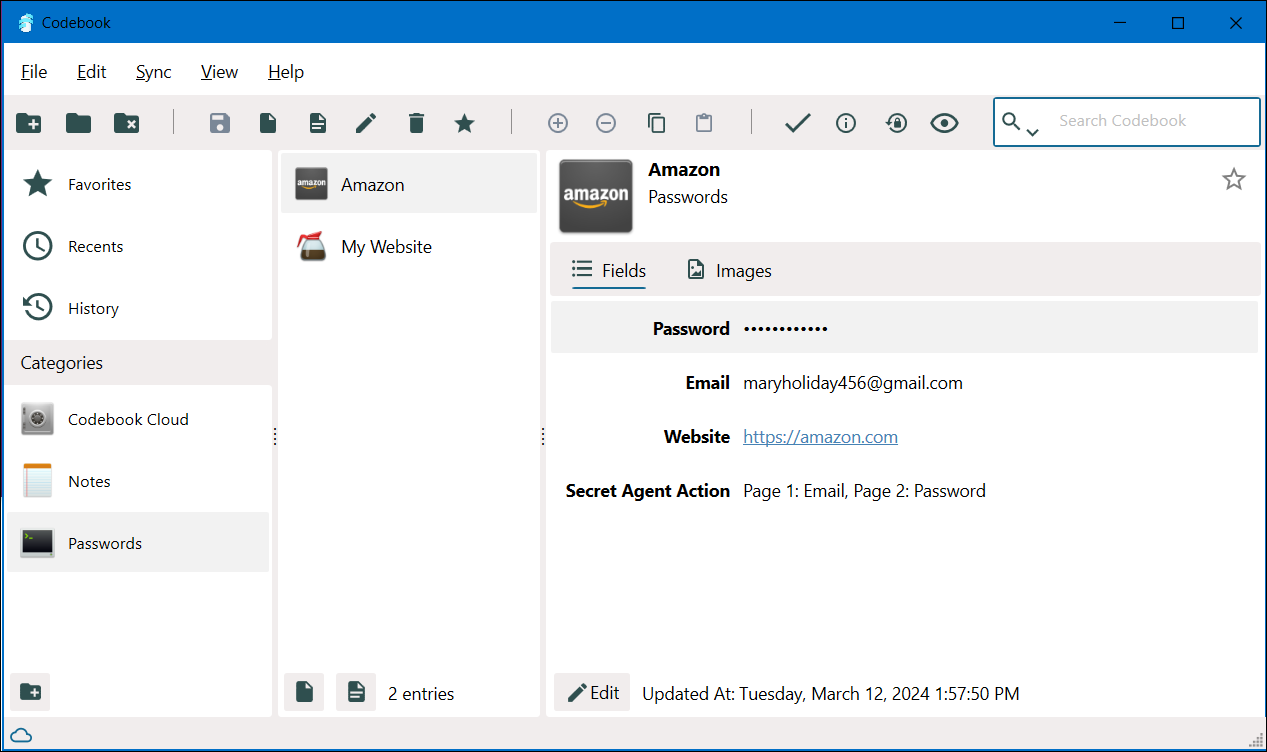
This creates a new category Cloud Services and displays it in the categories list. There aren't any Entries to see yet! Tap on the Passwords category. Long-press on the Amazon entry to display a menu with Editing options. Tap on the Copy Entry option. Go back to the Category view and tap the Cloud Services category.
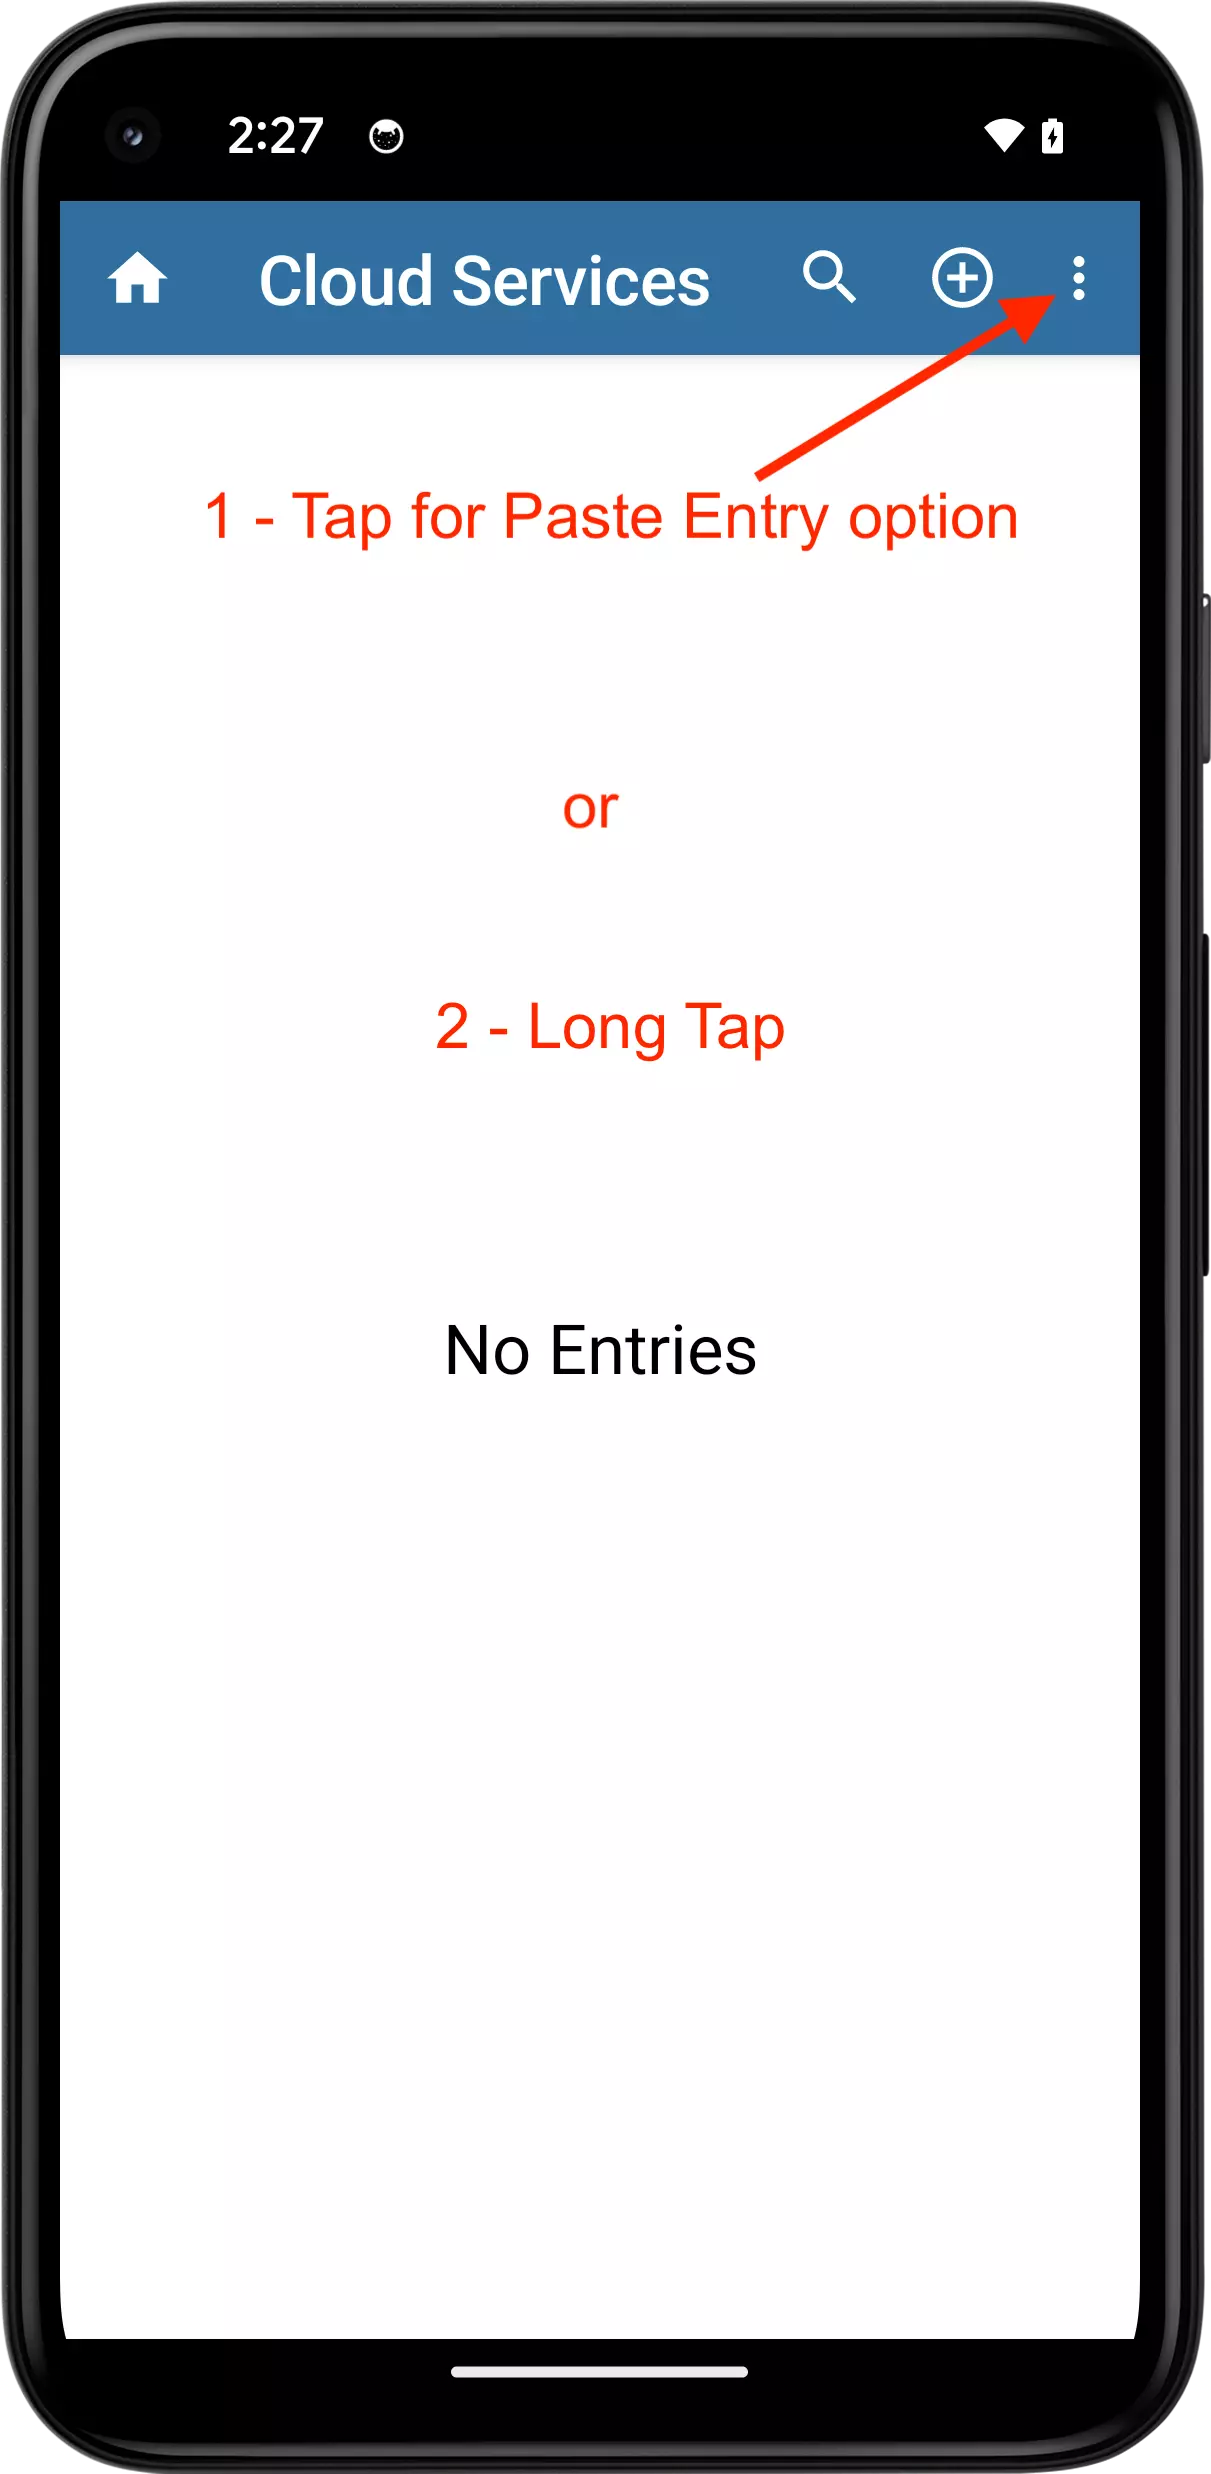
There are two ways to paste the entry you just copied:
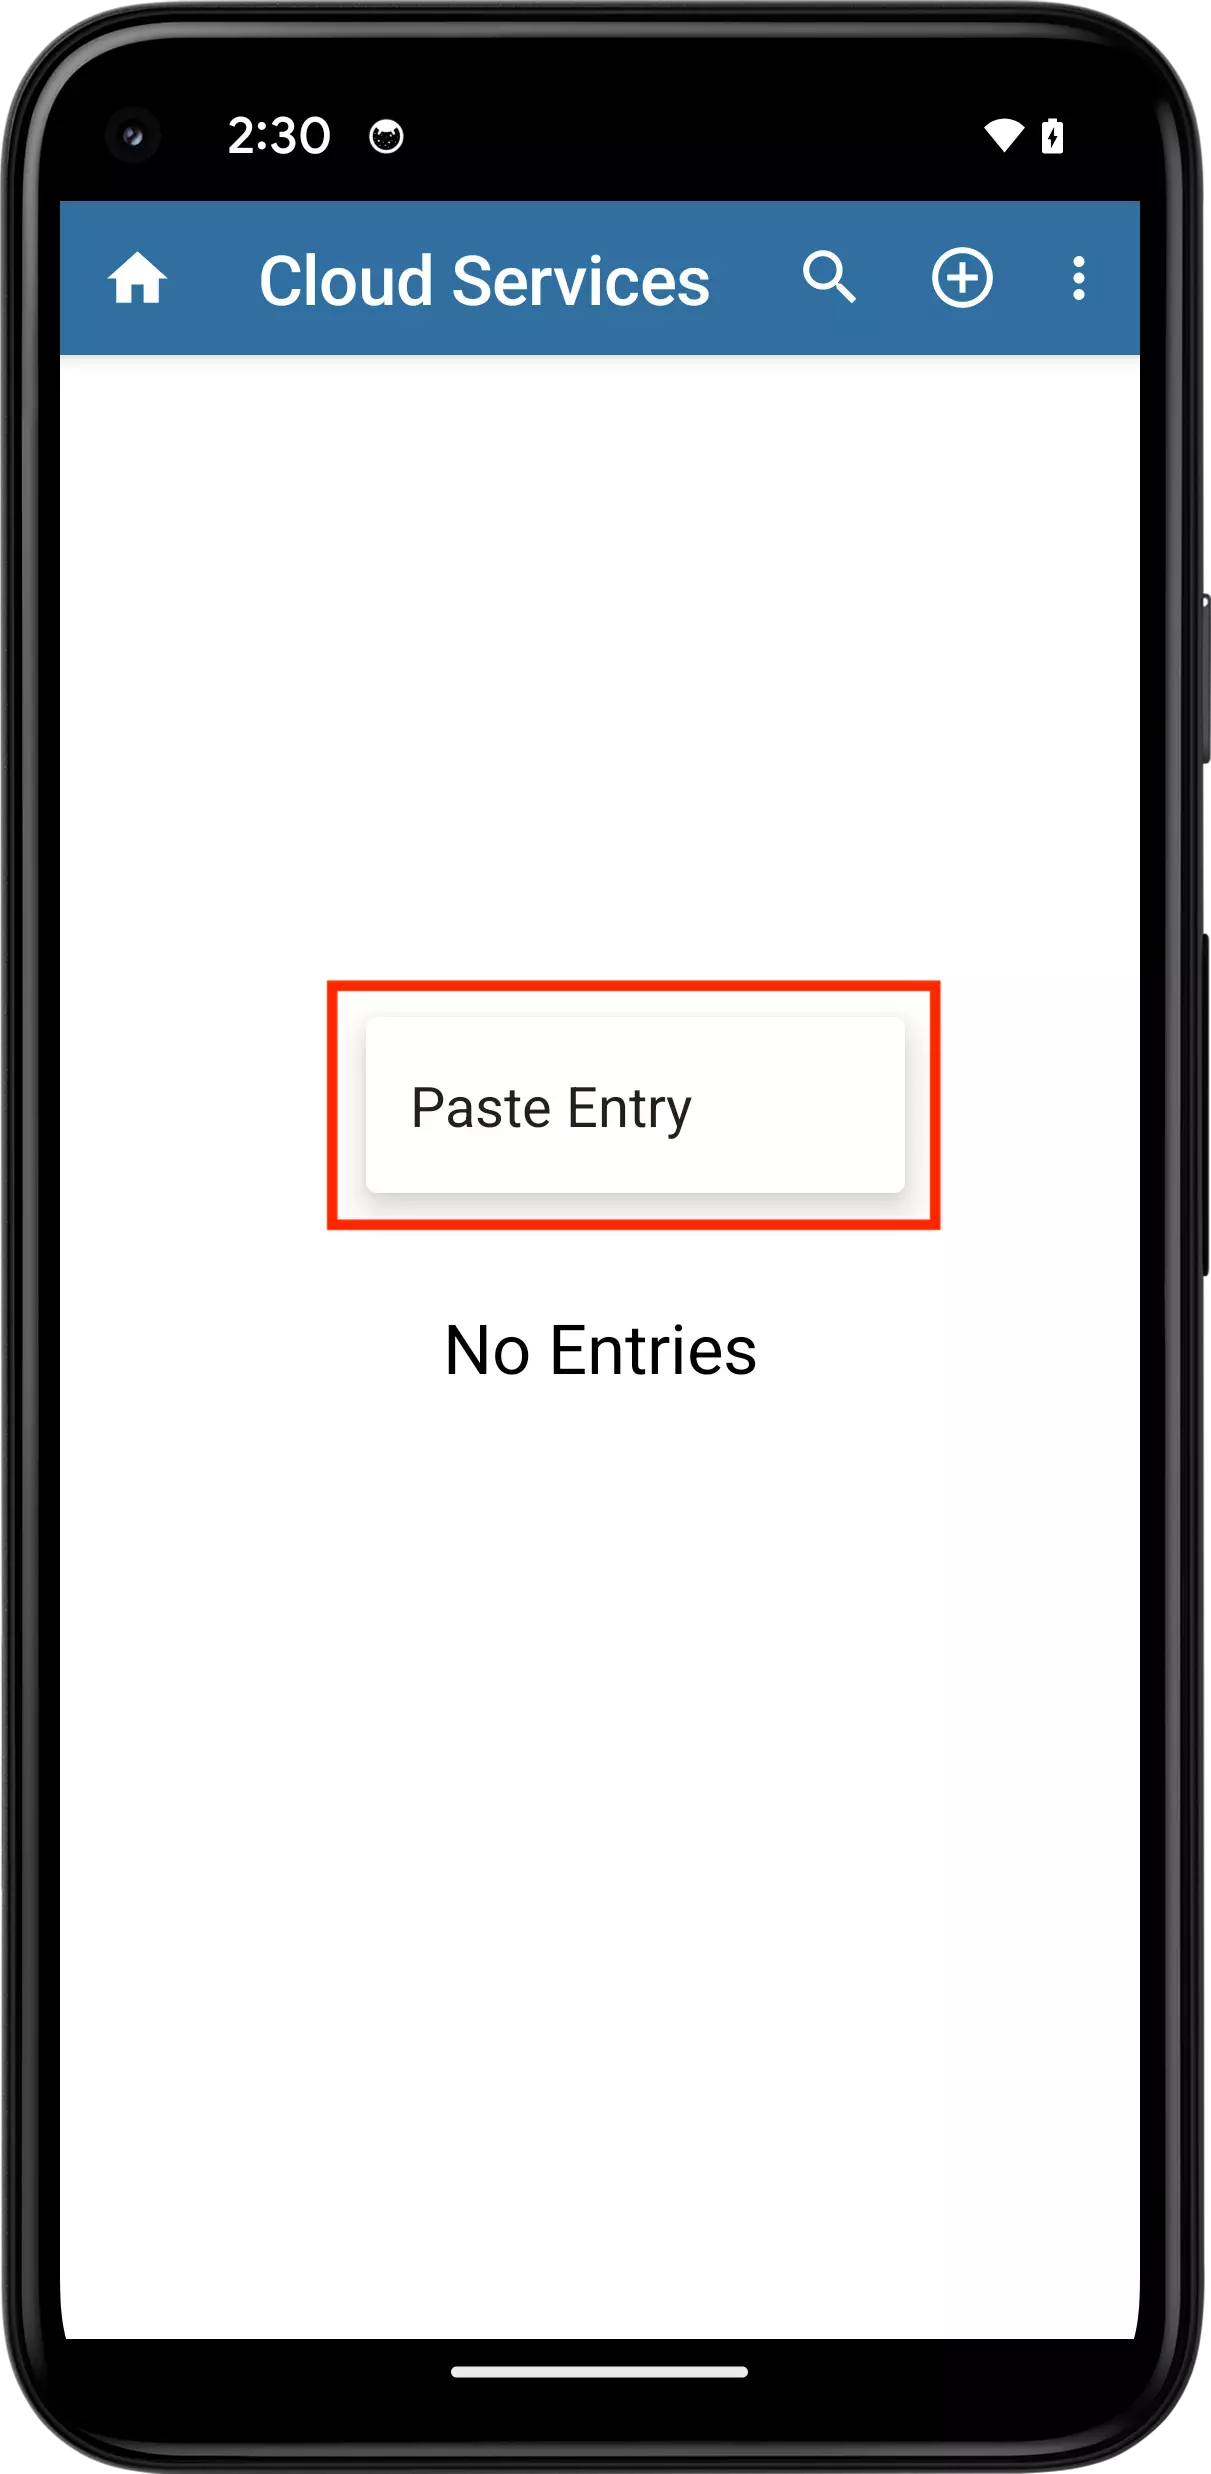
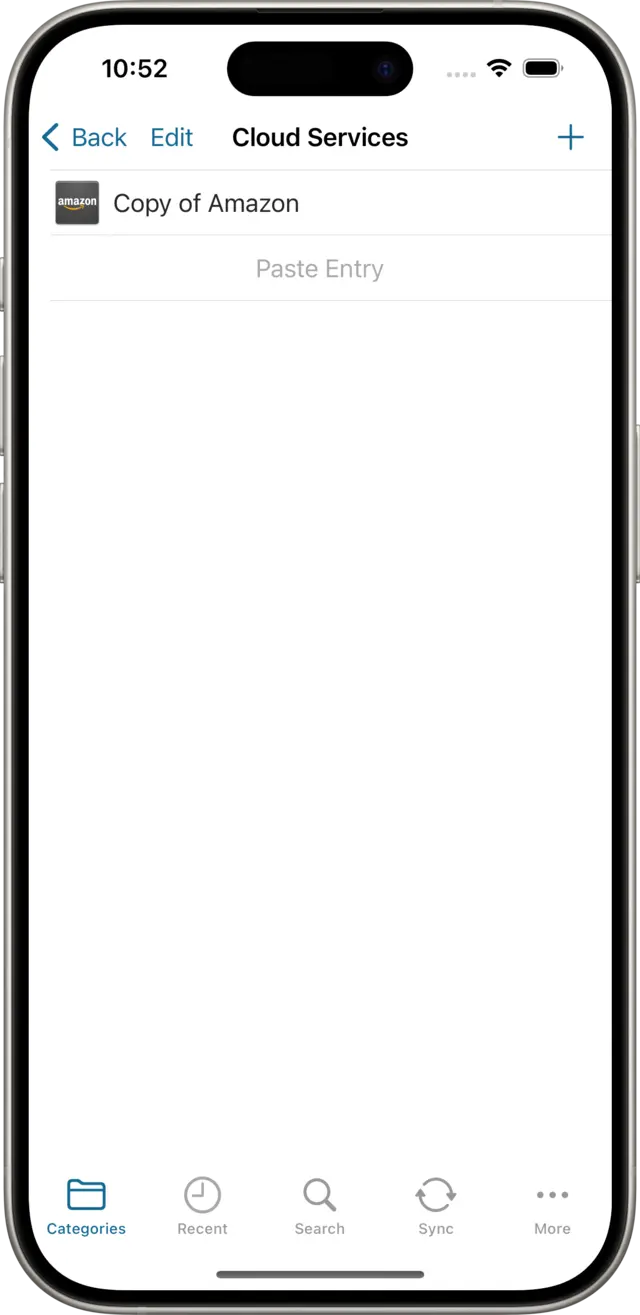
to reveal the option to Paste Entry. Tap on Paste Entry.
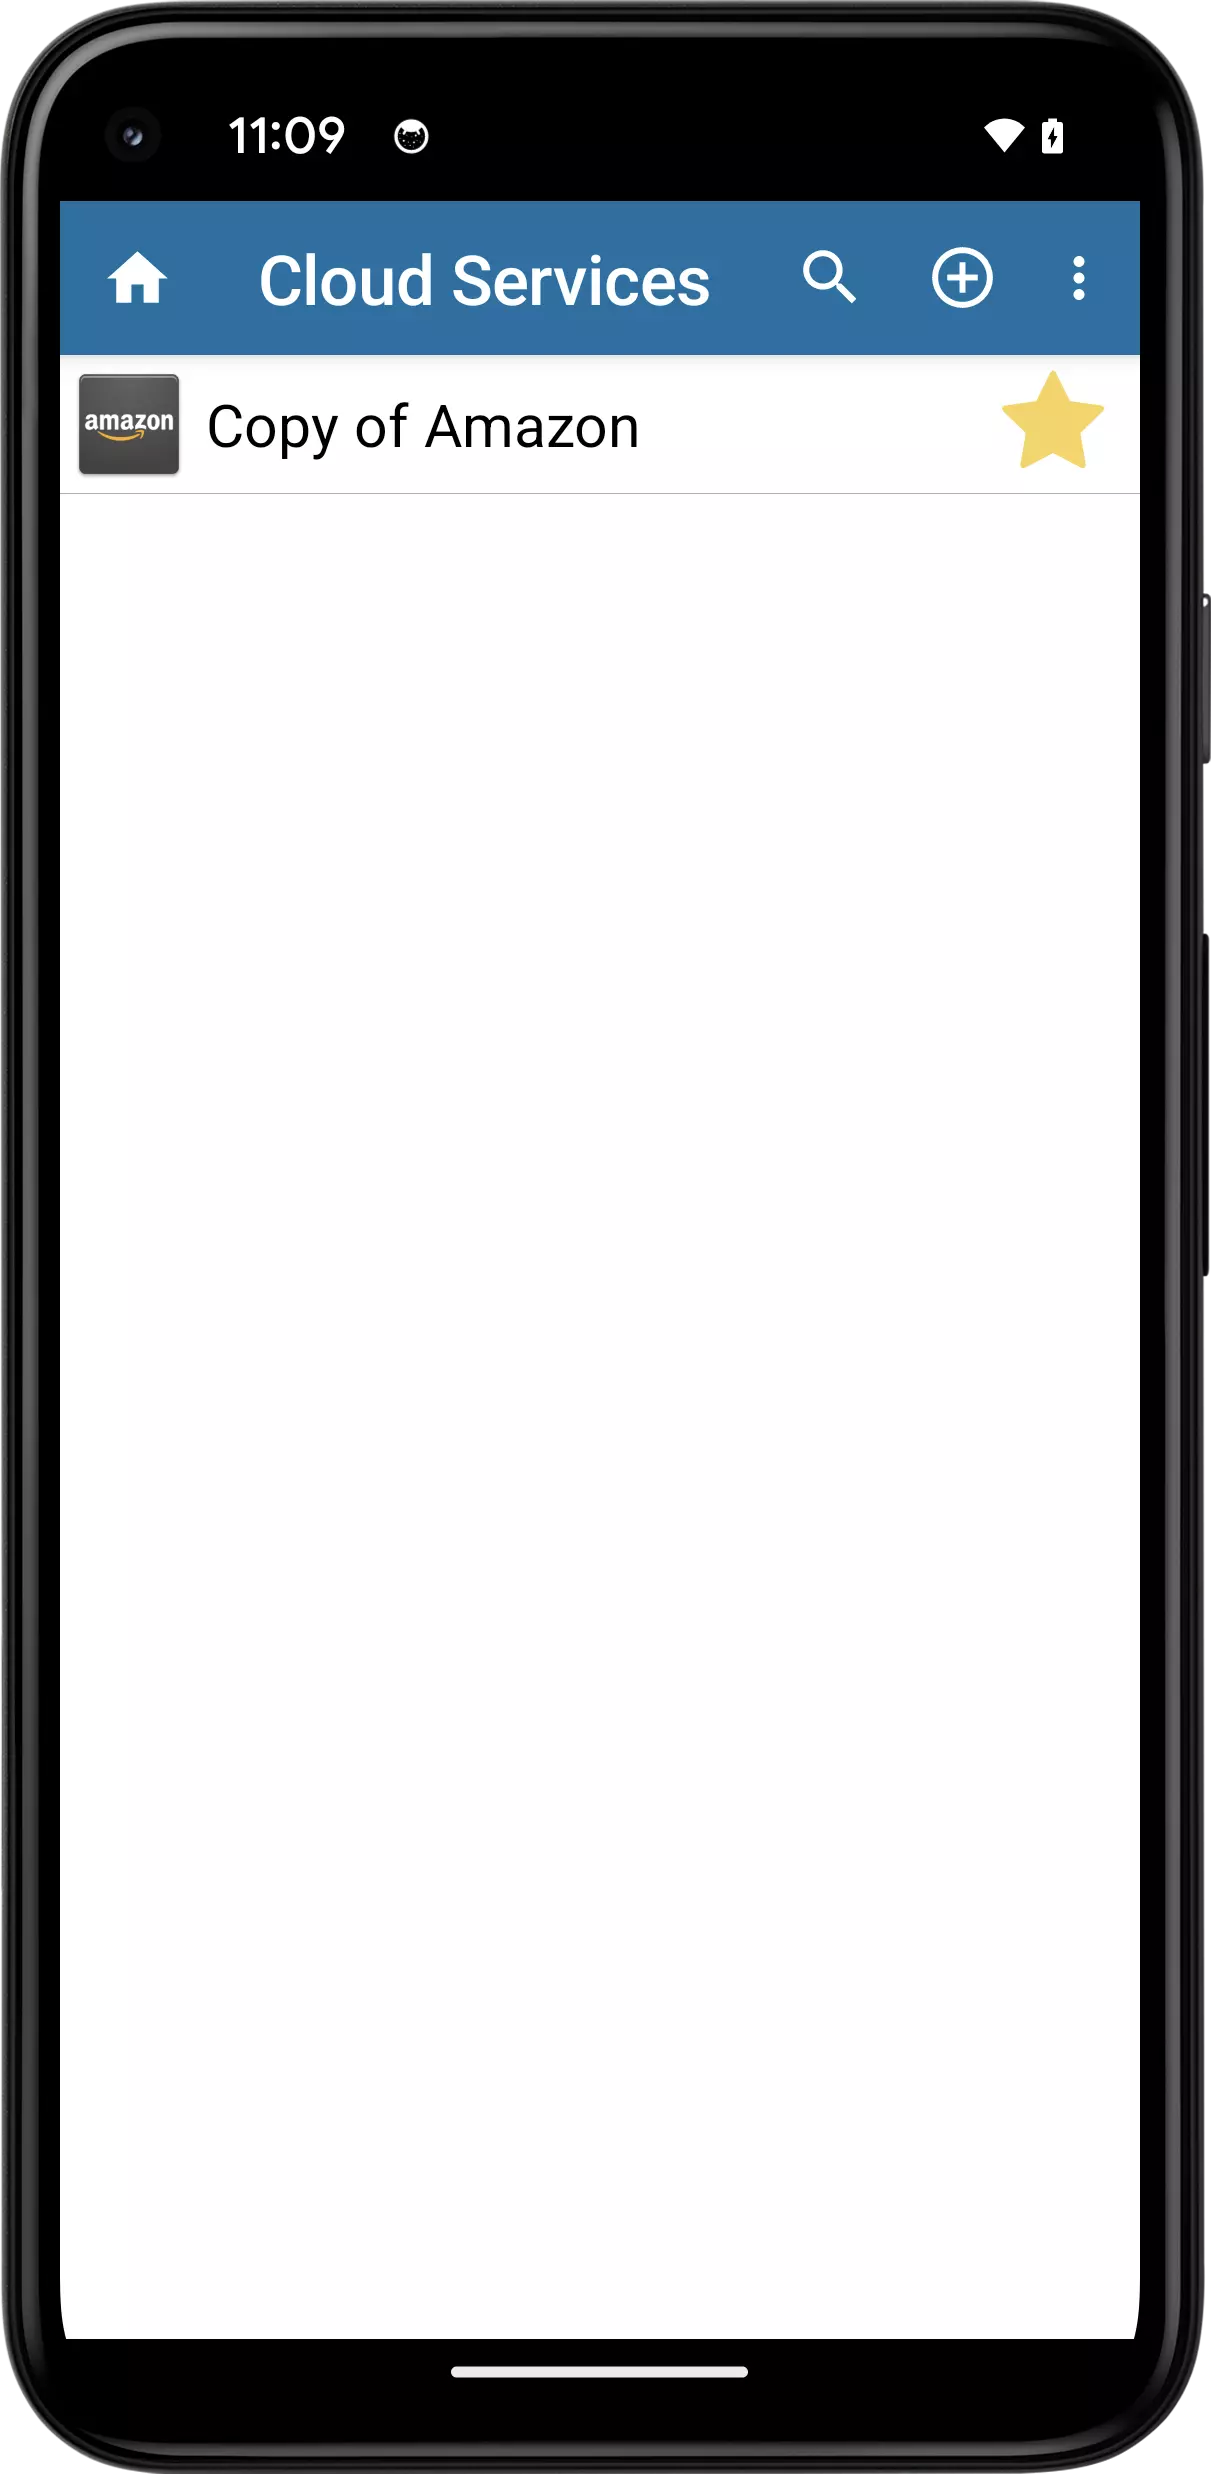
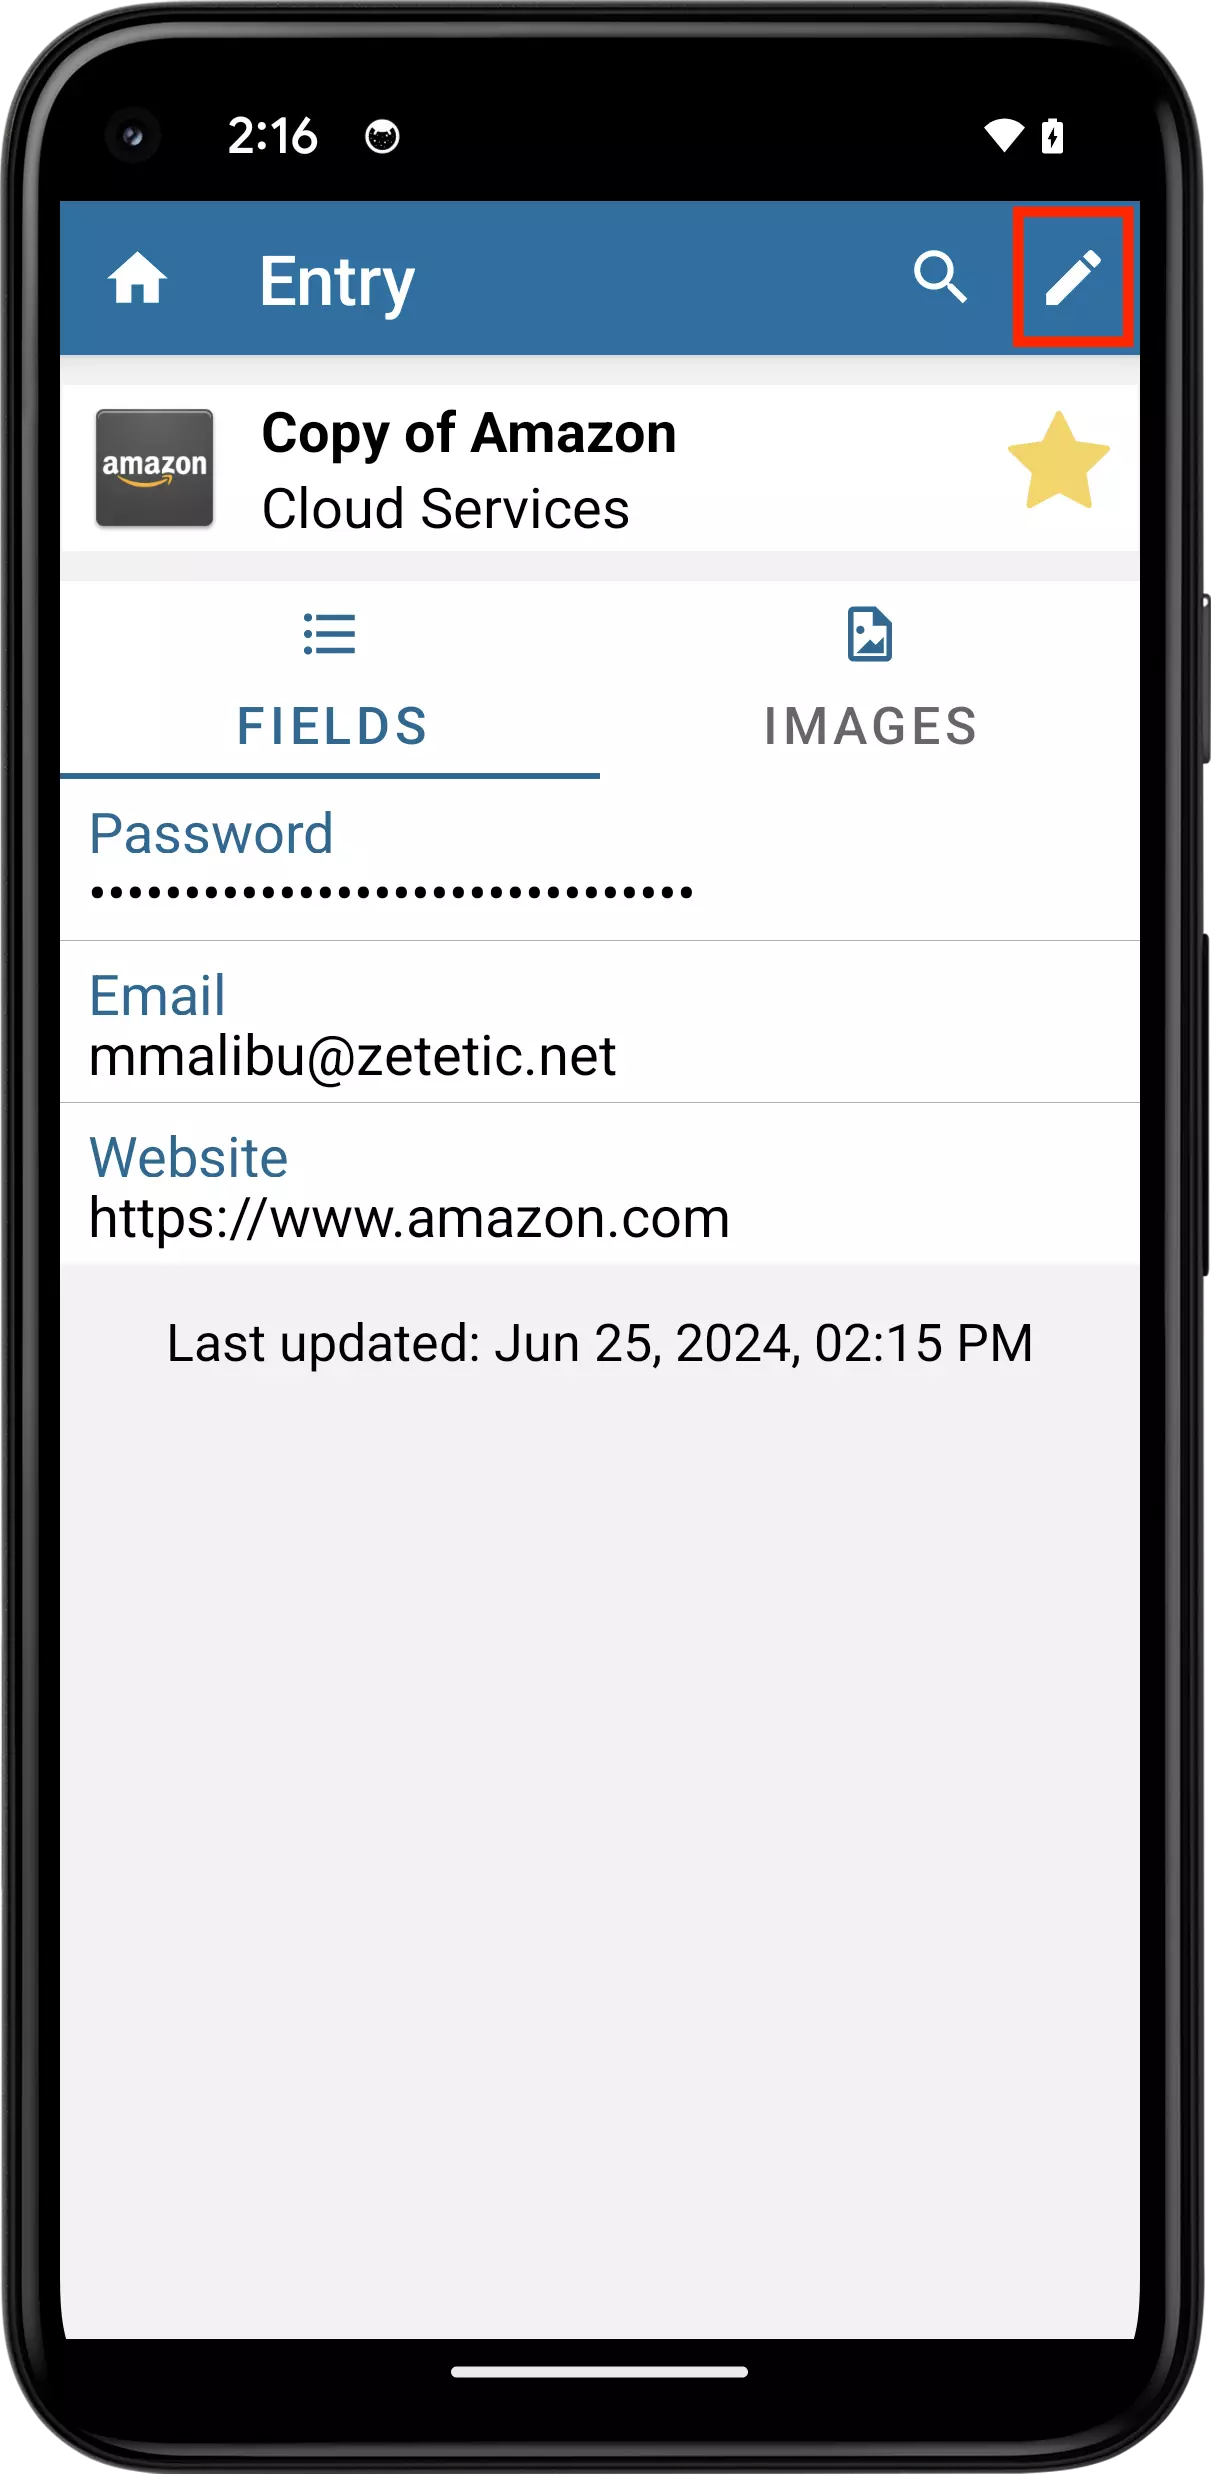
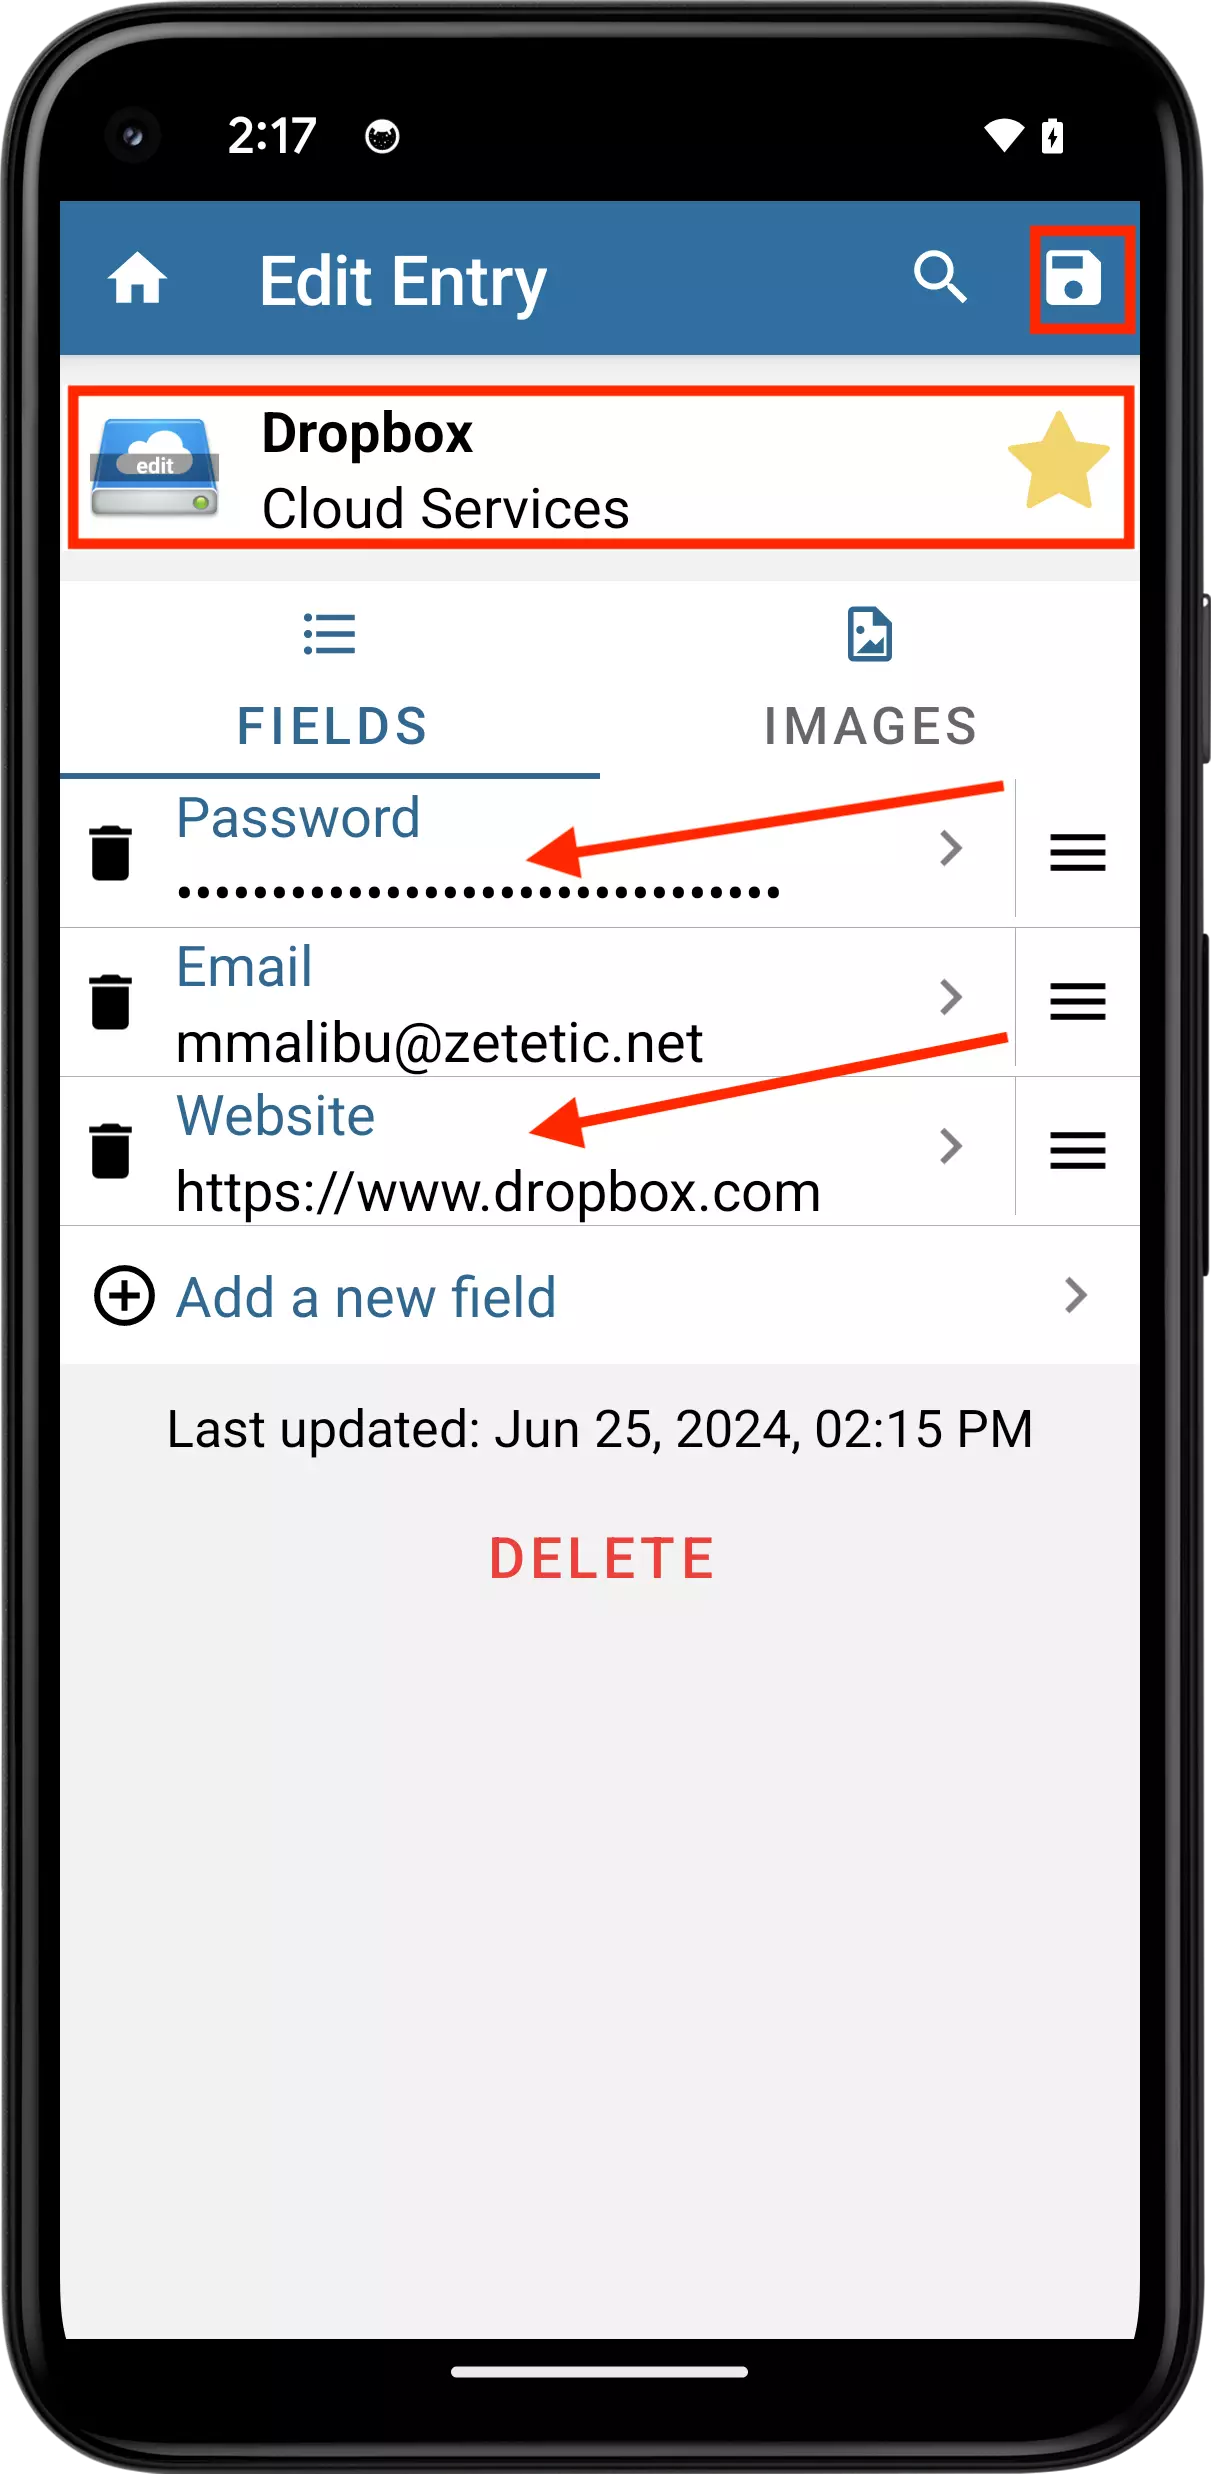
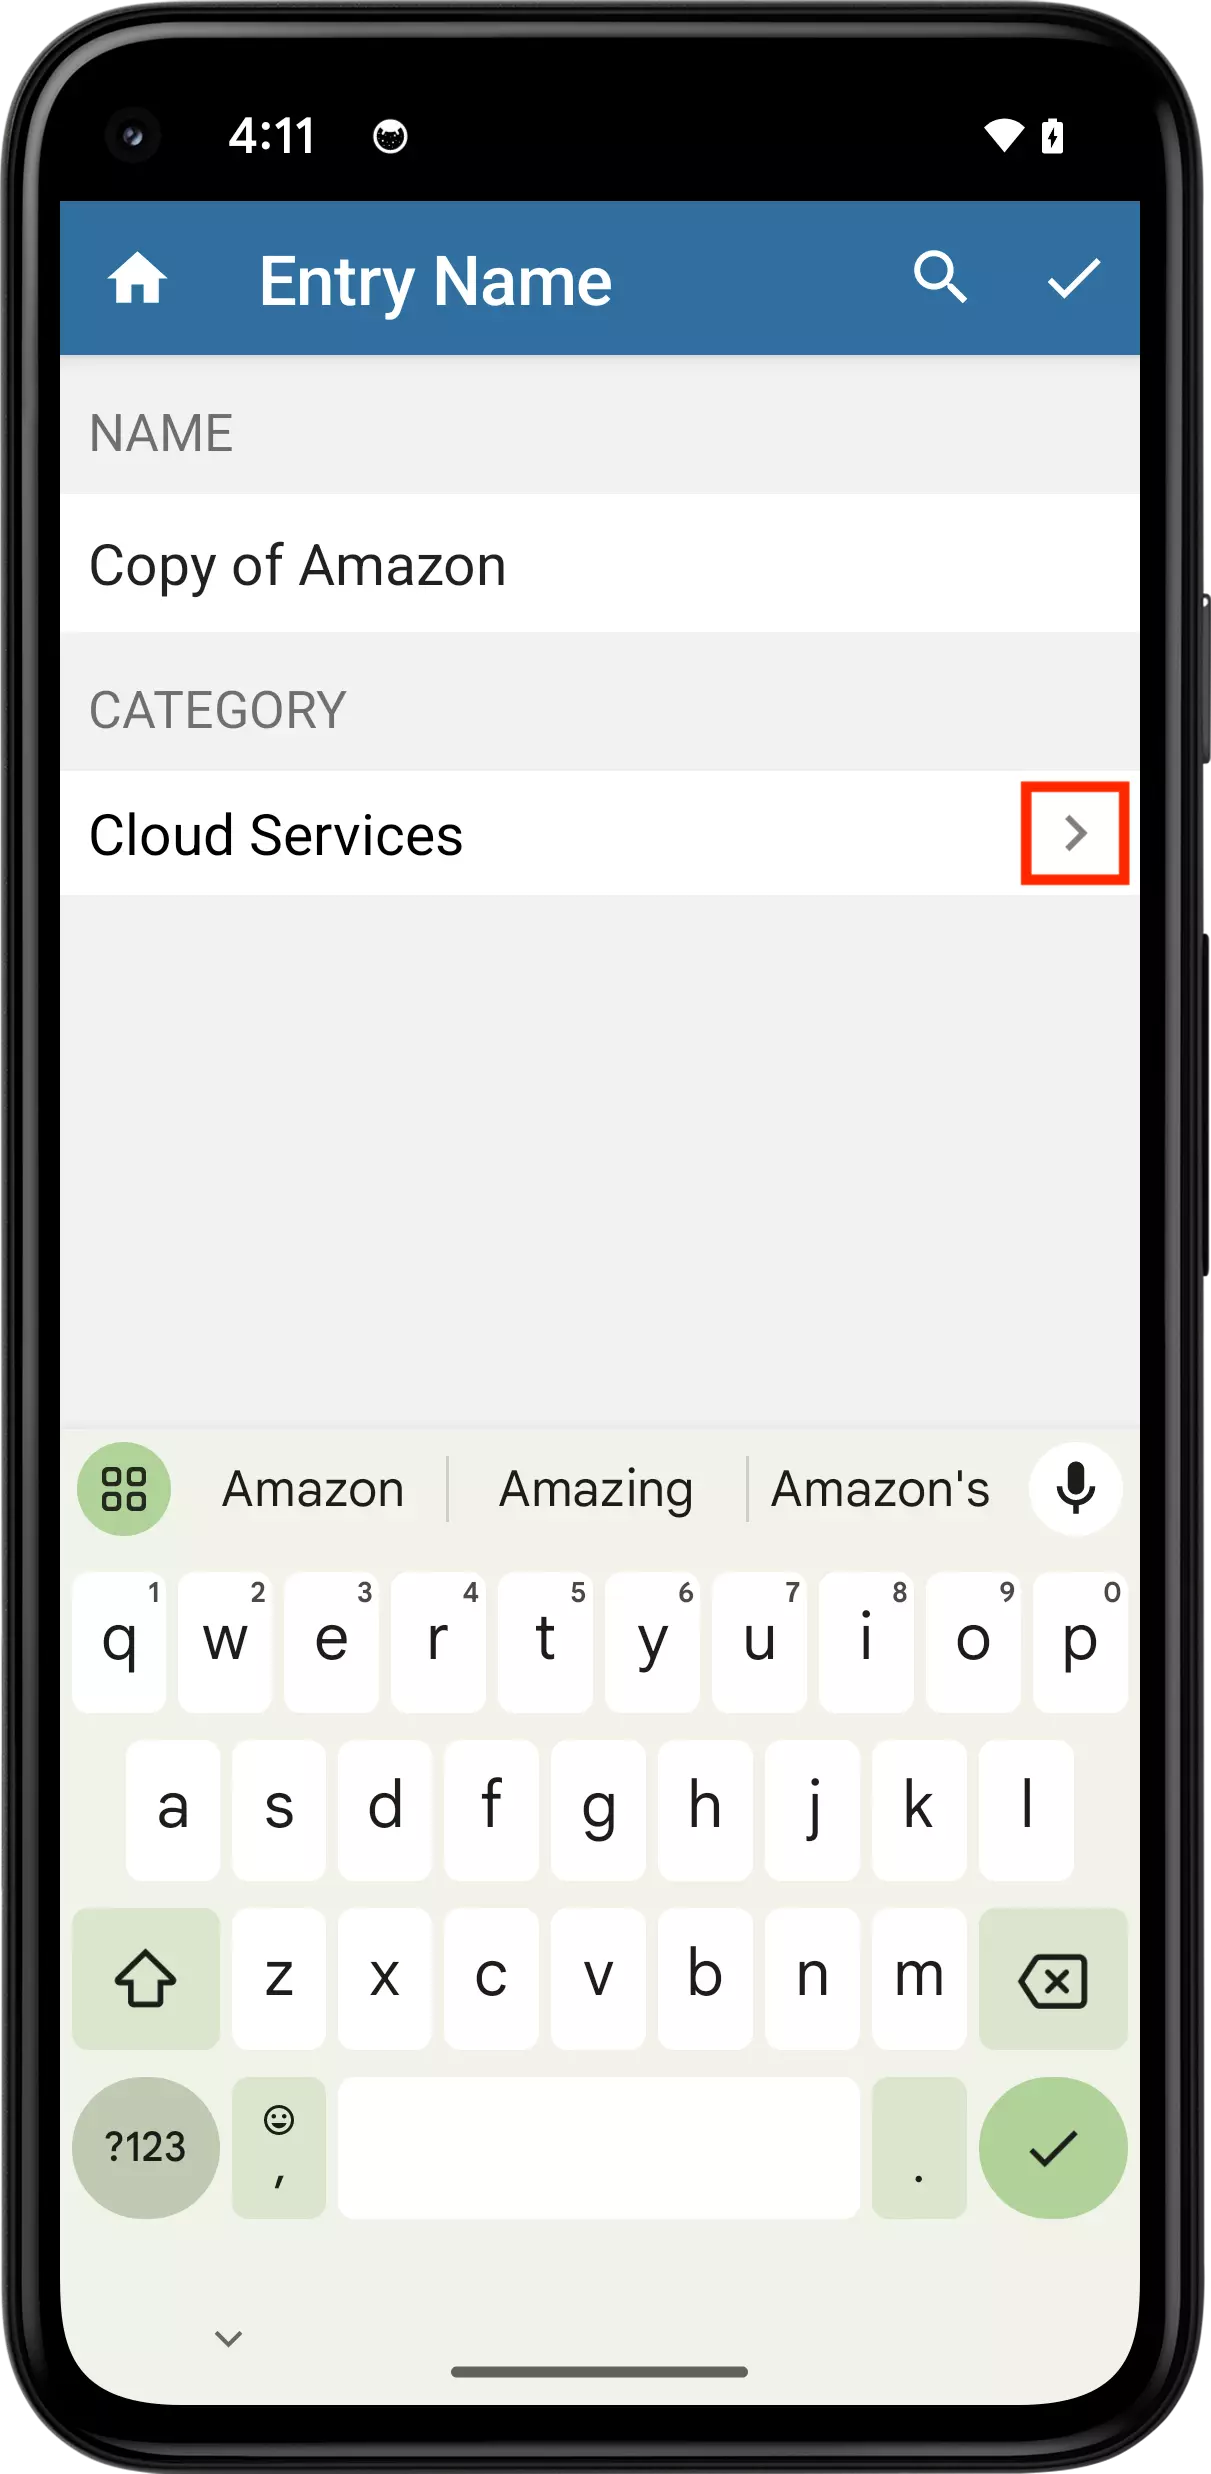
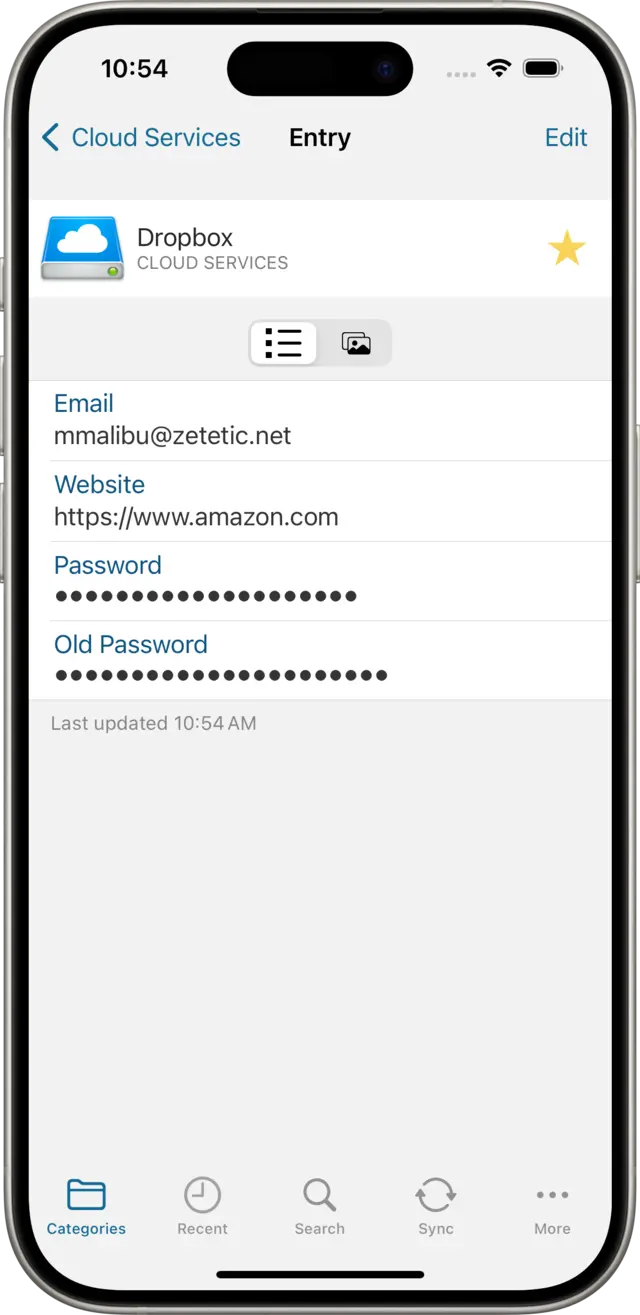
Immediately, we see a new Entry appear in the list named "Copy of Amazon". Tap on it and we see it's contains all the same fields as the original. Click on the Edit button and fill in the name and details for another account. In our case, we'll set it up as a Dropbox Entry by editing the Name, Icon, Website and Password fields as necessary. Remember to save your changes.
Codebook also allows you to Move entries. You simply long tap on the entry you would like to move and select Move Entry from the Options list. You will be shown your Category list. Tap on the category you would like to move it to. The entry will be deleted from the original category and added to the category you select next.
Let's start by creating a new Category. Tap on the Categories tab at the bottom of your iPhone's screen to navigate to the top of your records, and click on the plus button in the navigation bar.
The New Category view displays. Type in a name for the new Category (we'll use "Cloud Services"), tap on the folder icon to change its icon, and then tap on the Save button.
This creates a new Category and displays it for us. There aren't any Entries to see yet! Tap on the Back button to go back to the Categories list, and tap on the Passwords category where we previously created an Entry.
Long-press on the Entry we created previously, "Amazon" to display a menu with Editing options.
Tap on the Copy option in the menu that appears and we'll see we immediately have the option to Paste a copy of this Entry.
Now tap on the Back button again, and select the Cloud Services category. Then tap on Paste Entry.
Immediately, we see a new Entry appear in the list named "Copy of Amazon". Tap on it and we see it's almost the same as the original, with all the same Fields (the only difference is that it's not marked as a Favorite). Click on the Edit button and fill in the name and details for another account. In our case, we'll set it up as a Dropbox Entry by editing the Name, the Website, and the Password (we'll remove the Old Password field).
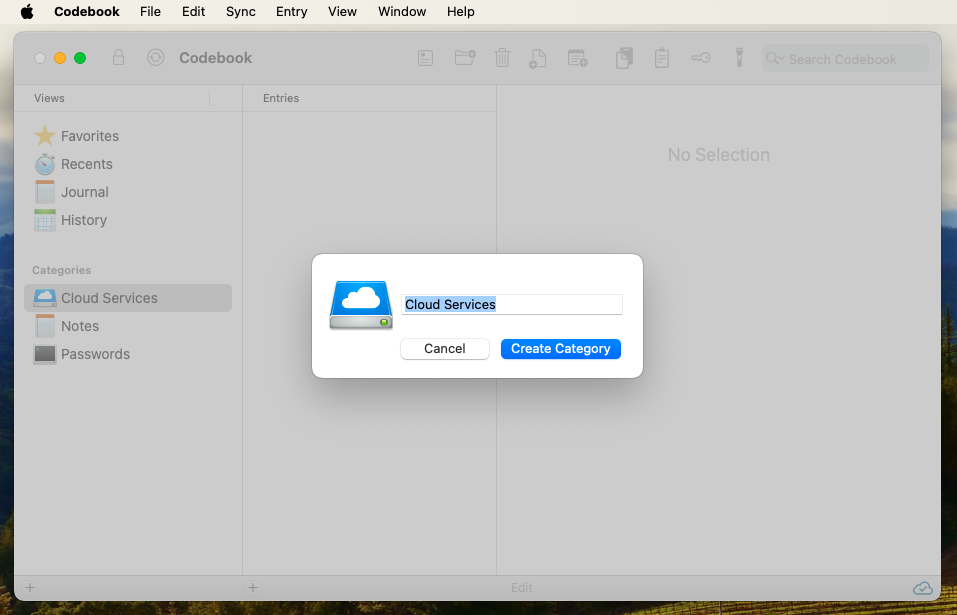
Let's start by creating a new Category. Click on the plus button at the bottom of the Categories list (⇧ ⌘ N).
The Create New Category sheet appears modally over the Main Window. Type in a name for the new Category (we'll use "Cloud Services"), click on the folder icon to change its icon, and then click on the Create Category button to save it to the Categories list.
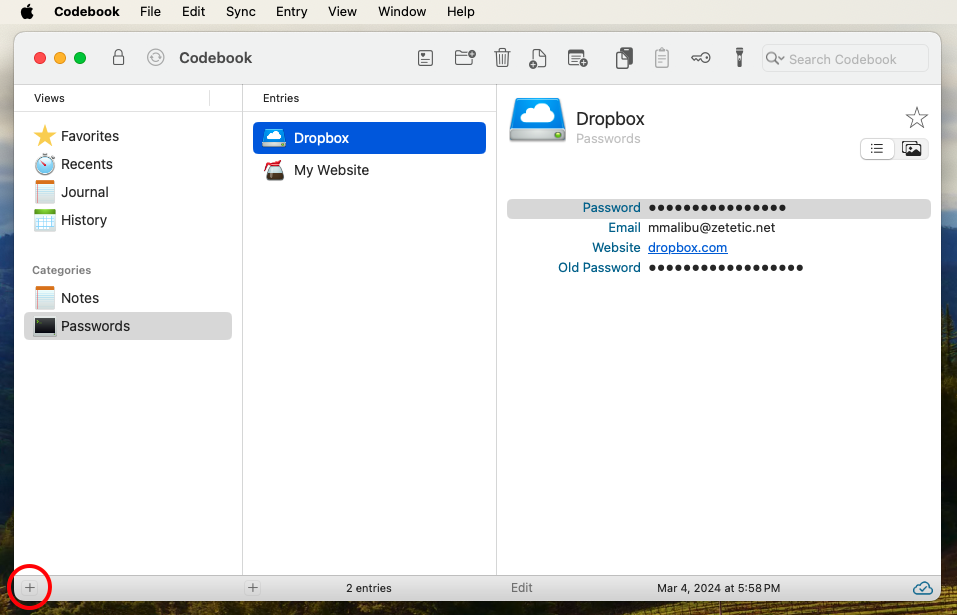
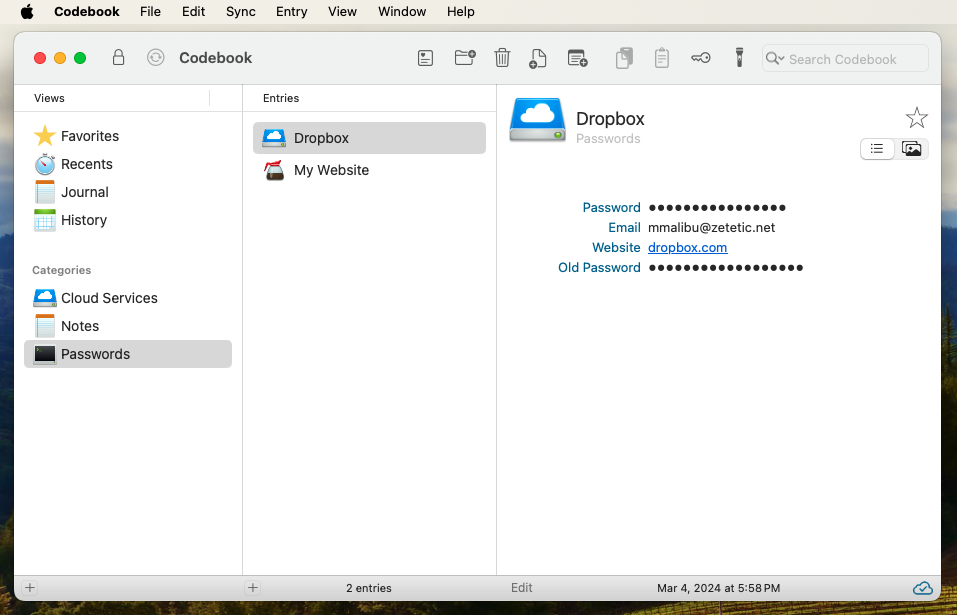
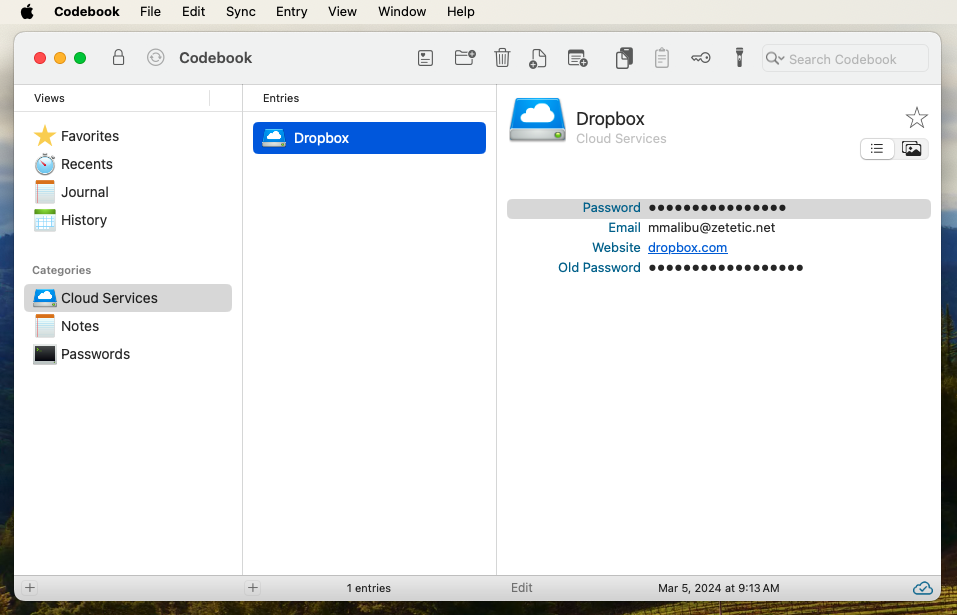
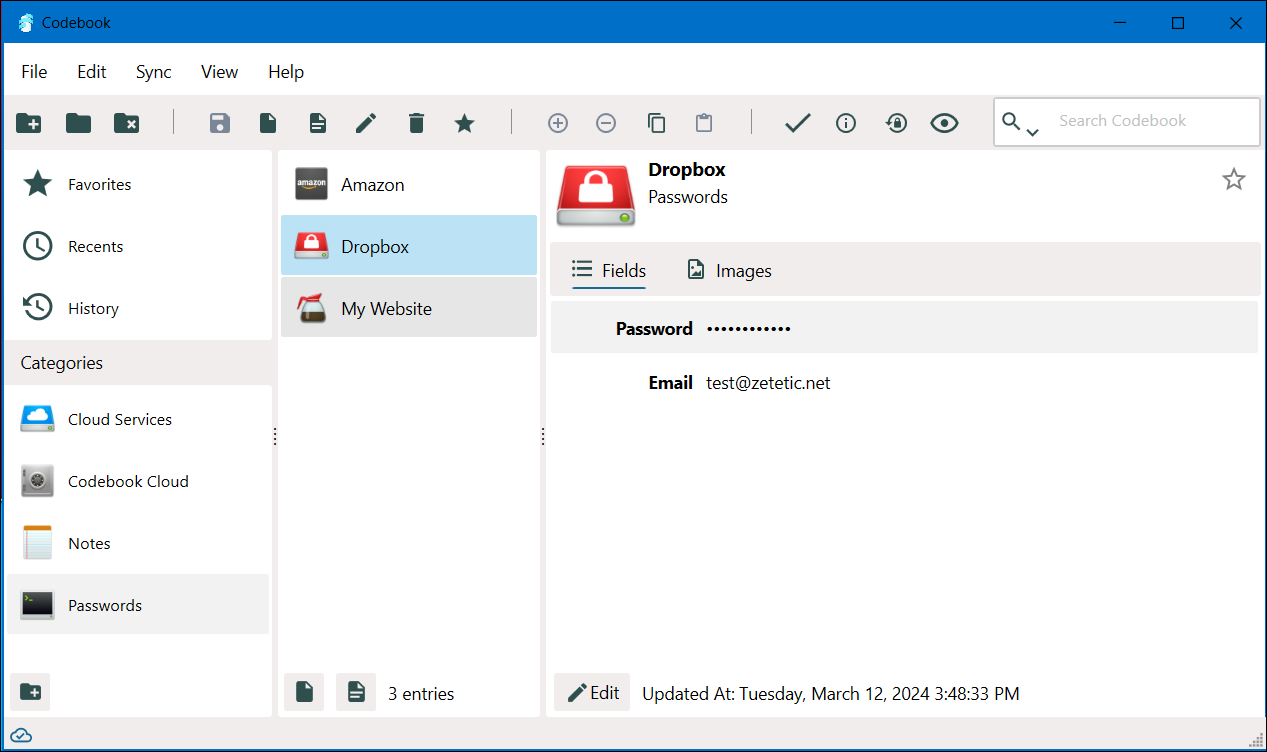
Next click on the Passwords Category so that the new Entry we've been working with ("Dropbox") is visible in the Entries list.
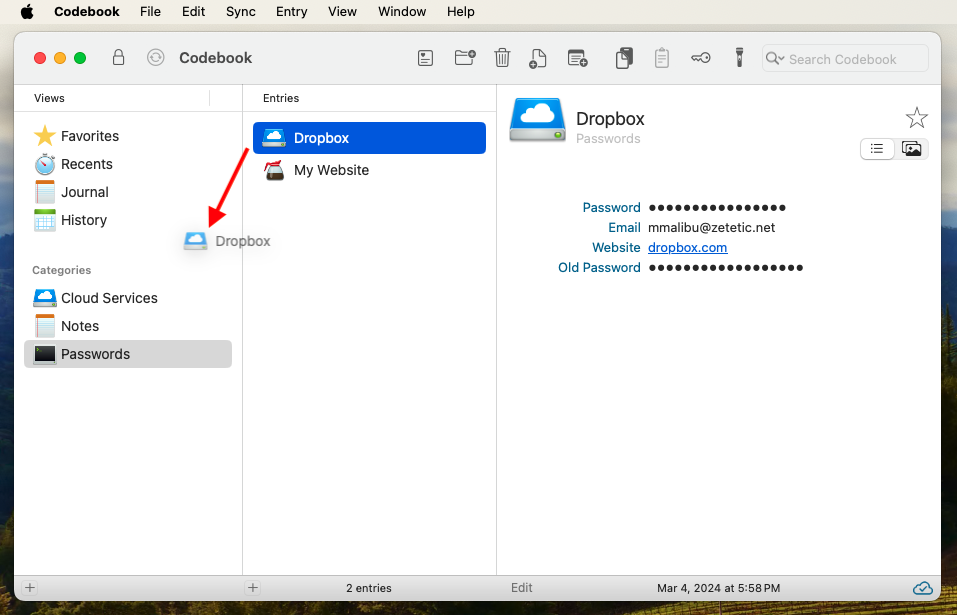
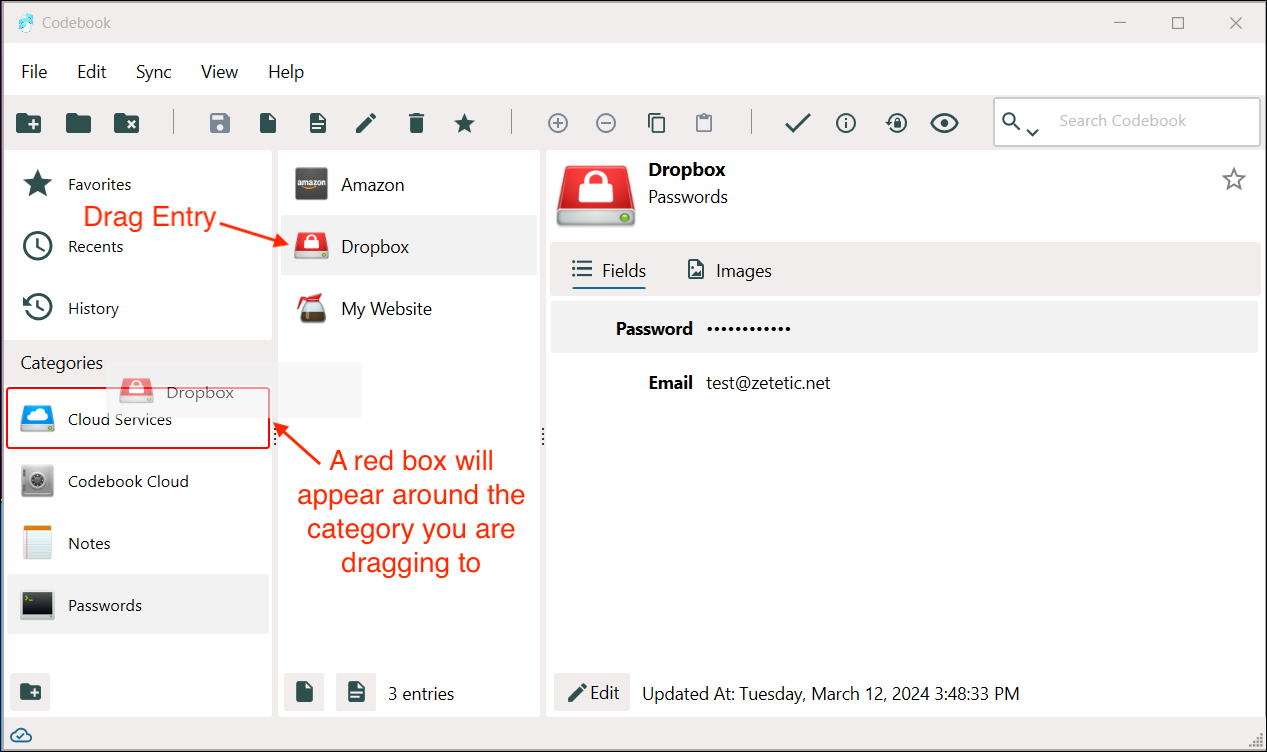
Click on the Entry's row in the Entries list and drag it into the new Category you created ("Cloud Services").
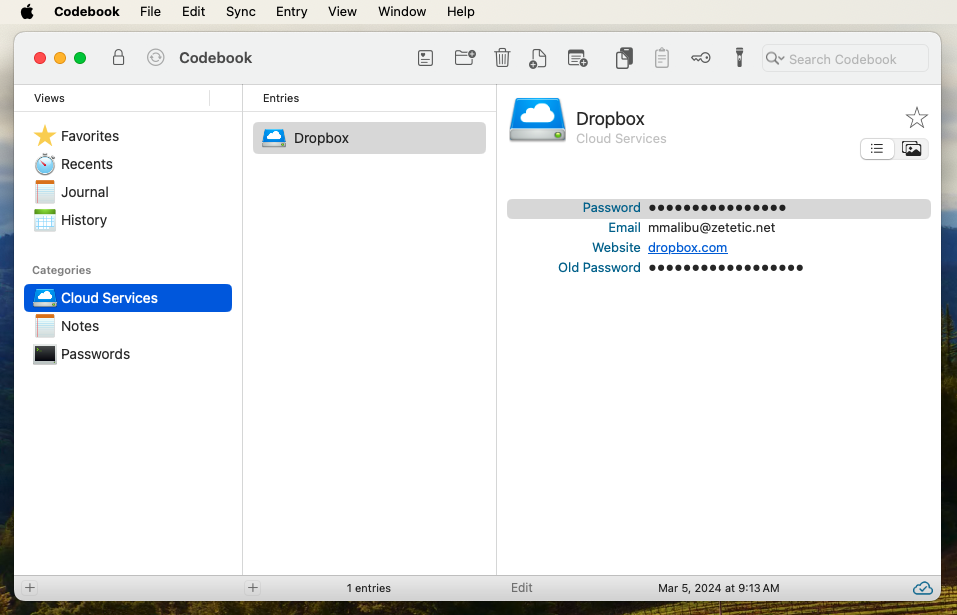
And that's it! Easy as drag and drop. Click on Cloud Services to see the Dropbox entry in the Entries list.
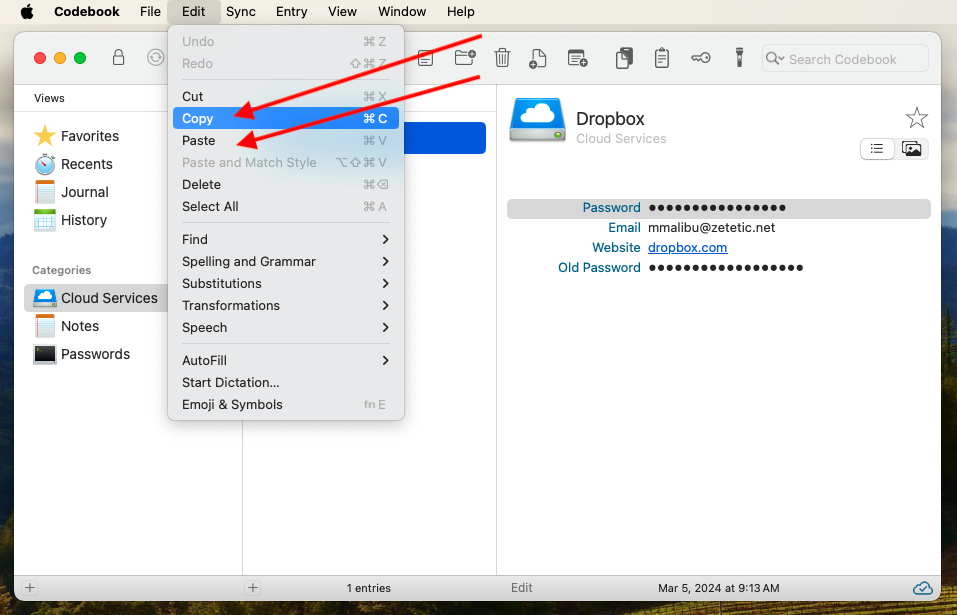
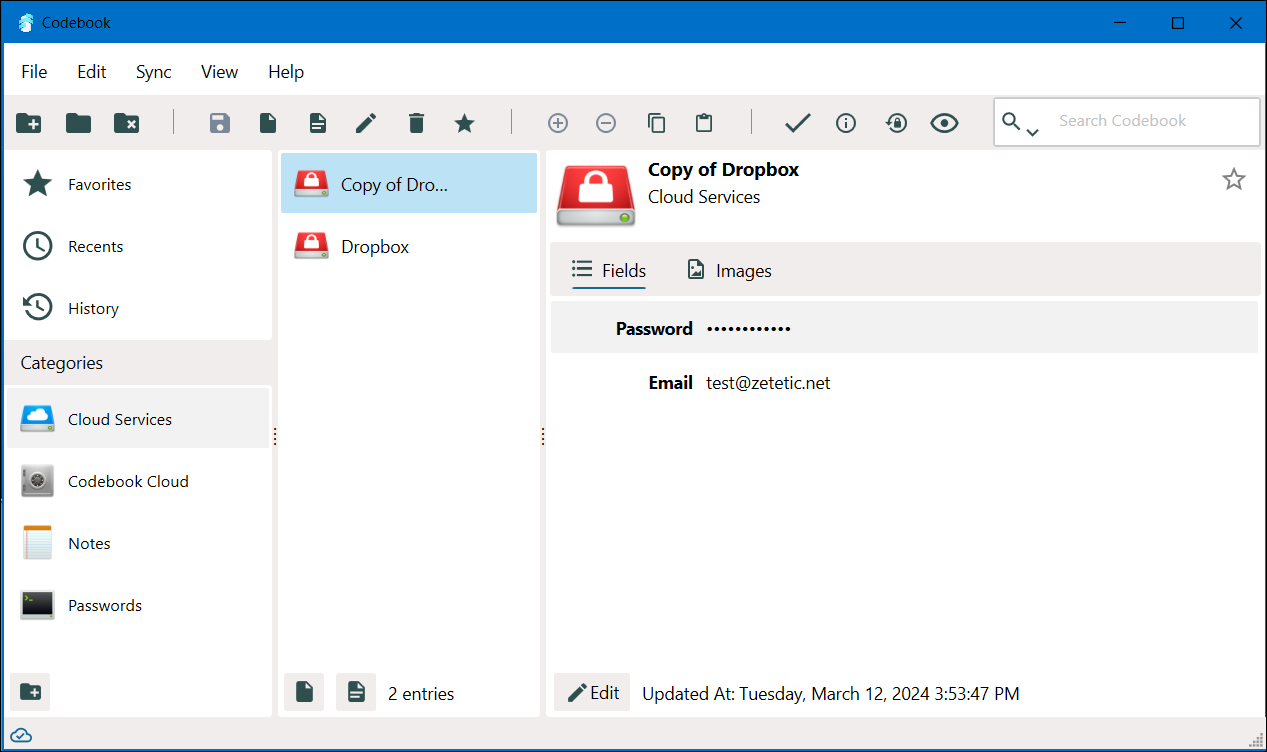
Now let's say we want to copy an Entry, because we like the way we have it set up and we want to re-use that for another account. Click on the Entry we dragged, Dropbox, in the Entries list so that it is selected.
Click on the Edit menu and select Copy. Click on the Edit menu again, and choose Paste. A copy of our Entry is created and pasted into the currently selected Categories, appearing in the Entries list as "Copy of Dropbox". When the Entry is selected we see it has all the same fields.
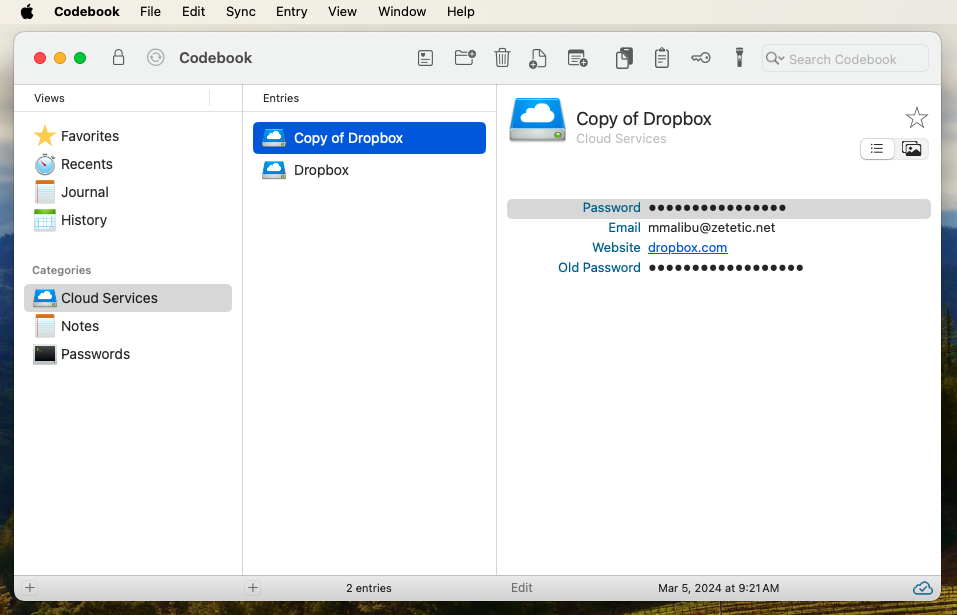
You don't have to paste copied Entries into the same Category. You can copy any Entry that appears in the Entries list, choose another Category, and paste the copied Entry into that Category from the clipboard.
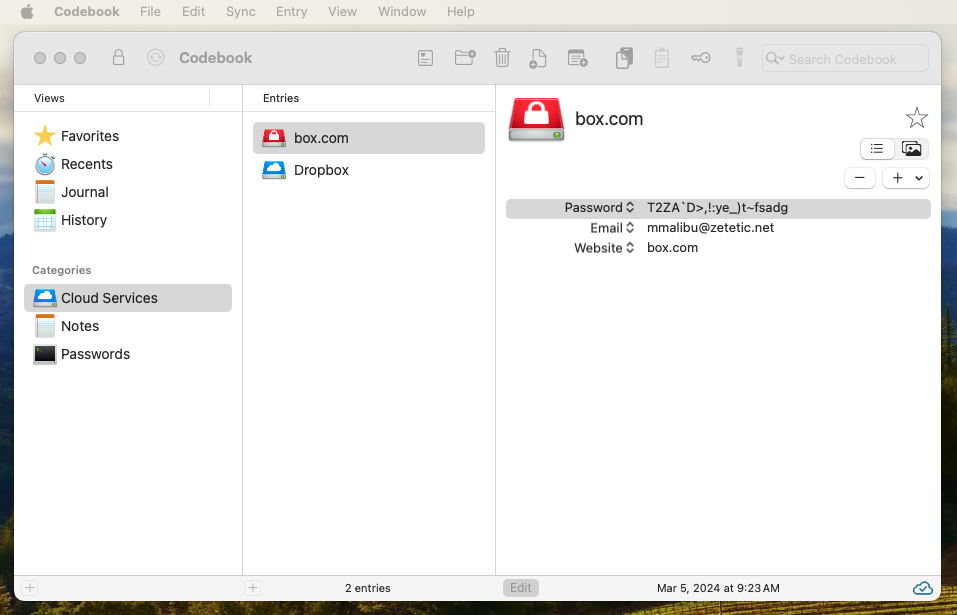
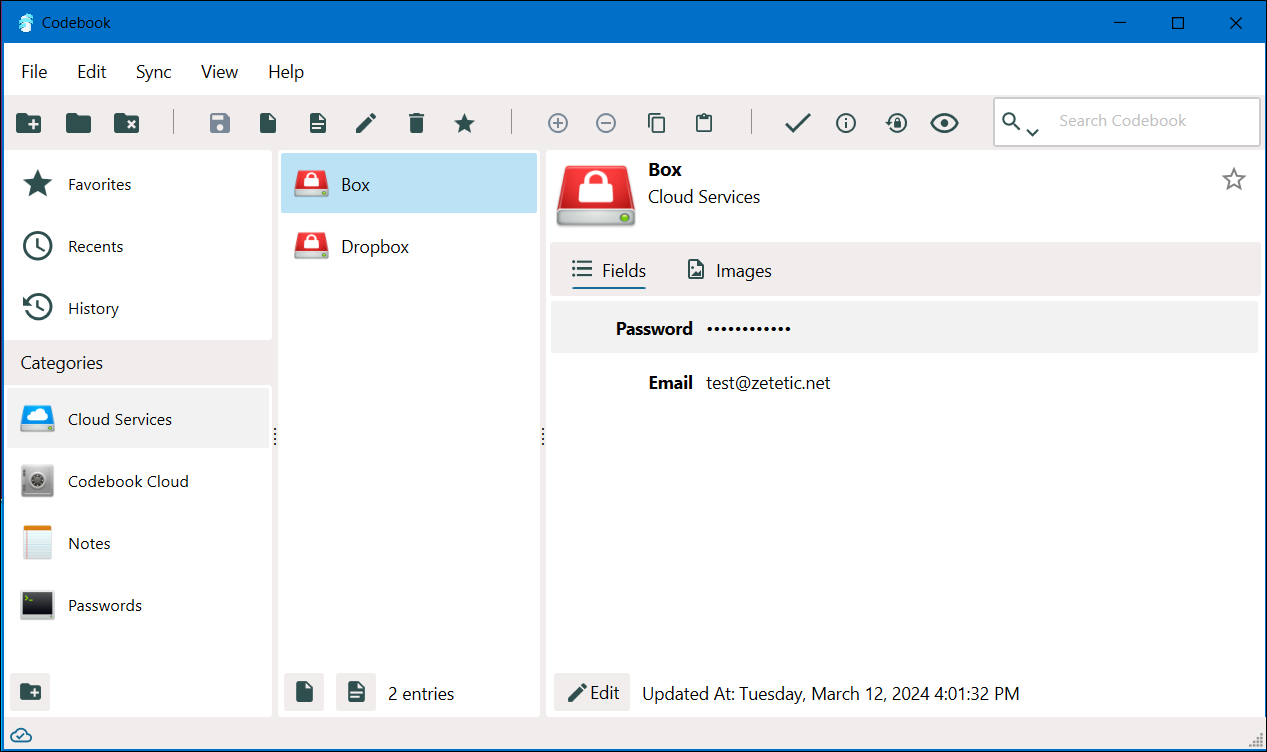
Let's edit the newly copied Entry, and use it for an account with another service, box.com. All we need to do is update the icon, type in the new name, create a new random password, we can leave our email address the same, delete old password and update the Website field.
Let's start by creating a new Category. Click on the plus button at the bottom of the Categories list (⇧ CTRL N).
The Create New Category popup appears over the Main Window. Type in a name for the new Category (we'll use "Cloud Services"), click on the folder icon to change its icon, and then click on the Save button to save it to the Categories list.
Next click on the Passwords Category so that the new Entry we've been working with ("Dropbox") is visible in the Entries list.
Click on the Entry's row in the Entries list and drag it into the new Category you created ("Cloud Services").
And that's it! Easy as drag and drop. Click on Cloud Services to see the Dropbox entry in the Entries list.
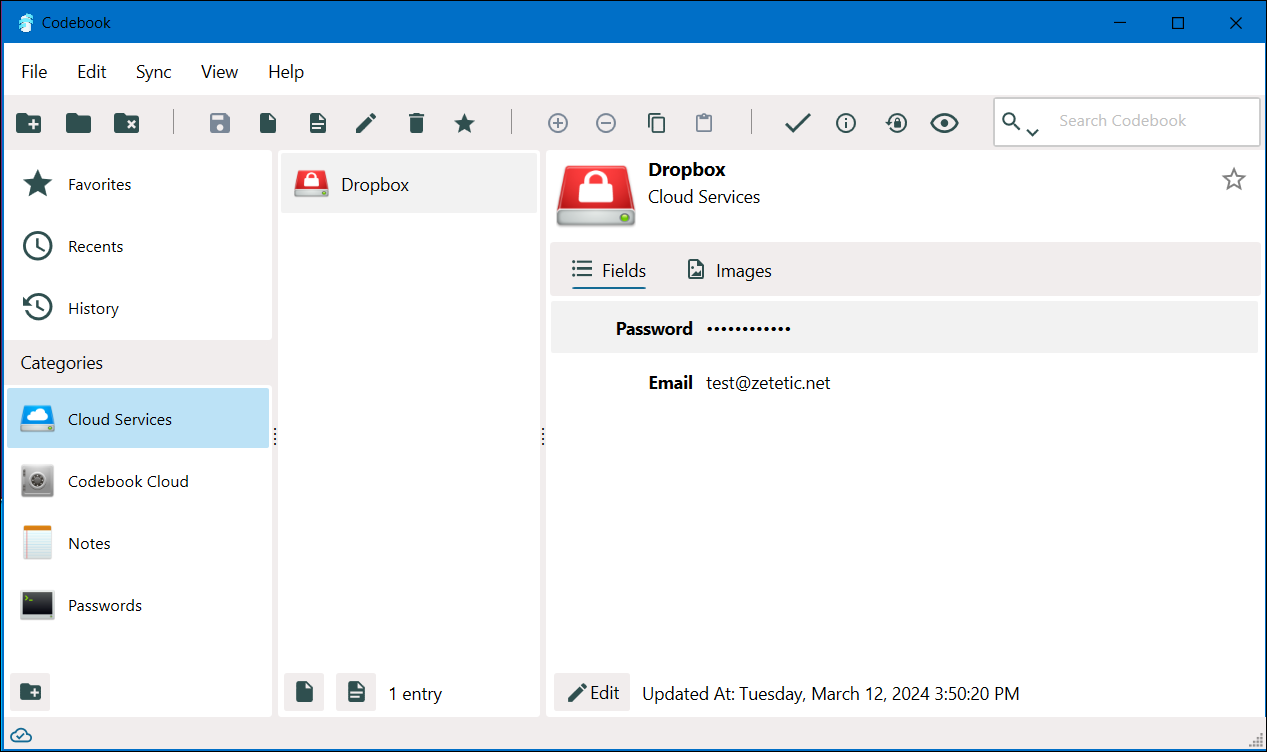
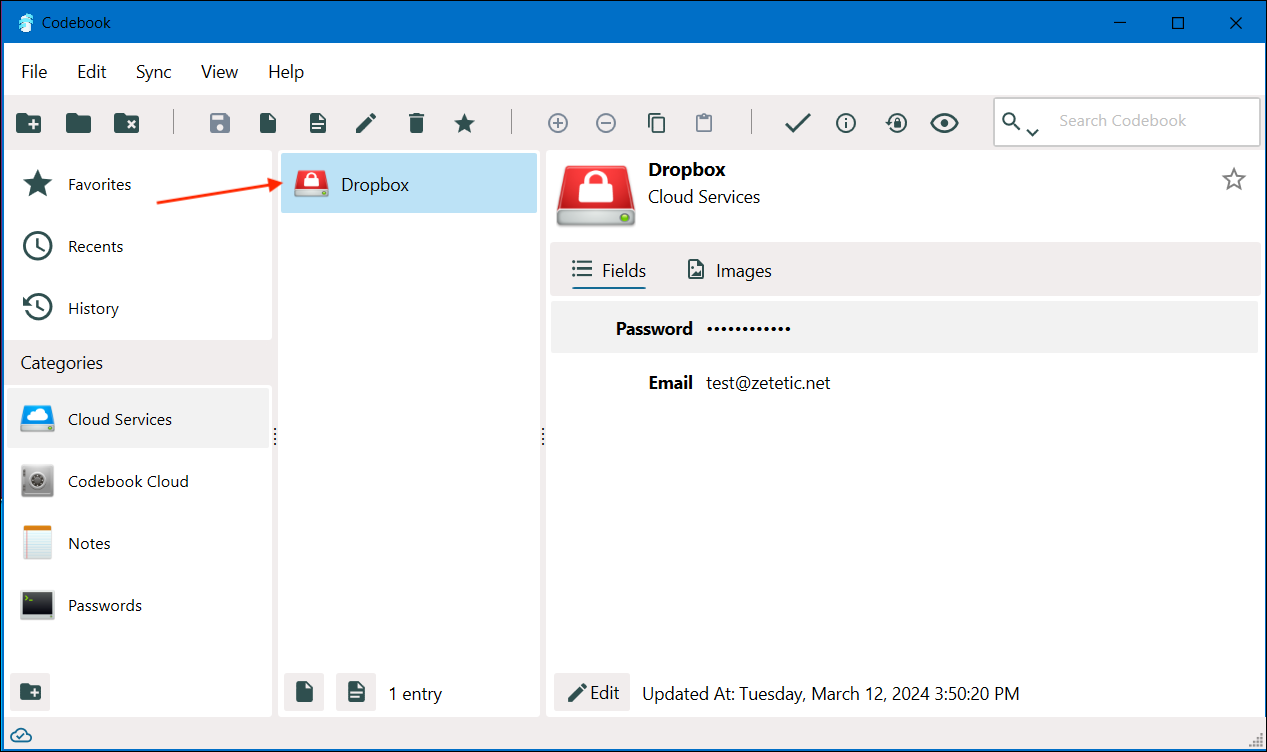
Now let's say we want to copy an Entry, because we like the way we have it set up and we want to re-use that for another account. We will copy the Dropbox Entry. Click on Dropbox in the Entries list so that it is selected.
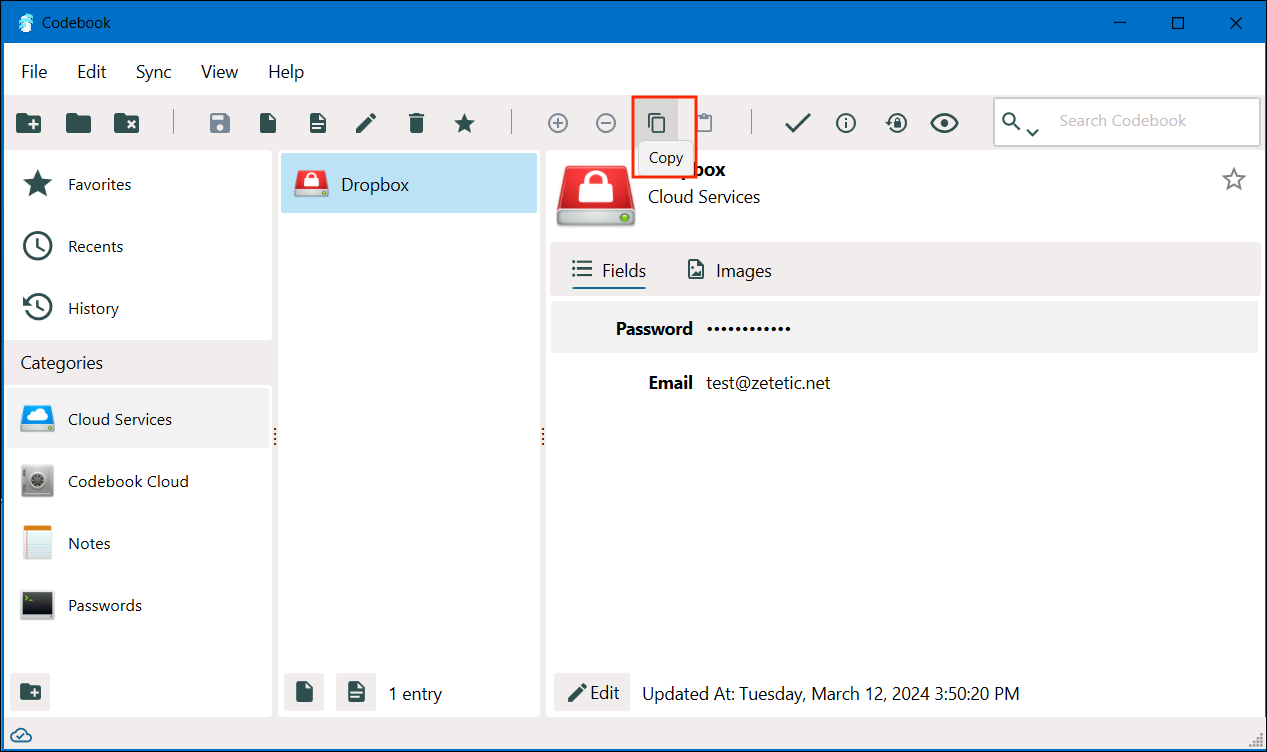
Click on the Copy Button.
Click on the Paste Button.
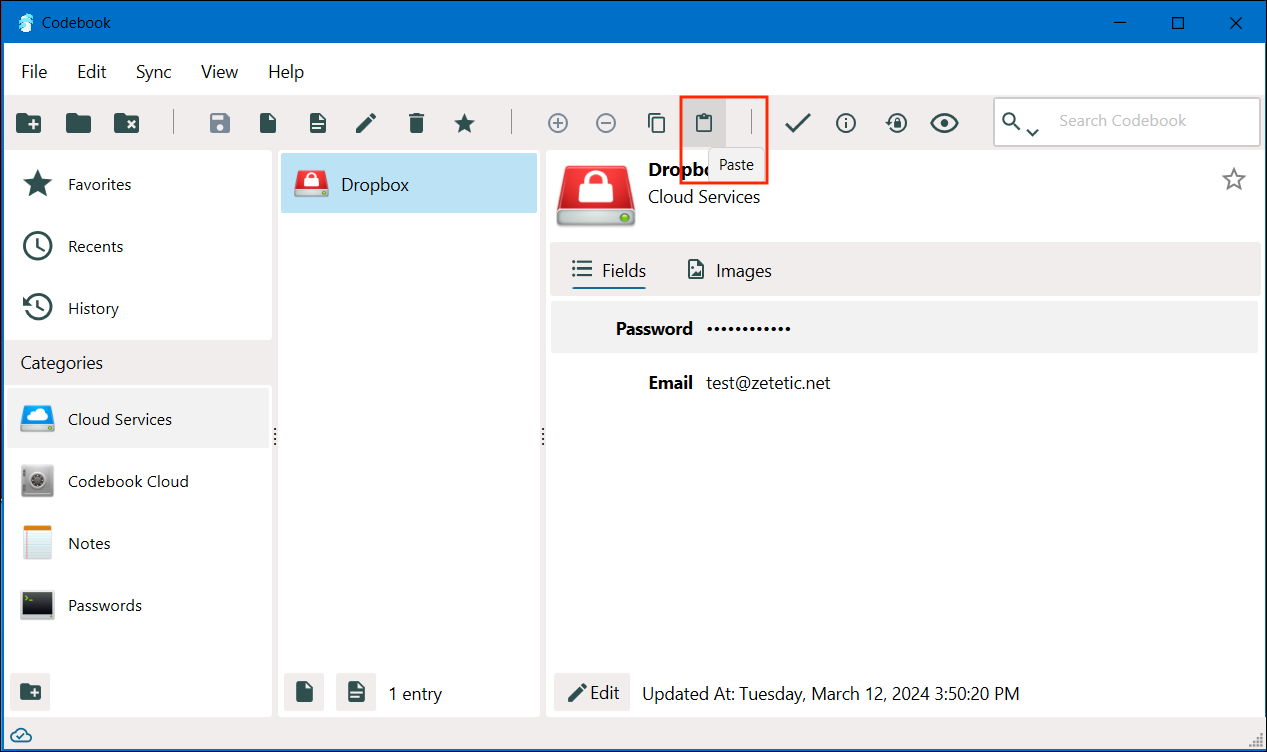
A copy of our Entry is created and pasted into the currently selected Category, appearing in the Entries list as "Copy of Dropbox". When the Entry is selected we see it has all the same fields.
You don't have to paste copied Entries into the same Category. You can copy any Entry that appears in the Entries list, choose another Category, and paste the copied Entry into that Category from the clipboard.
Let's edit the newly copied Entry, and use it for an account with another service, box.com. All we need to do is change the icon, type in the new name, create a new random password, we can leave our email address the same.
The Entries list supports multiple selection, so you can drag more than one Entry into another Category at once.
