Adjusts the information on this page by operating system
Once you've started using Codebook's Sync feature, you'll eventually want to add a new computer or other mobile device to the family of devices you are syncing. Since your Sync Key is used to encrypt/decrpyt your data, the same Sync Key is used for all of your Codebook devices so the data can be synced.
Now that you have Codebook installed on another device, you will want set it up to sync with your Codebook Cloud account so your data automatically syncs with Codebook running on other devices. This is a 3 step process: (1) Installing Codebook, (2) Importing your Sync Key and (3) Setting your Sync Preference.
Install Codebook
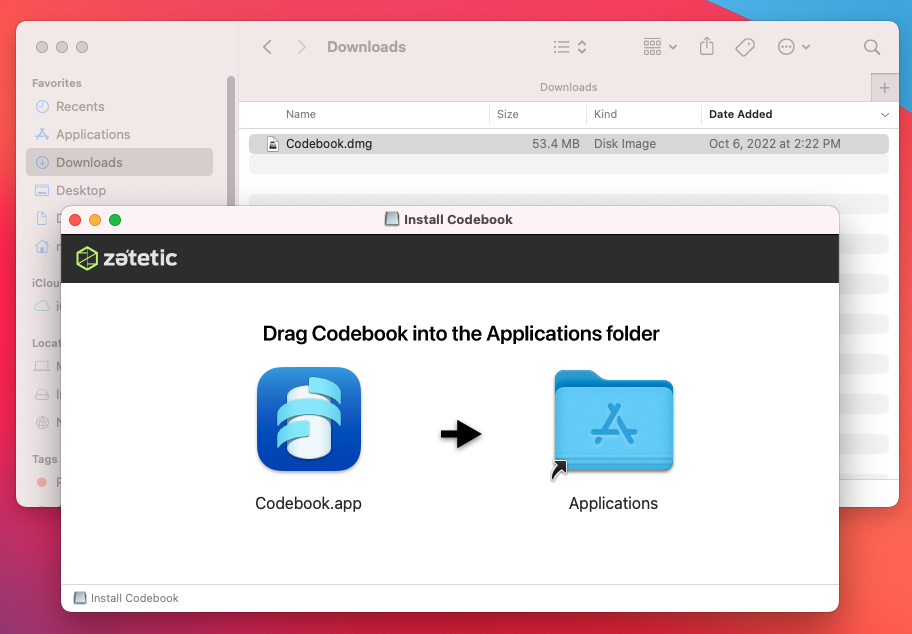
Codebook.dmg (it should be in your Downloads folder).In the Install Codebook window that opens, drag and drop the Codebook icon onto the Applications folder to install the app.
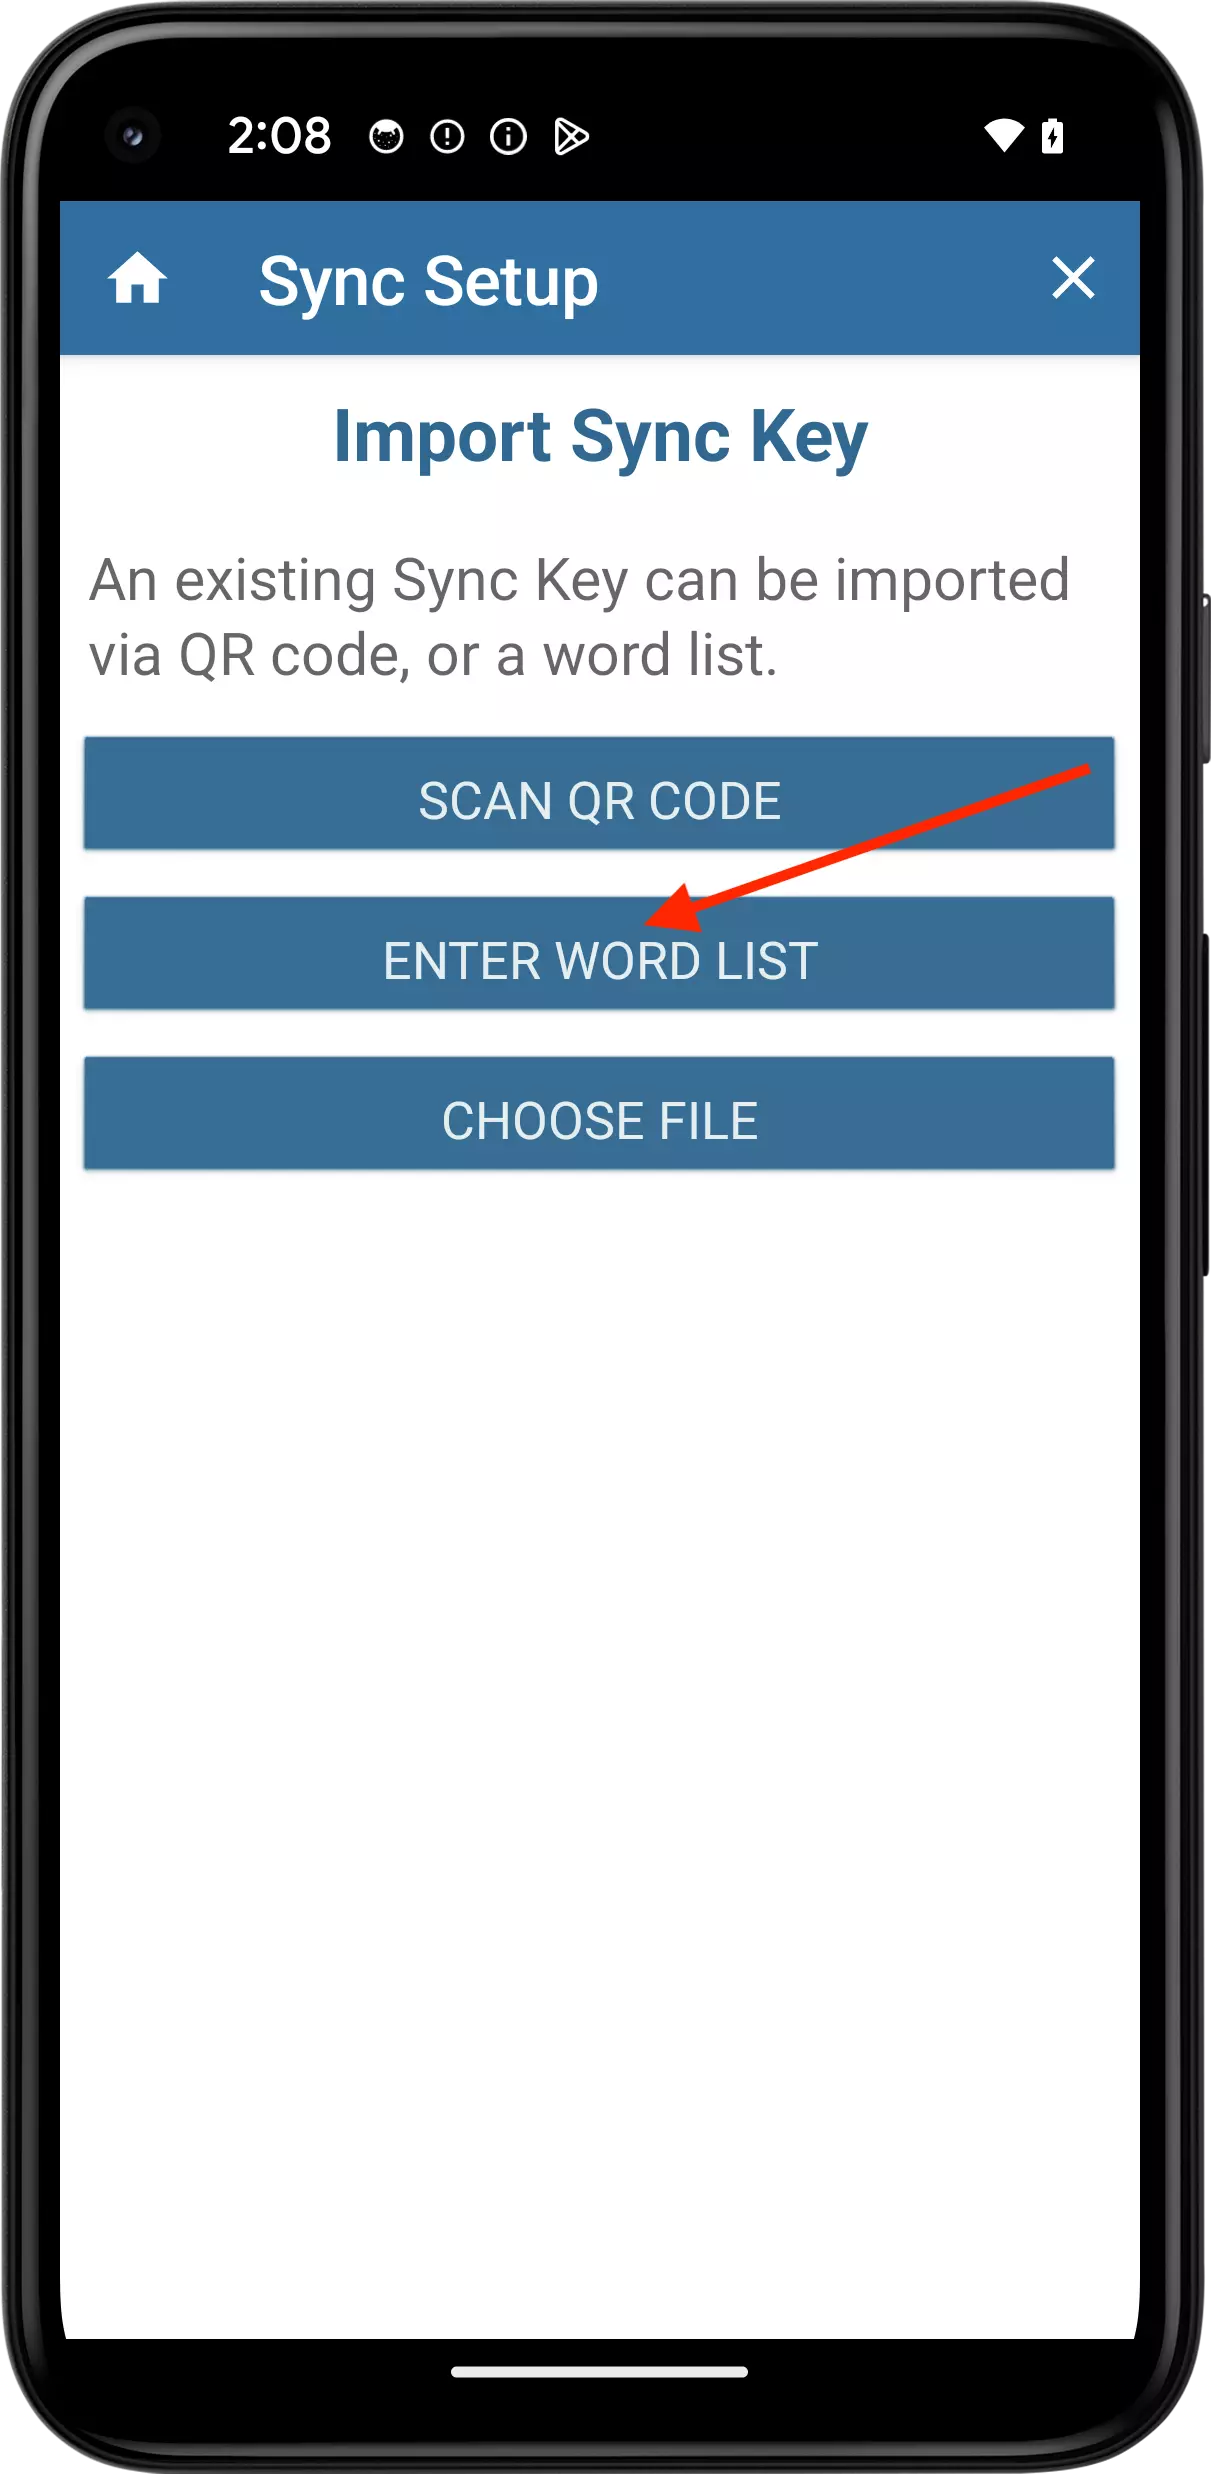
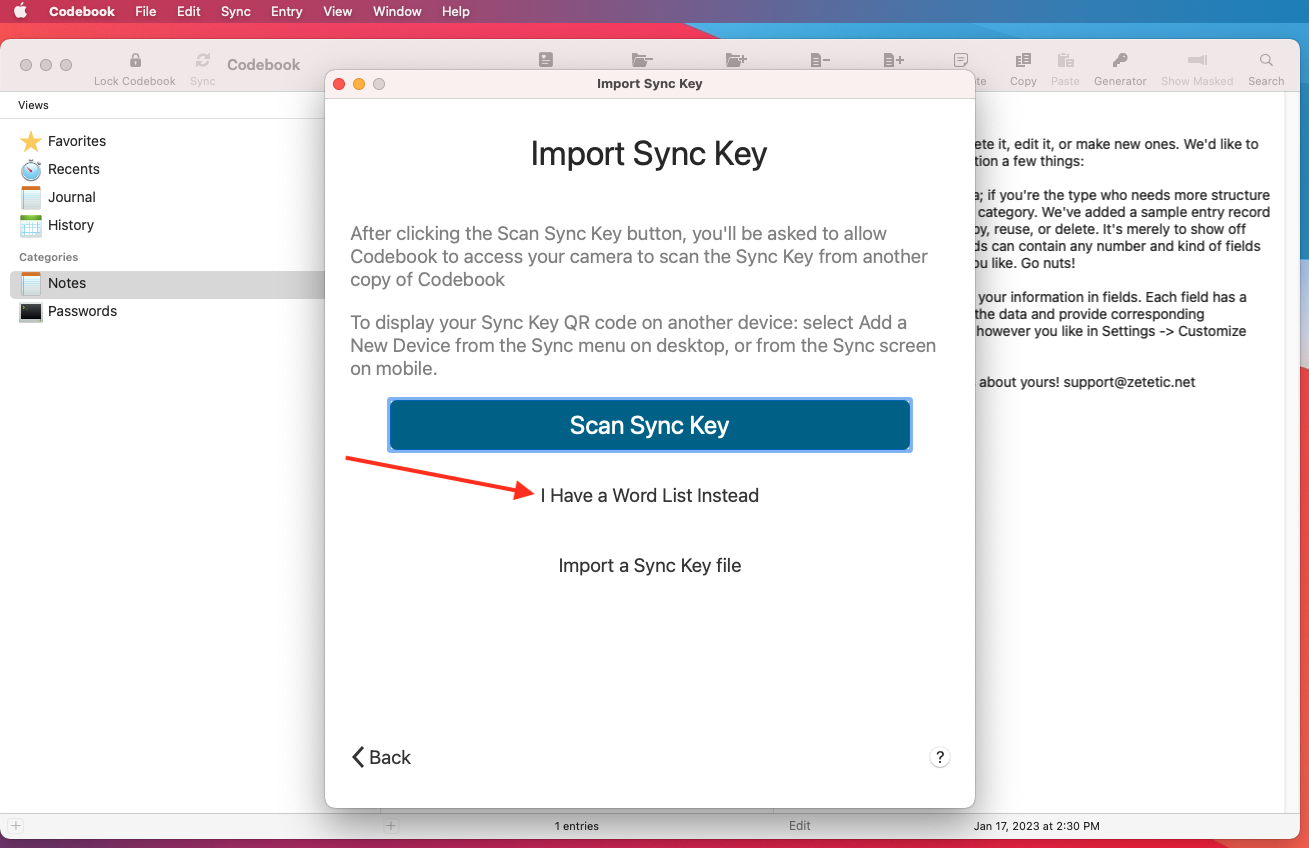
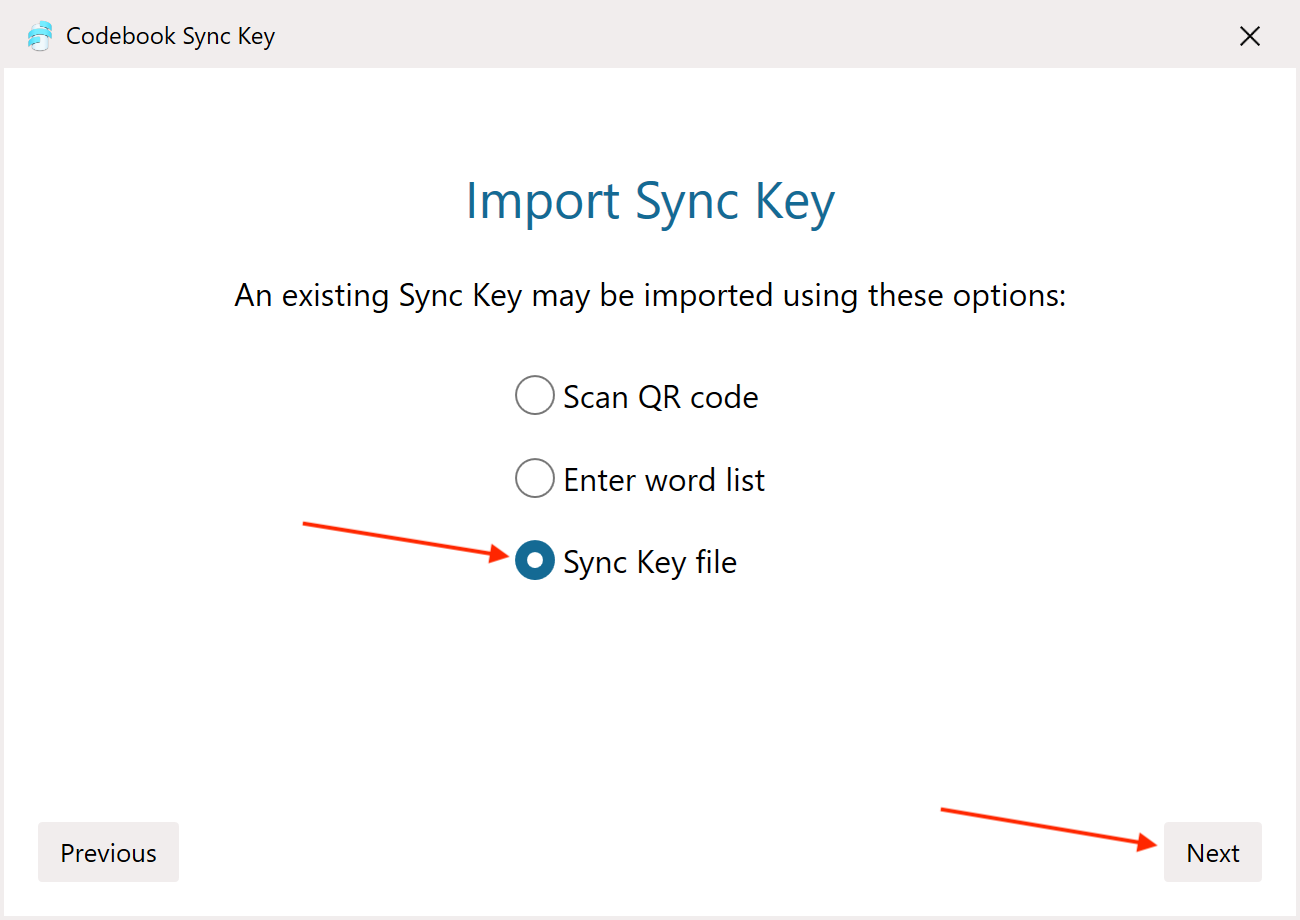
CodebookSetup.msi (or choose Run if prompted by your browser).Importing your existing Sync Key: There are 3 ways to import your Sync Key. You select the method you will use based on the type of Sync Key or Backup Sync Key you have.
You can scan your Backup QR Code during installation or it can be added after Codebook has been installed.
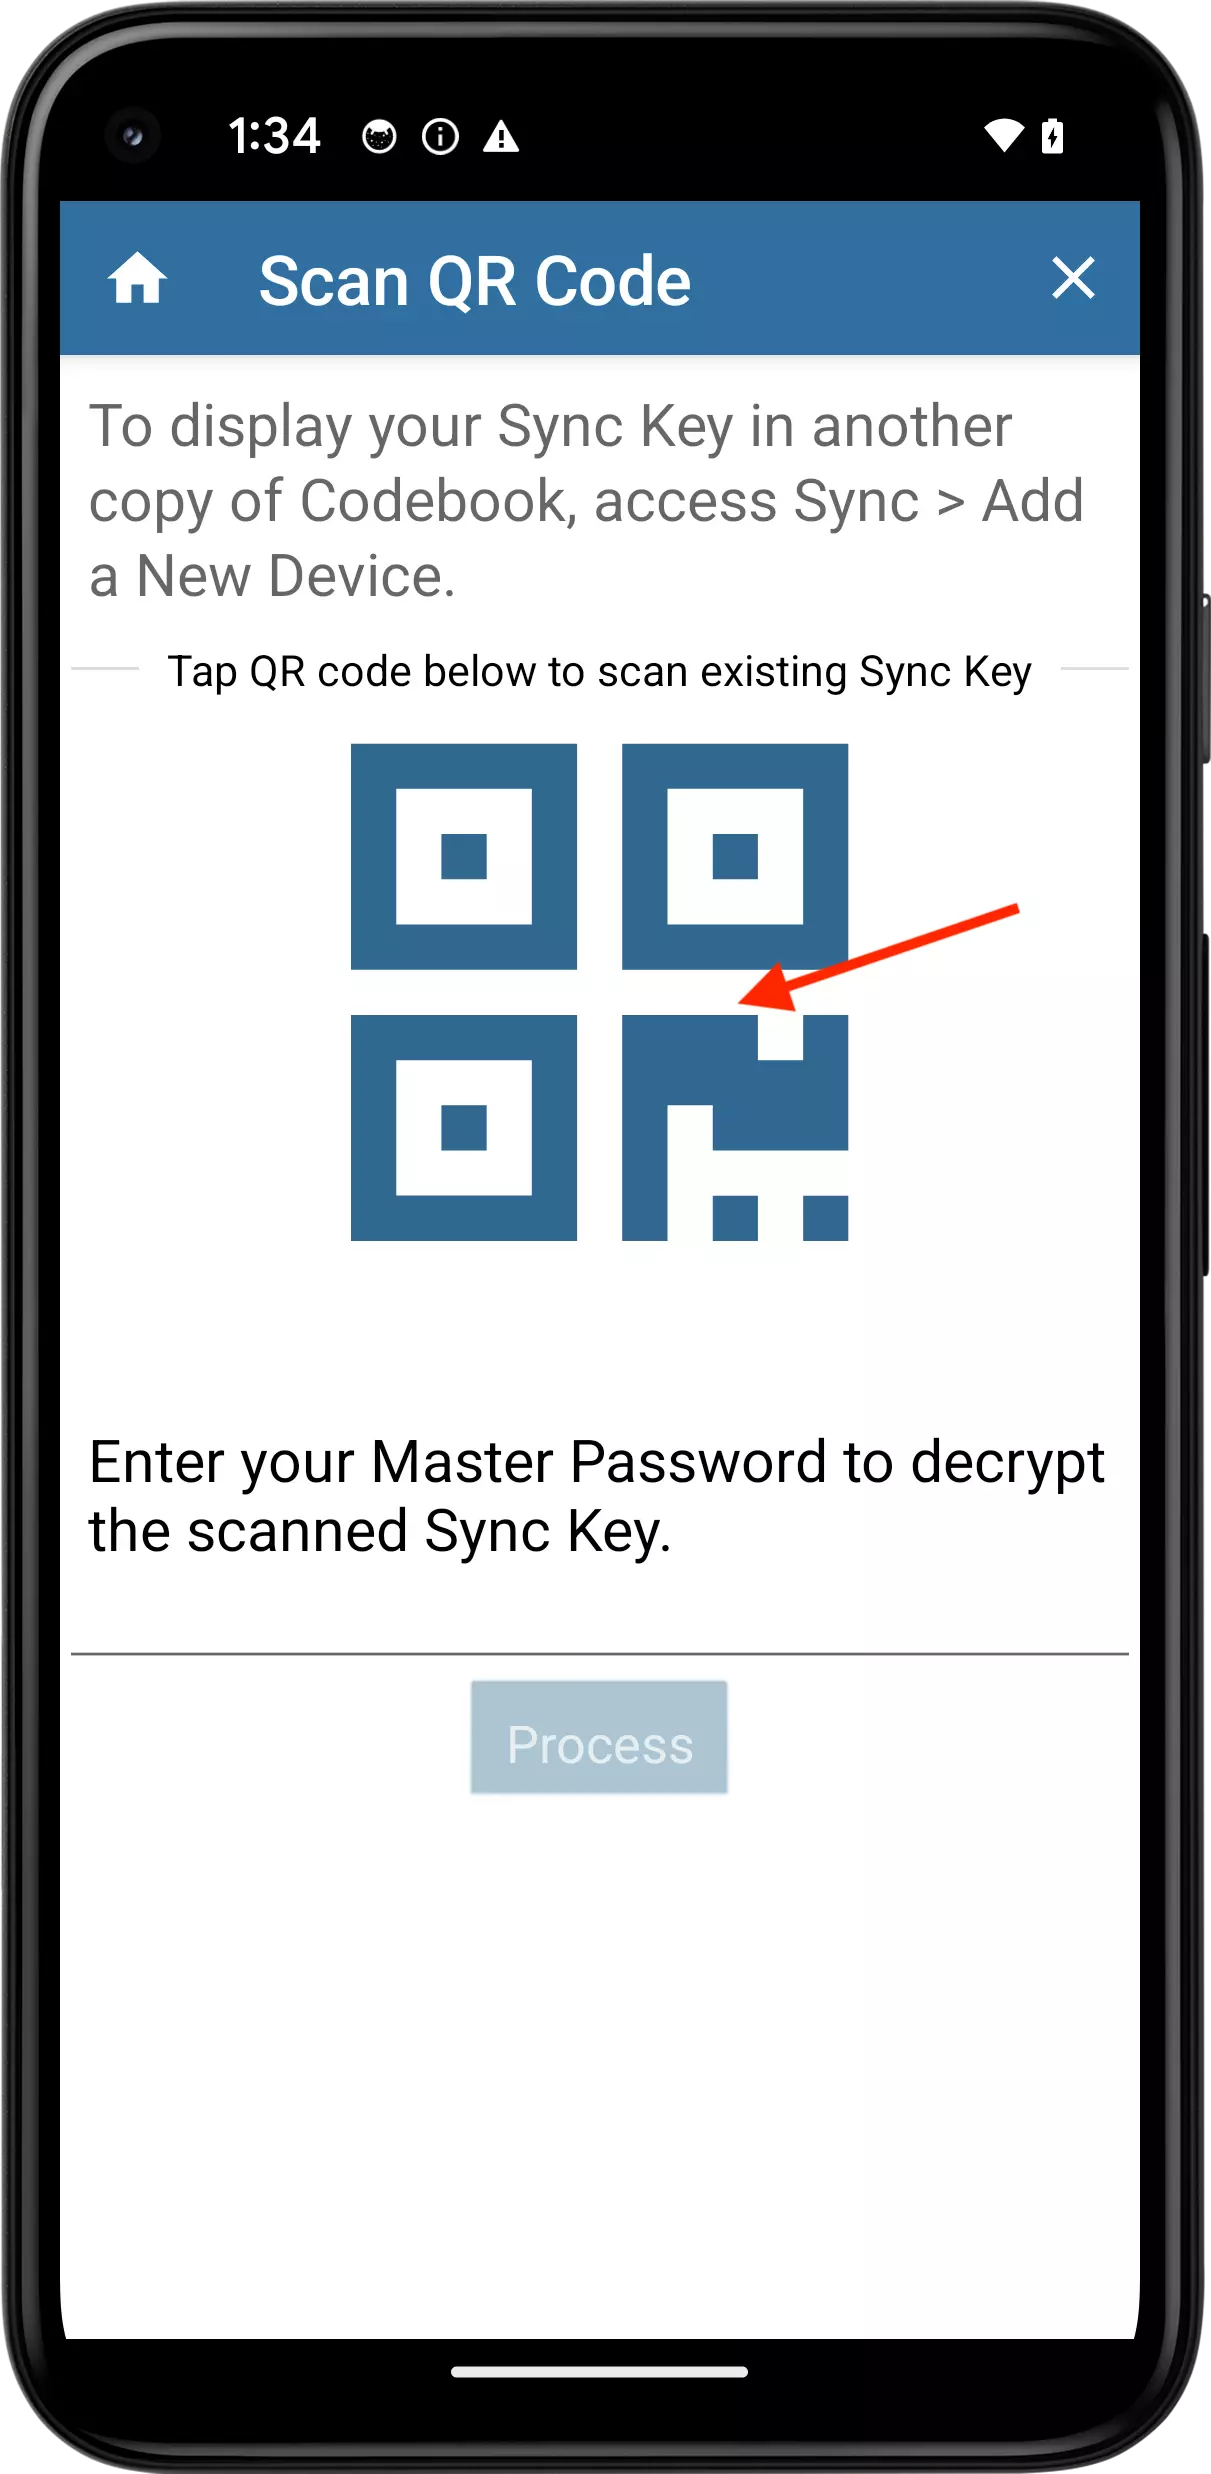
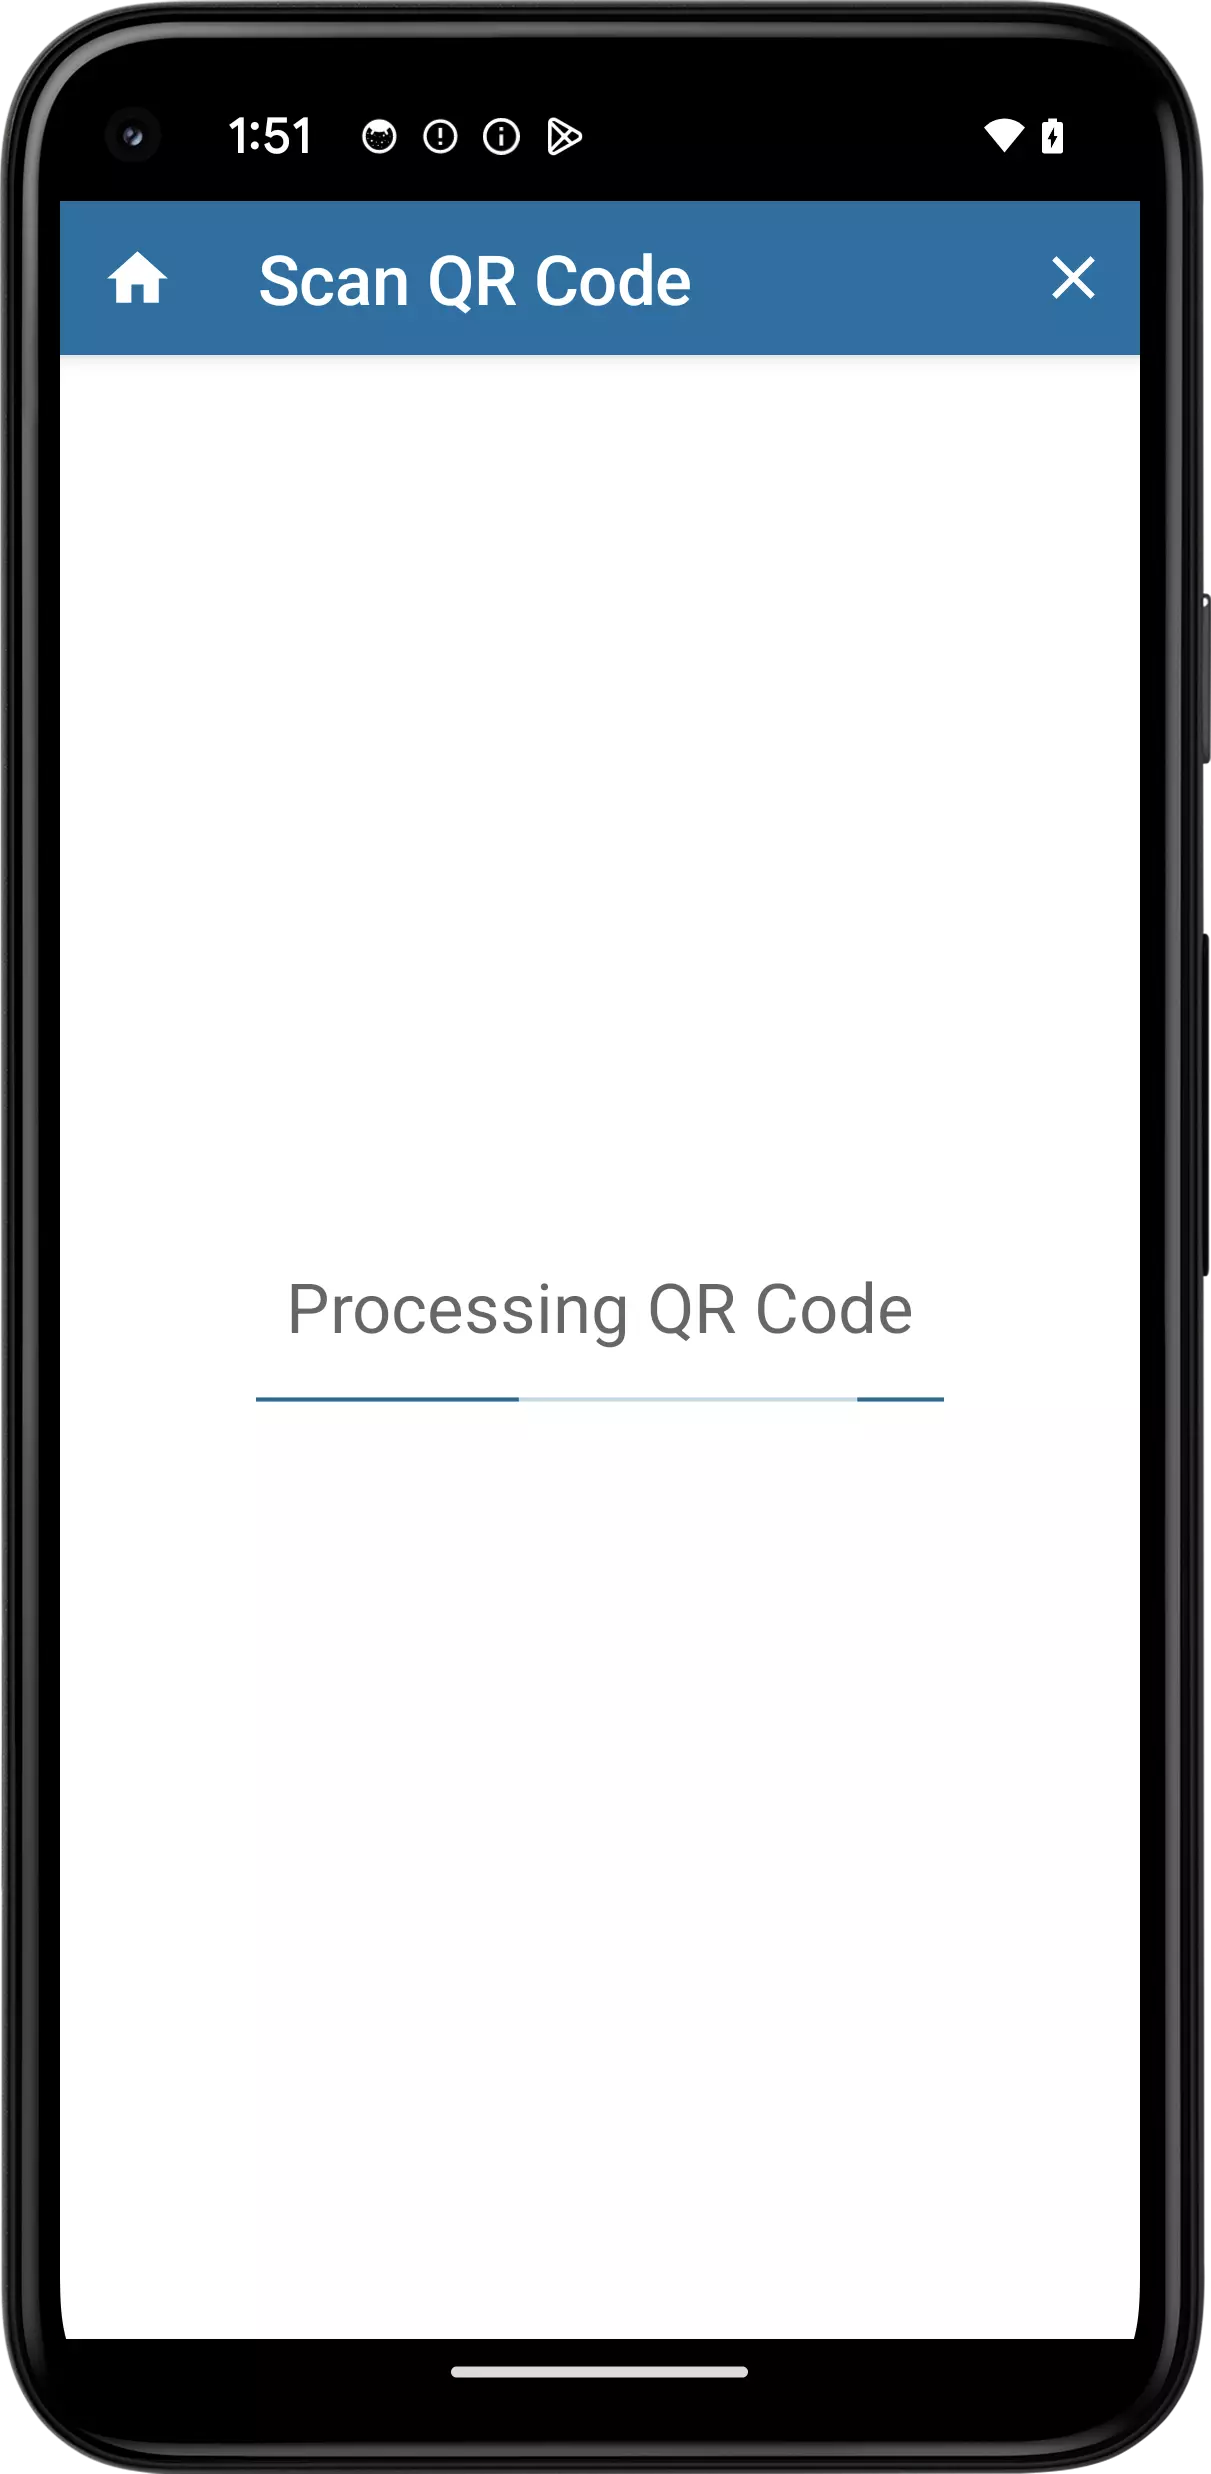
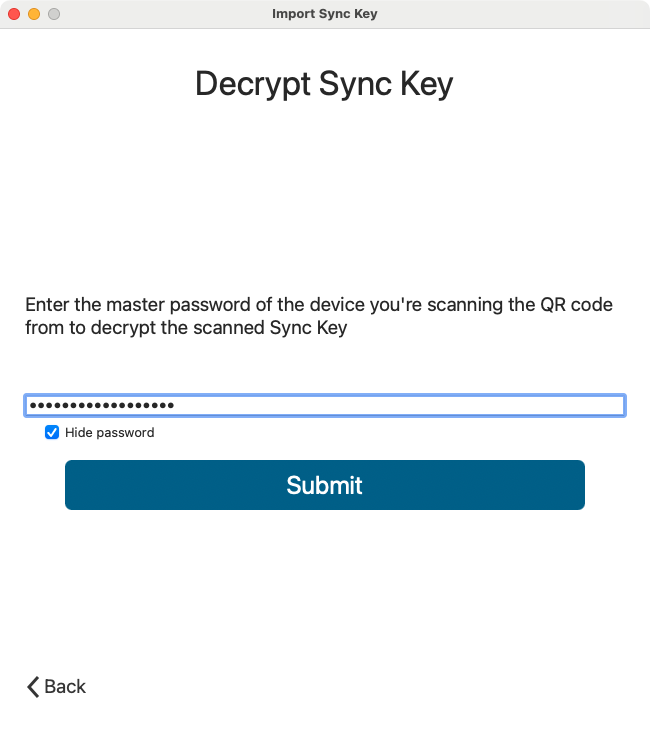
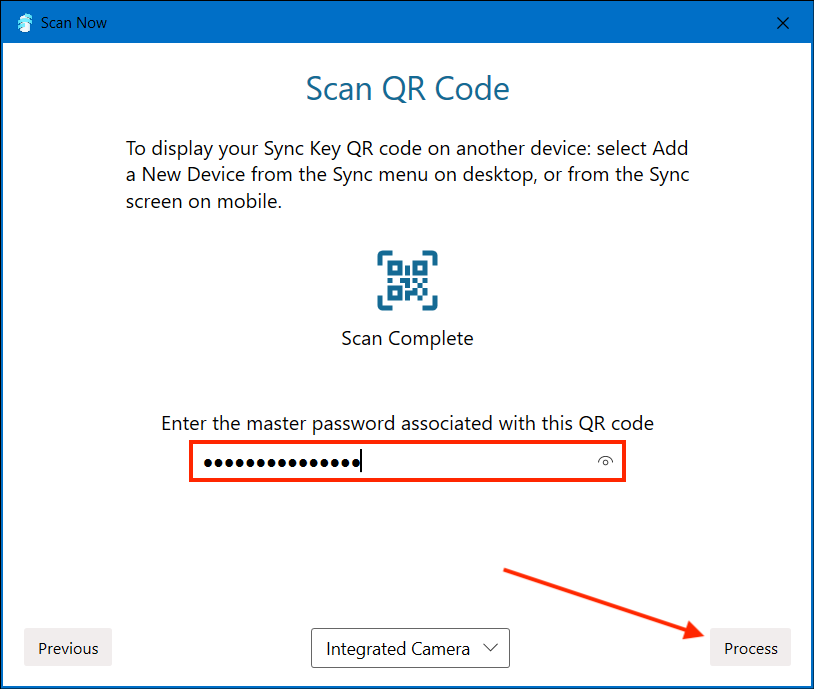
If you have access to Codebook on another device, you can display your Sync Key/Backup QR code on that device for scanning. For detailed instructions on displaying a Sync Key see - Display Sync Key for Scanning. You can also can also scan a printed Backup QR Code. Your Sync Key QR Code/Backup QR Code will contain two QR codes. Scan both codes. Data from both QR codes is needed to correctly recreate your Sync Key.
Note: Sync Key QR codes that were printed prior to Release 5.0 will only contain 1 QR code. This single QR Code will still allow to import your Sync Key and encrypted/decrypt your synced data.
If your Backup QR Code was generated or printed while you were signed in to your Codebook Cloud account, Codebook will try to Sign In to your Codebook Cloud account making this the preferred method for importing your Sync Key. If you are successfully signed in to Codebook Cloud, automatic syncing will start.
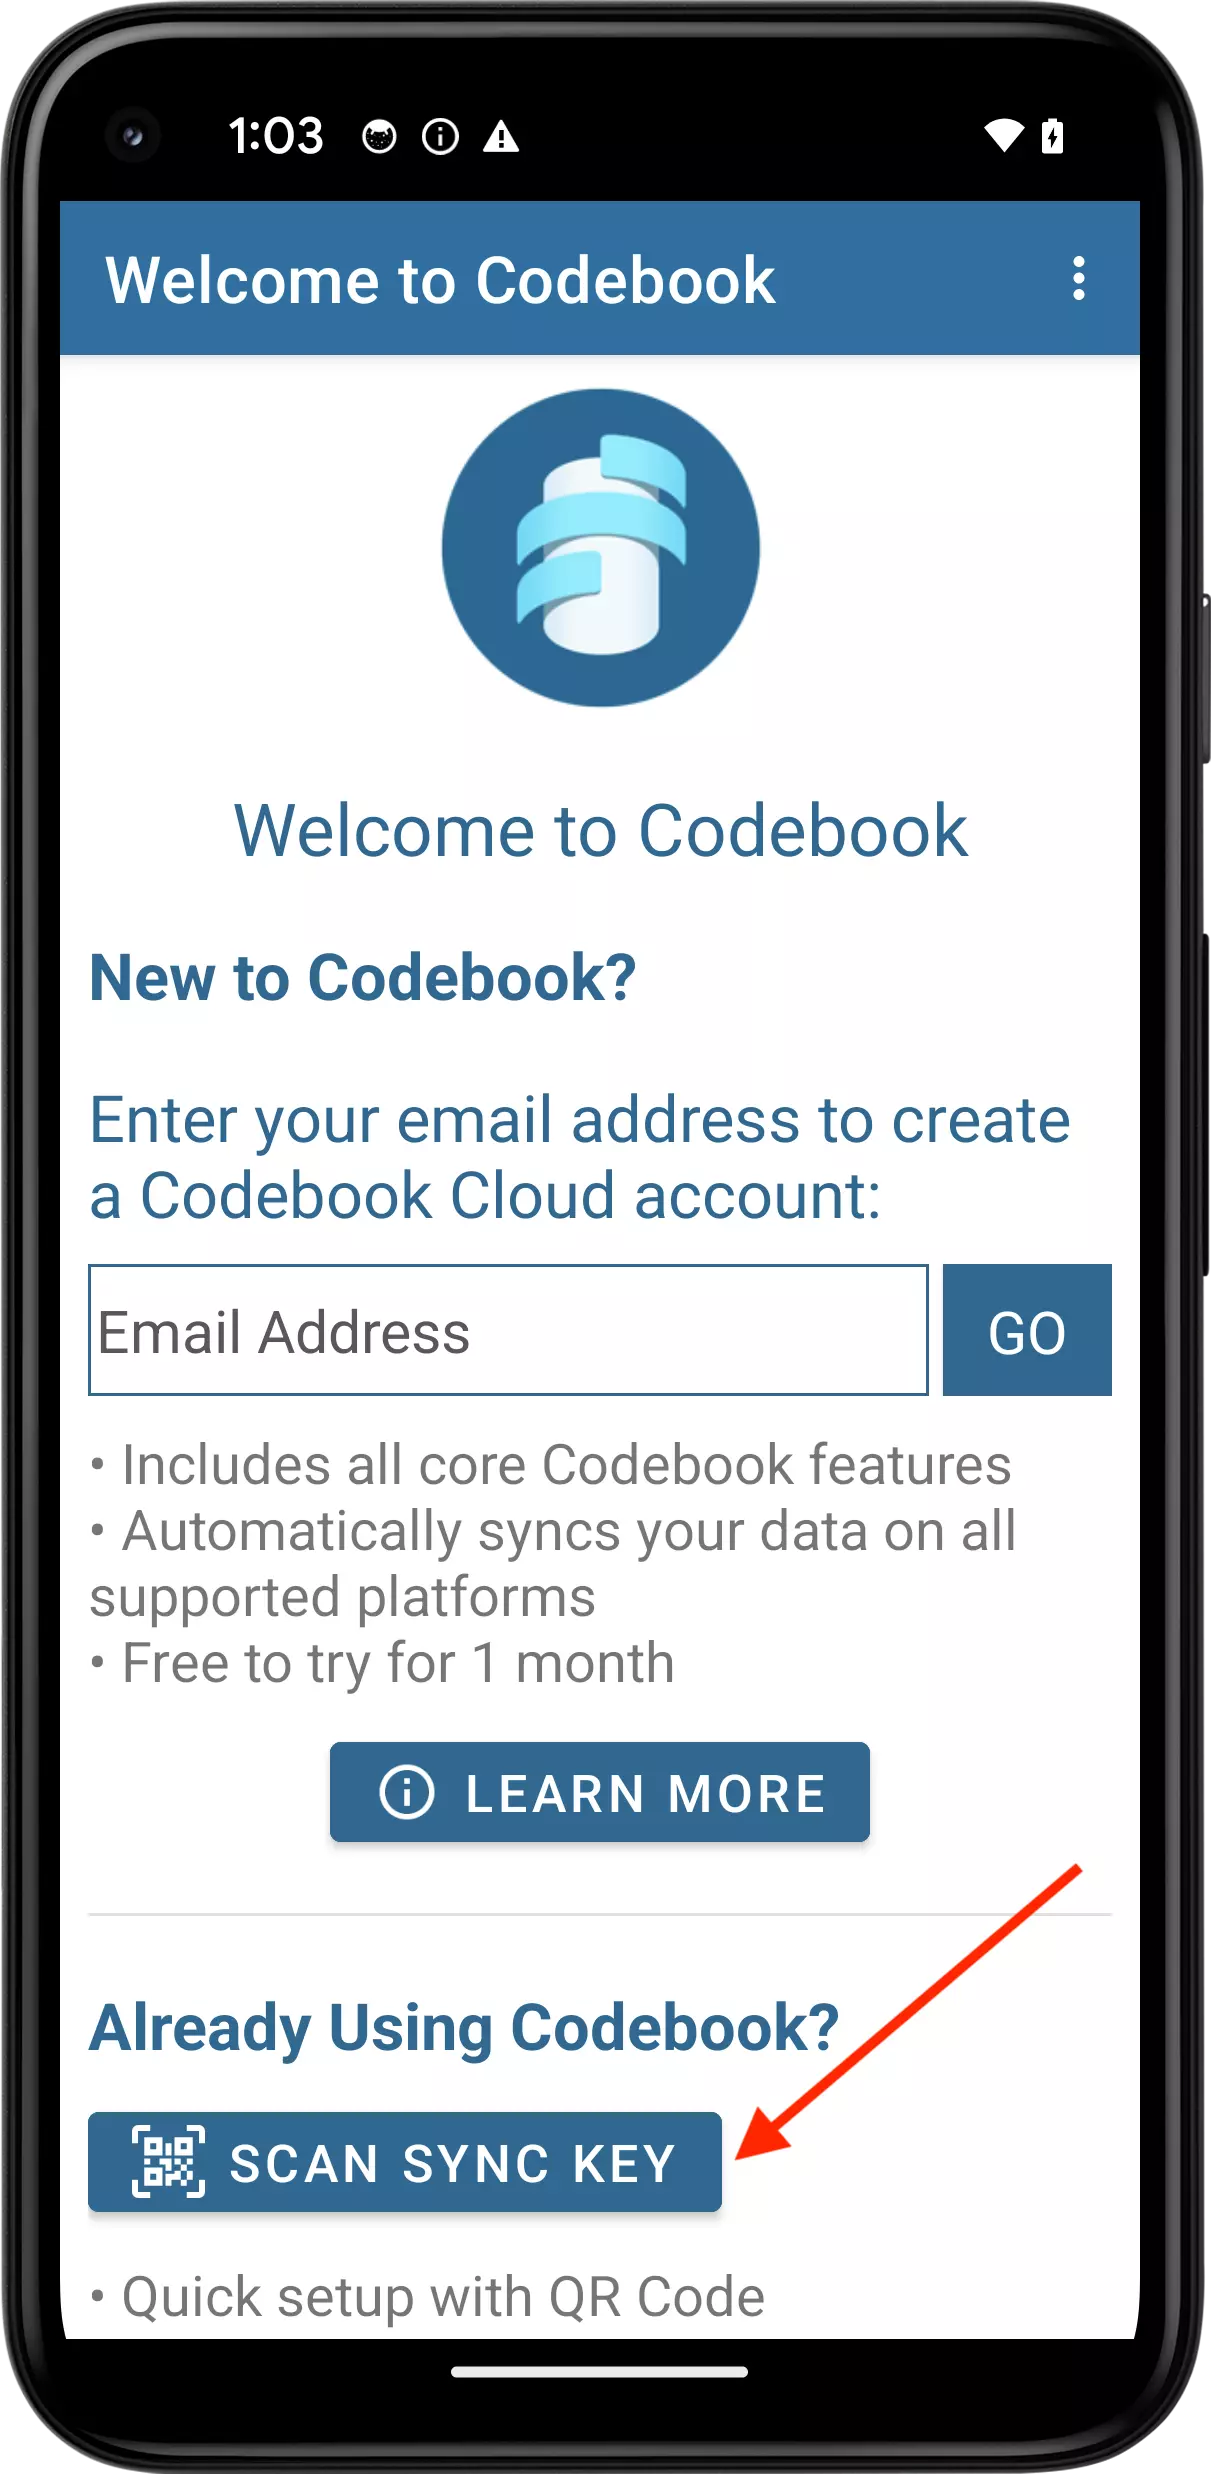
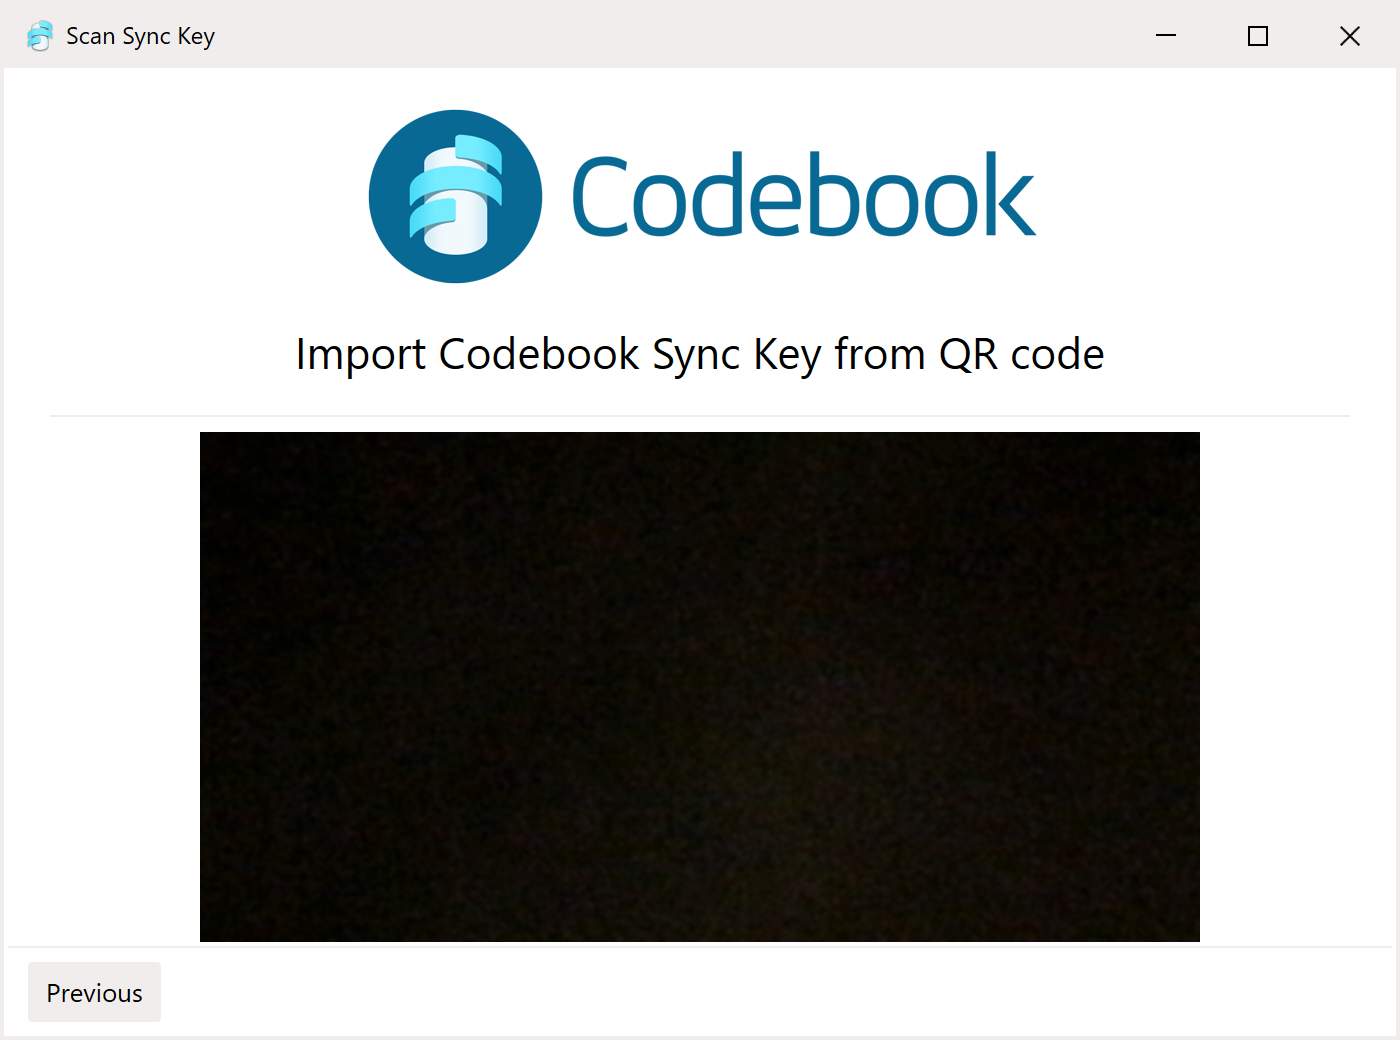
To import your Sync Key during Codebook installation:
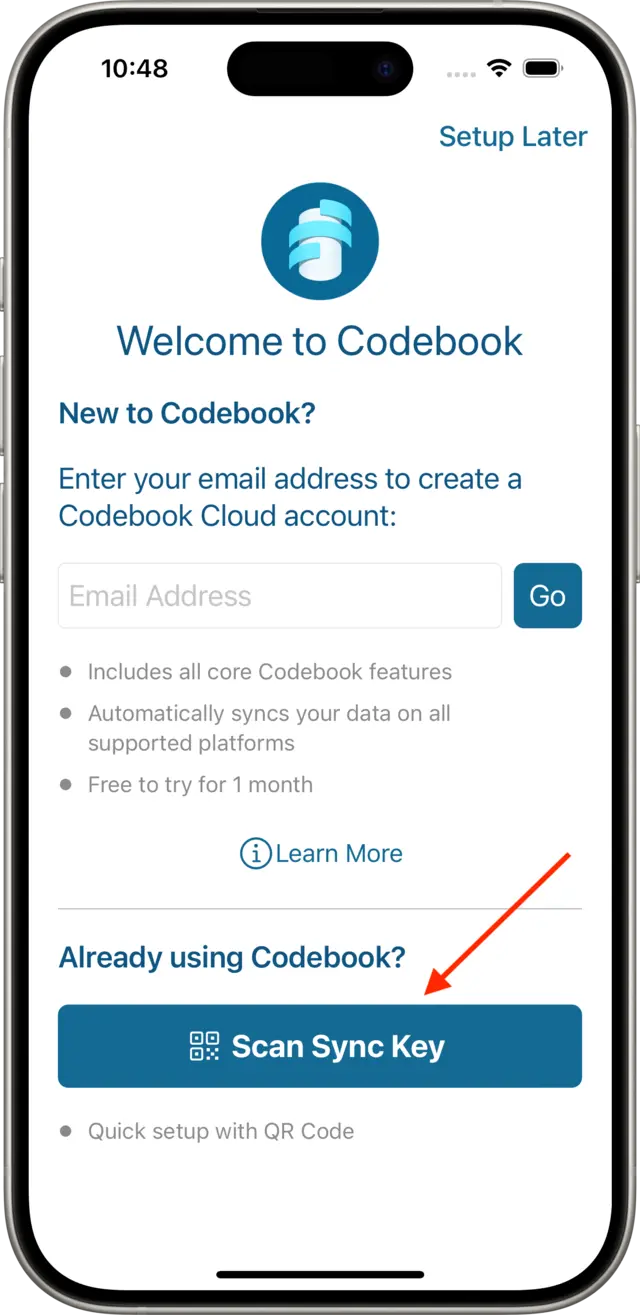
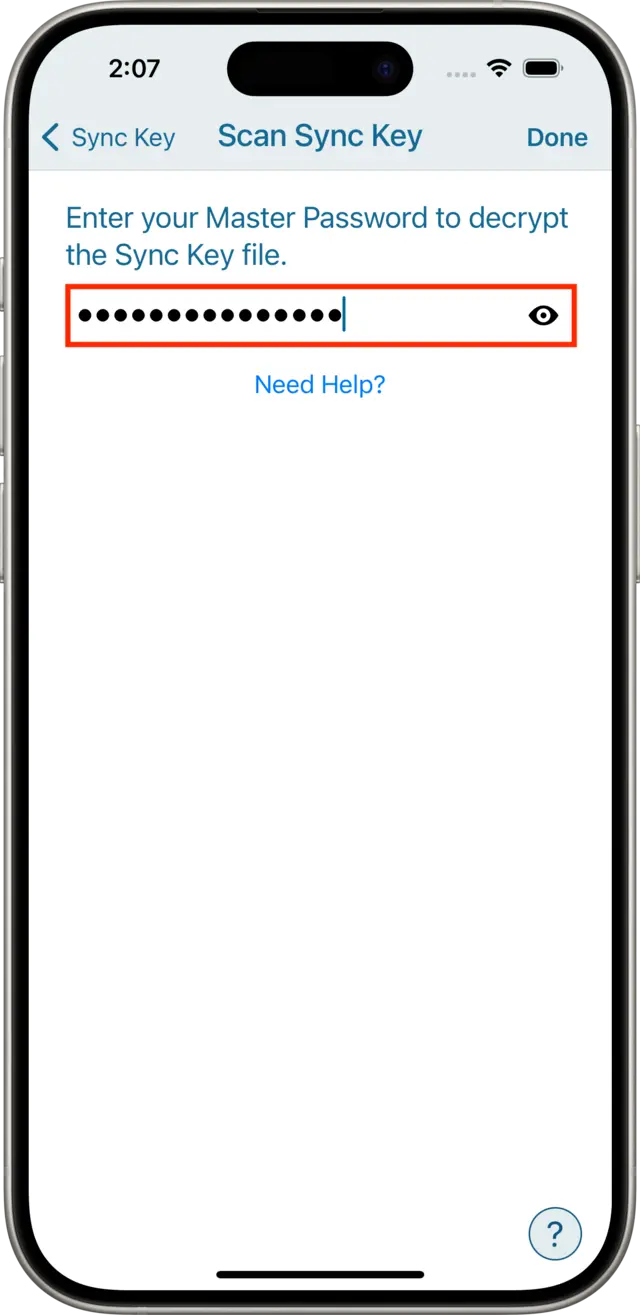
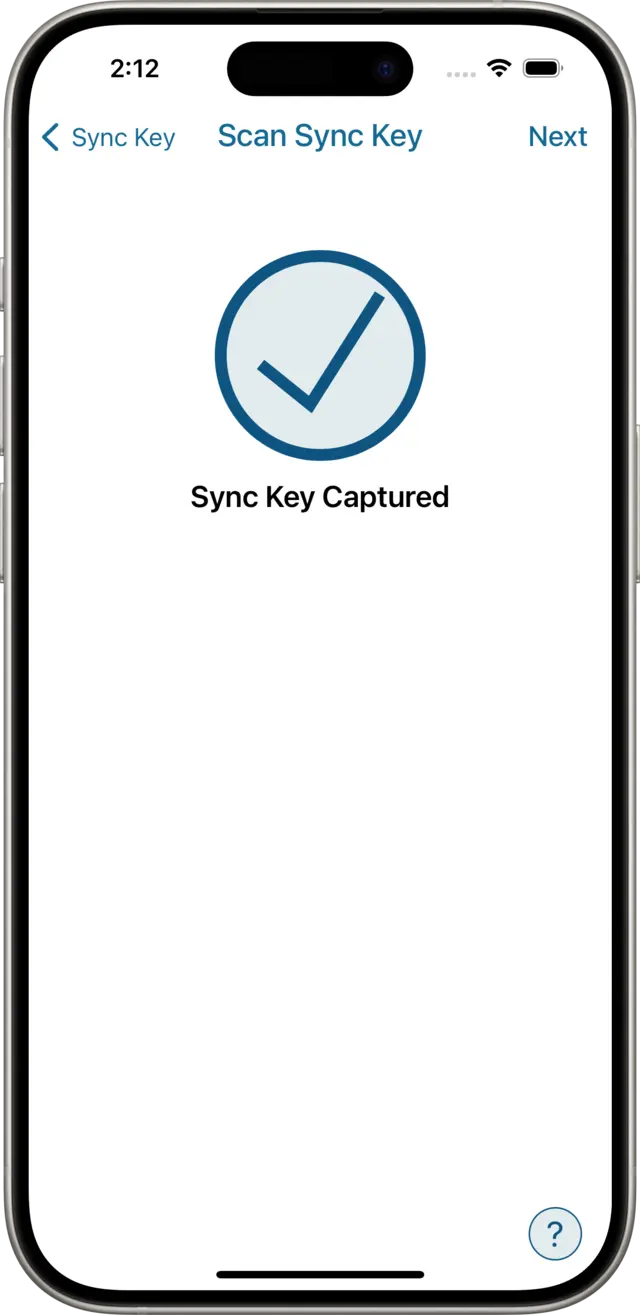
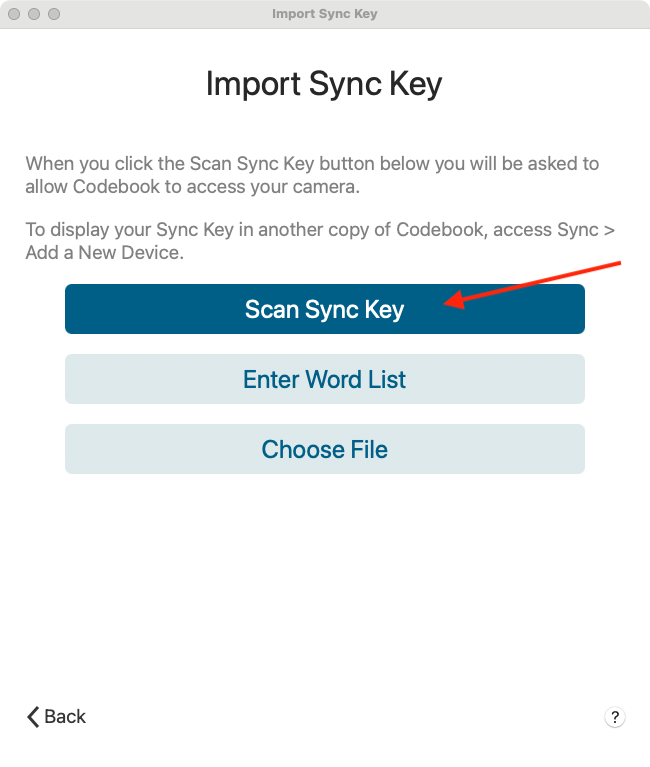
Tap Scan Sync Key to scan the sync key from another Codebook device.
To import your Sync Key after Codebook installation:
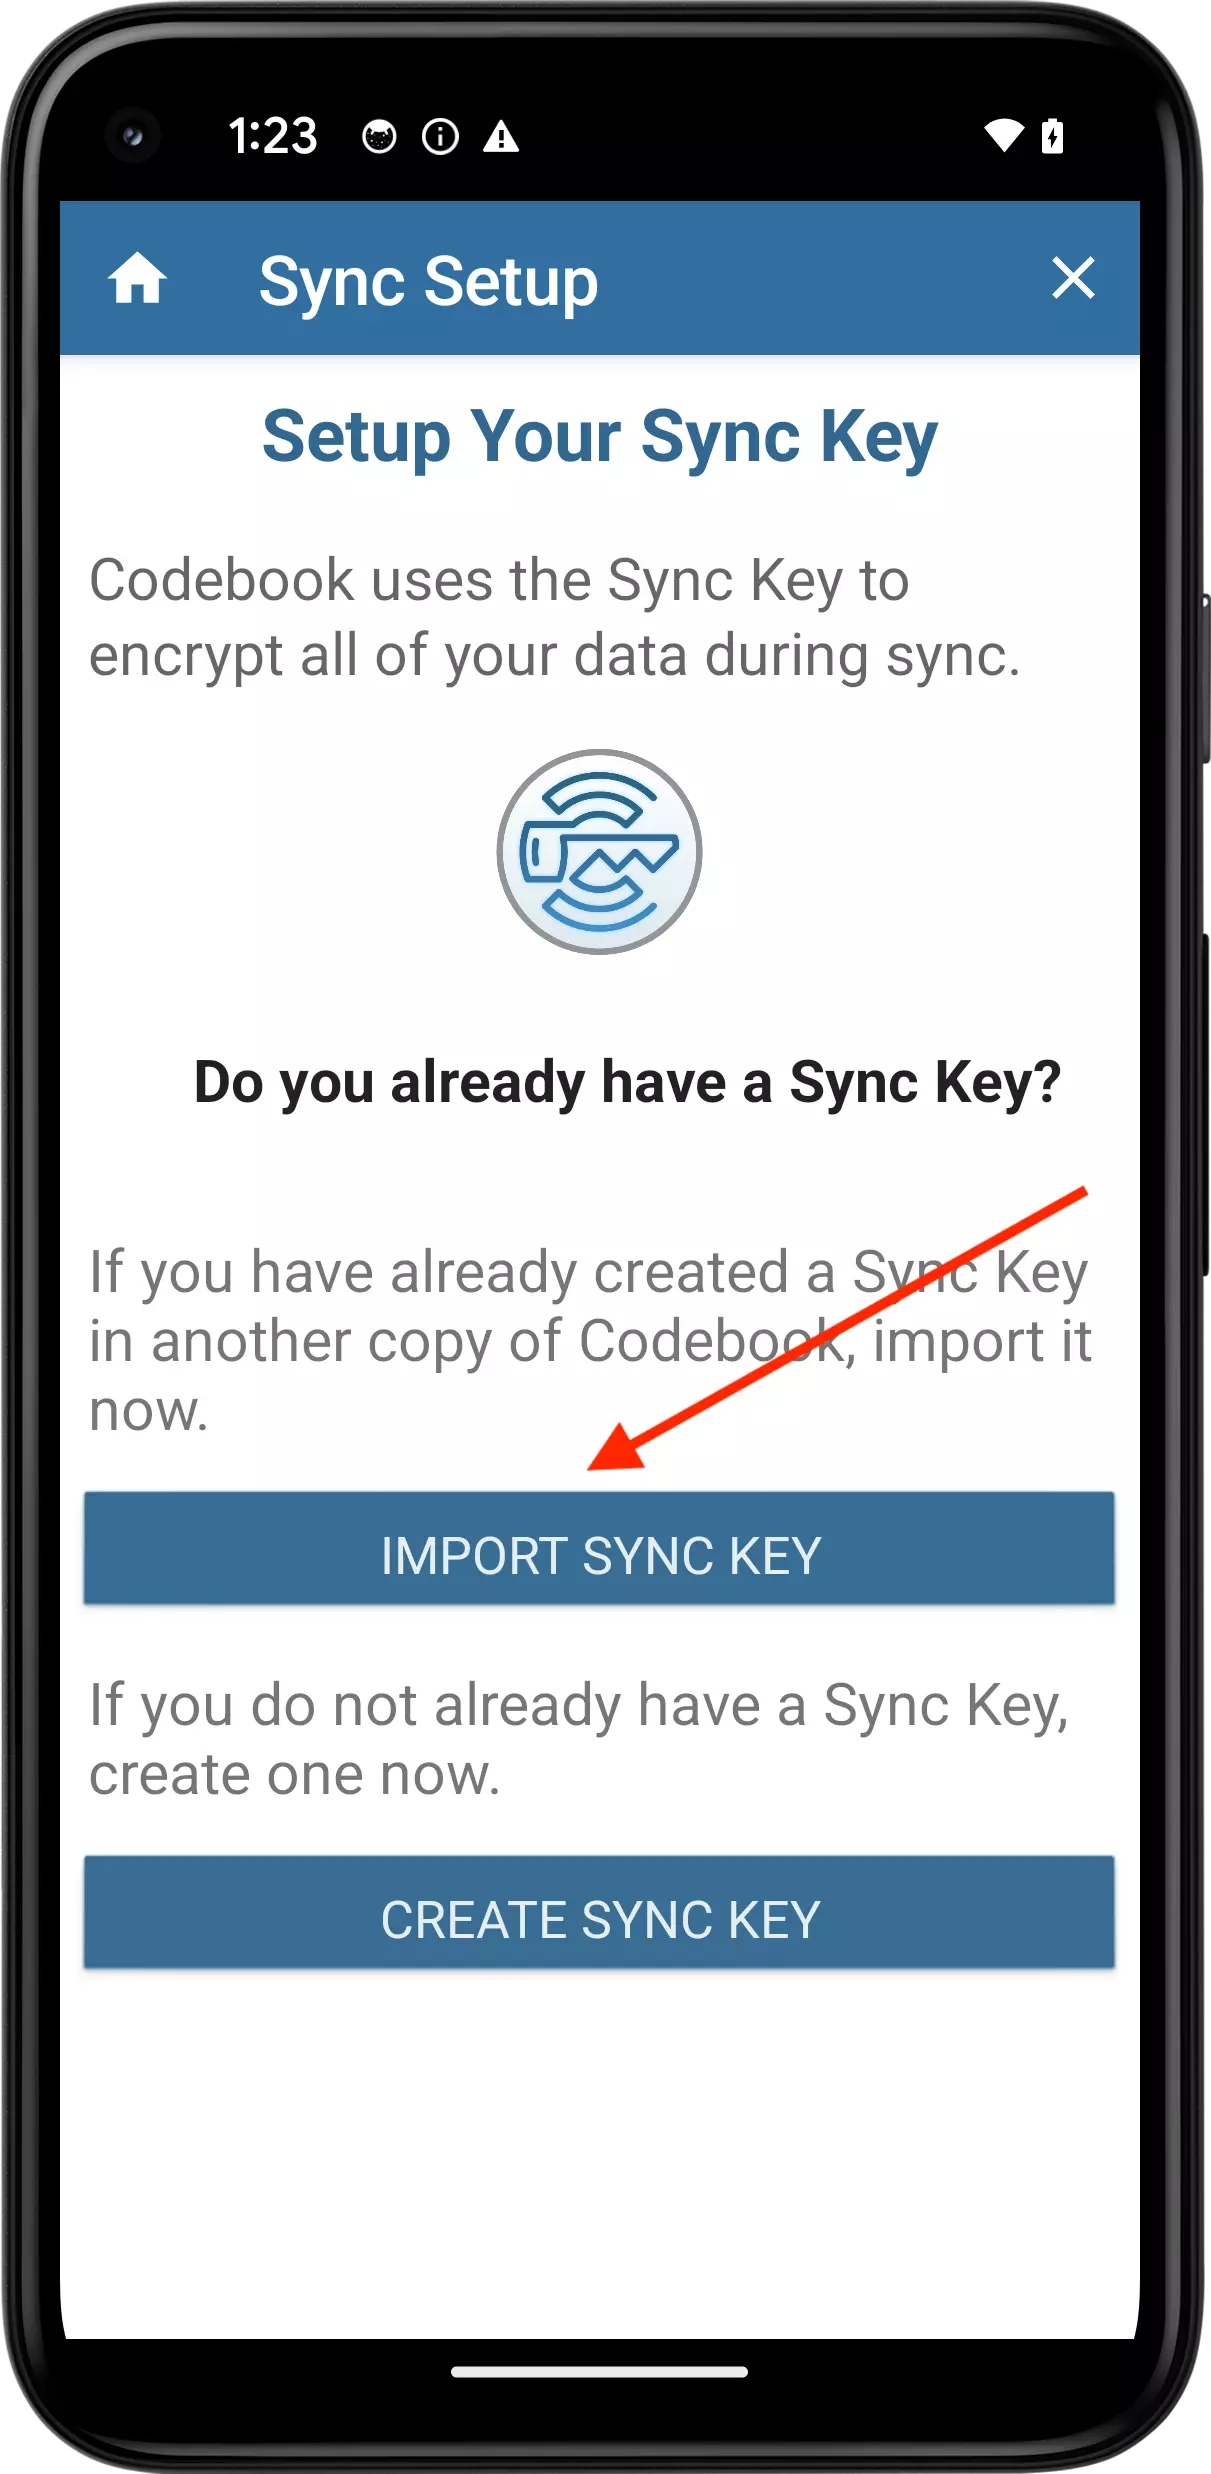
Start the import process from Home -> Sync -> Setup Sync Key.
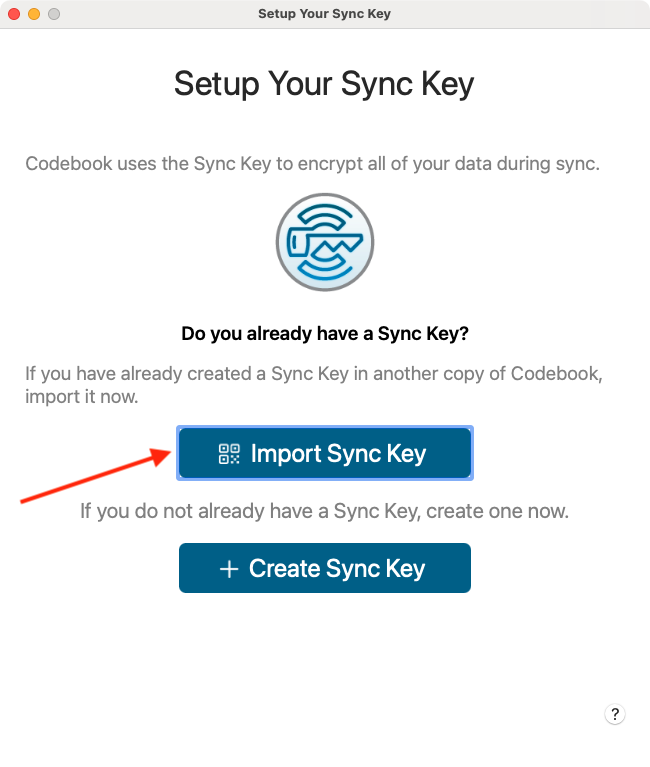
On the Setup Your Sync Key screen, select IMPORT SYNC KEY to begin importing your Sync Key.

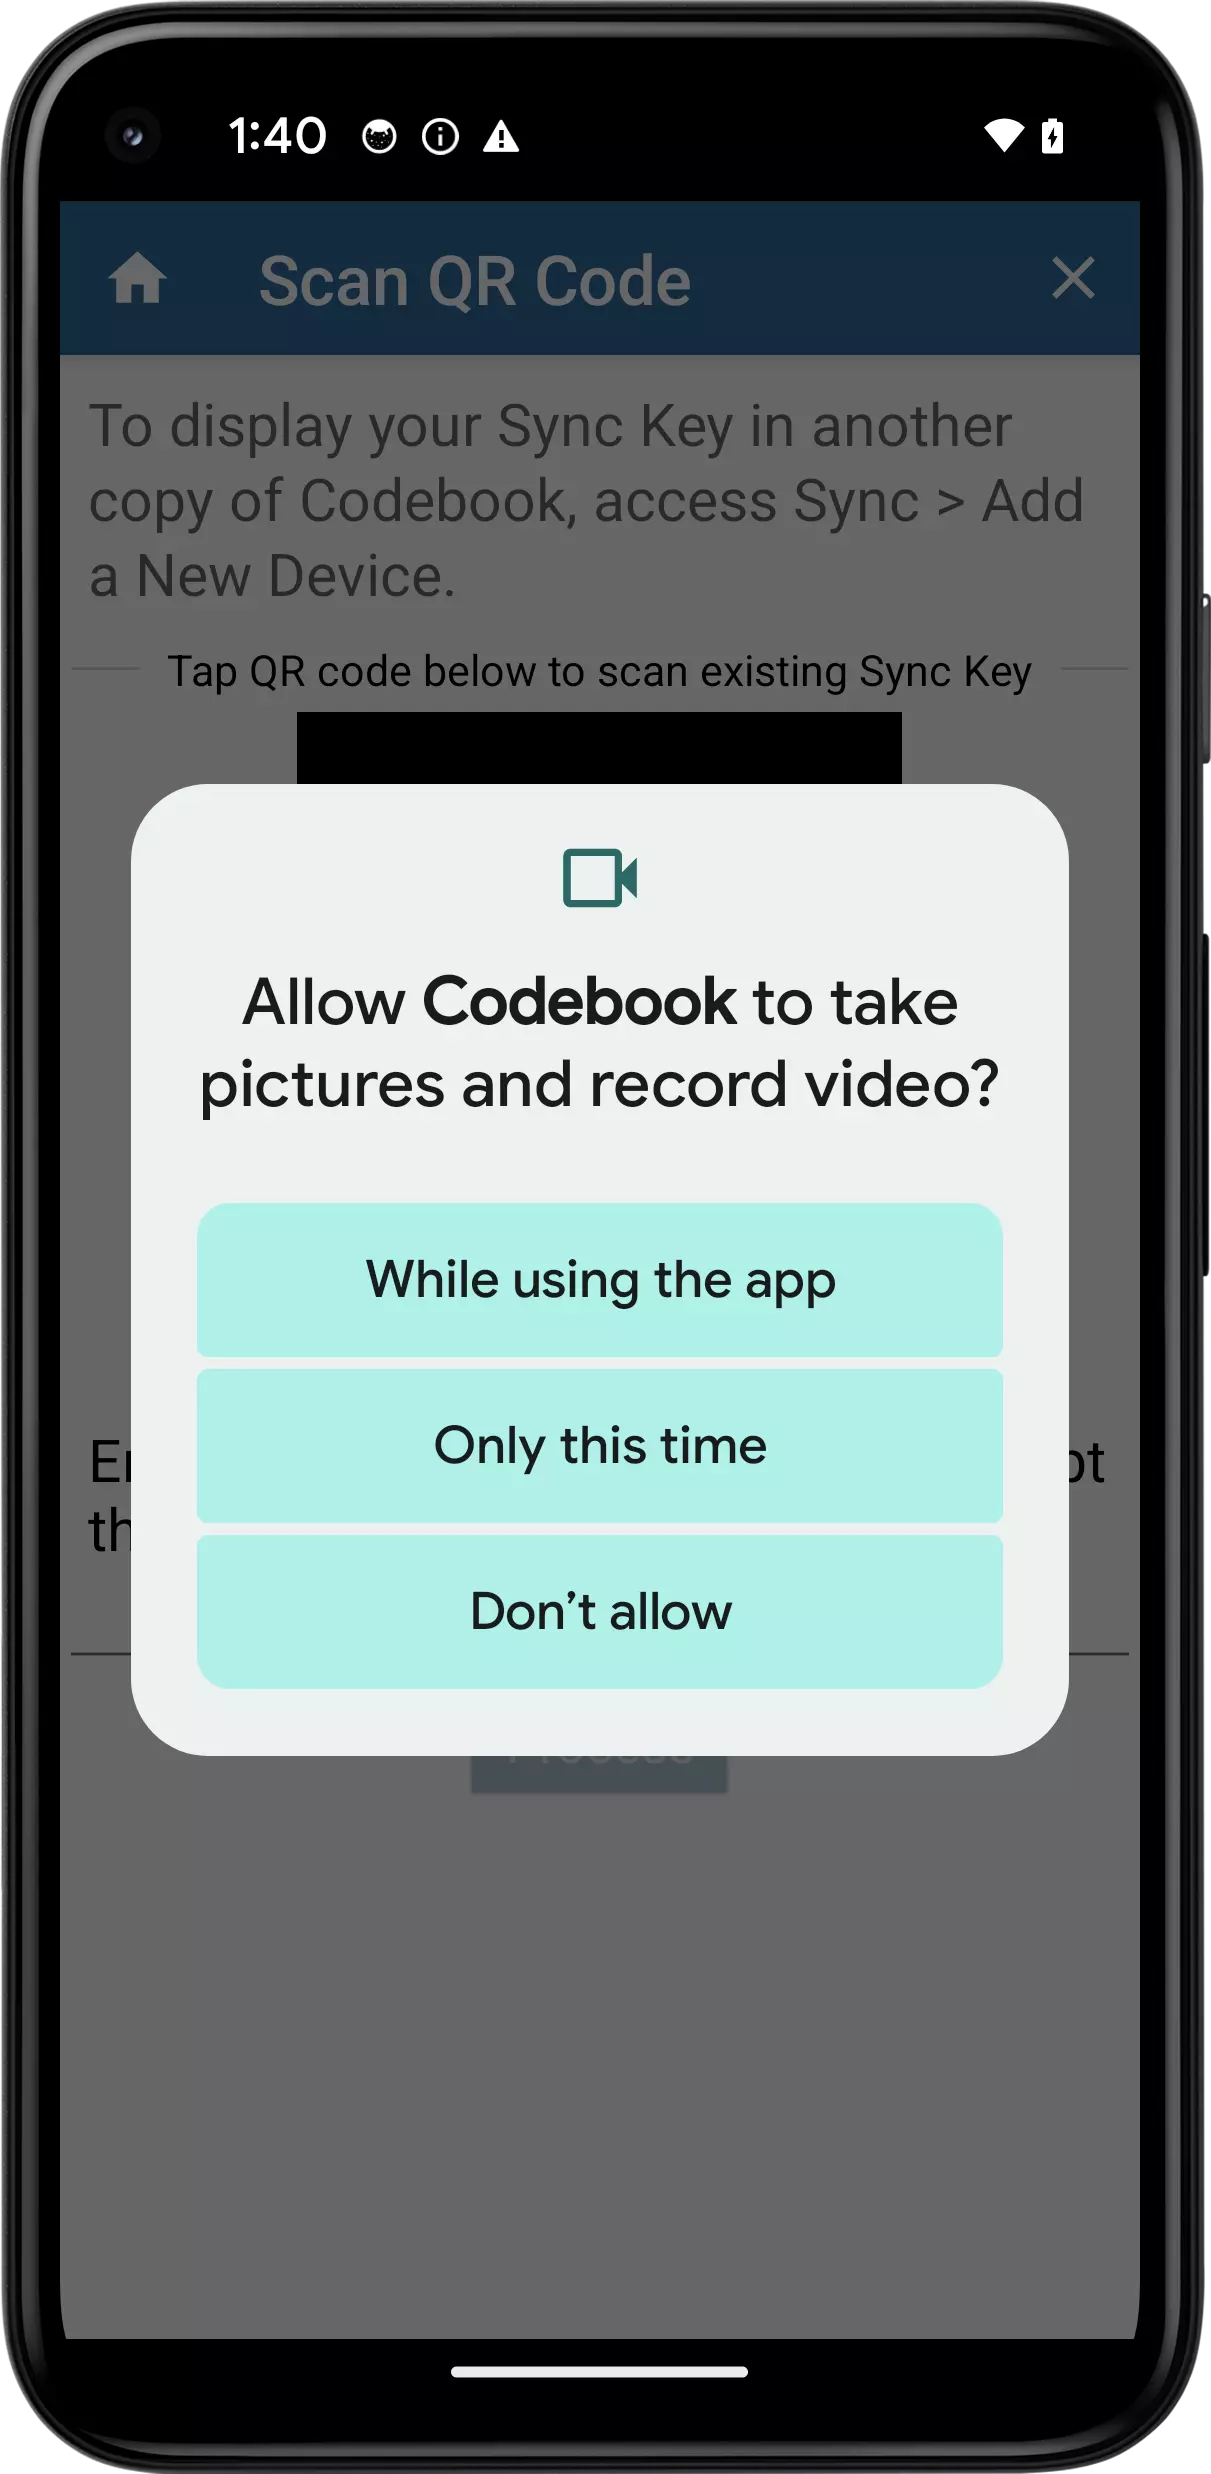
You may be prompted to allow codebook to have access to your new device's camera. Tap your desired permission level.
NOTES FOR CODEBOOK CLOUD SYNC:
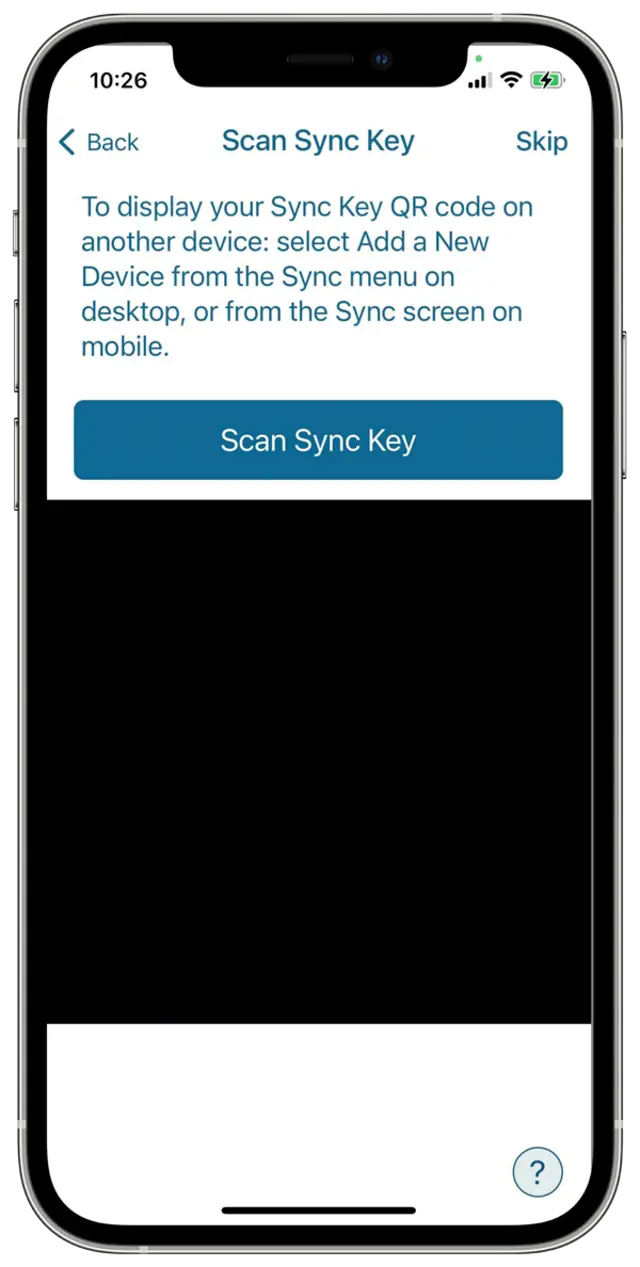
To import your Sync Key during Codebook installation:
Tap Scan Sync Key to scan the sync key from another Codebook device.
Continue with Step 2.
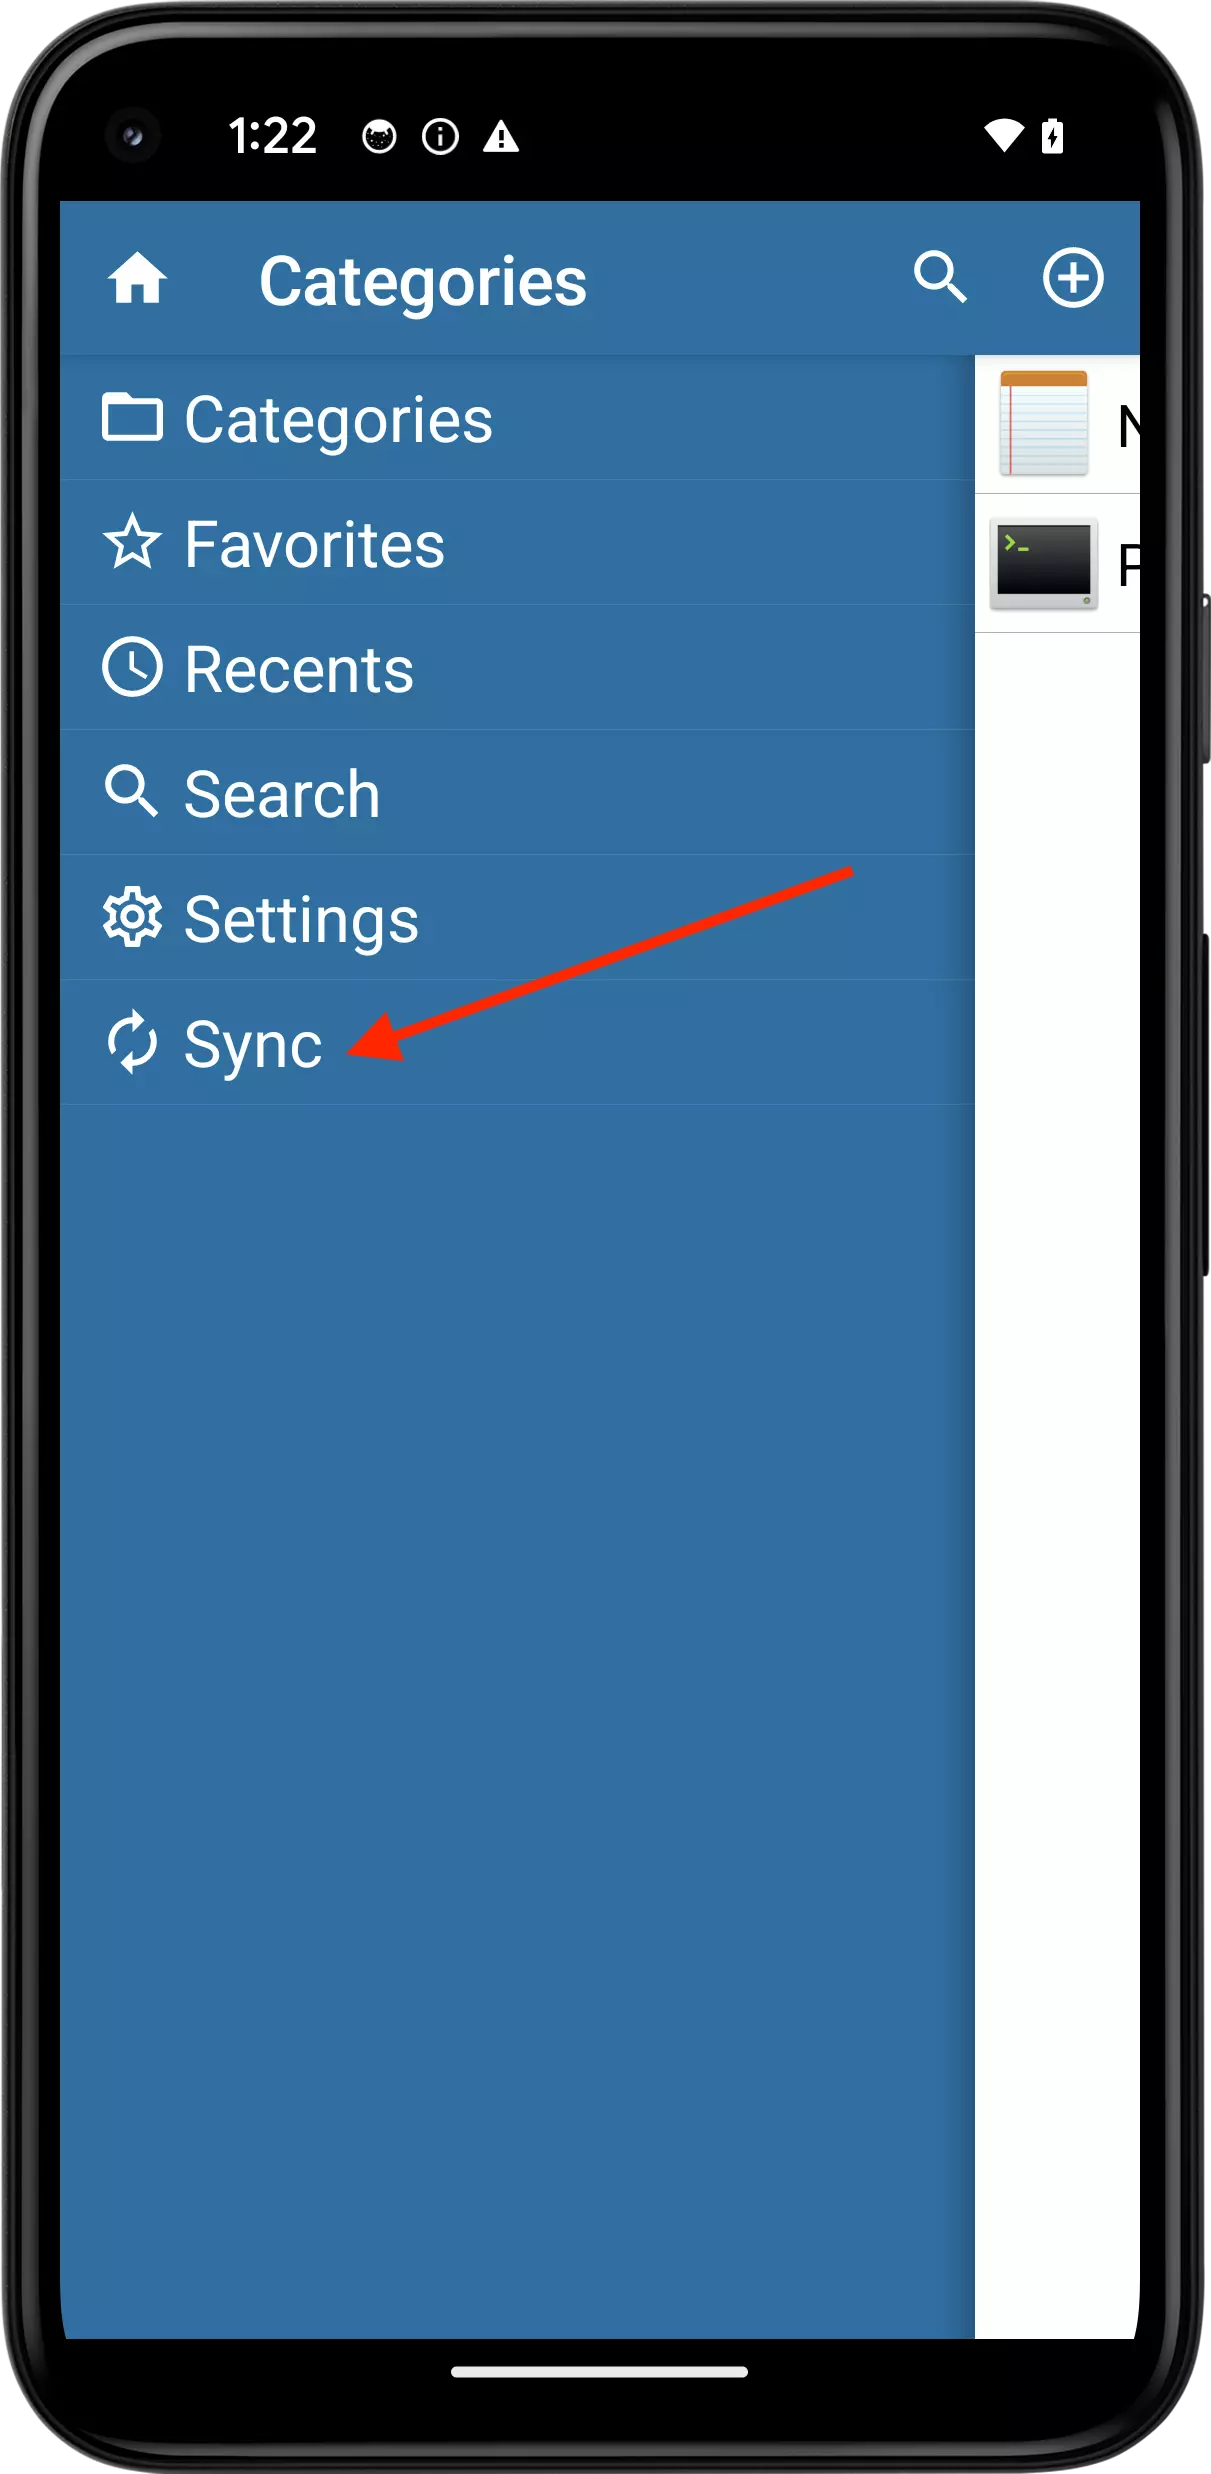
To import your Sync Key after Codebook installation:
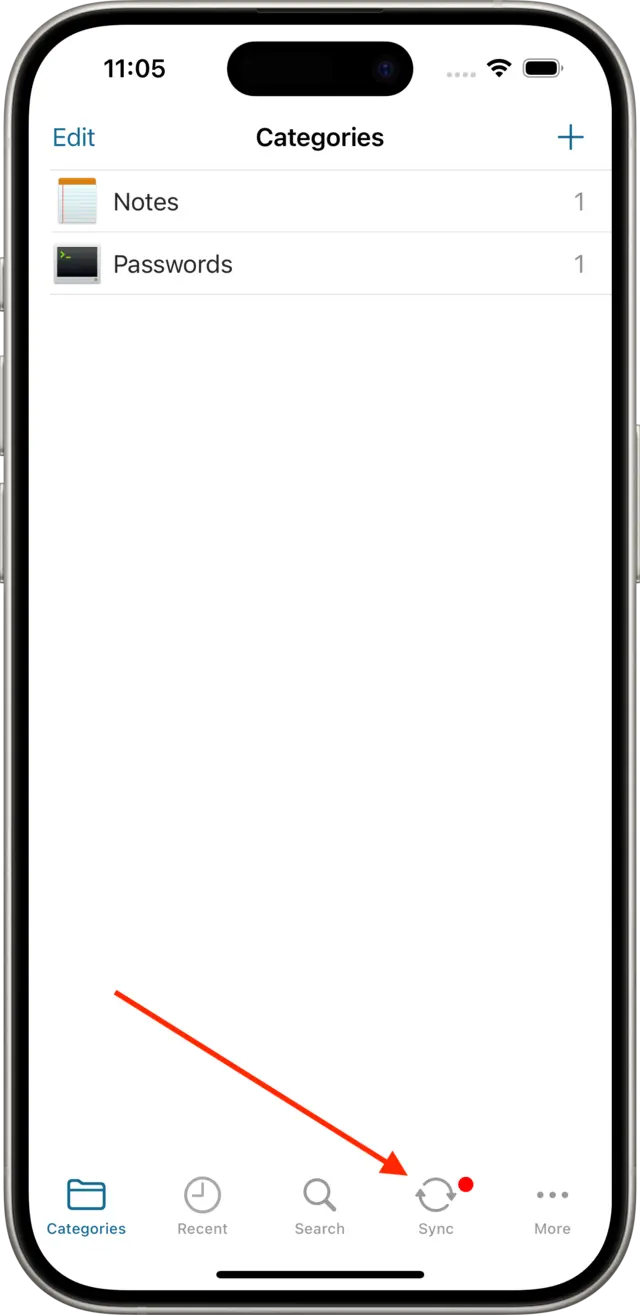
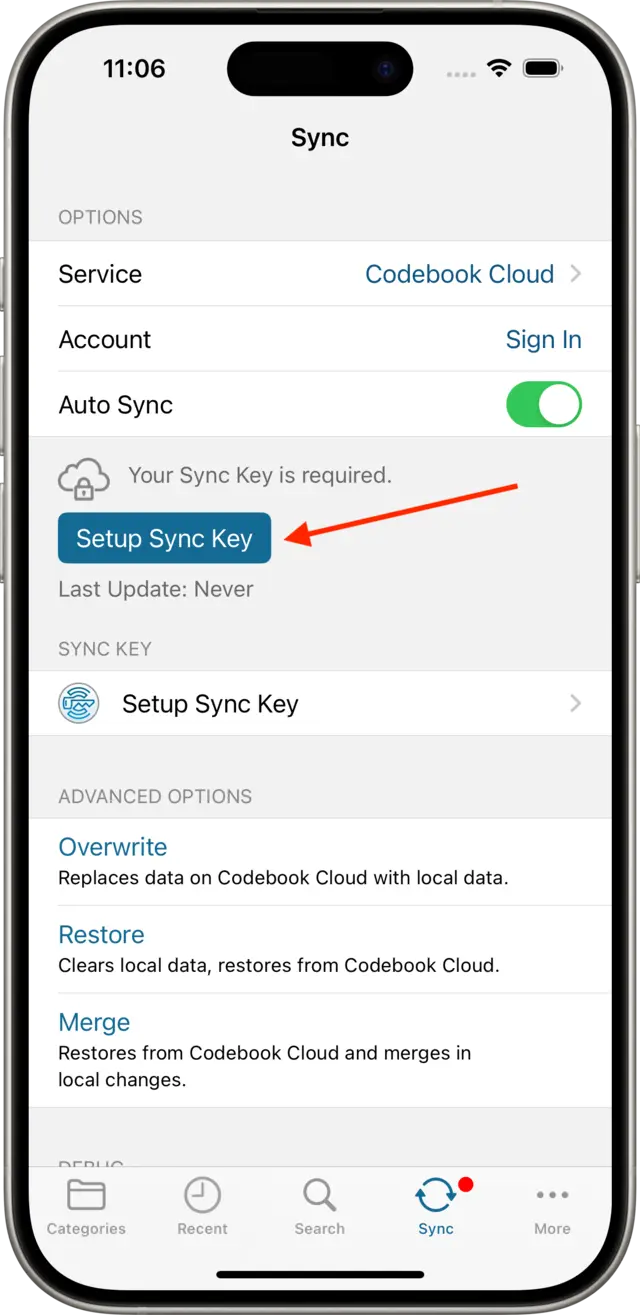
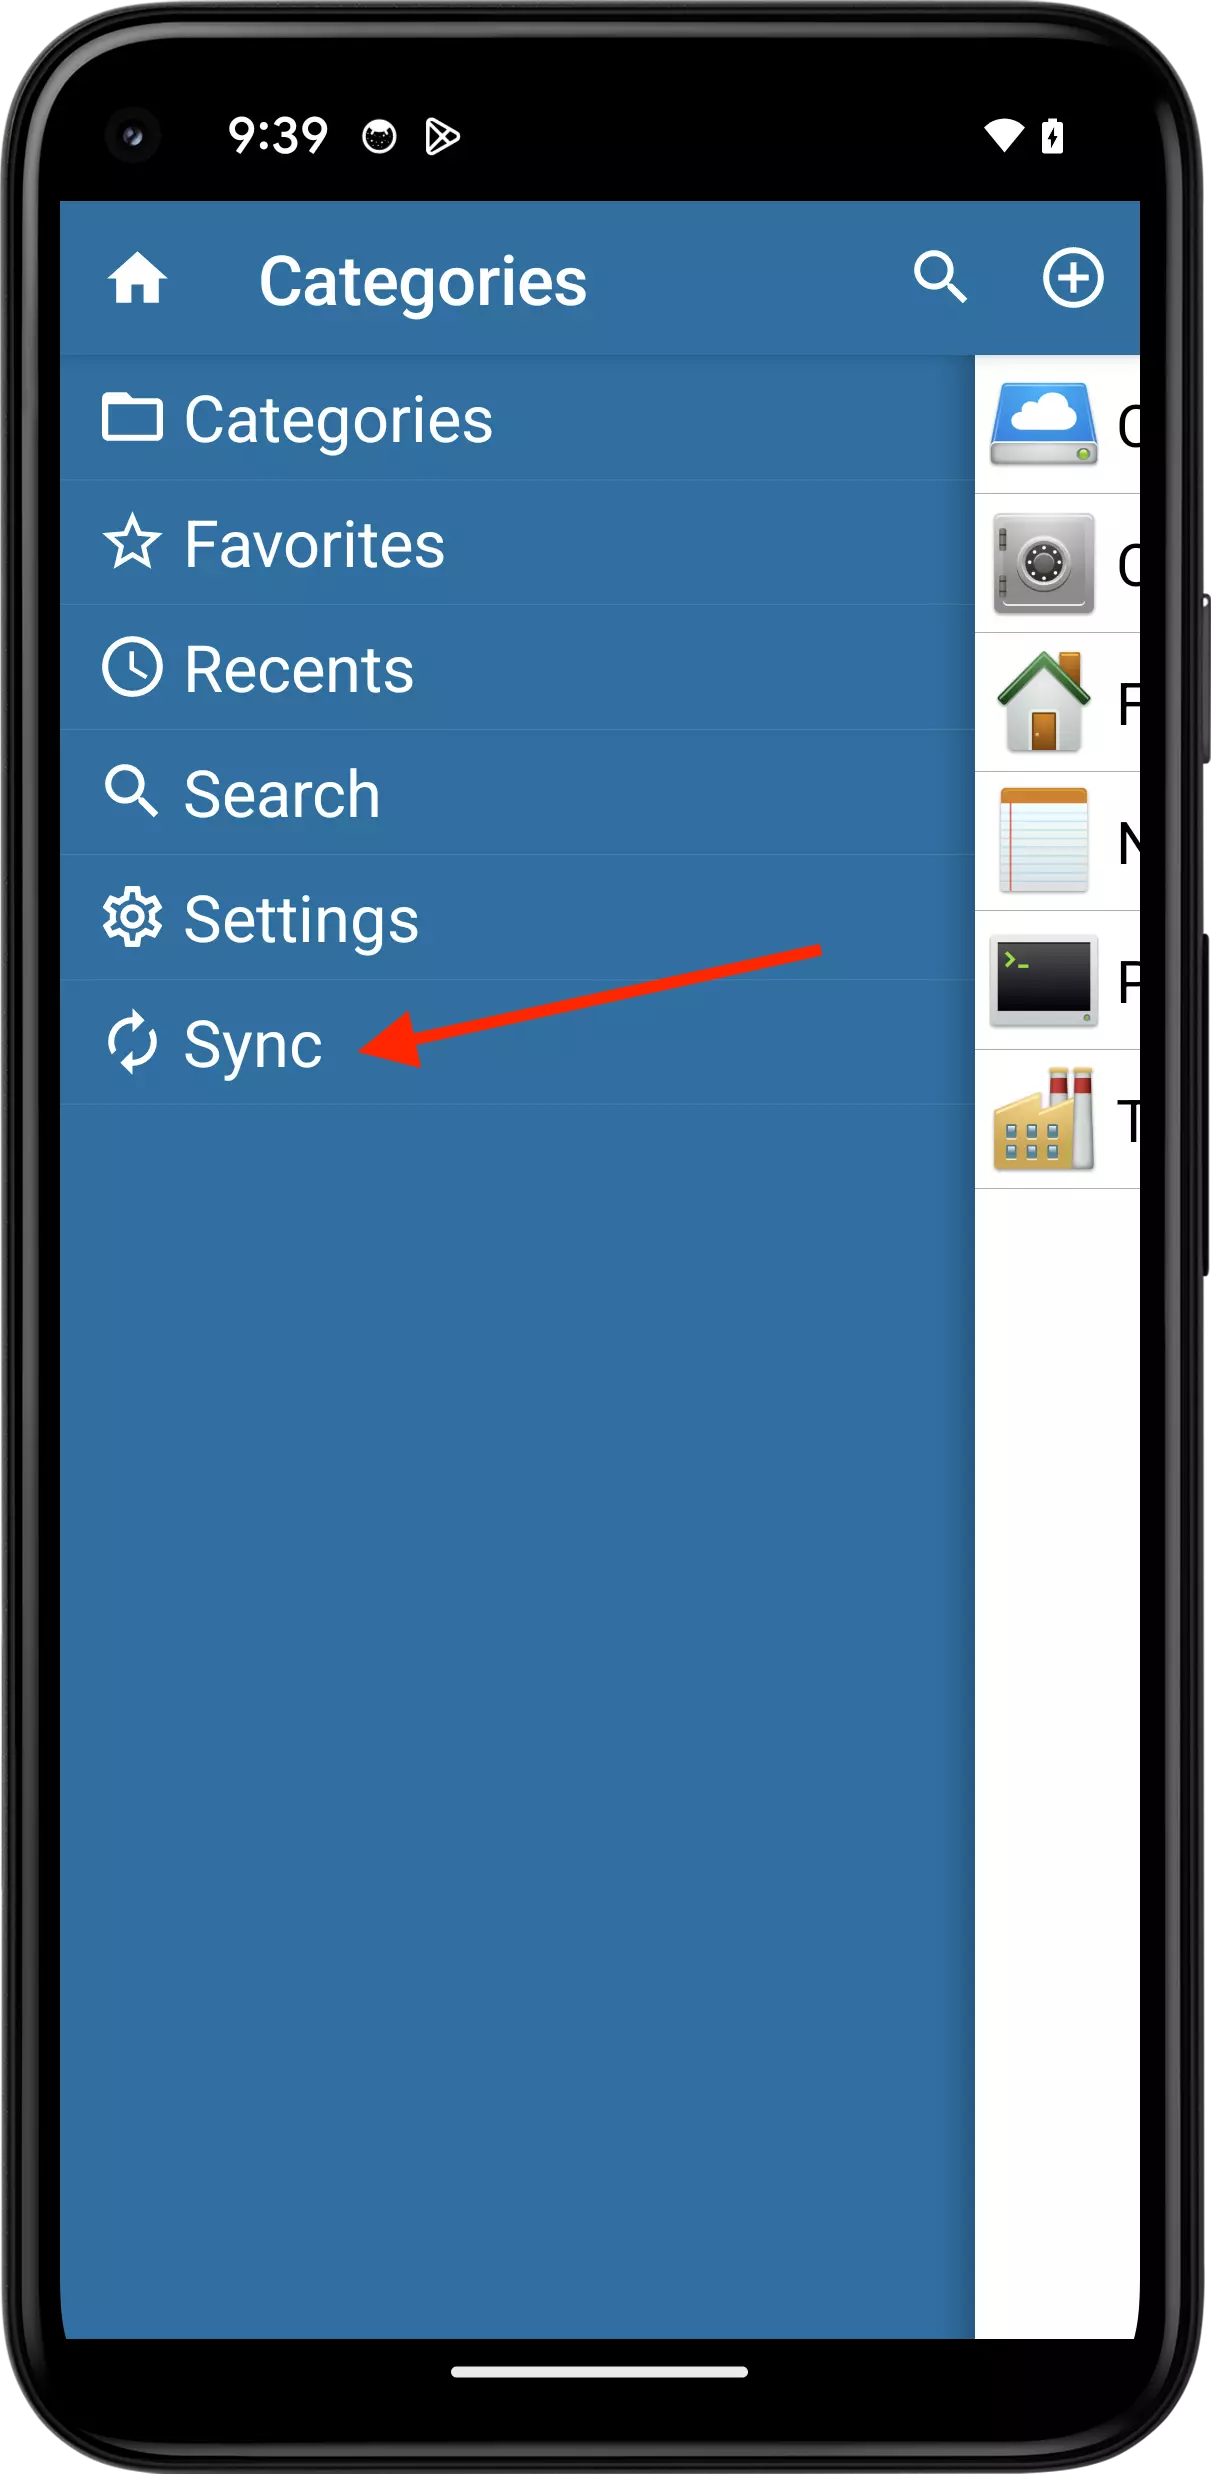
Start the import process by tapping Sync on the tab bar.
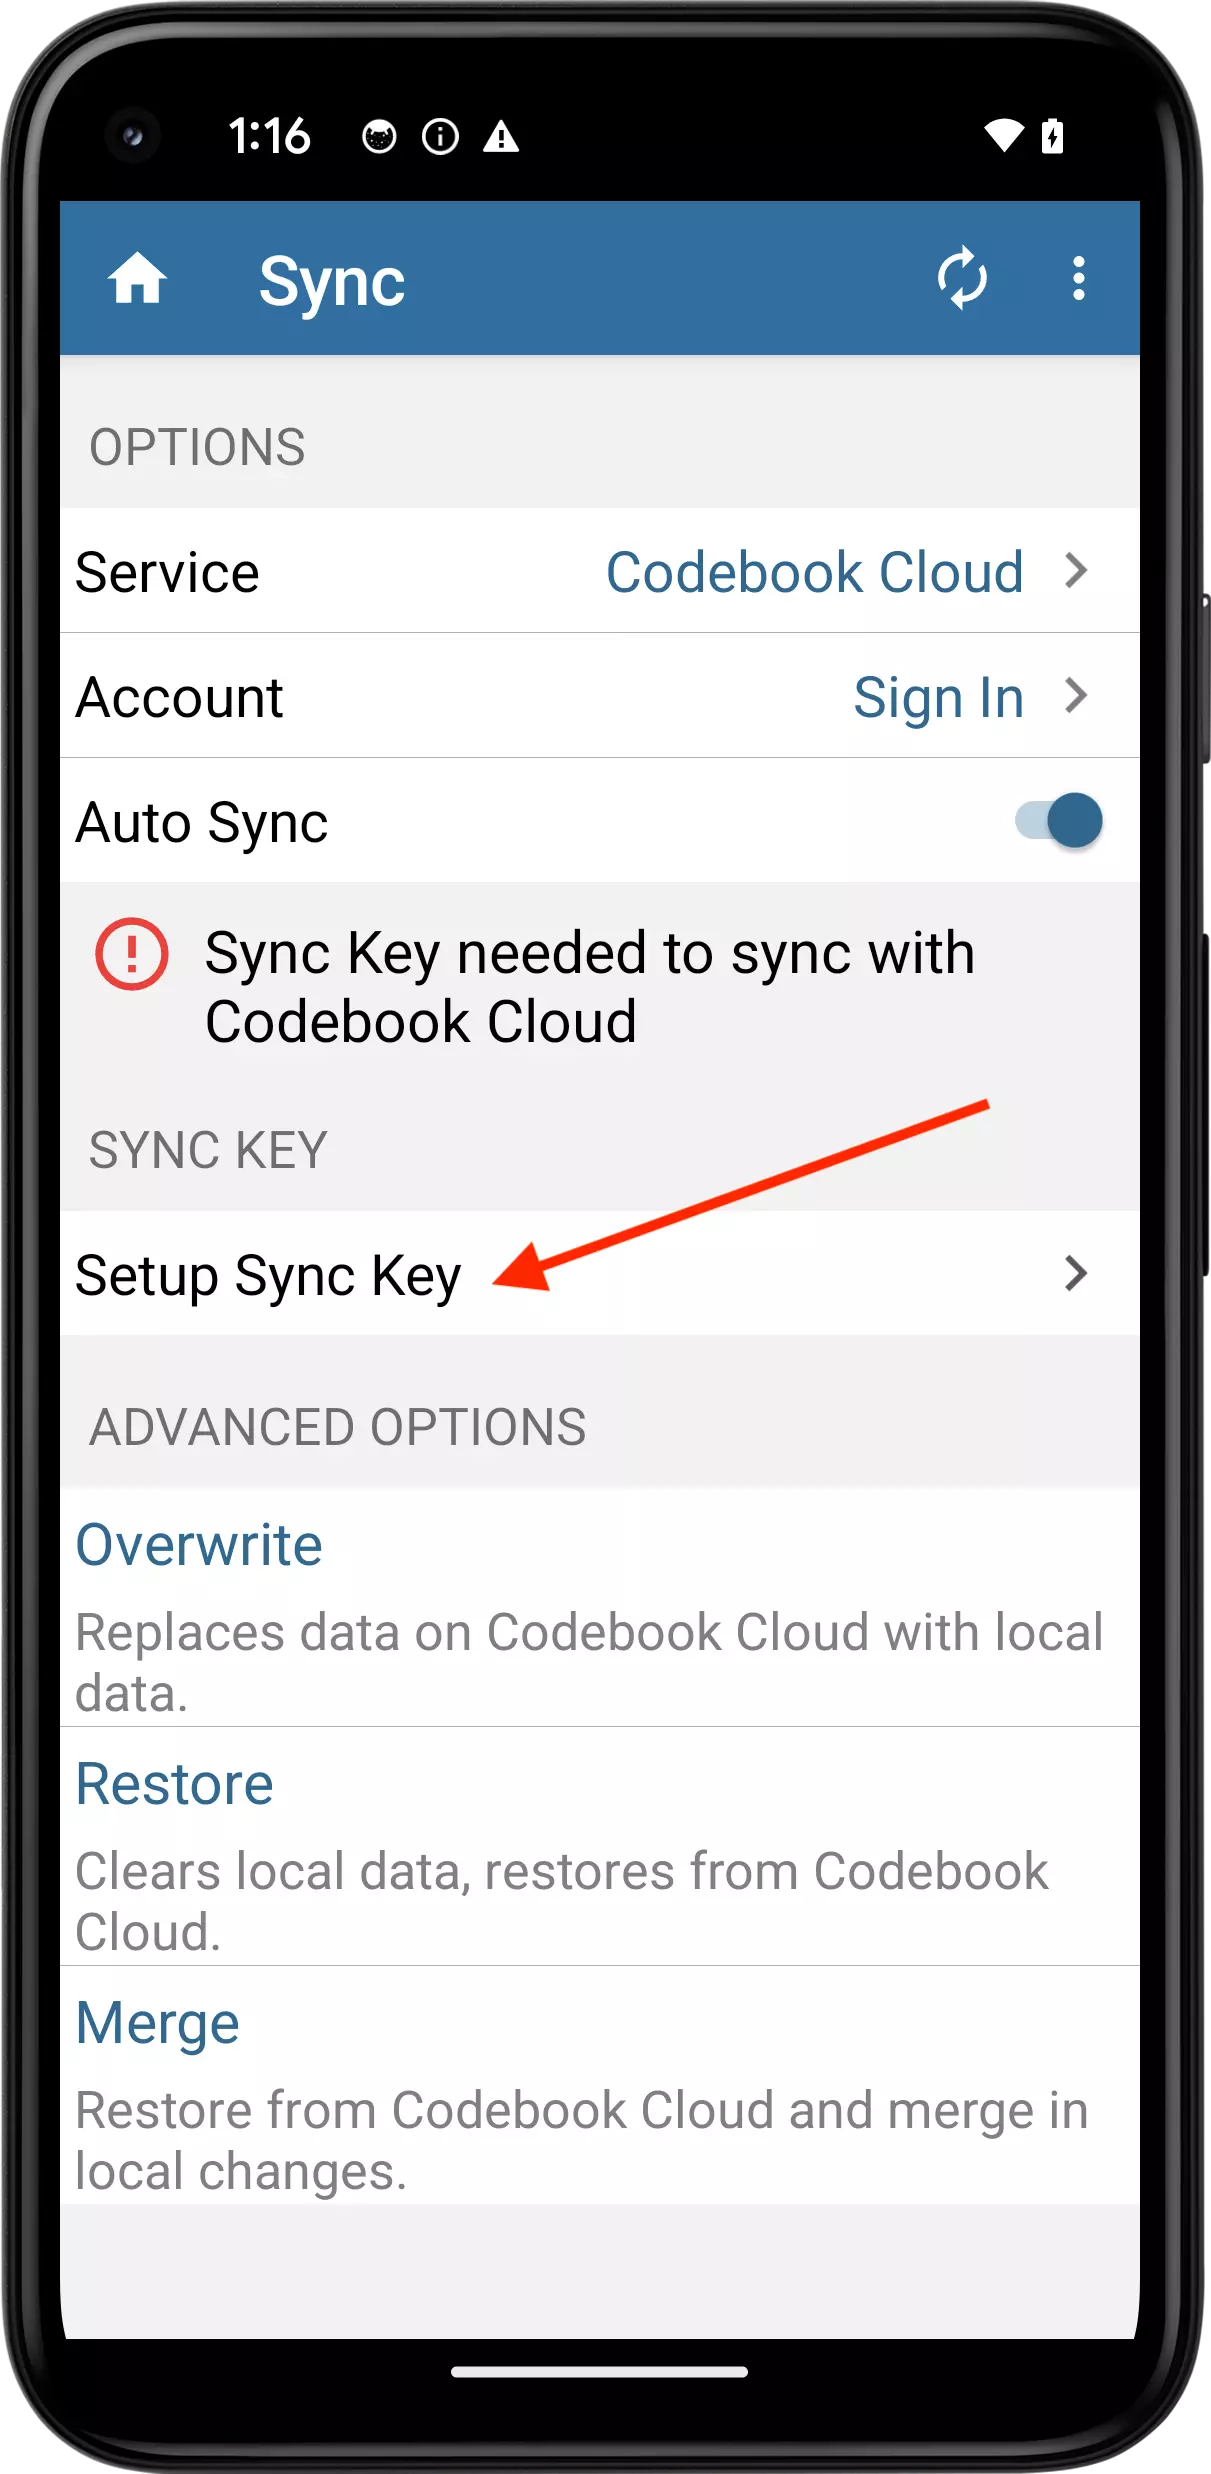
On the Sync screen, tap the Setup Sync Key button.
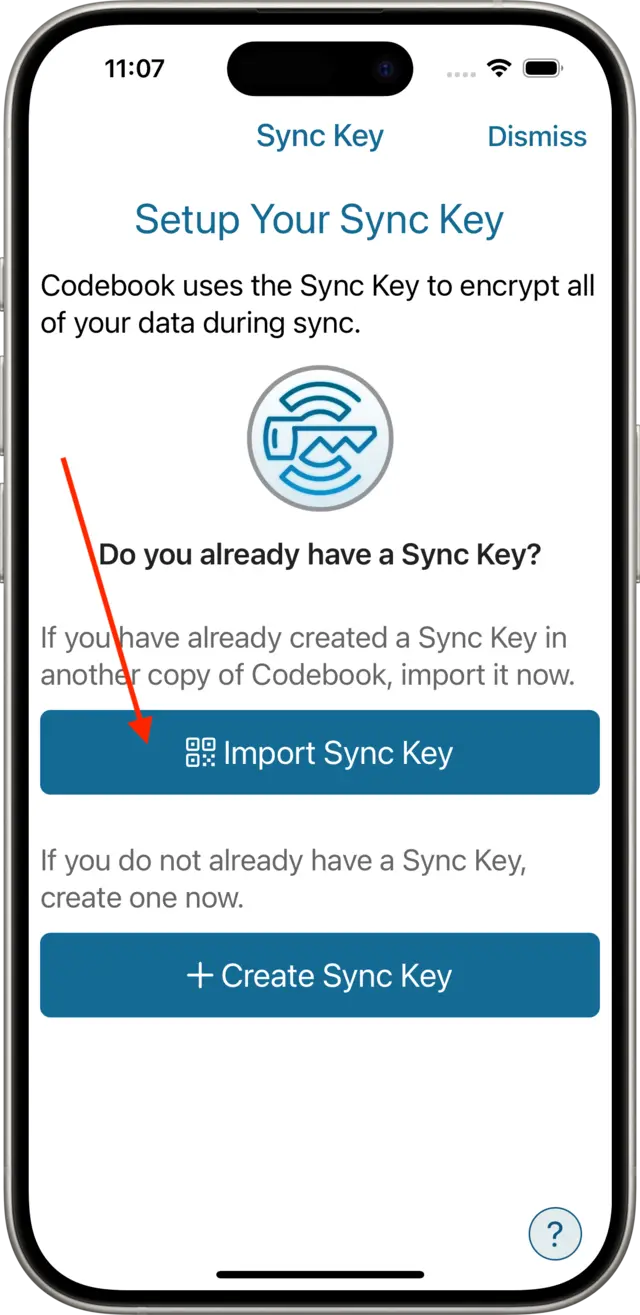
On the Setup Your Sync Key screen, tap the Import Sync Key button.
If your backup sync key is stored in your wallet, you will be given the option to Import from Wallet.
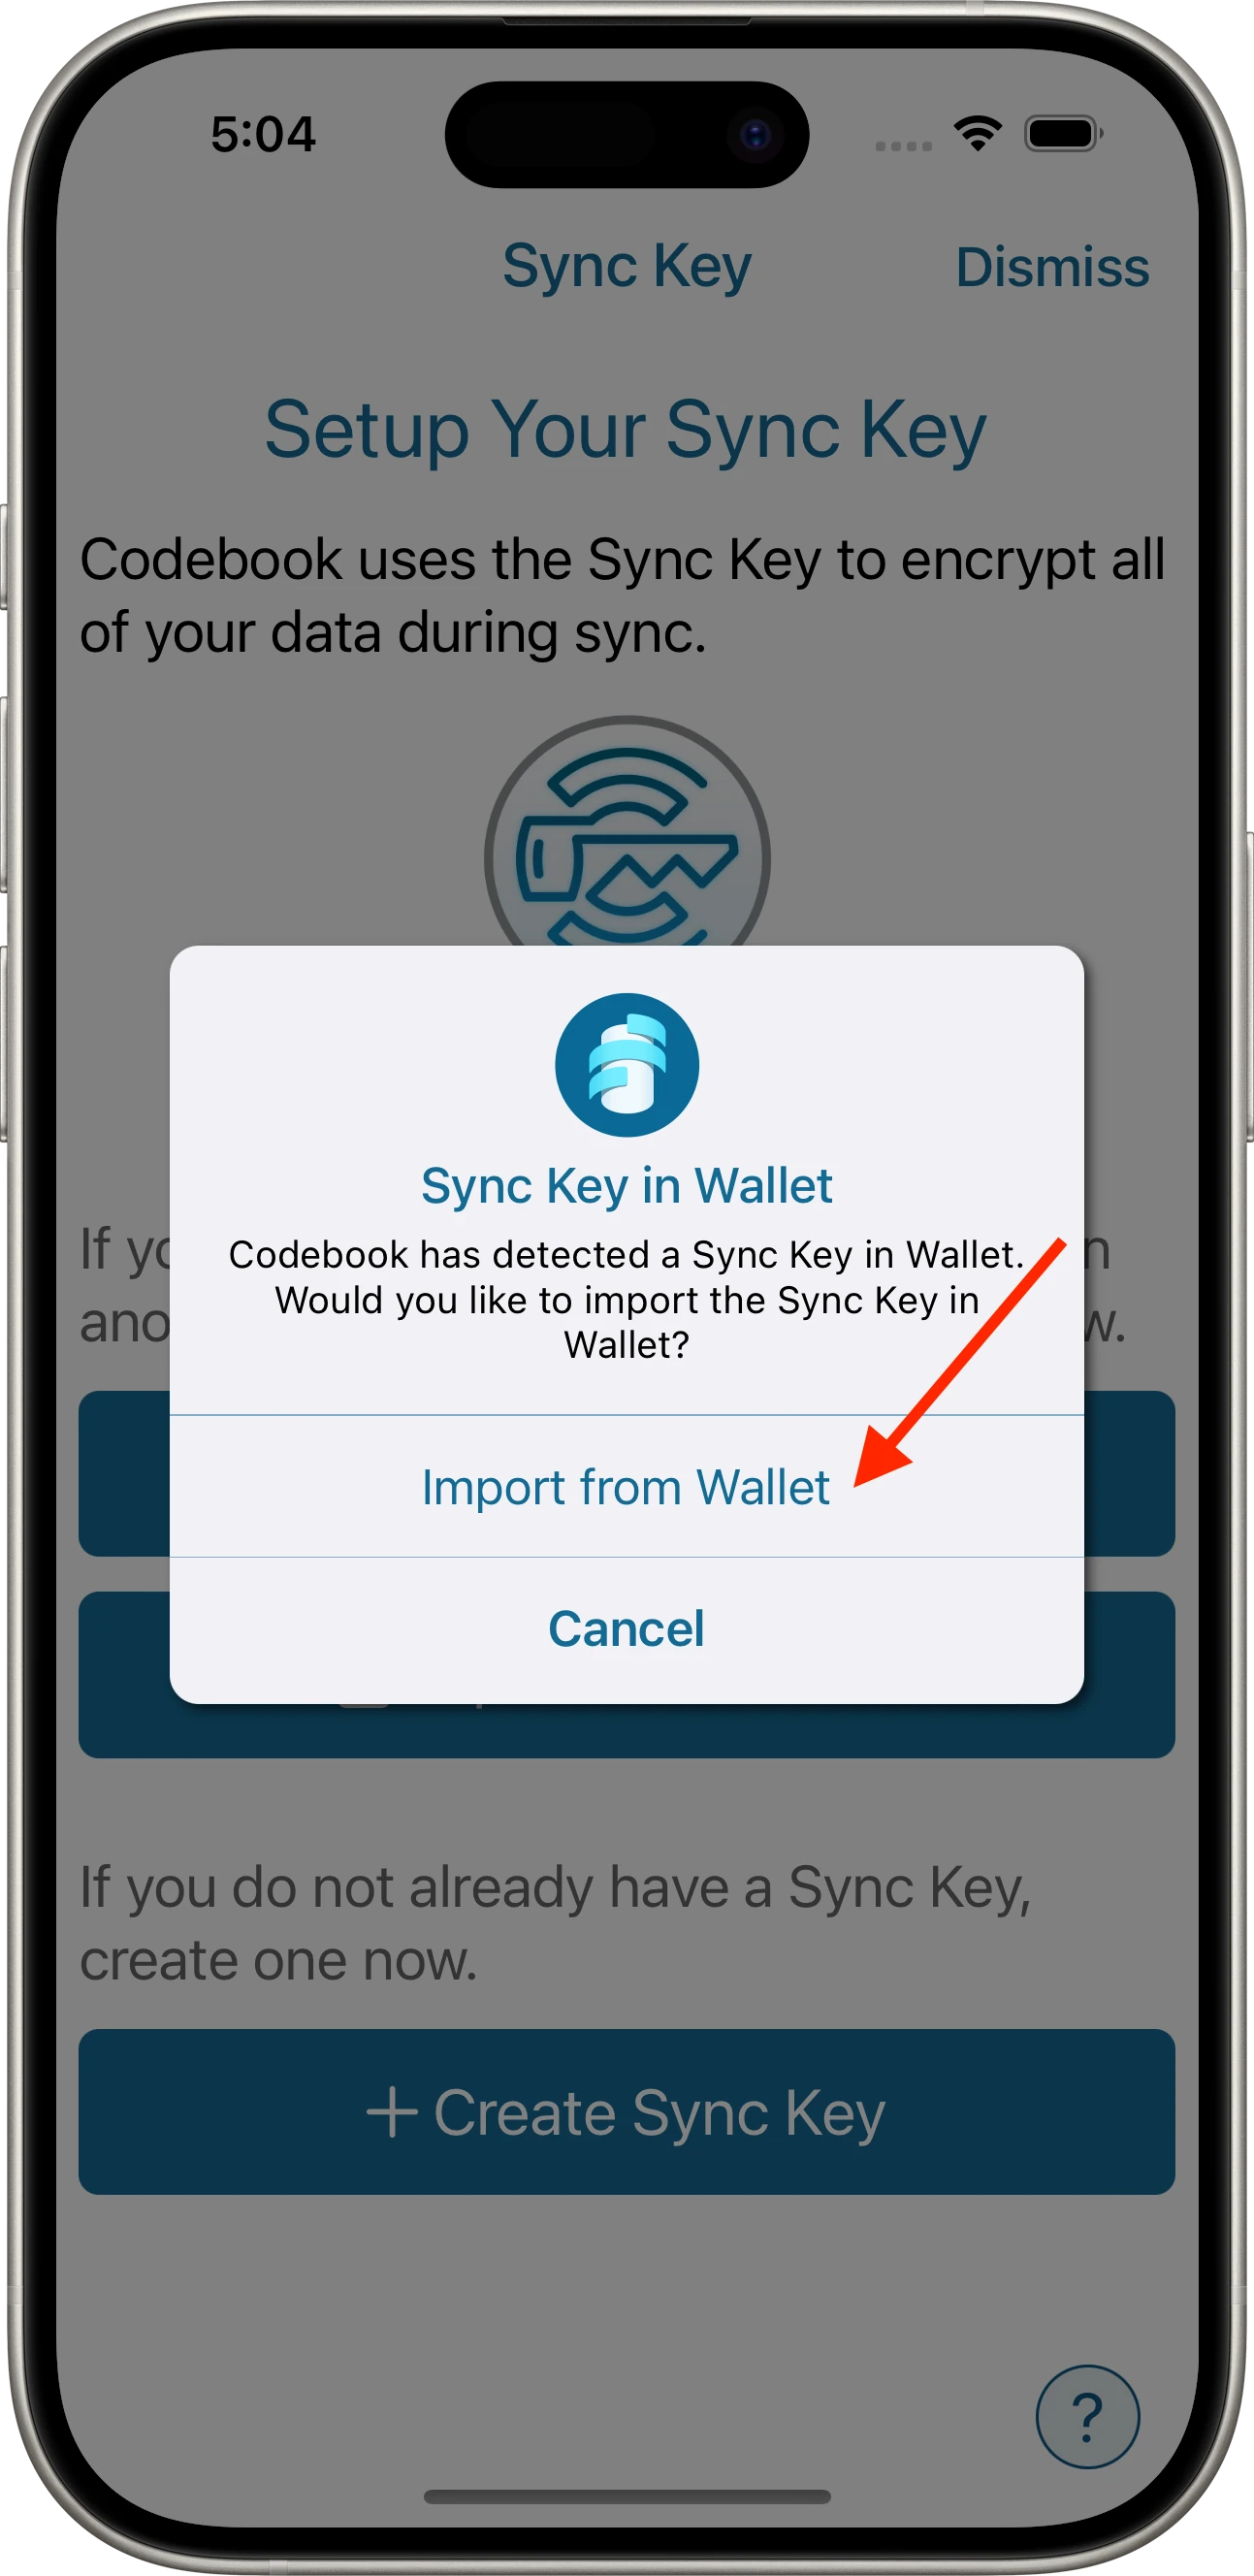
You may be prompted to allow codebook to have access to your new device's camera. Tap OK

NOTES FOR CODEBOOK CLOUD SYNC:
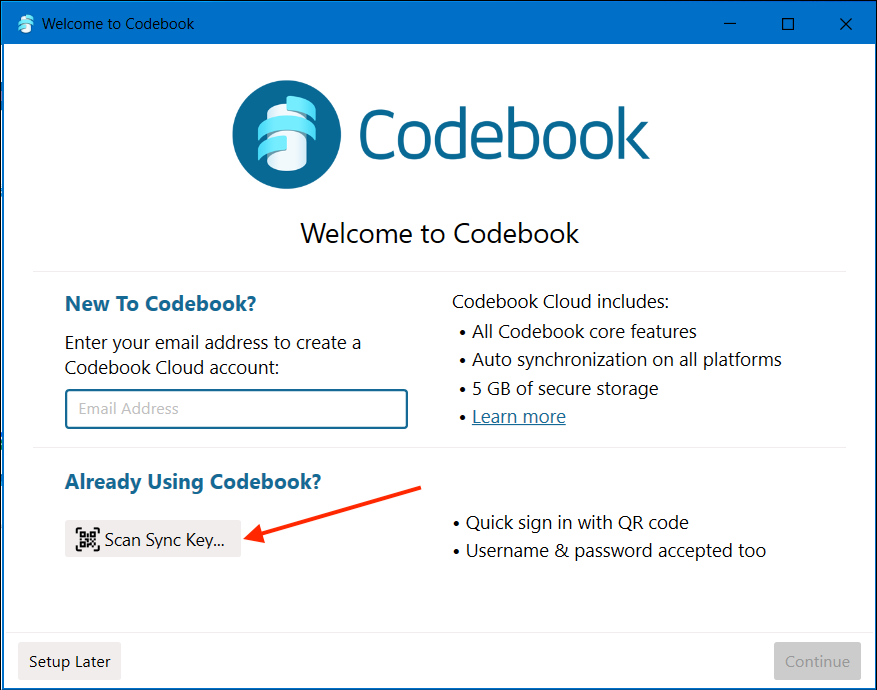
To import your Sync Key during Codebook installation:
Tap Scan Sync Key... to scan the sync key from another Codebook device.
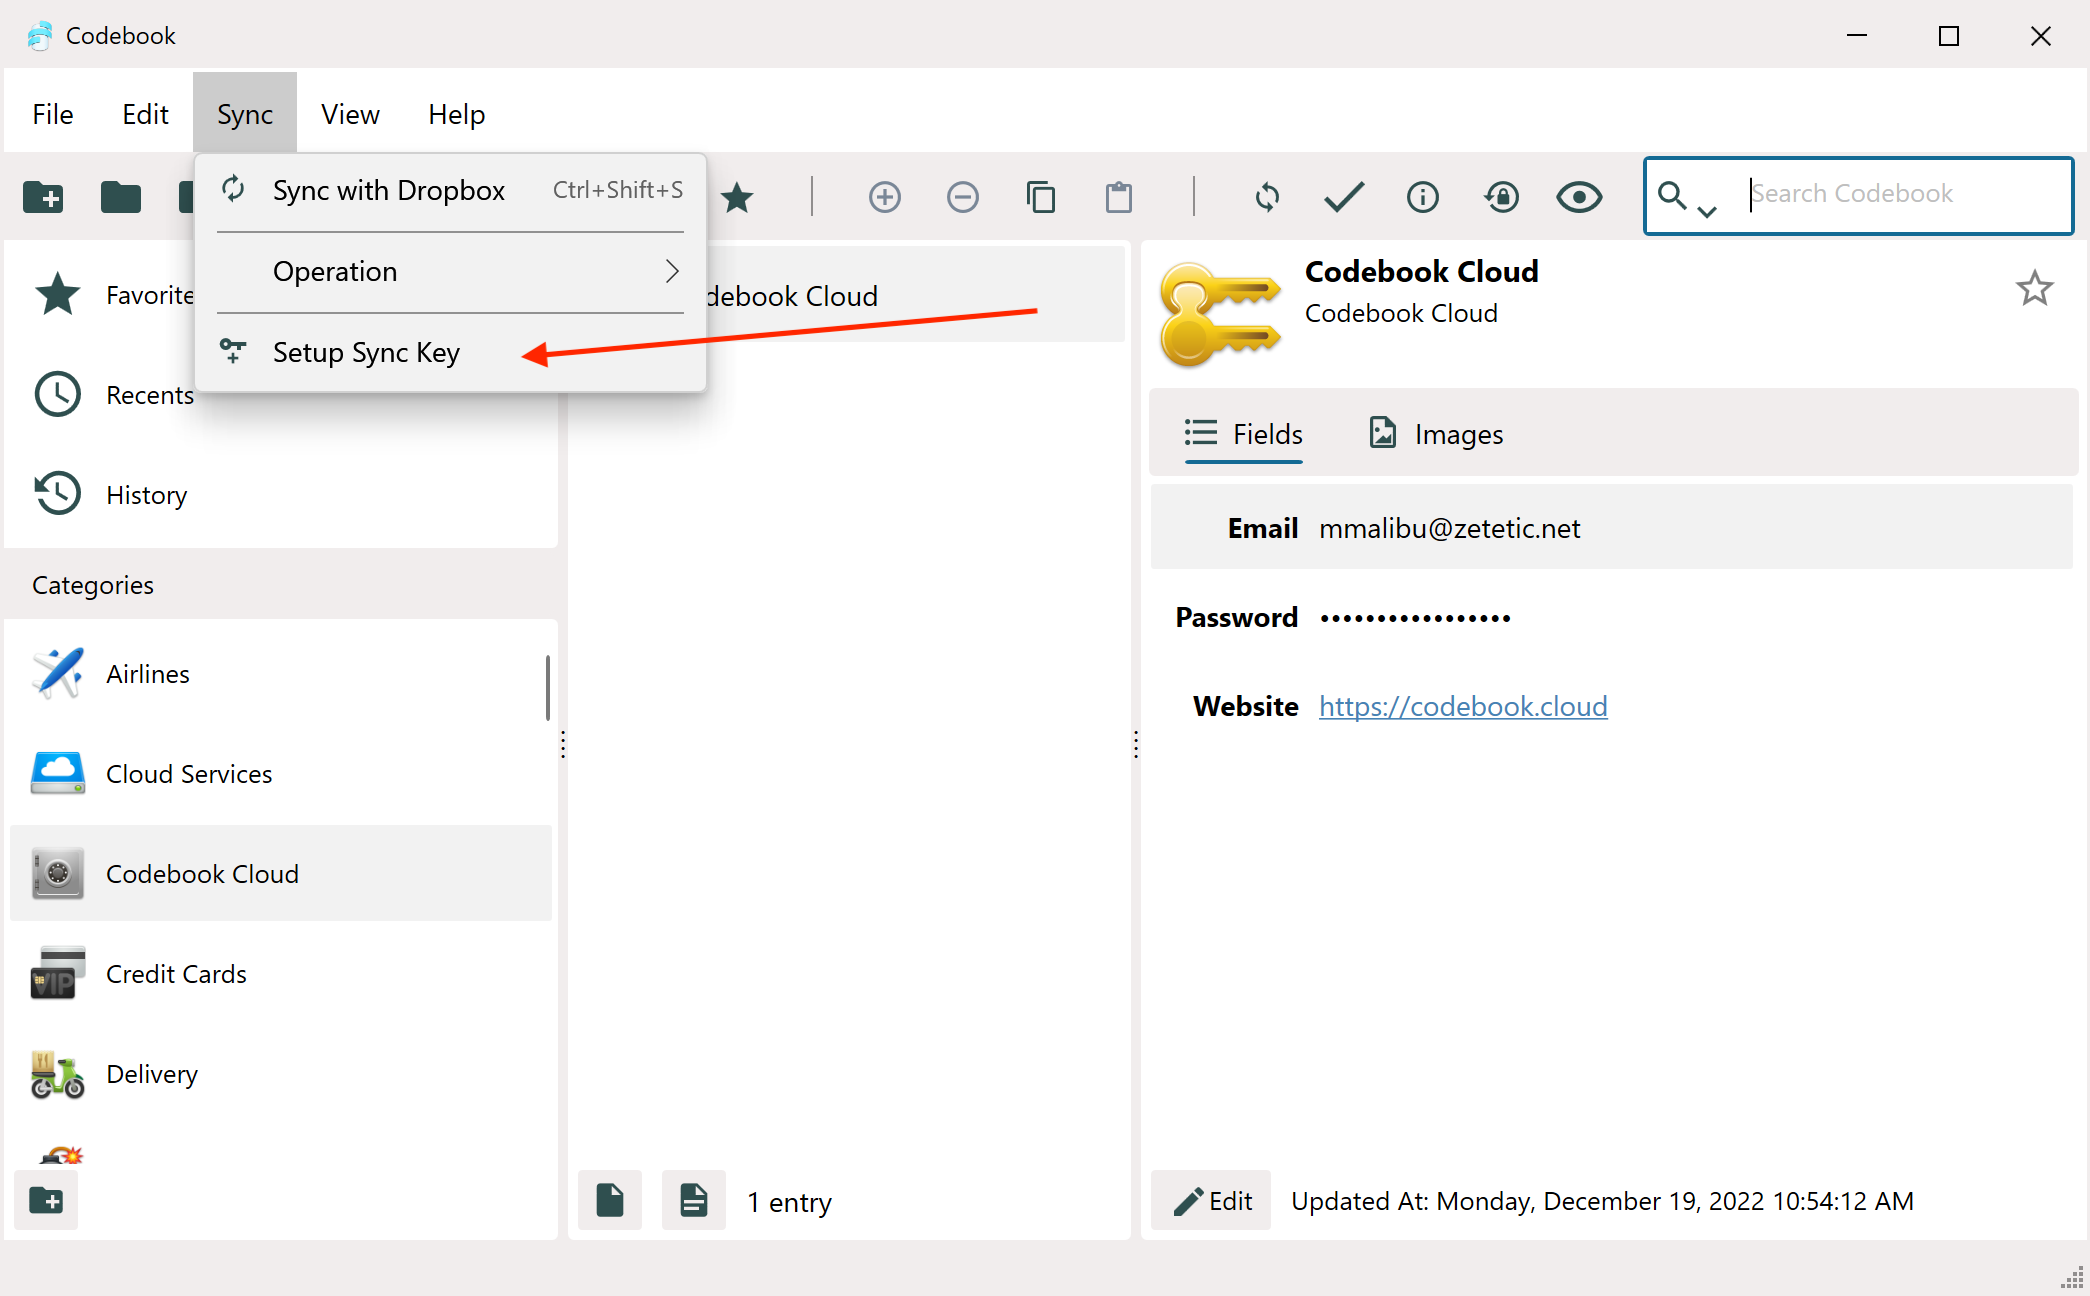
To import your Sync Key after Codebook installation:
Start the import process from Sync -> Setup Sync Key...
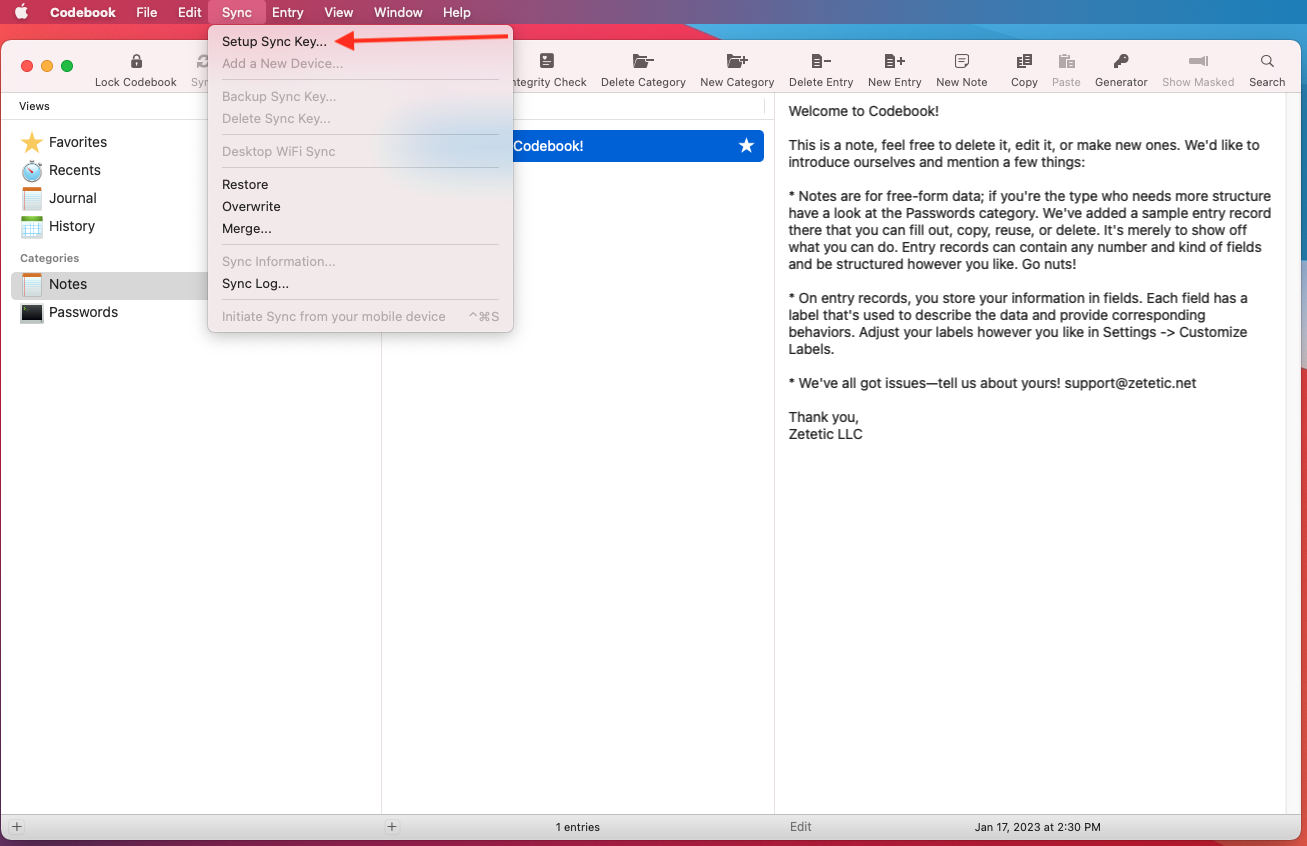
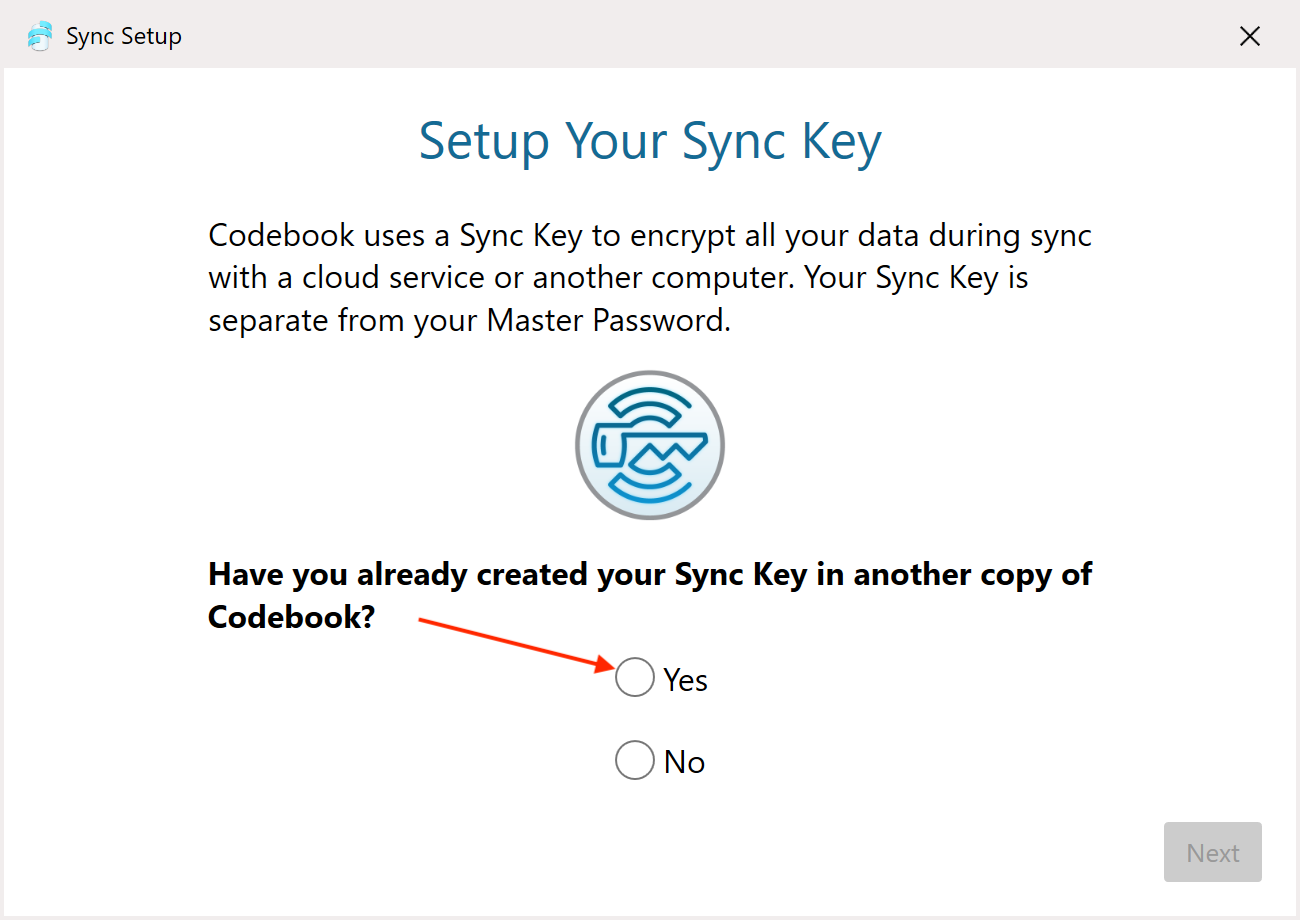
On the Setup Your Sync Key screen, select Import Sync Key to begin importing your Sync Key.

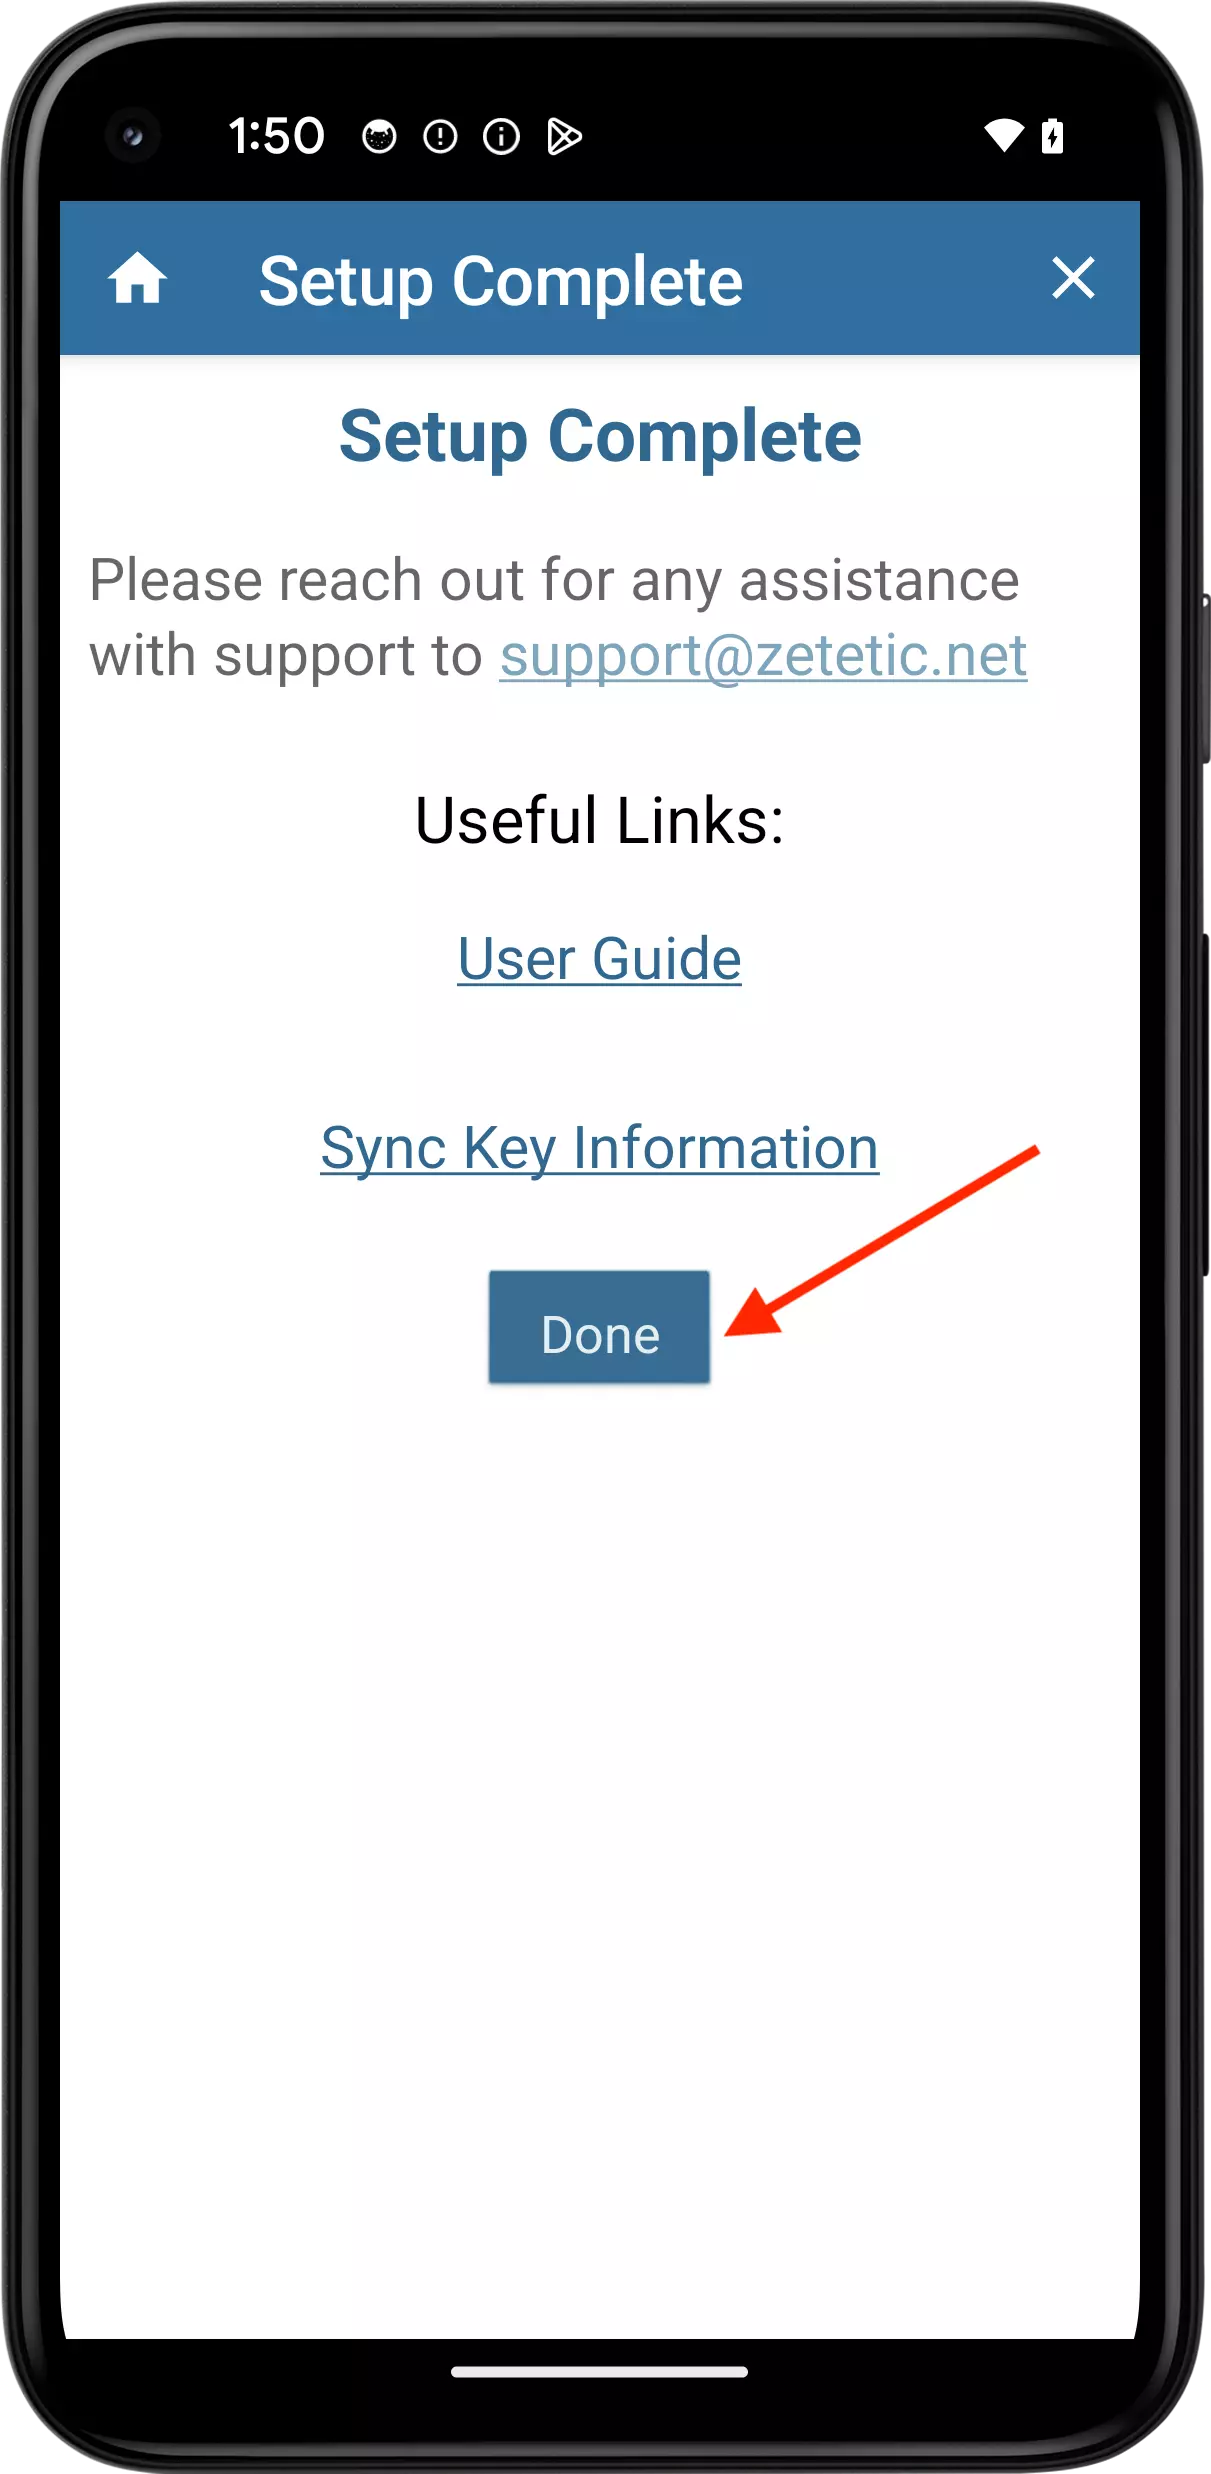
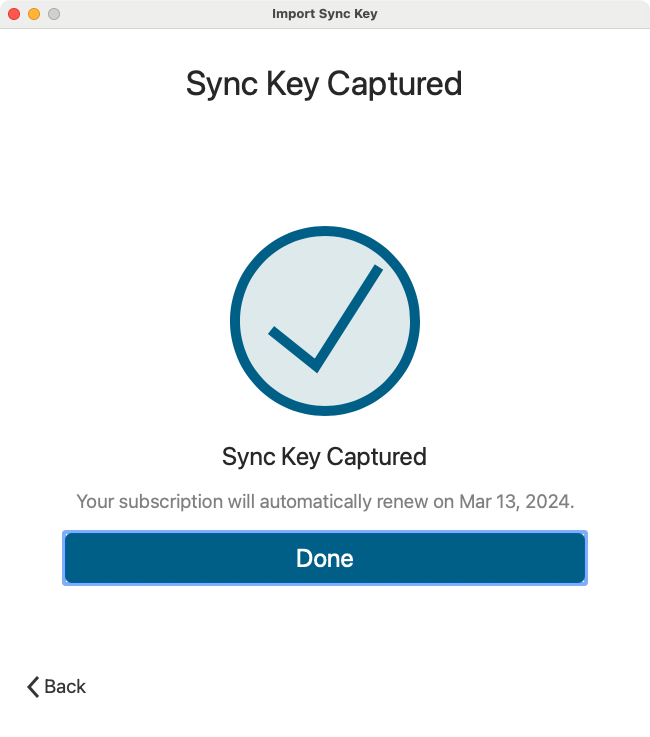
Click Done
NOTES FOR CODEBOOK CLOUD SYNC:
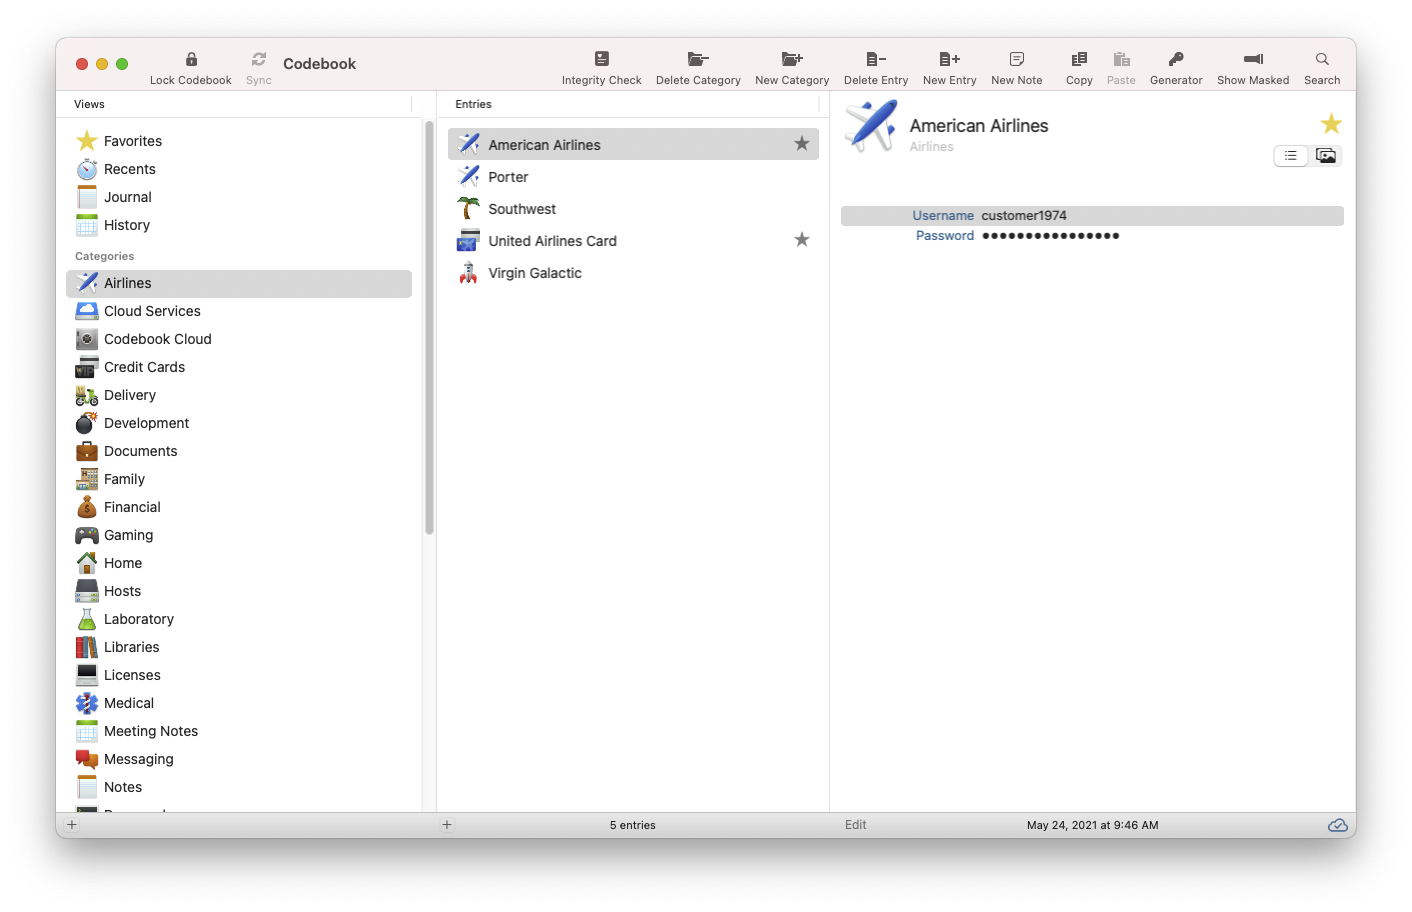
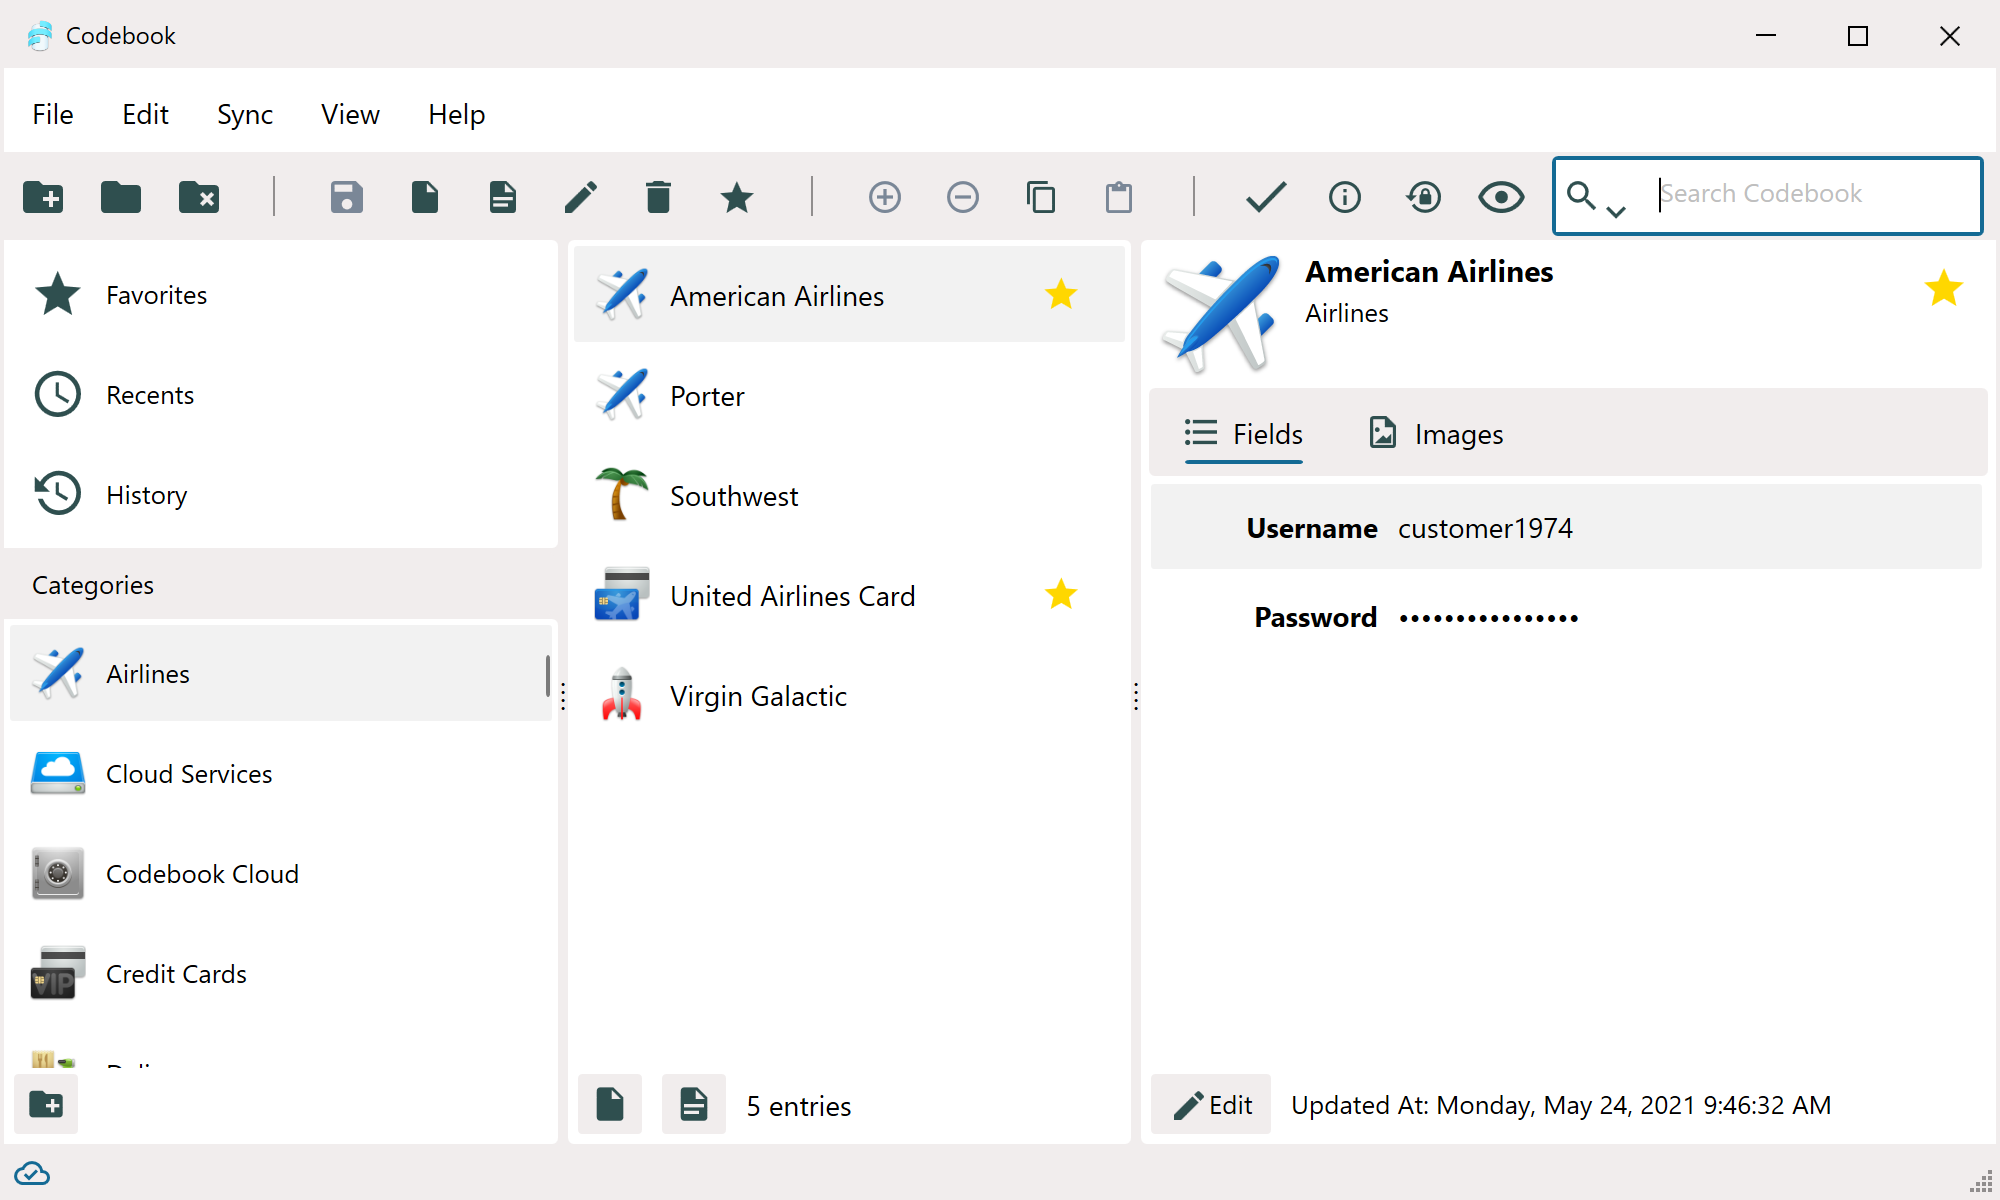
The Main Window will be displayed showing your data has been synced with your existing Codebook Cloud data.
To import your Sync Key during Codebook installation:
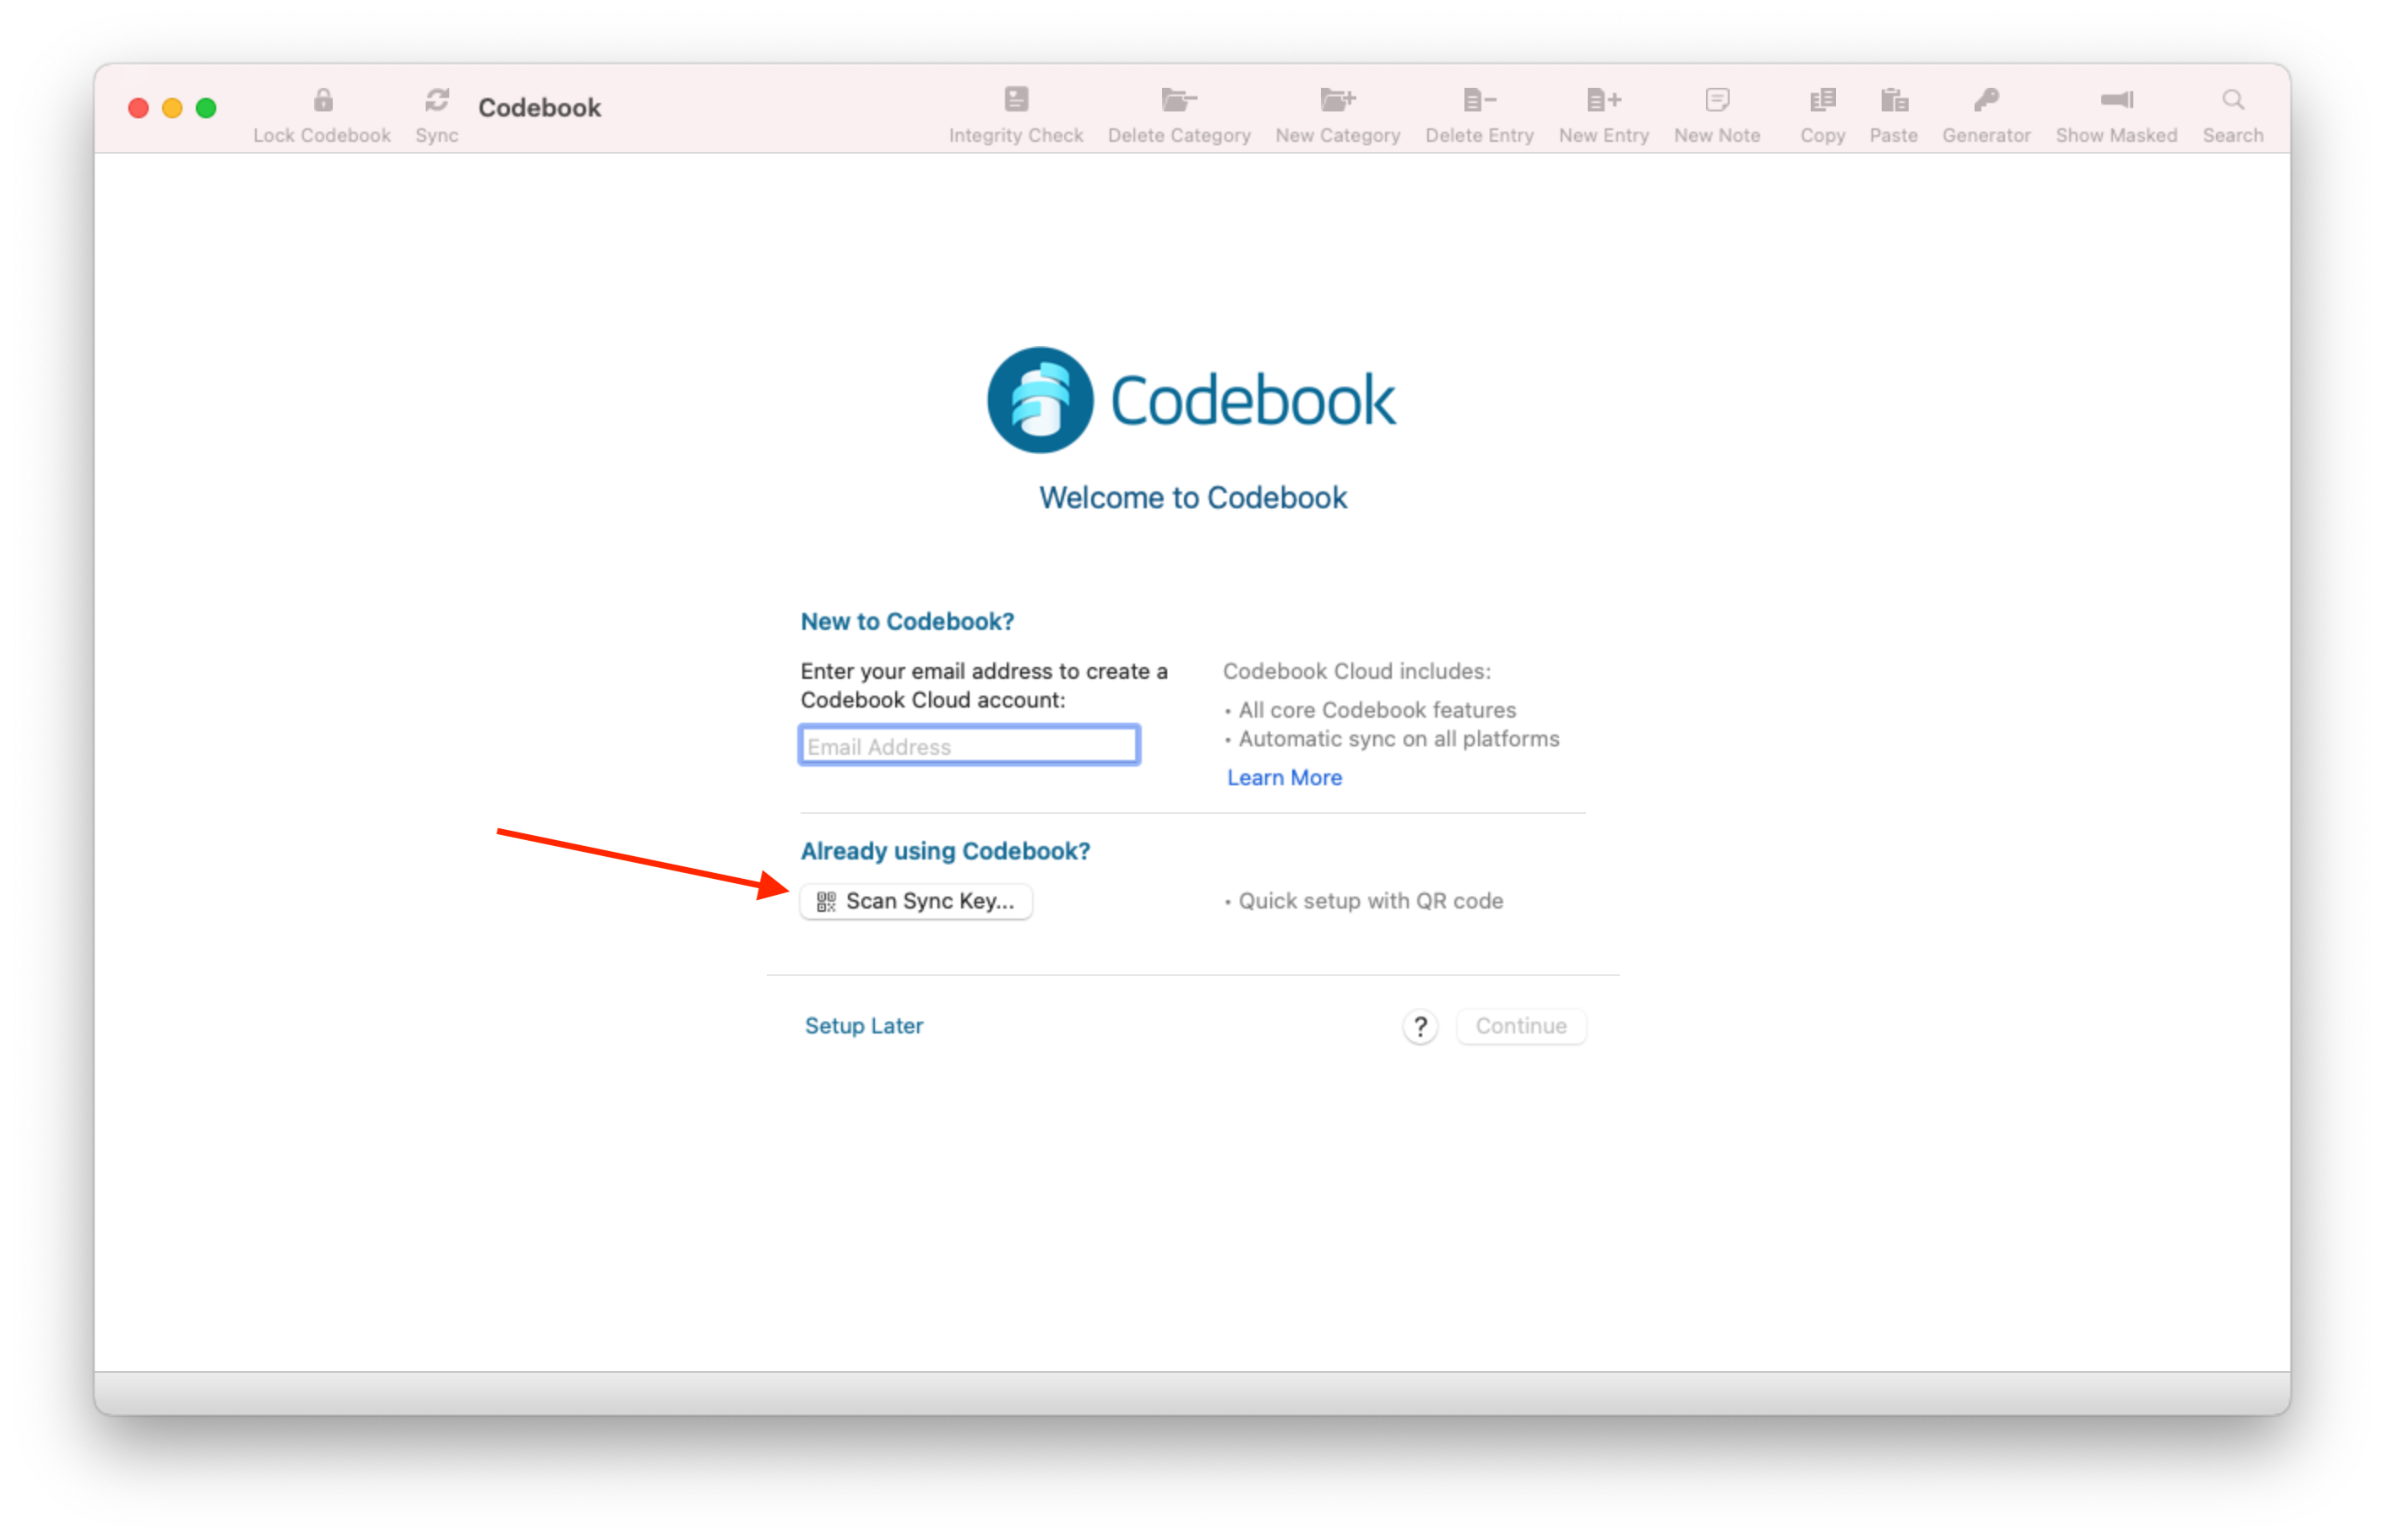
Click Scan Sync Key... to scan the sync key from another Codebook device.
To import your Sync Key after Codebook installation:

NOTES:
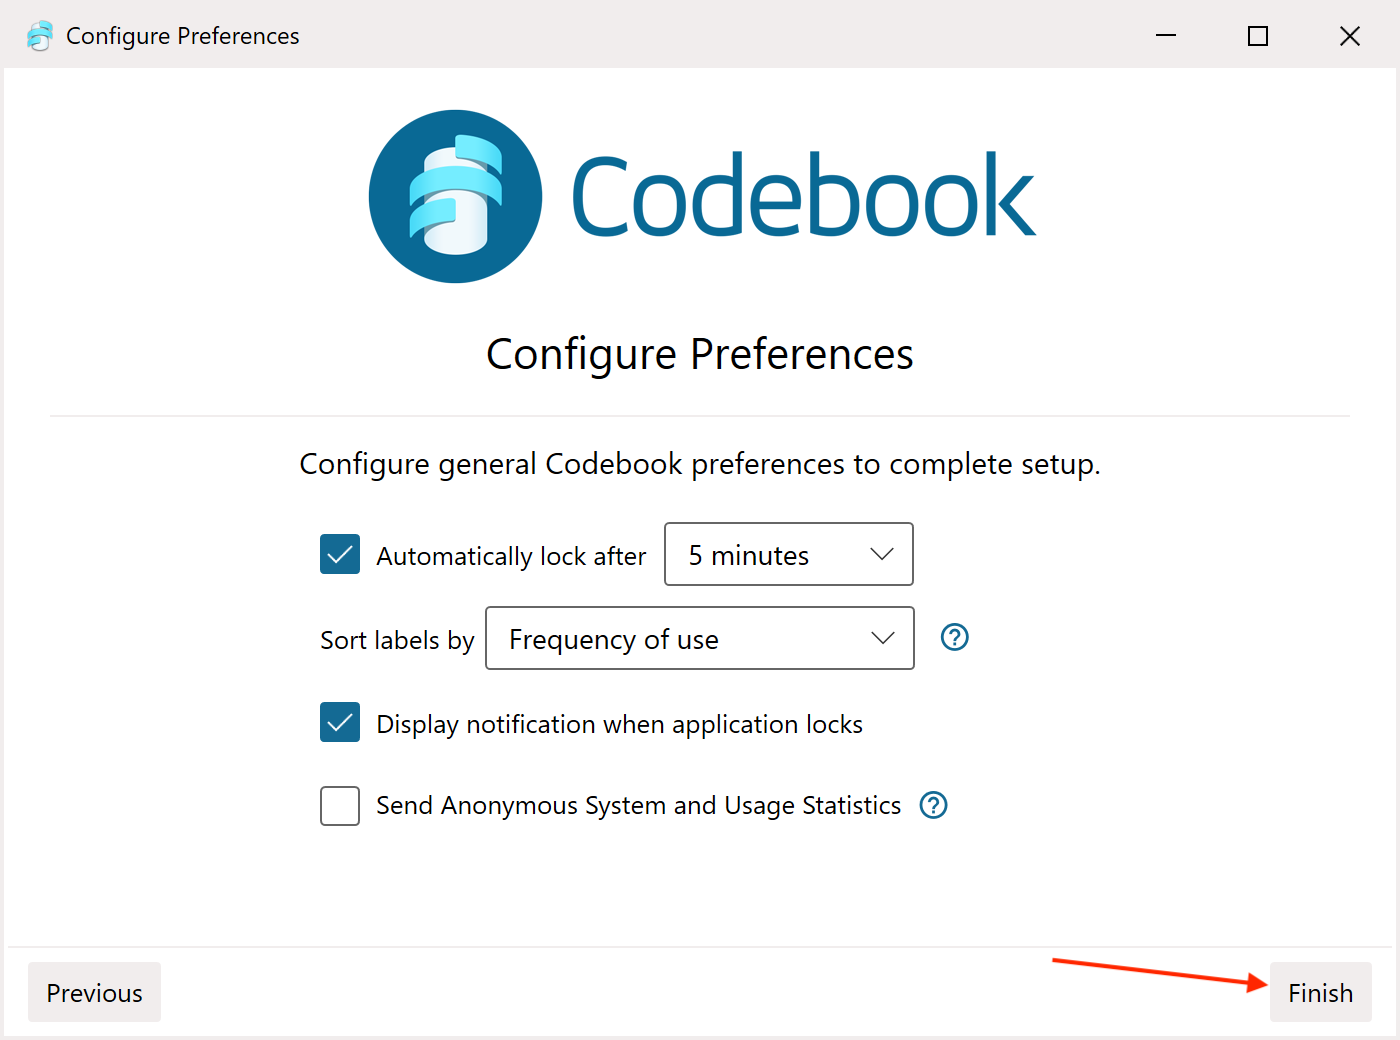
Preferences:
Click Finish
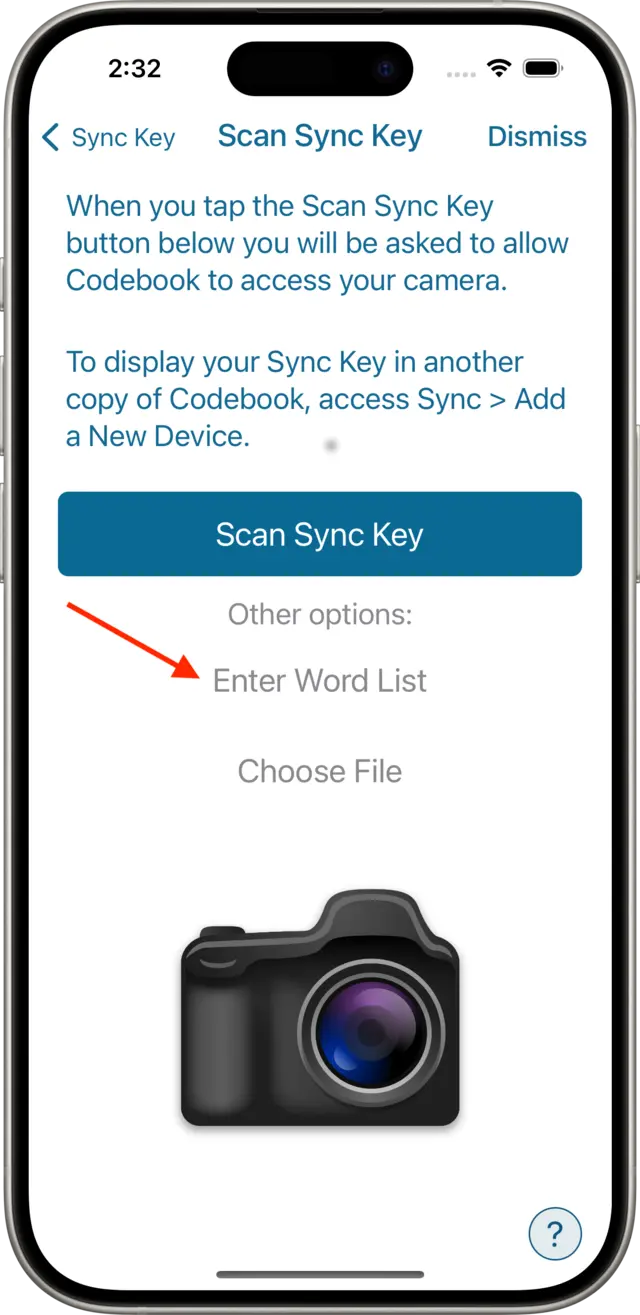
On the Setup Your Sync Key screen, tap Setup Sync Key to begin importing your Sync Key.
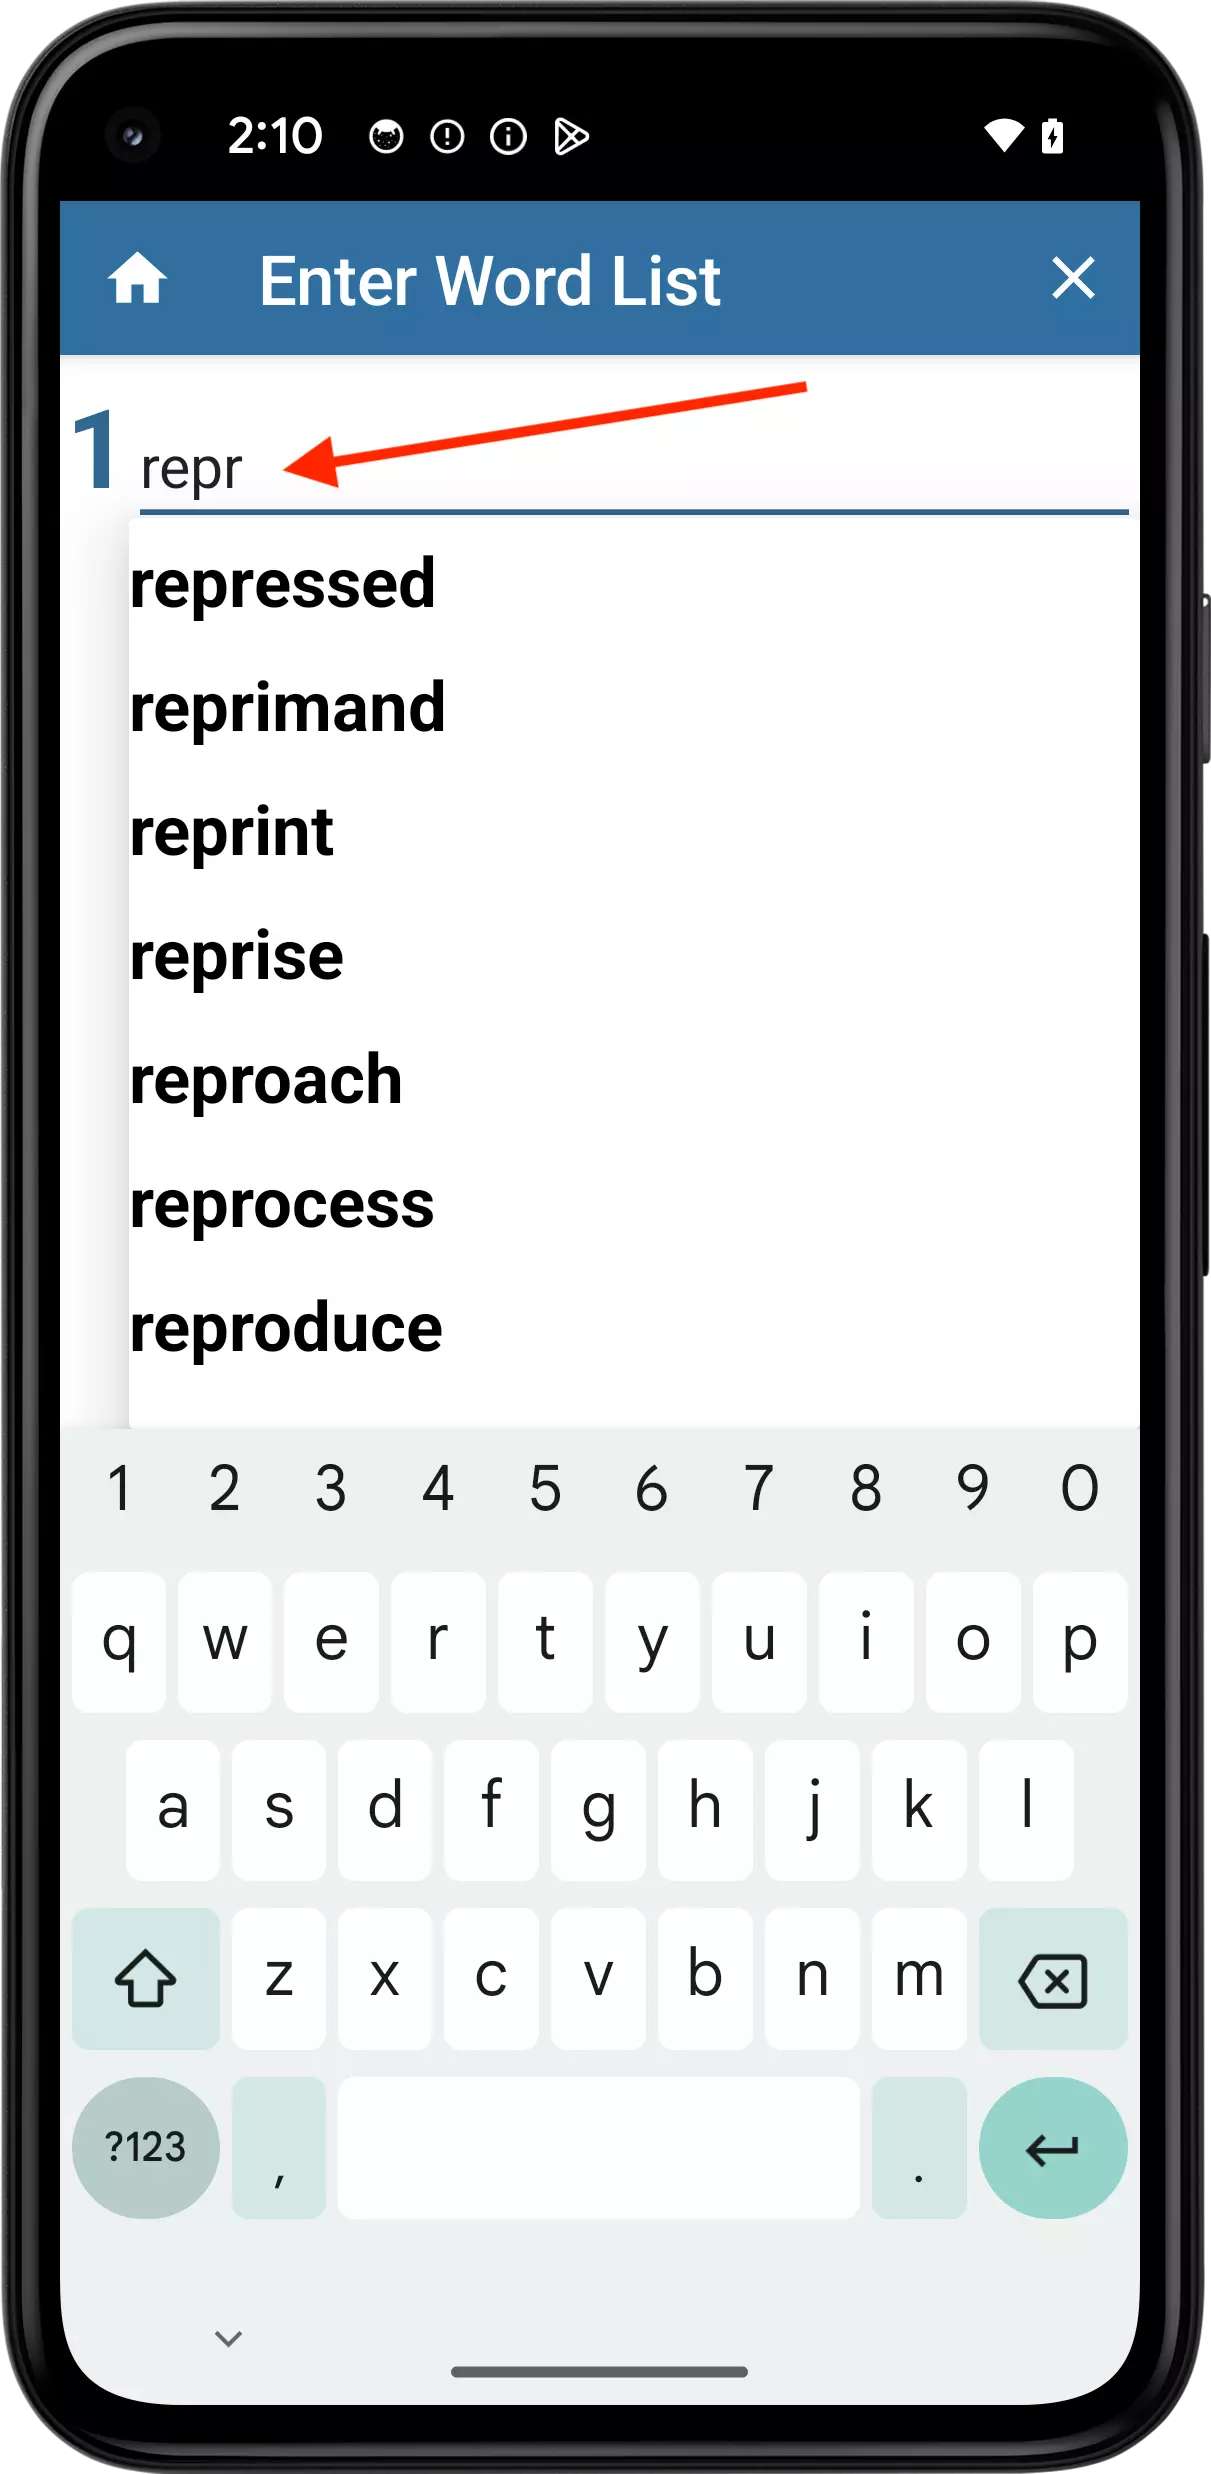
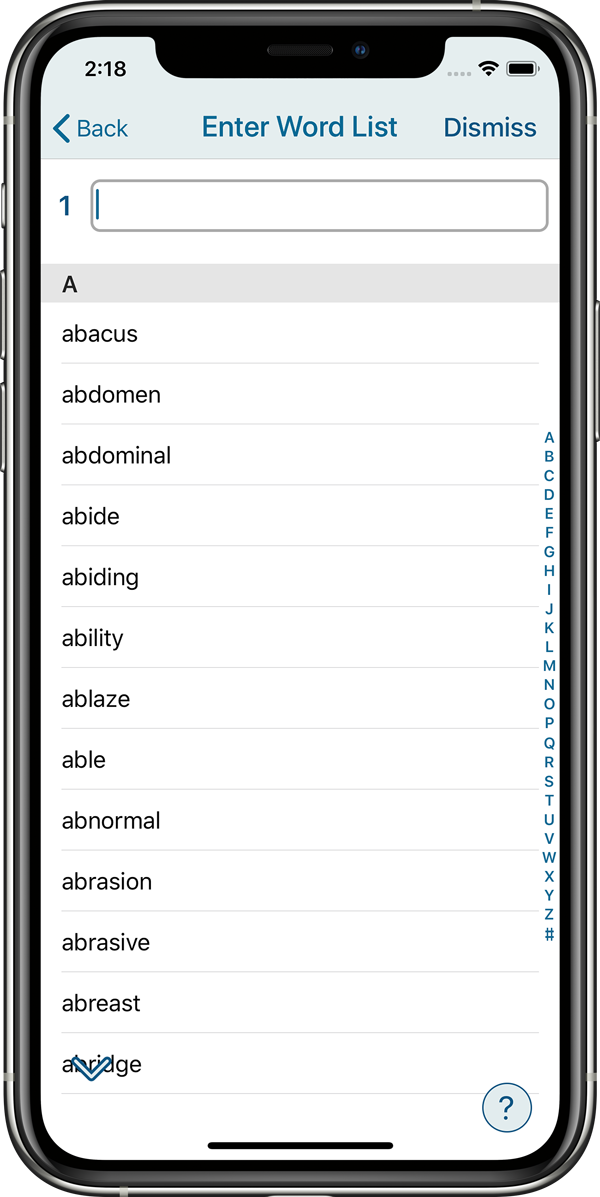
The Enter Your Word List Screen will be displayed.
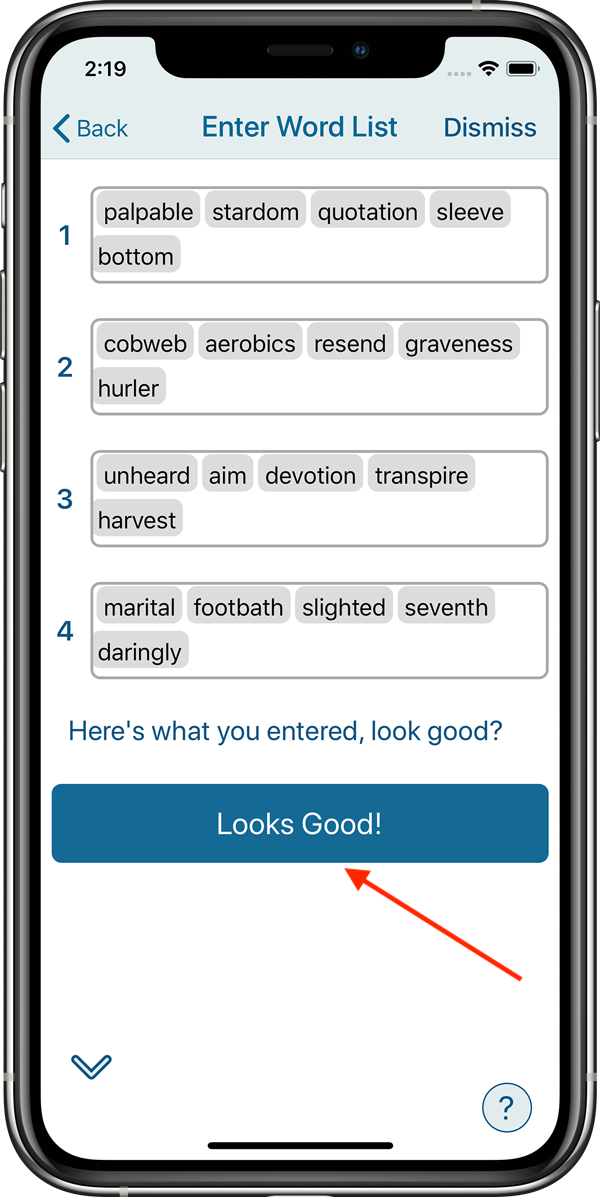
Enter the 20 words from your Backup Word List in order. Enter your words one row of five words at a time. As you type, the auto-complete selection list will show words matching the letters you have typed. You can continue typing or tap the desired word to select it. Be careful to select the correct word from the selection list, many of the words are very similar.
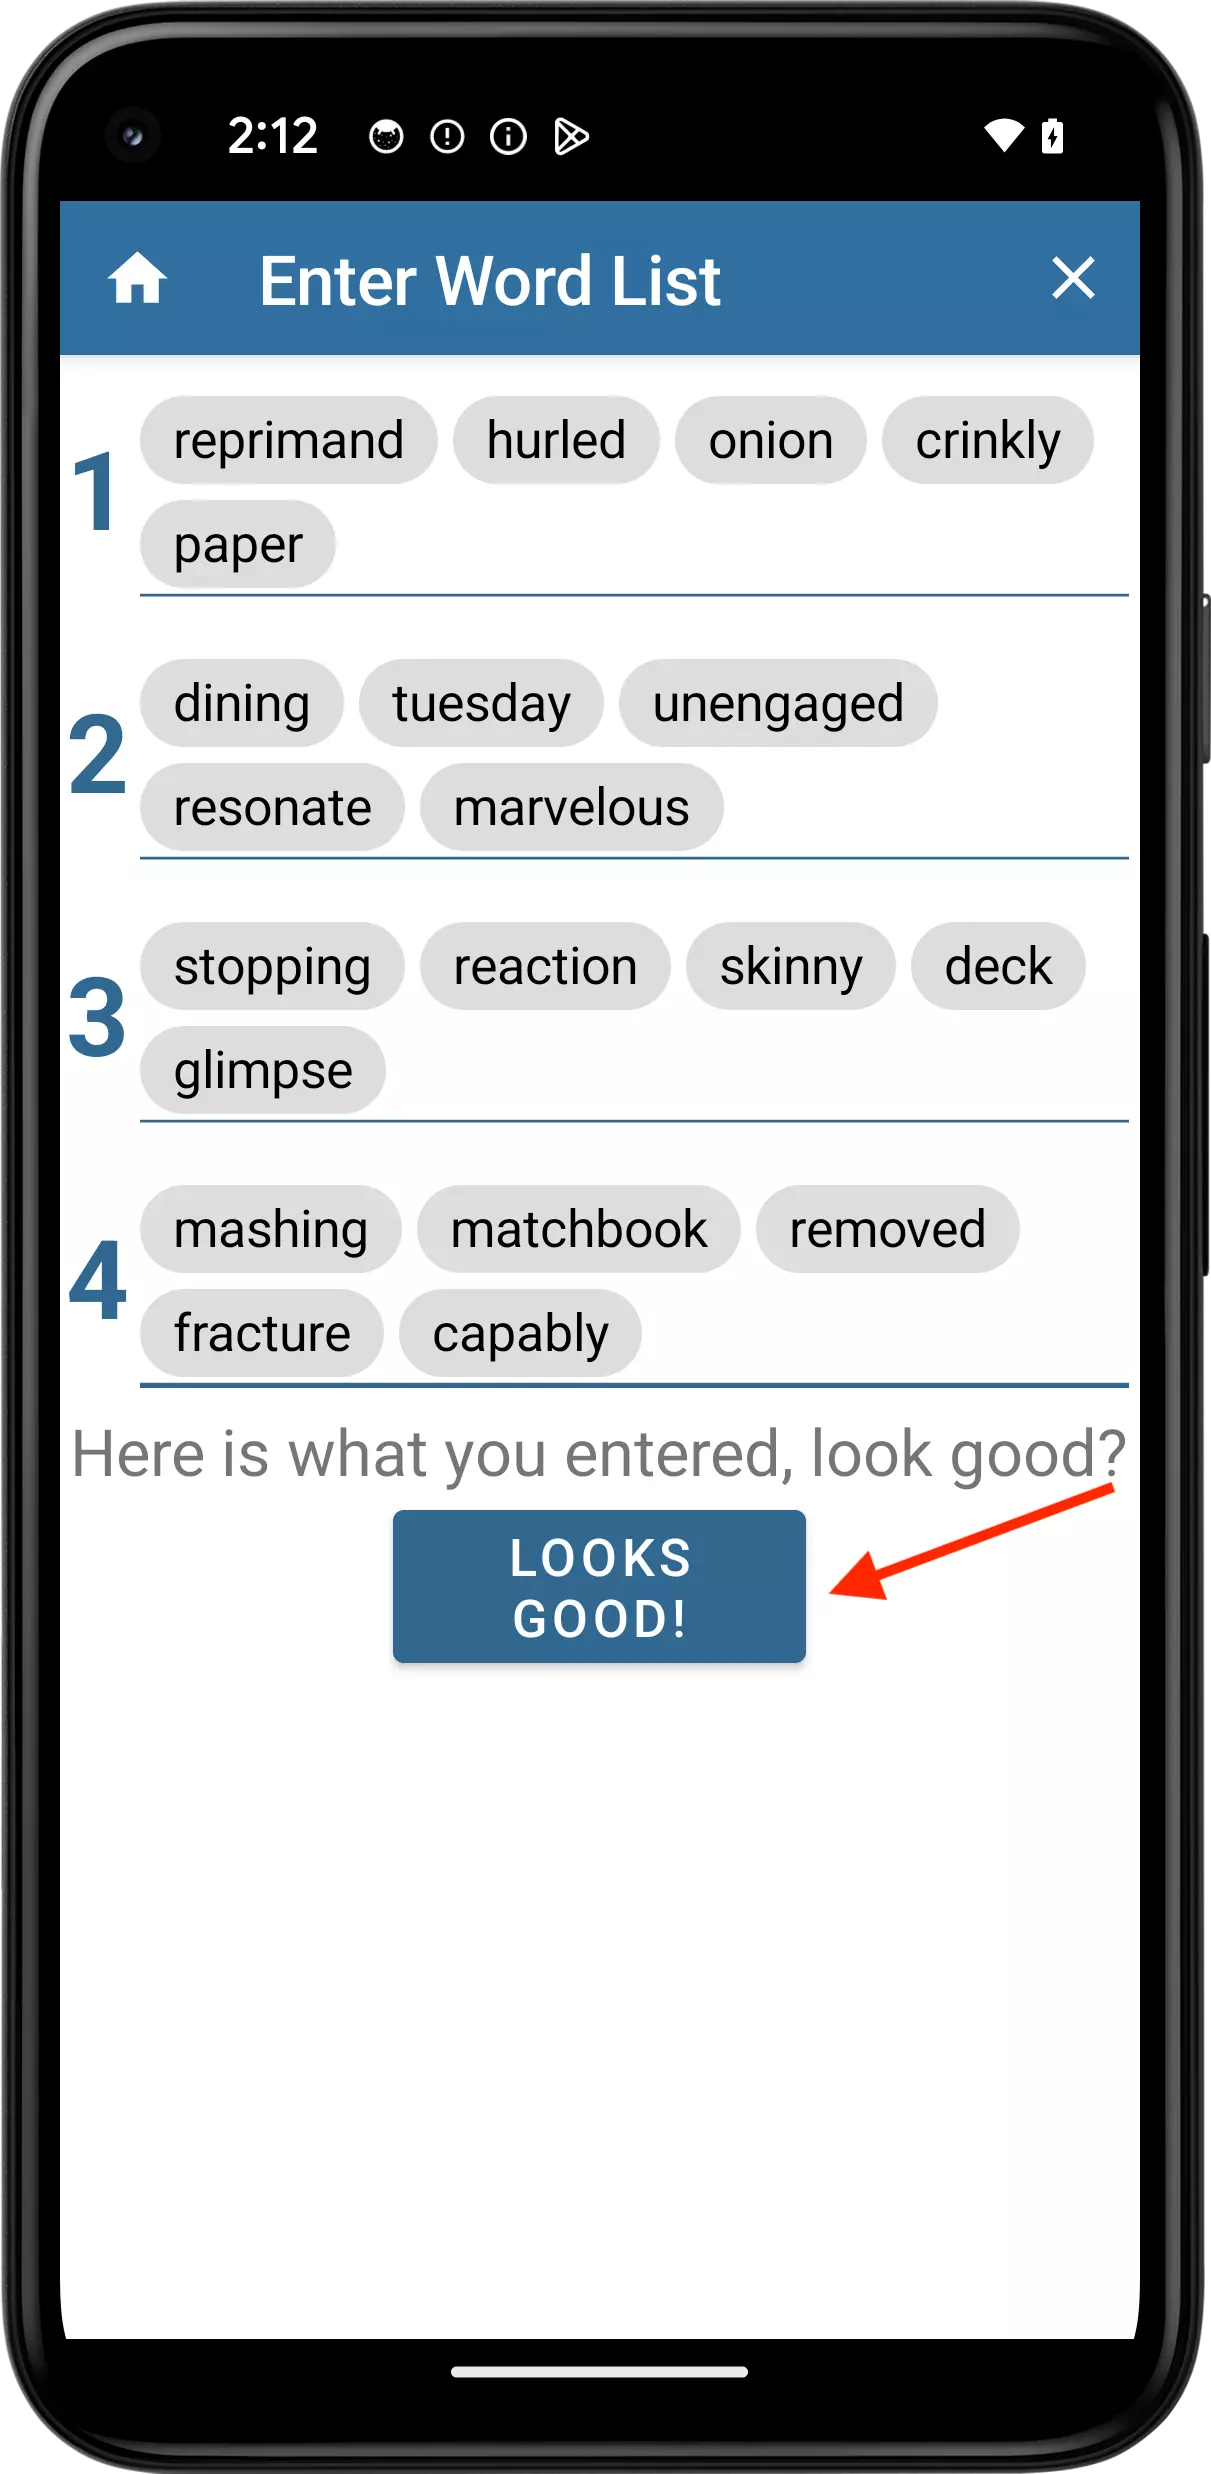
After you have entered your 20 words, your entire Word List will be displayed for you to review. You will be asked - Here's what you entered, look good? Tap Looks Good! after you have verified the words are correct.
On the Setup Your Sync Key screen, tap the Import Sync Key button to begin importing your Sync Key.
The Enter Your Word List Screen will be displayed.
Enter the 20 words from your Backup Word List in order. Enter your words one row of five words at a time. As you type, the auto-complete selection list will show words matching the letters you have typed. You can continue typing or tap the desired word to select it. Be careful to select the correct word from the selection list, many of the words are very similar.
After you have entered your 20 words, your entire Word List will be displayed for you to review. You will be asked - Here's what you entered, look good? Tap Looks Good! after you have verified the words are correct.
On the Setup Your Sync Key screen, select Yes to begin importing your Sync Key.
The Enter Your Word List Screen will be displayed.
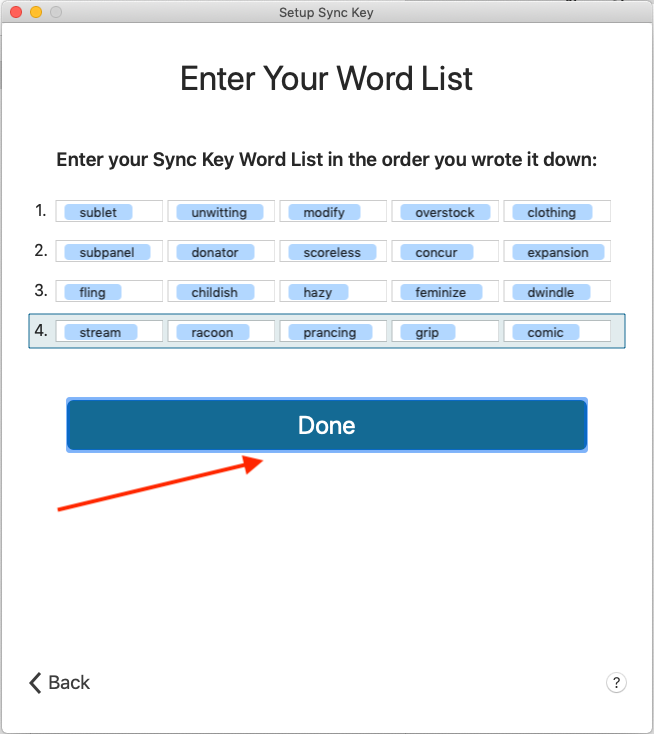
Enter the 20 words from your Backup Word List in order. As you type, the auto-complete selection list will show words matching the letters you have typed. You can continue typing or scroll to the desired word and press enter. Be careful to select the correct word from the selection list, many of the words are very similar. Be sure to enter the words in the correct order.
After you have entered your 20 words, click on Done
Start the import process from Sync -> Setup Sync Key.
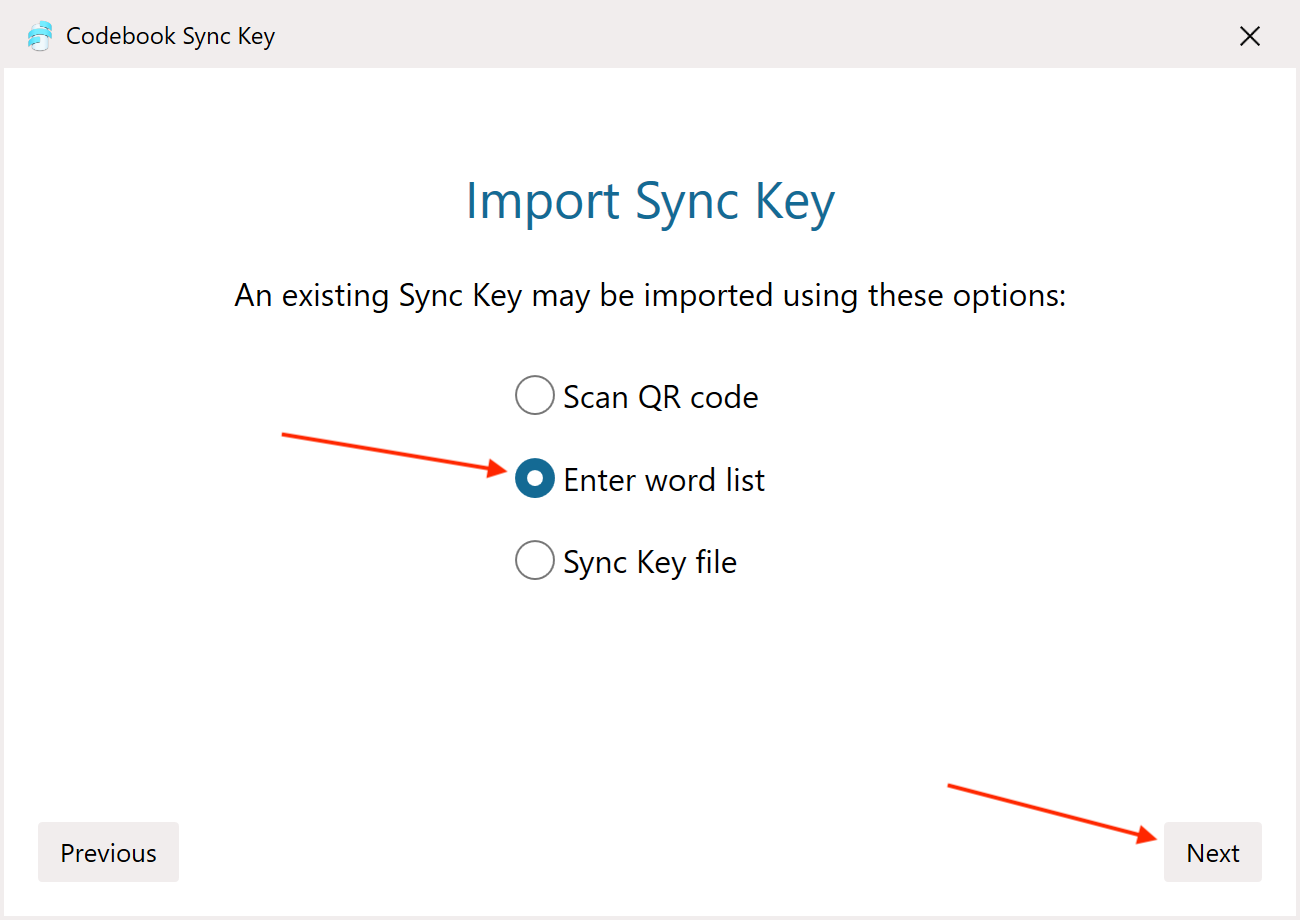
On the Setup Your Sync Key screen, select Yes, click Next to begin importing your Sync Key.
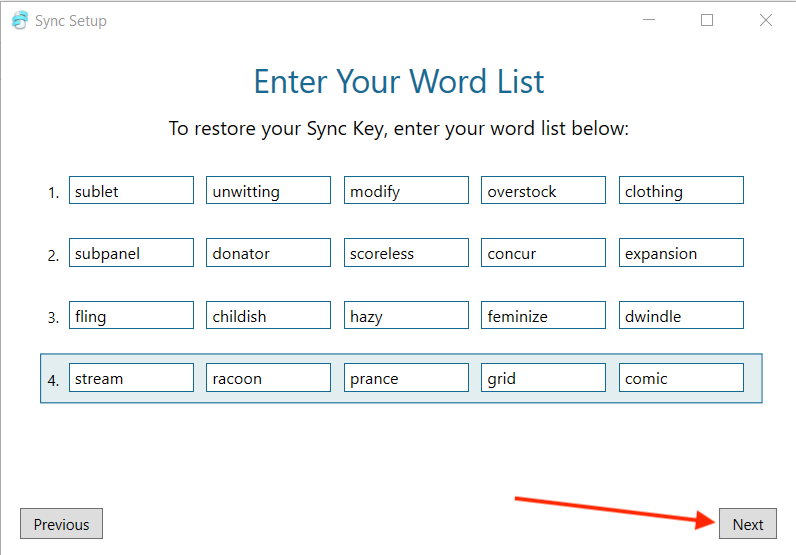
The Enter Your Word List Screen will be displayed
Enter the 20 words from your Backup Word List in order. Be sure to enter the words in the correct order. As you type, the auto-complete selection list will show words matching the letters you have typed. You can continue typing or scroll to the desired word and press enter. Be careful to select the correct word from the selection list, many of the words are very similar.
After you have entered your 20 words, click on Next
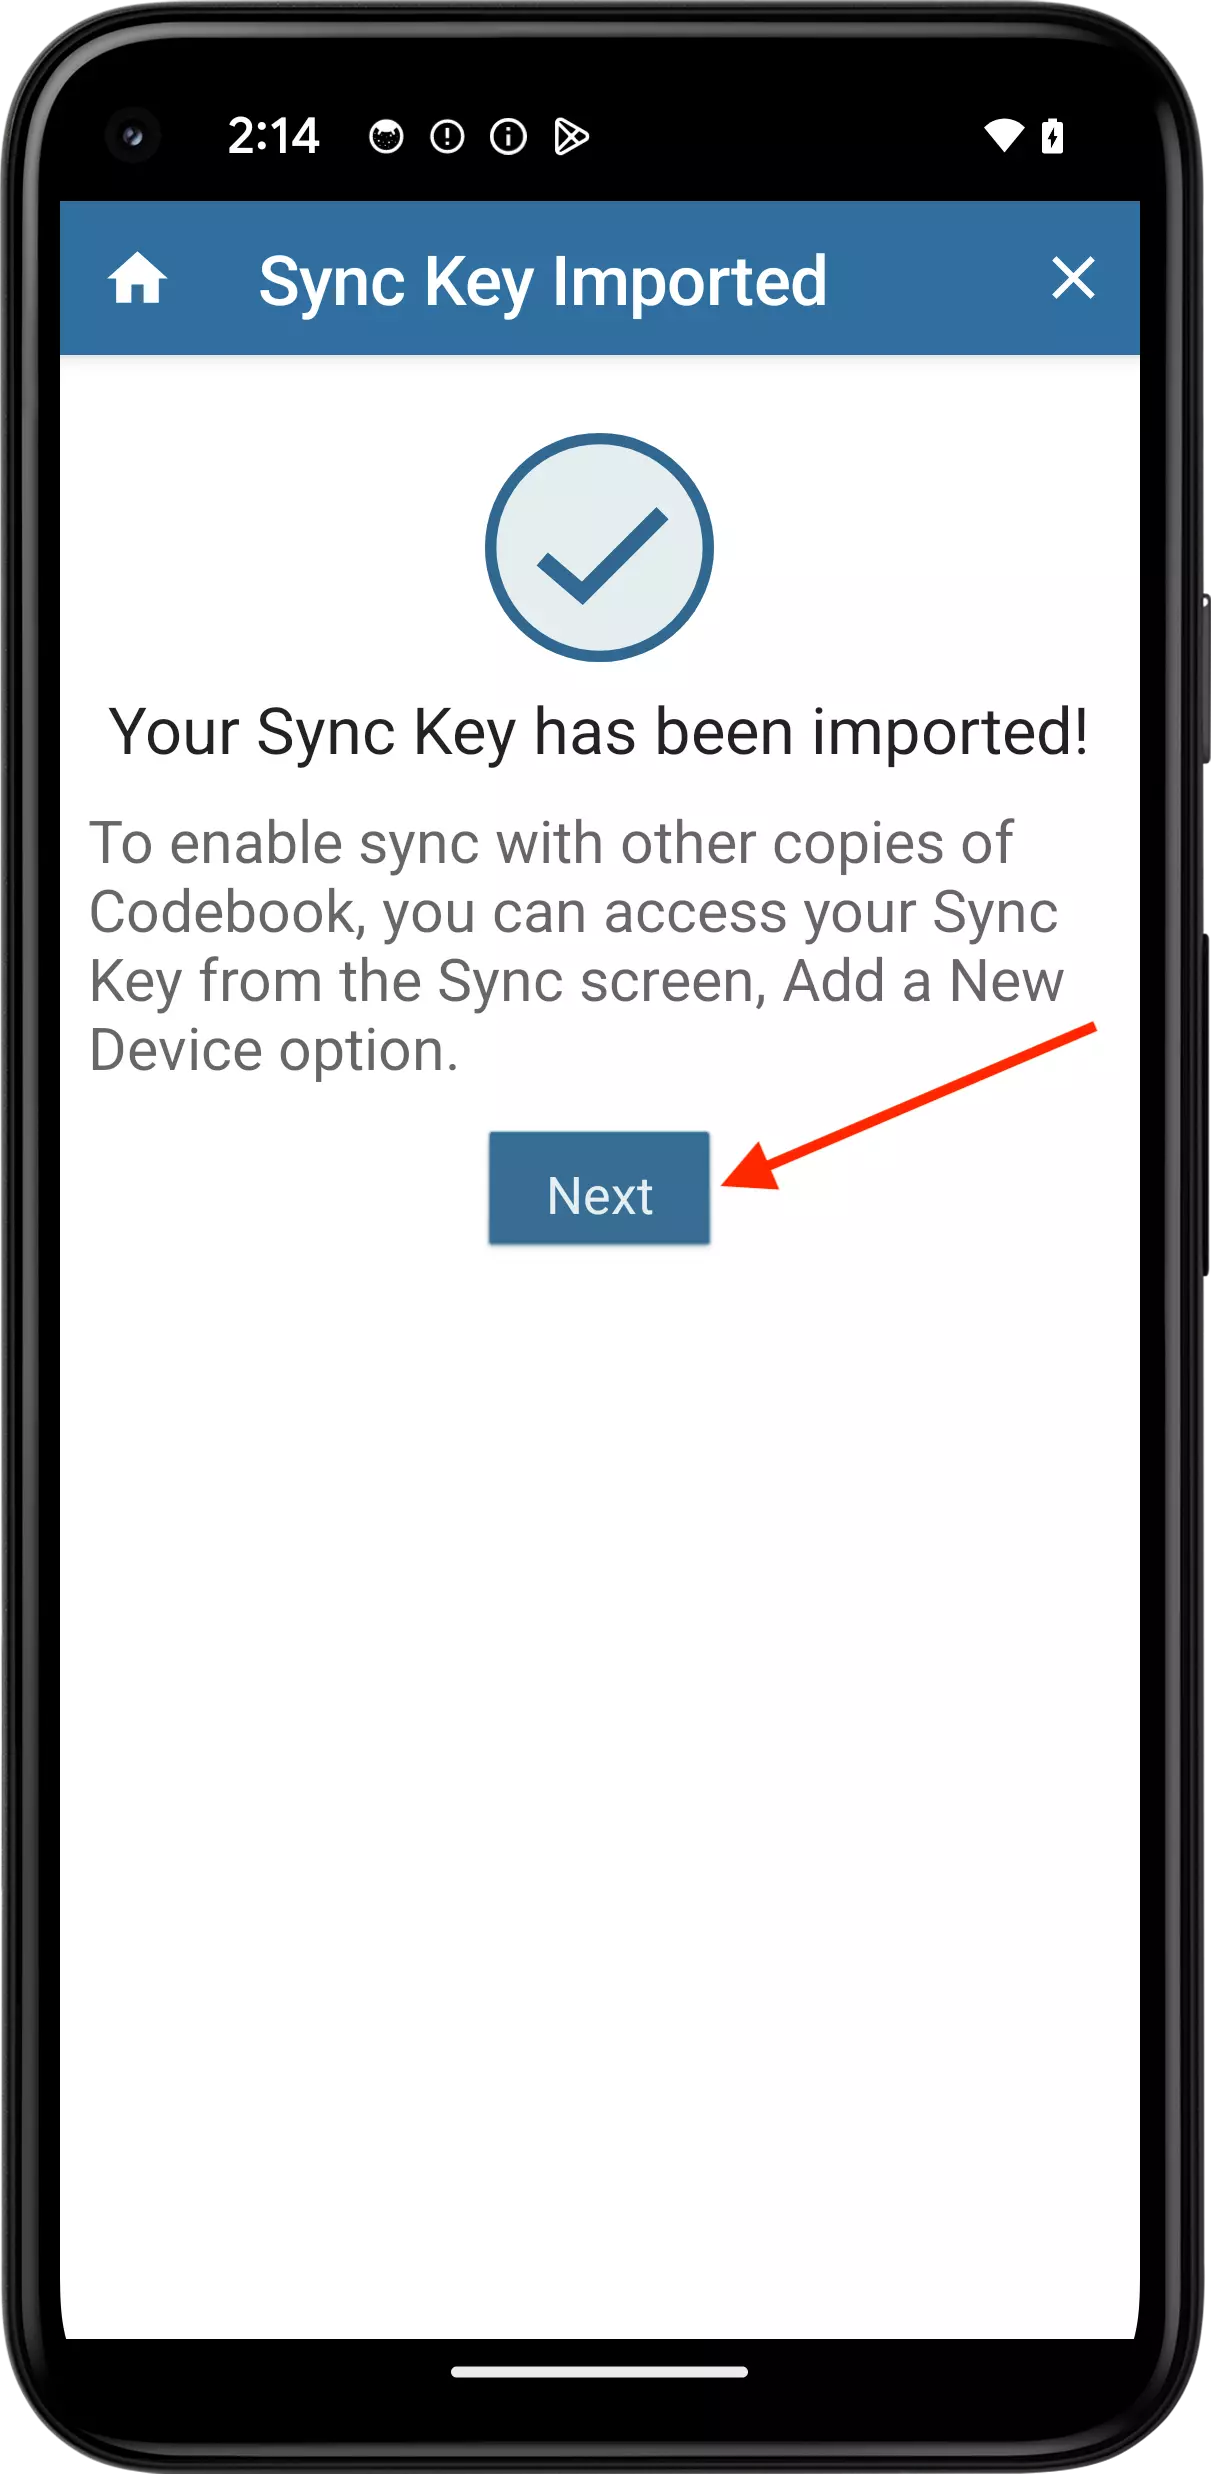
The Sync Key Setup Complete screen will be displayed. This screen contains links to the Codebook User Guide and detailed Sync Key and Filling in Forms information. Tap Done to use Codebook
On the Setup Your Sync Key screen, tap Setup Sync Key to begin importing your Sync Key.
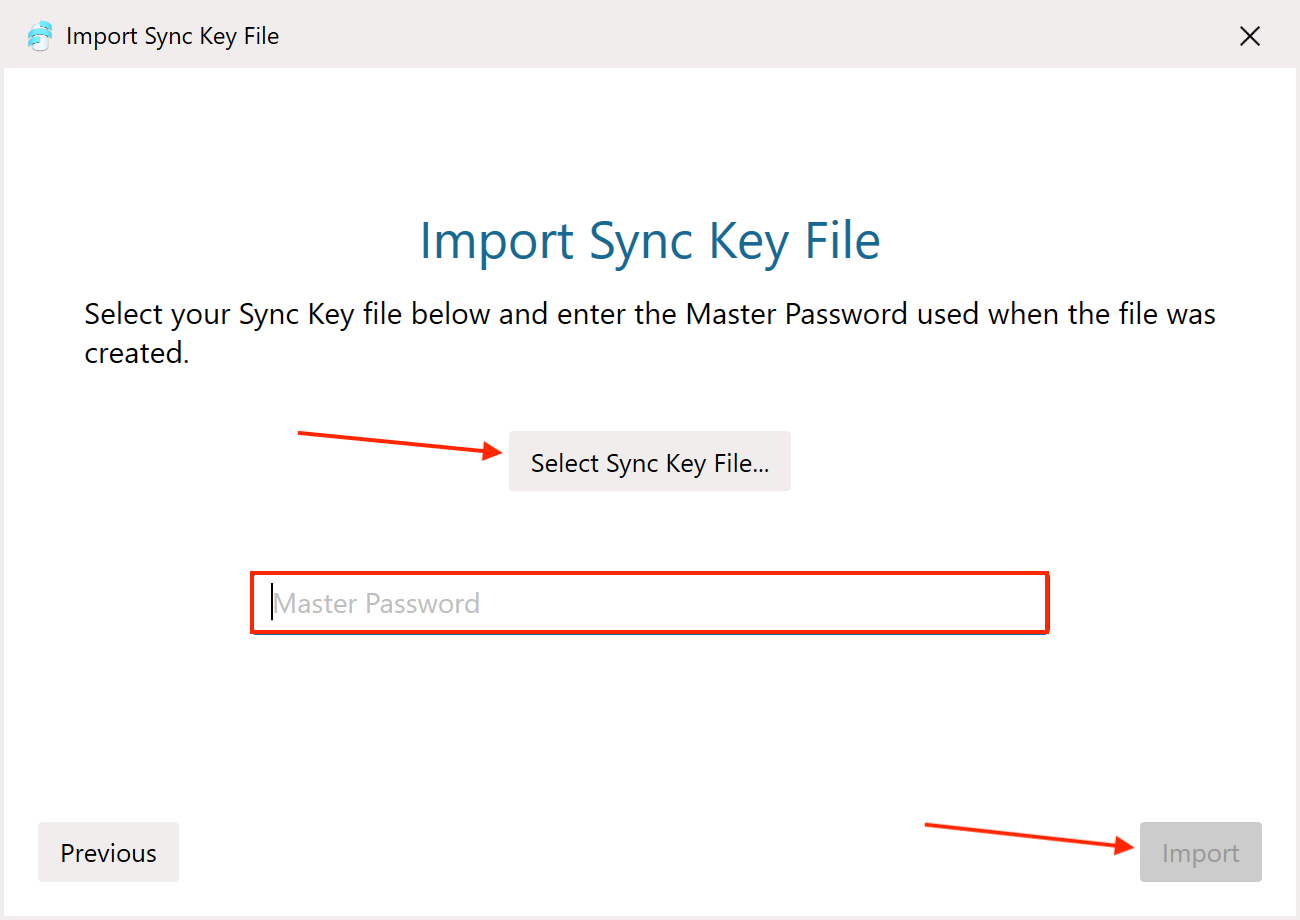
Select the location of your Sync Key file.
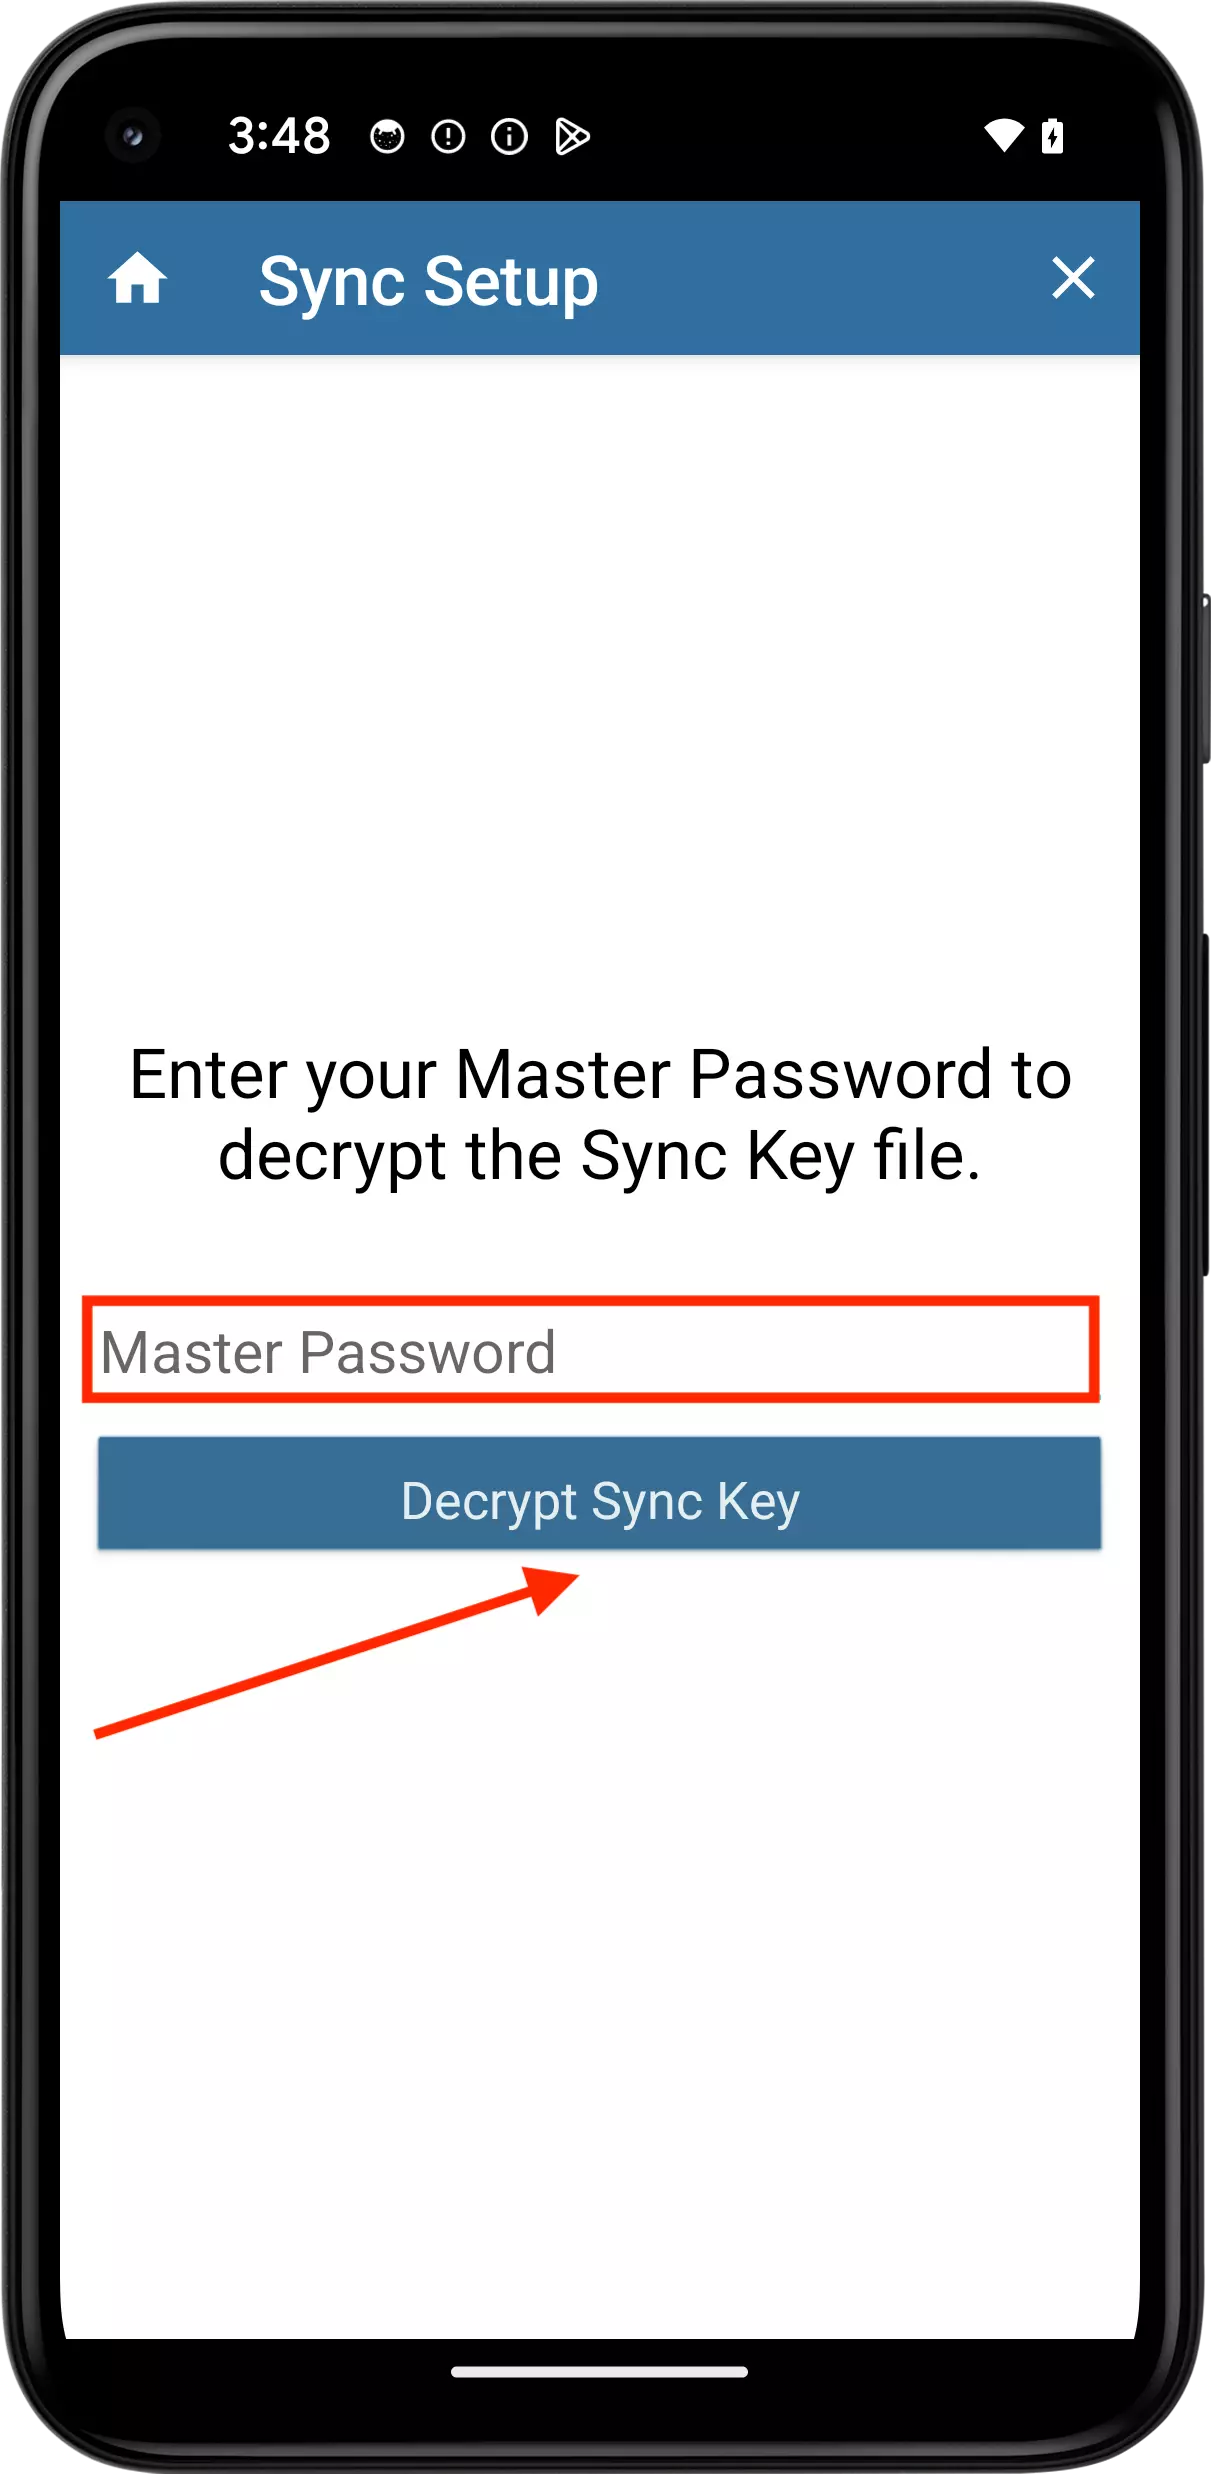
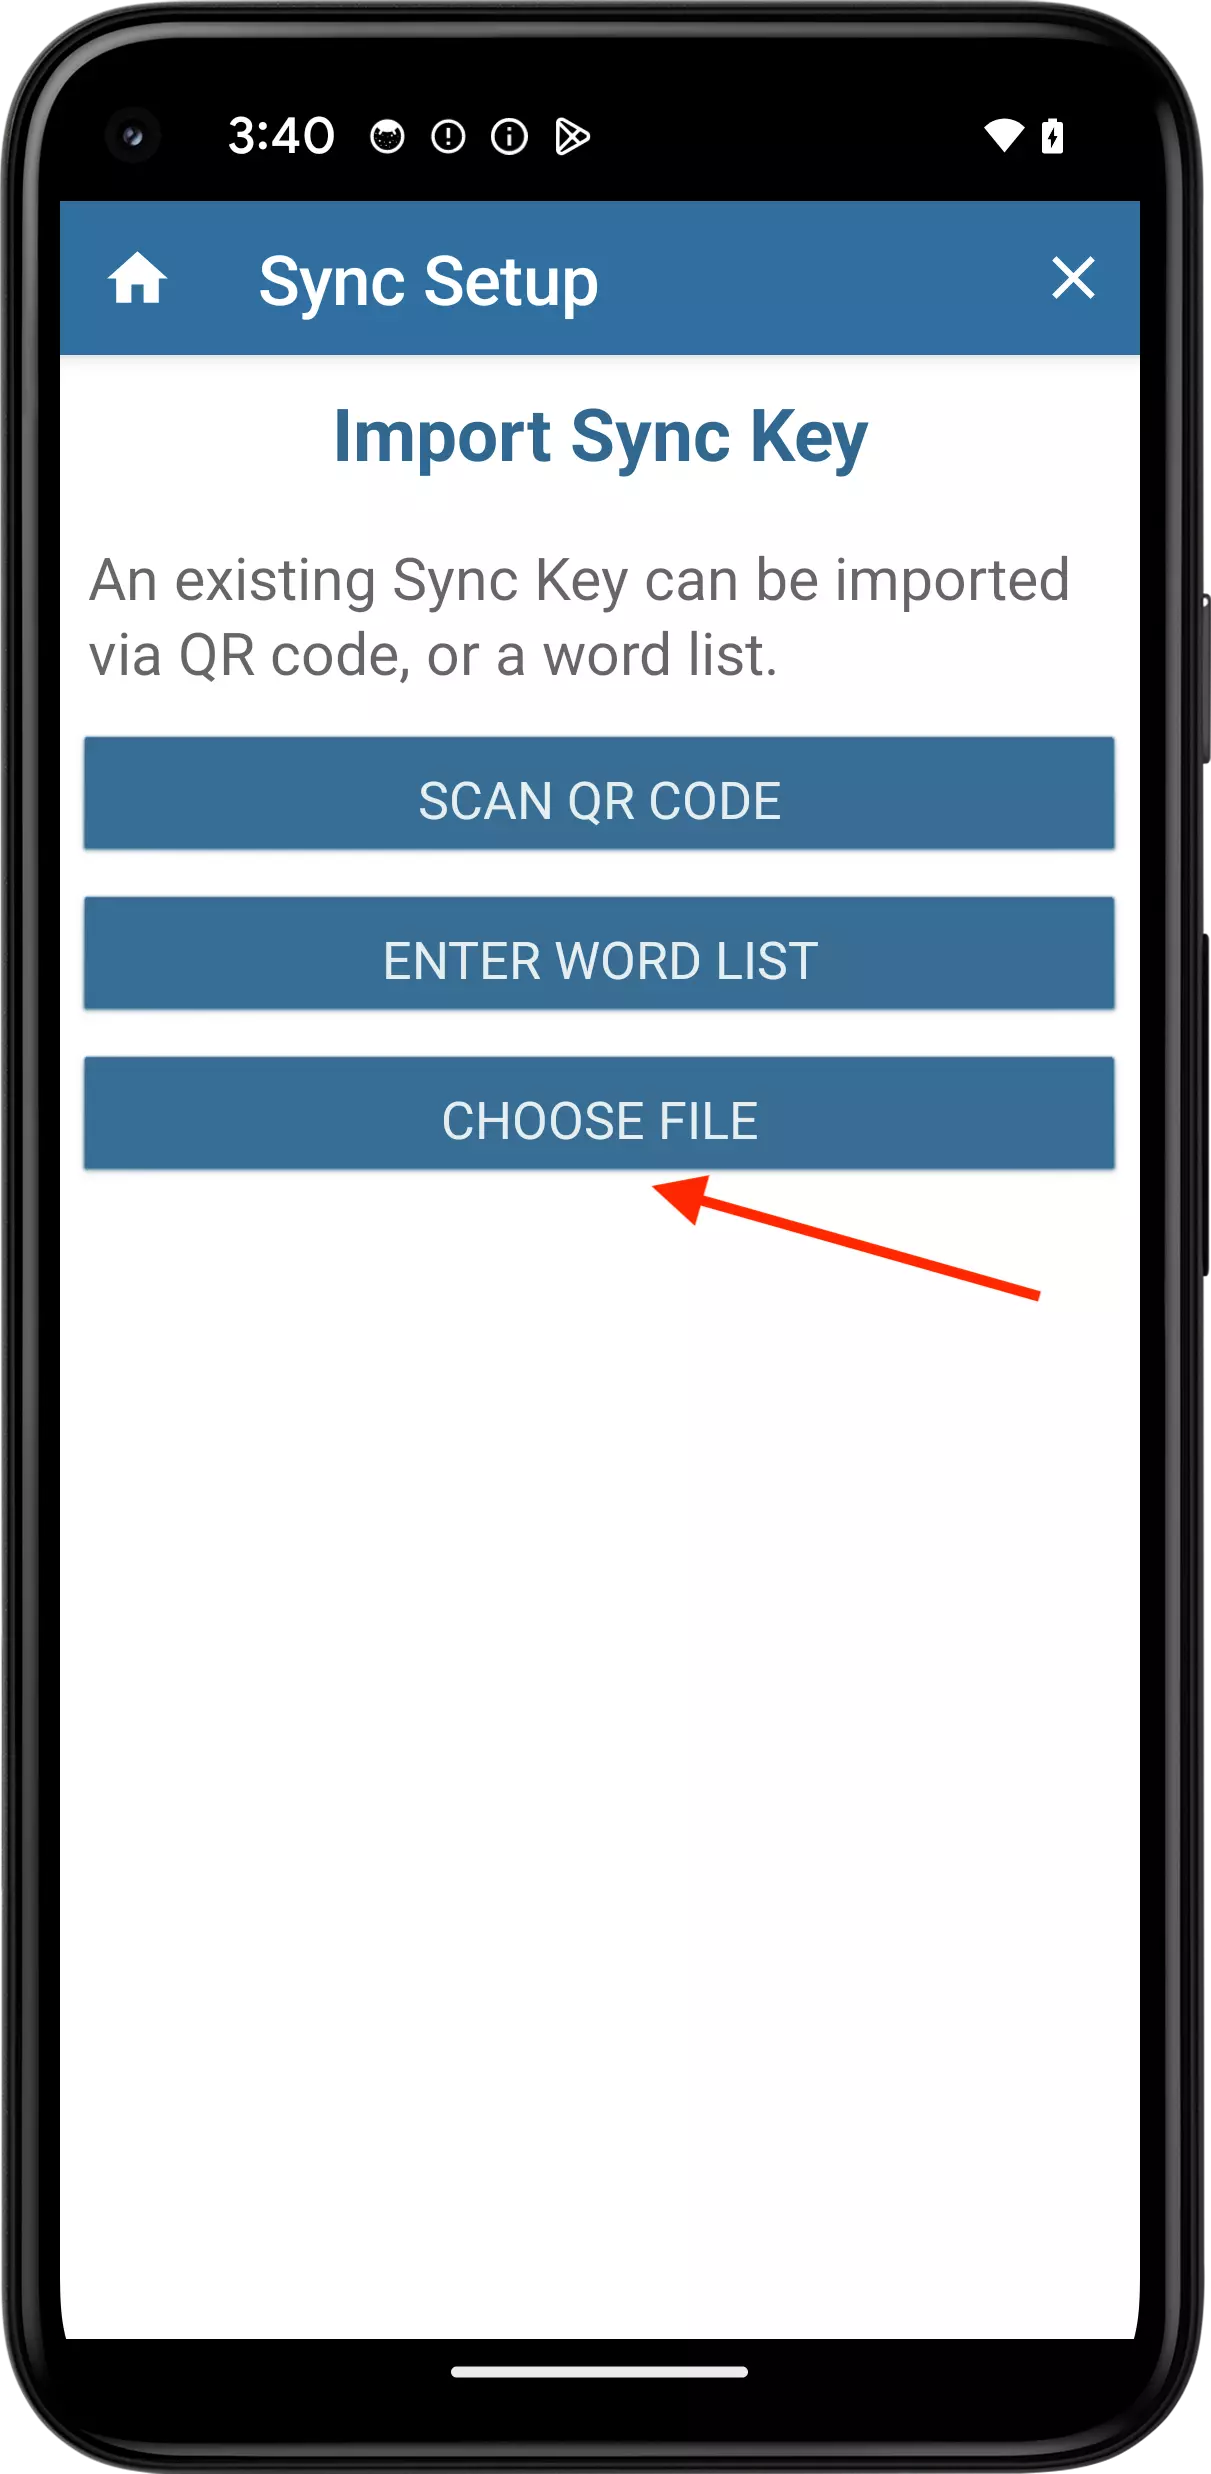
On the Setup Your Sync Key screen, tap the Import Sync Key button to begin importing your Sync Key.
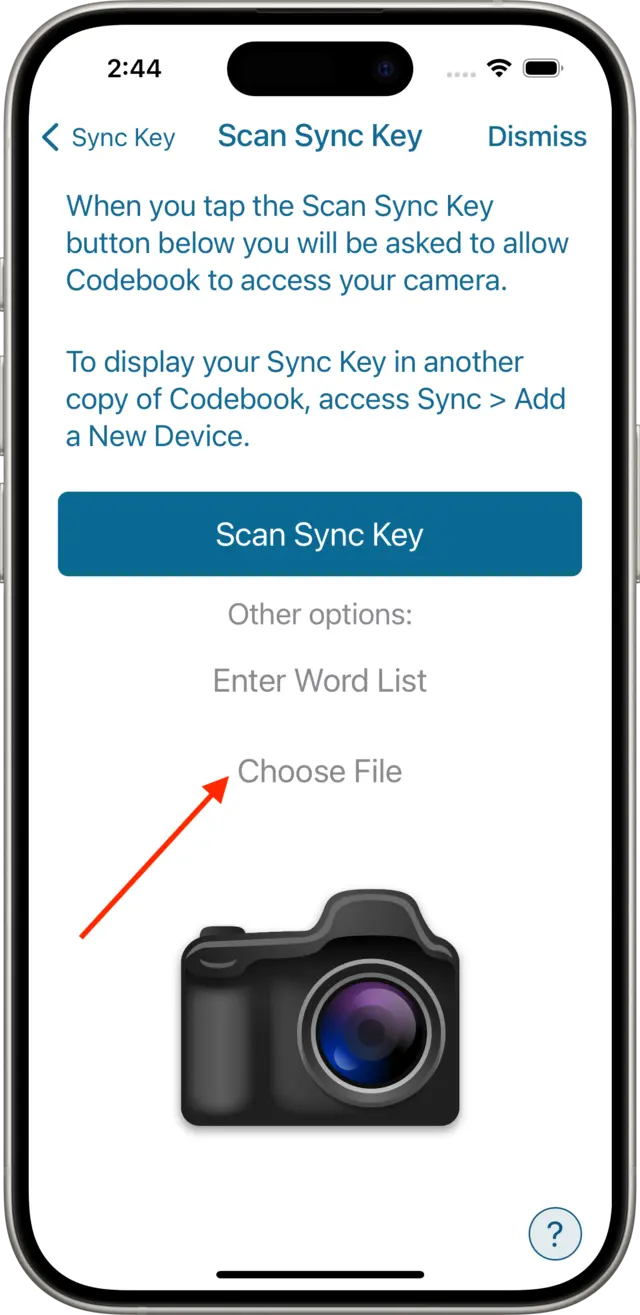
Select the location of your Sync Key file.
On the Setup Your Sync Key screen, select Yes to begin importing your Sync Key.
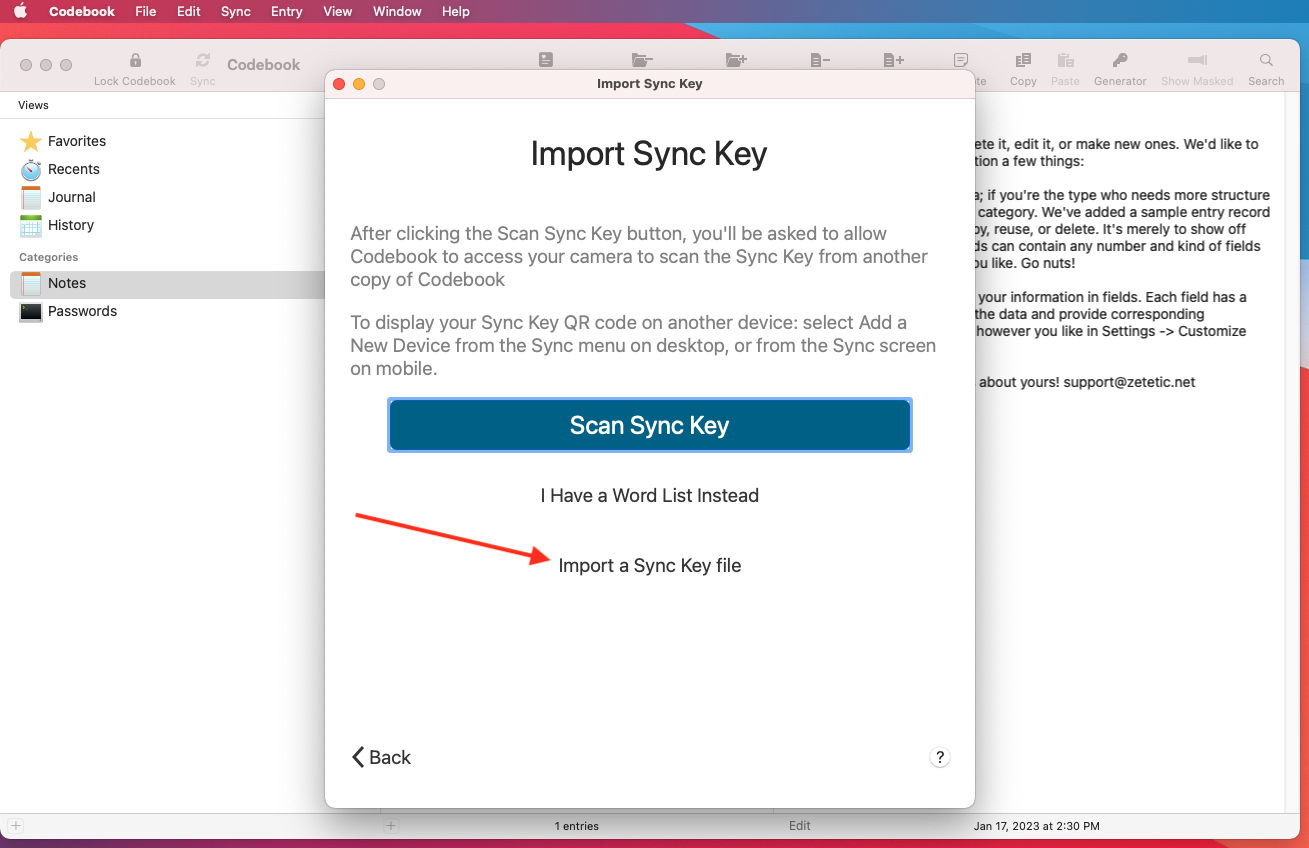
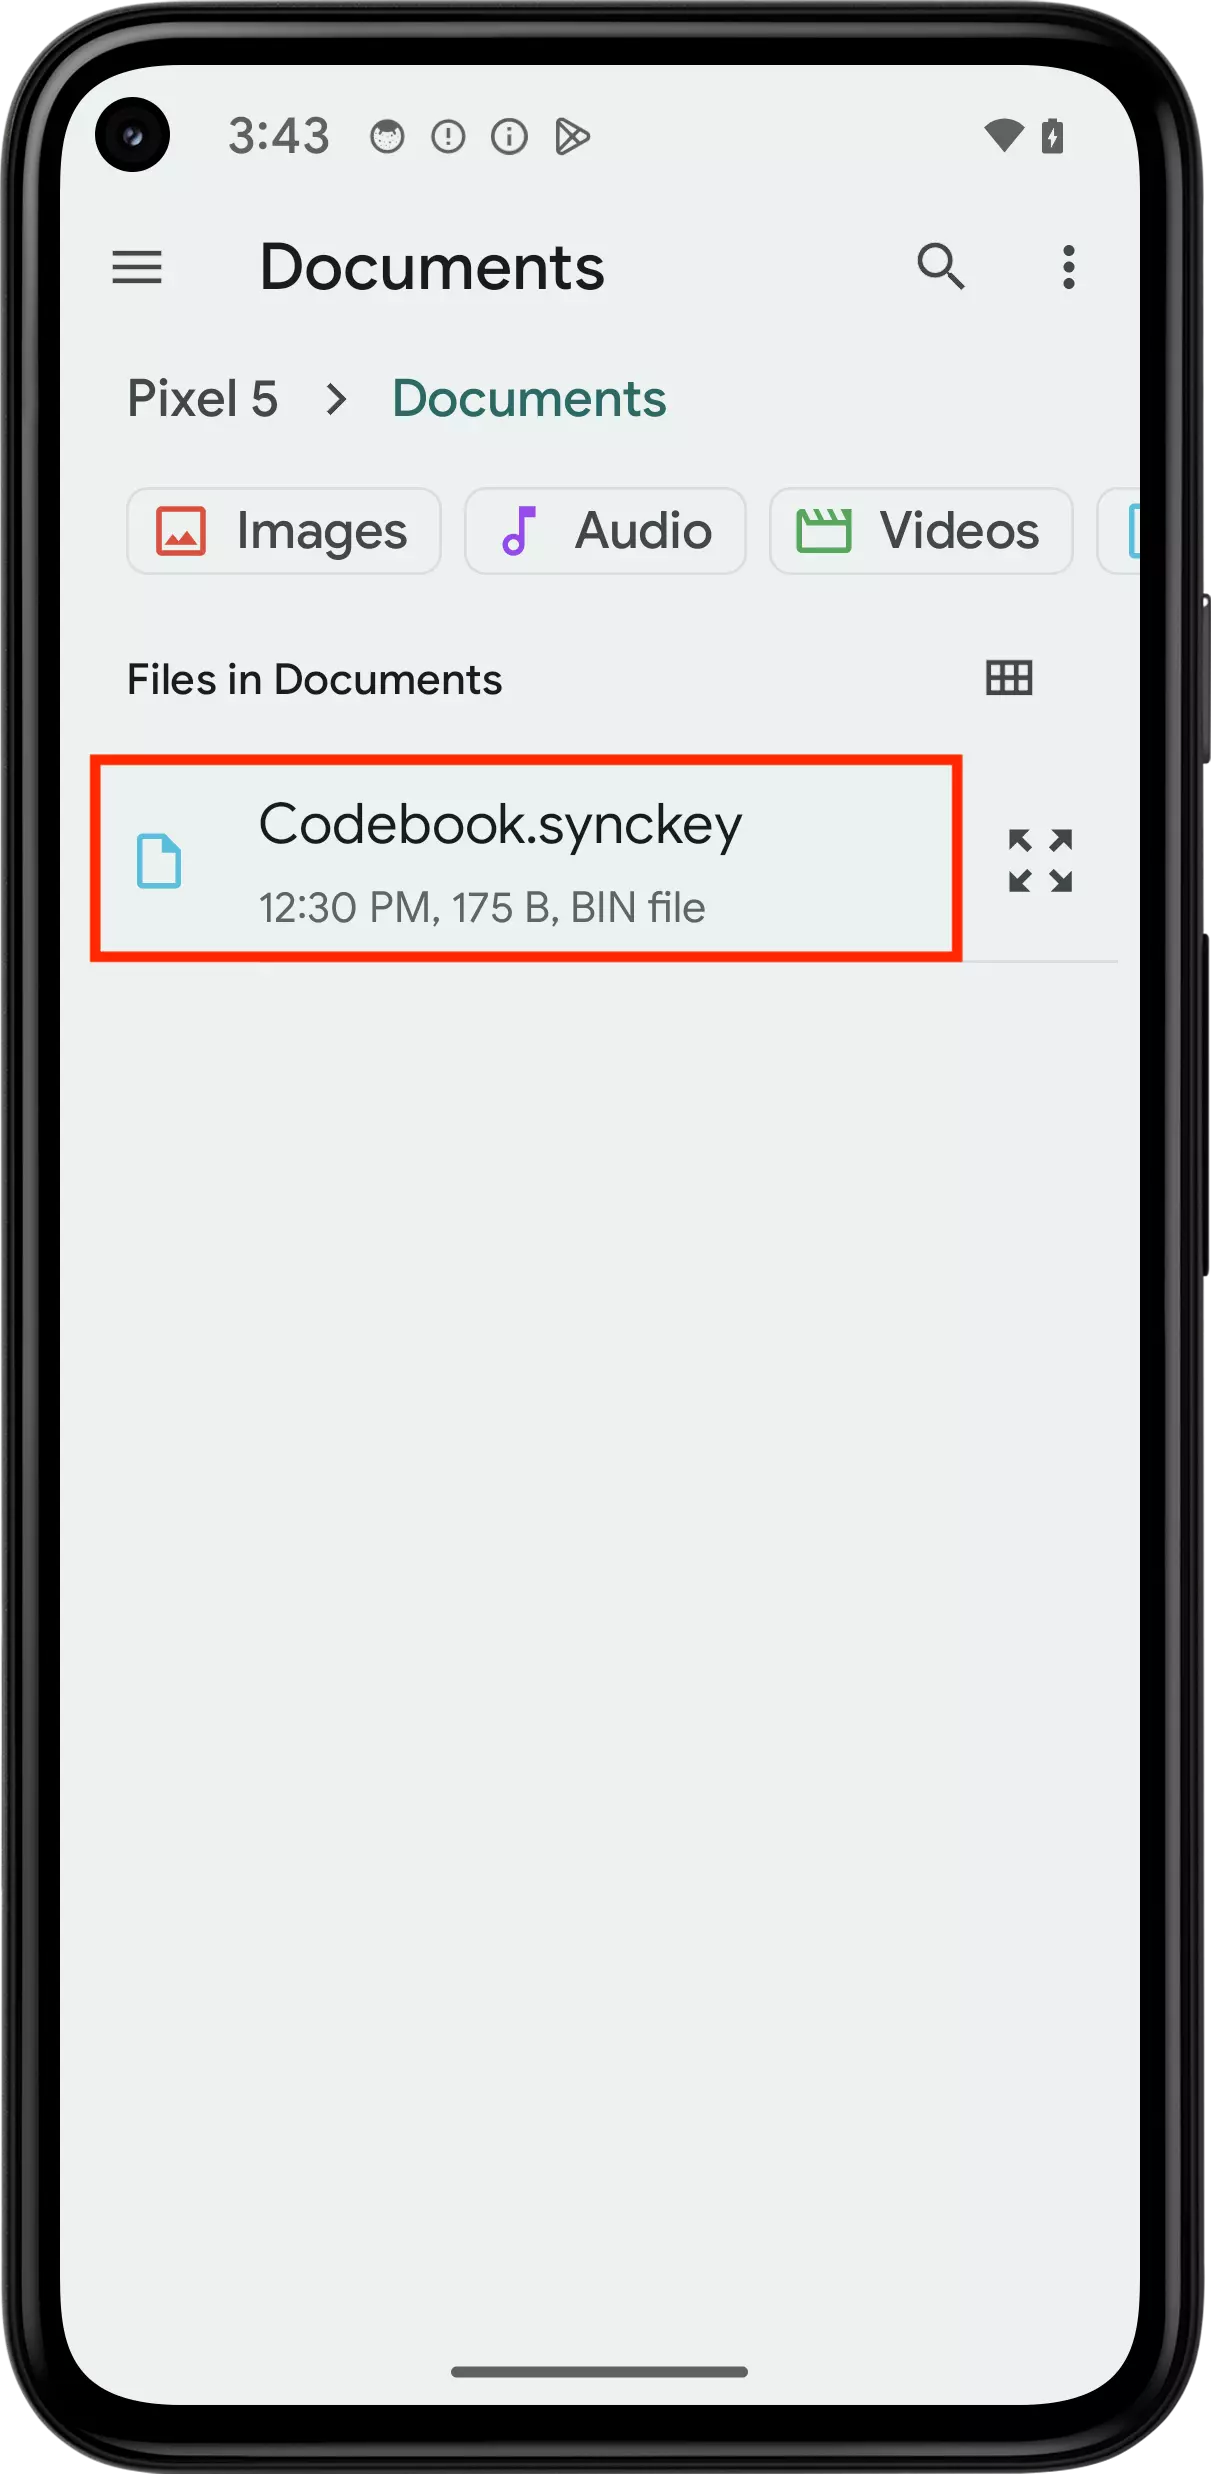
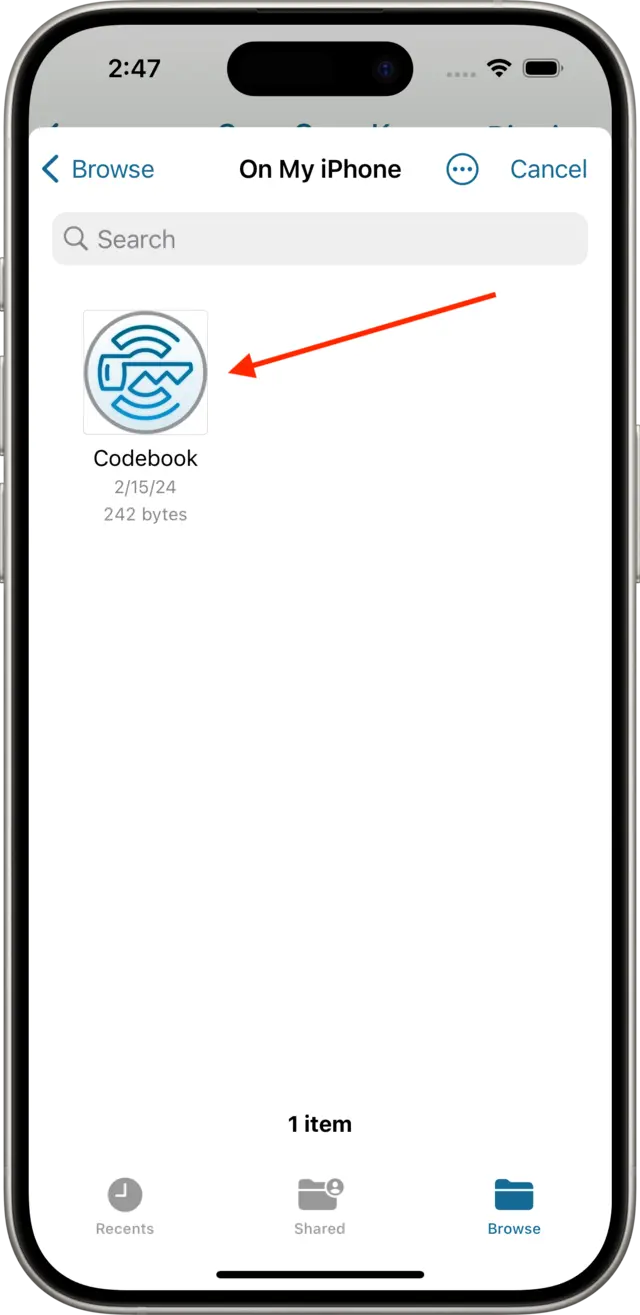
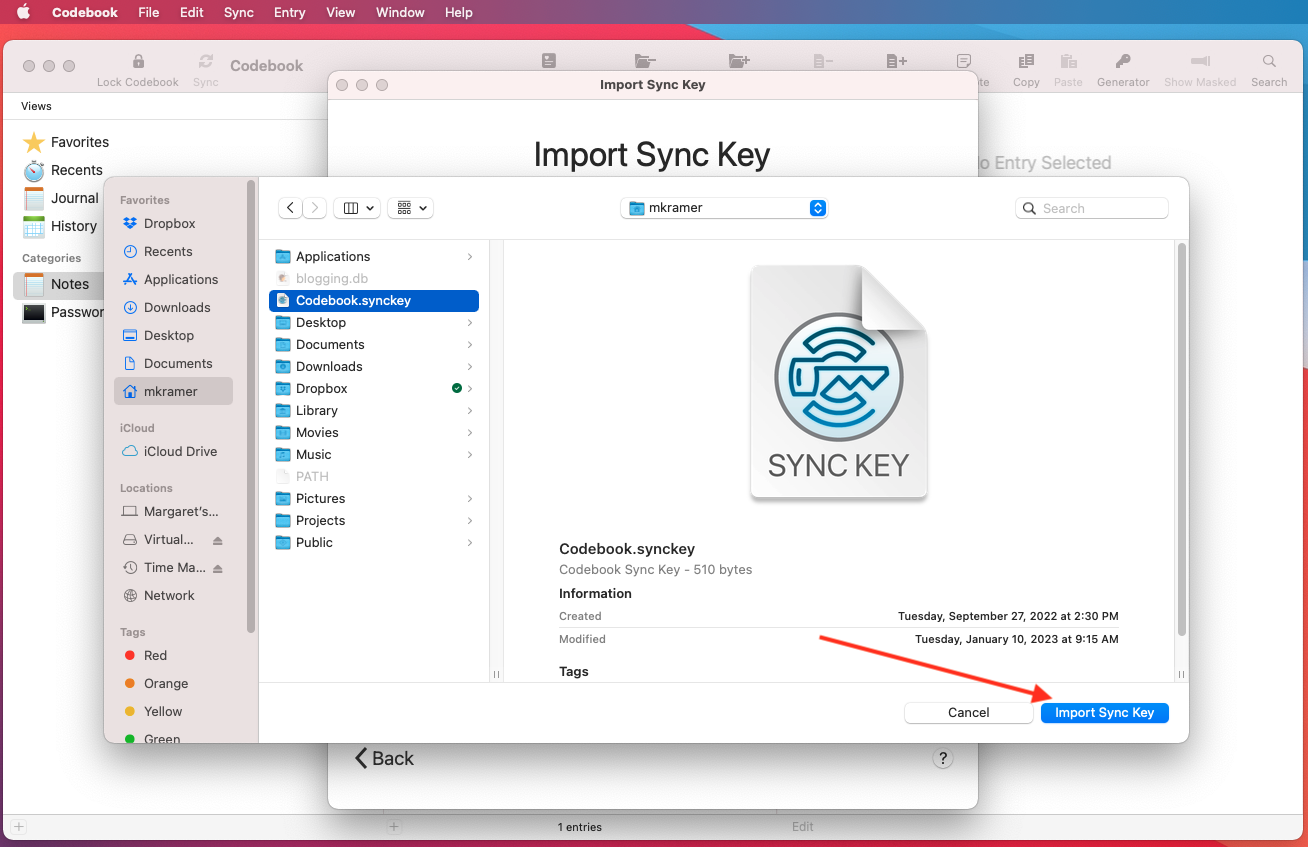
A window will be displayed for you to select your sync key file. It was originally saved in a file called Codebook.synckey. Select the file and click on Import a Sync Key
Start the import process from Sync -> Setup Sync Key.
On the Setup Your Sync Key screen, select Yes, click Next to begin importing your Sync Key.
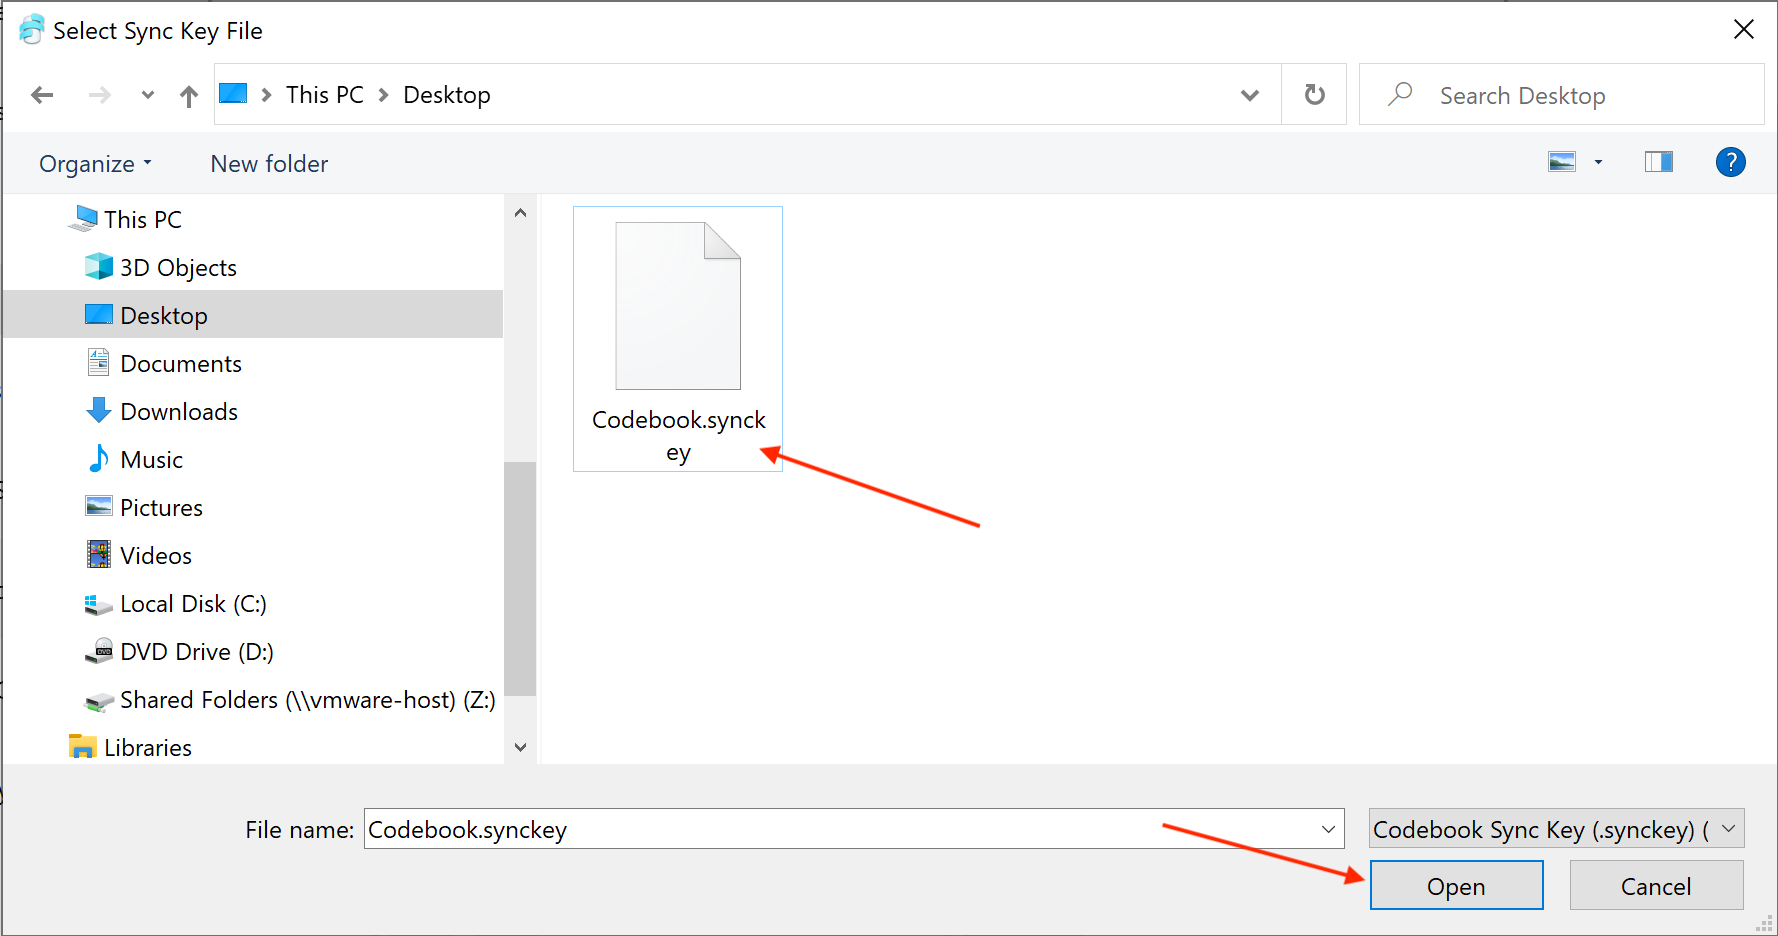
A window will be displayed for you to select your sync key file. It was originally saved in a file called Codebook.synckey.
Select the file and click Open
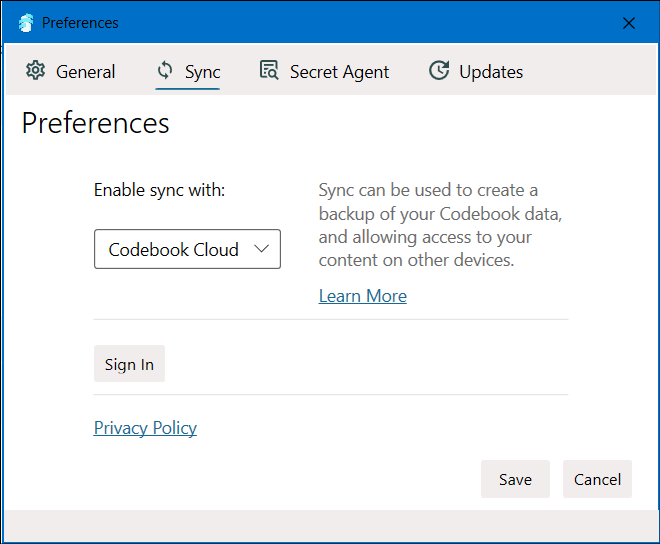
Setting your Sync Preference
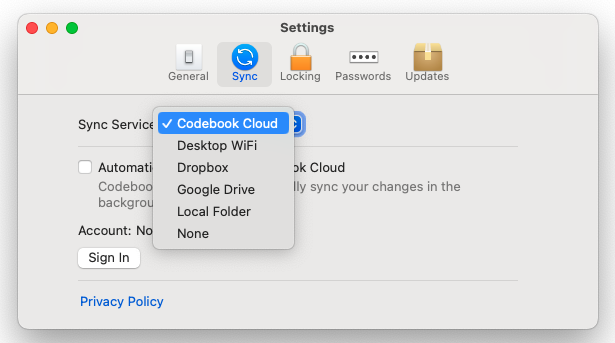
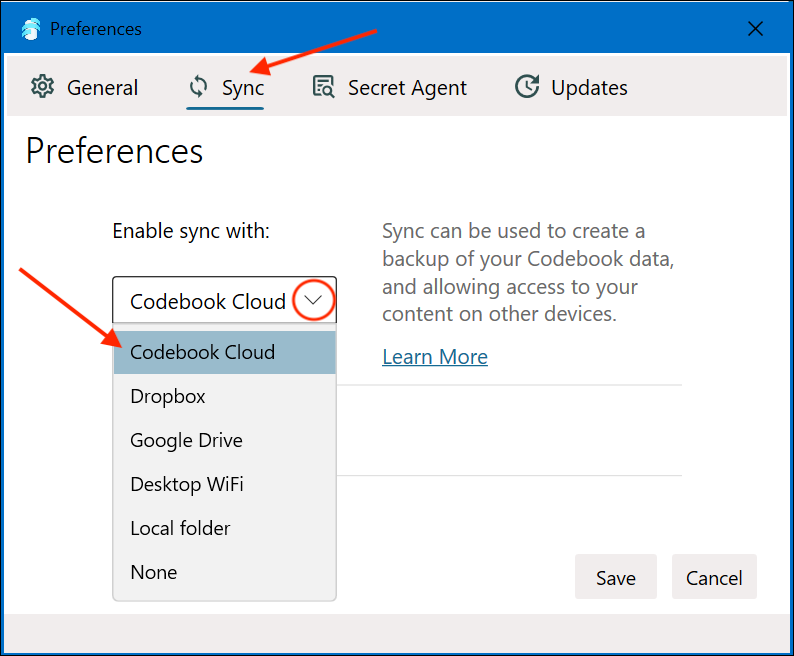
Click to open the Sync Service drop-down list.
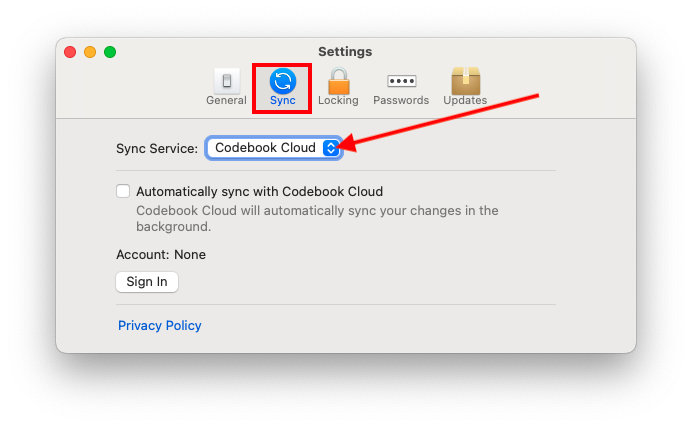
Select Codebook Cloud
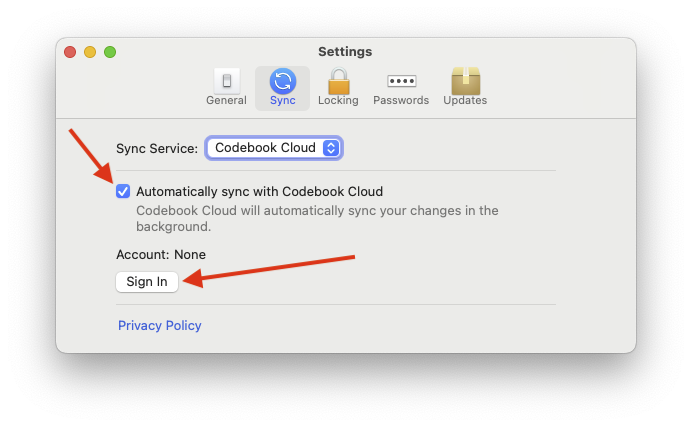
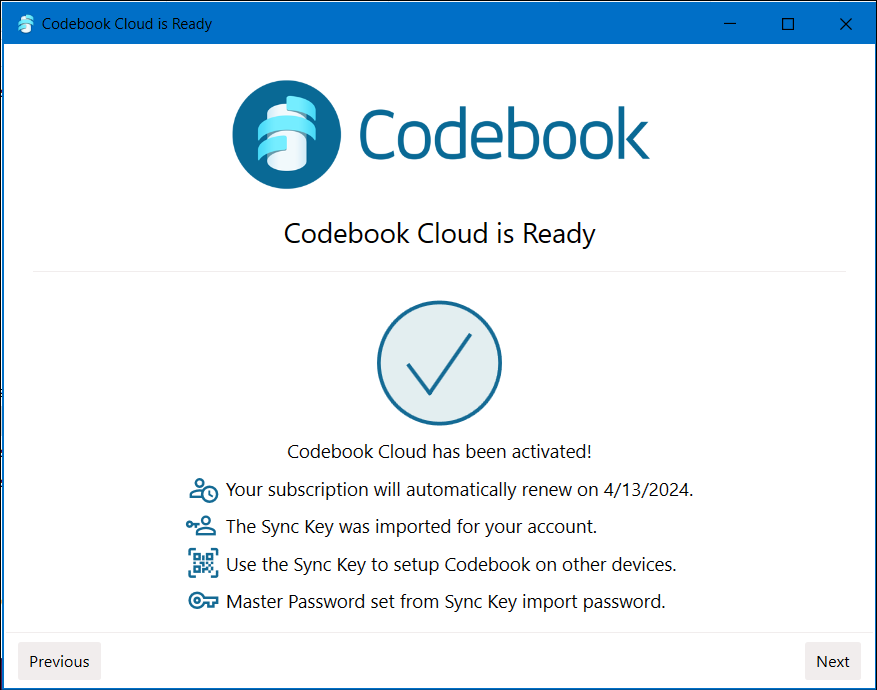
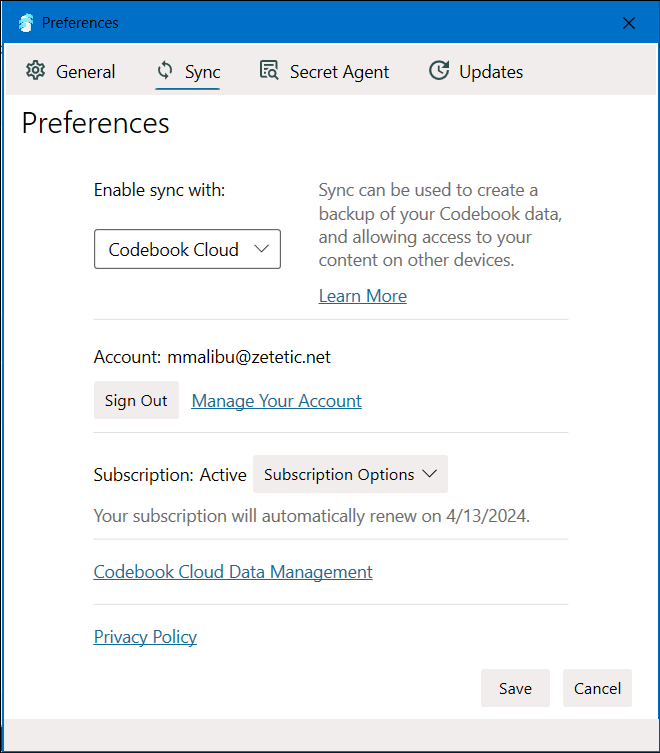
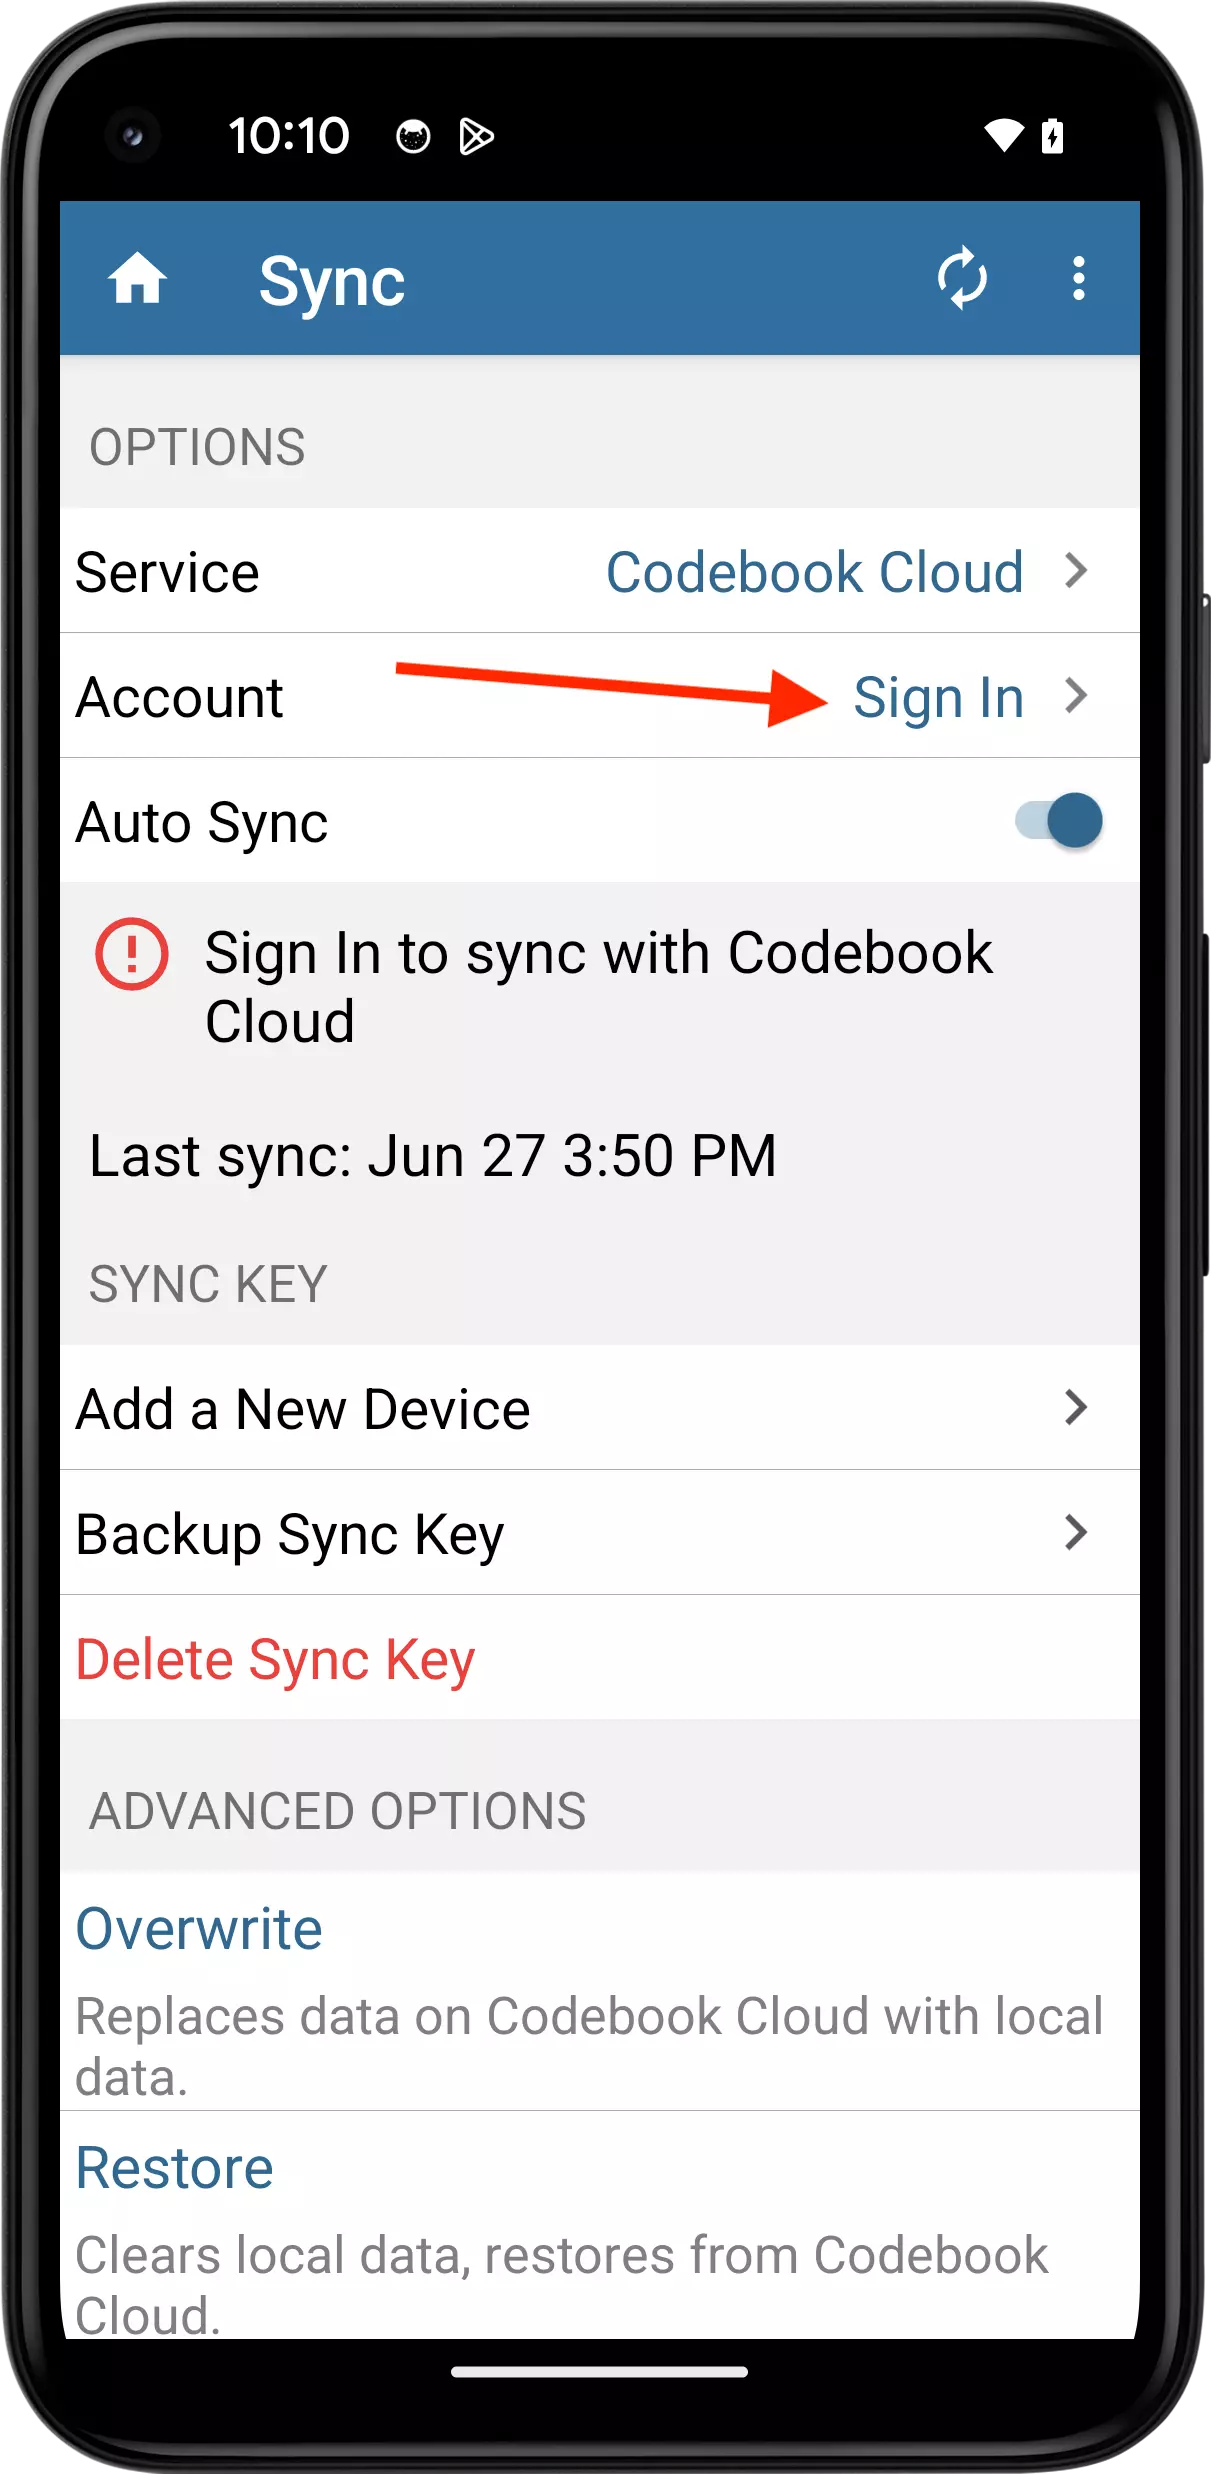
The Codebook Cloud is Ready screen will be displayed.
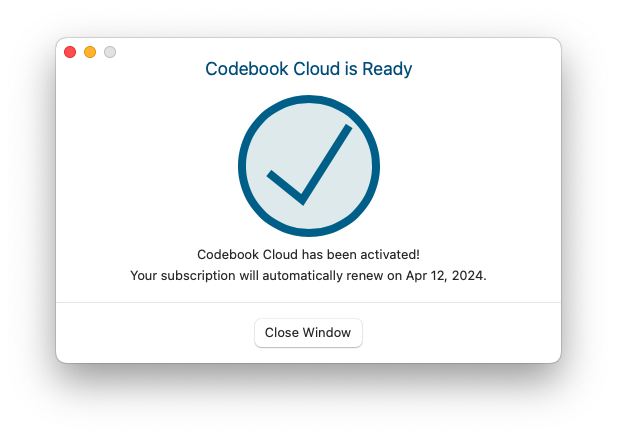
Your account and subscription status will be displayed.
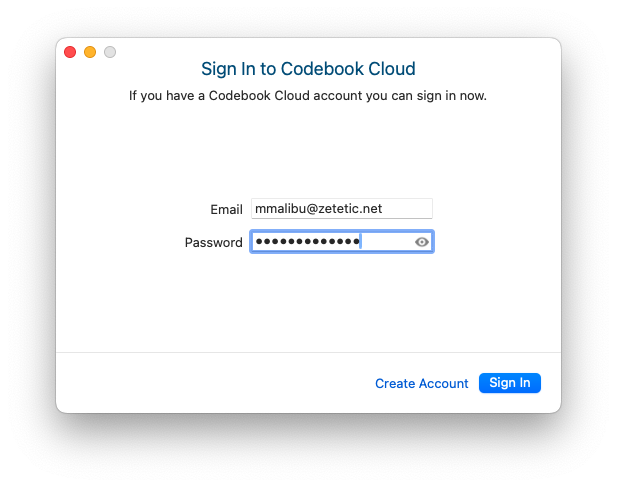
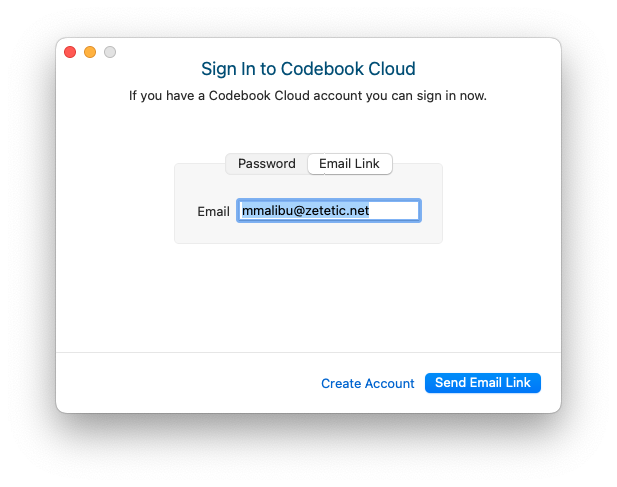
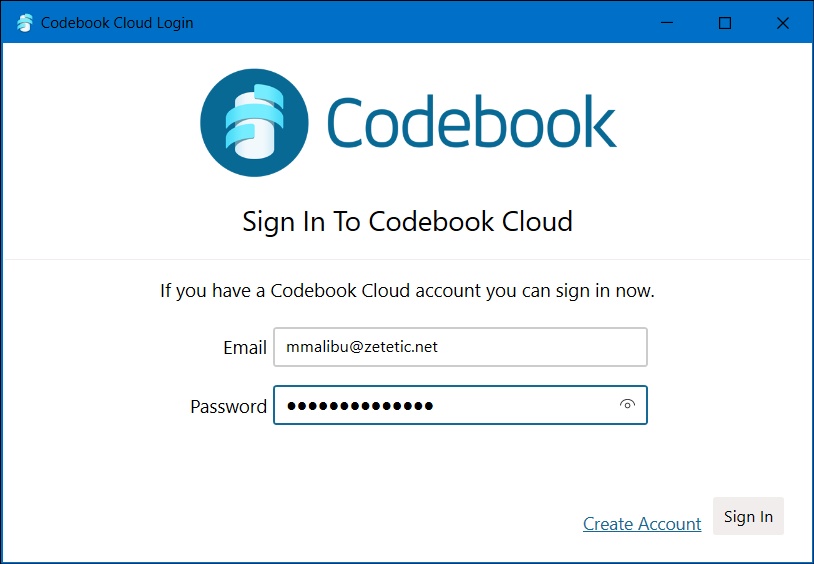
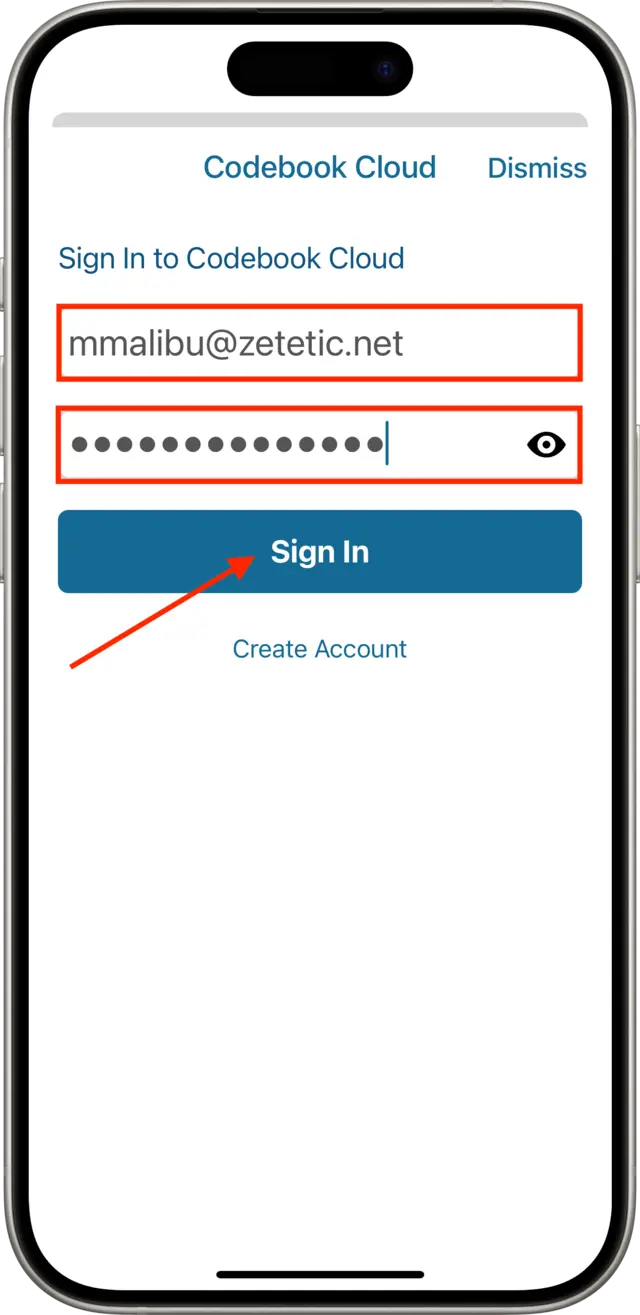
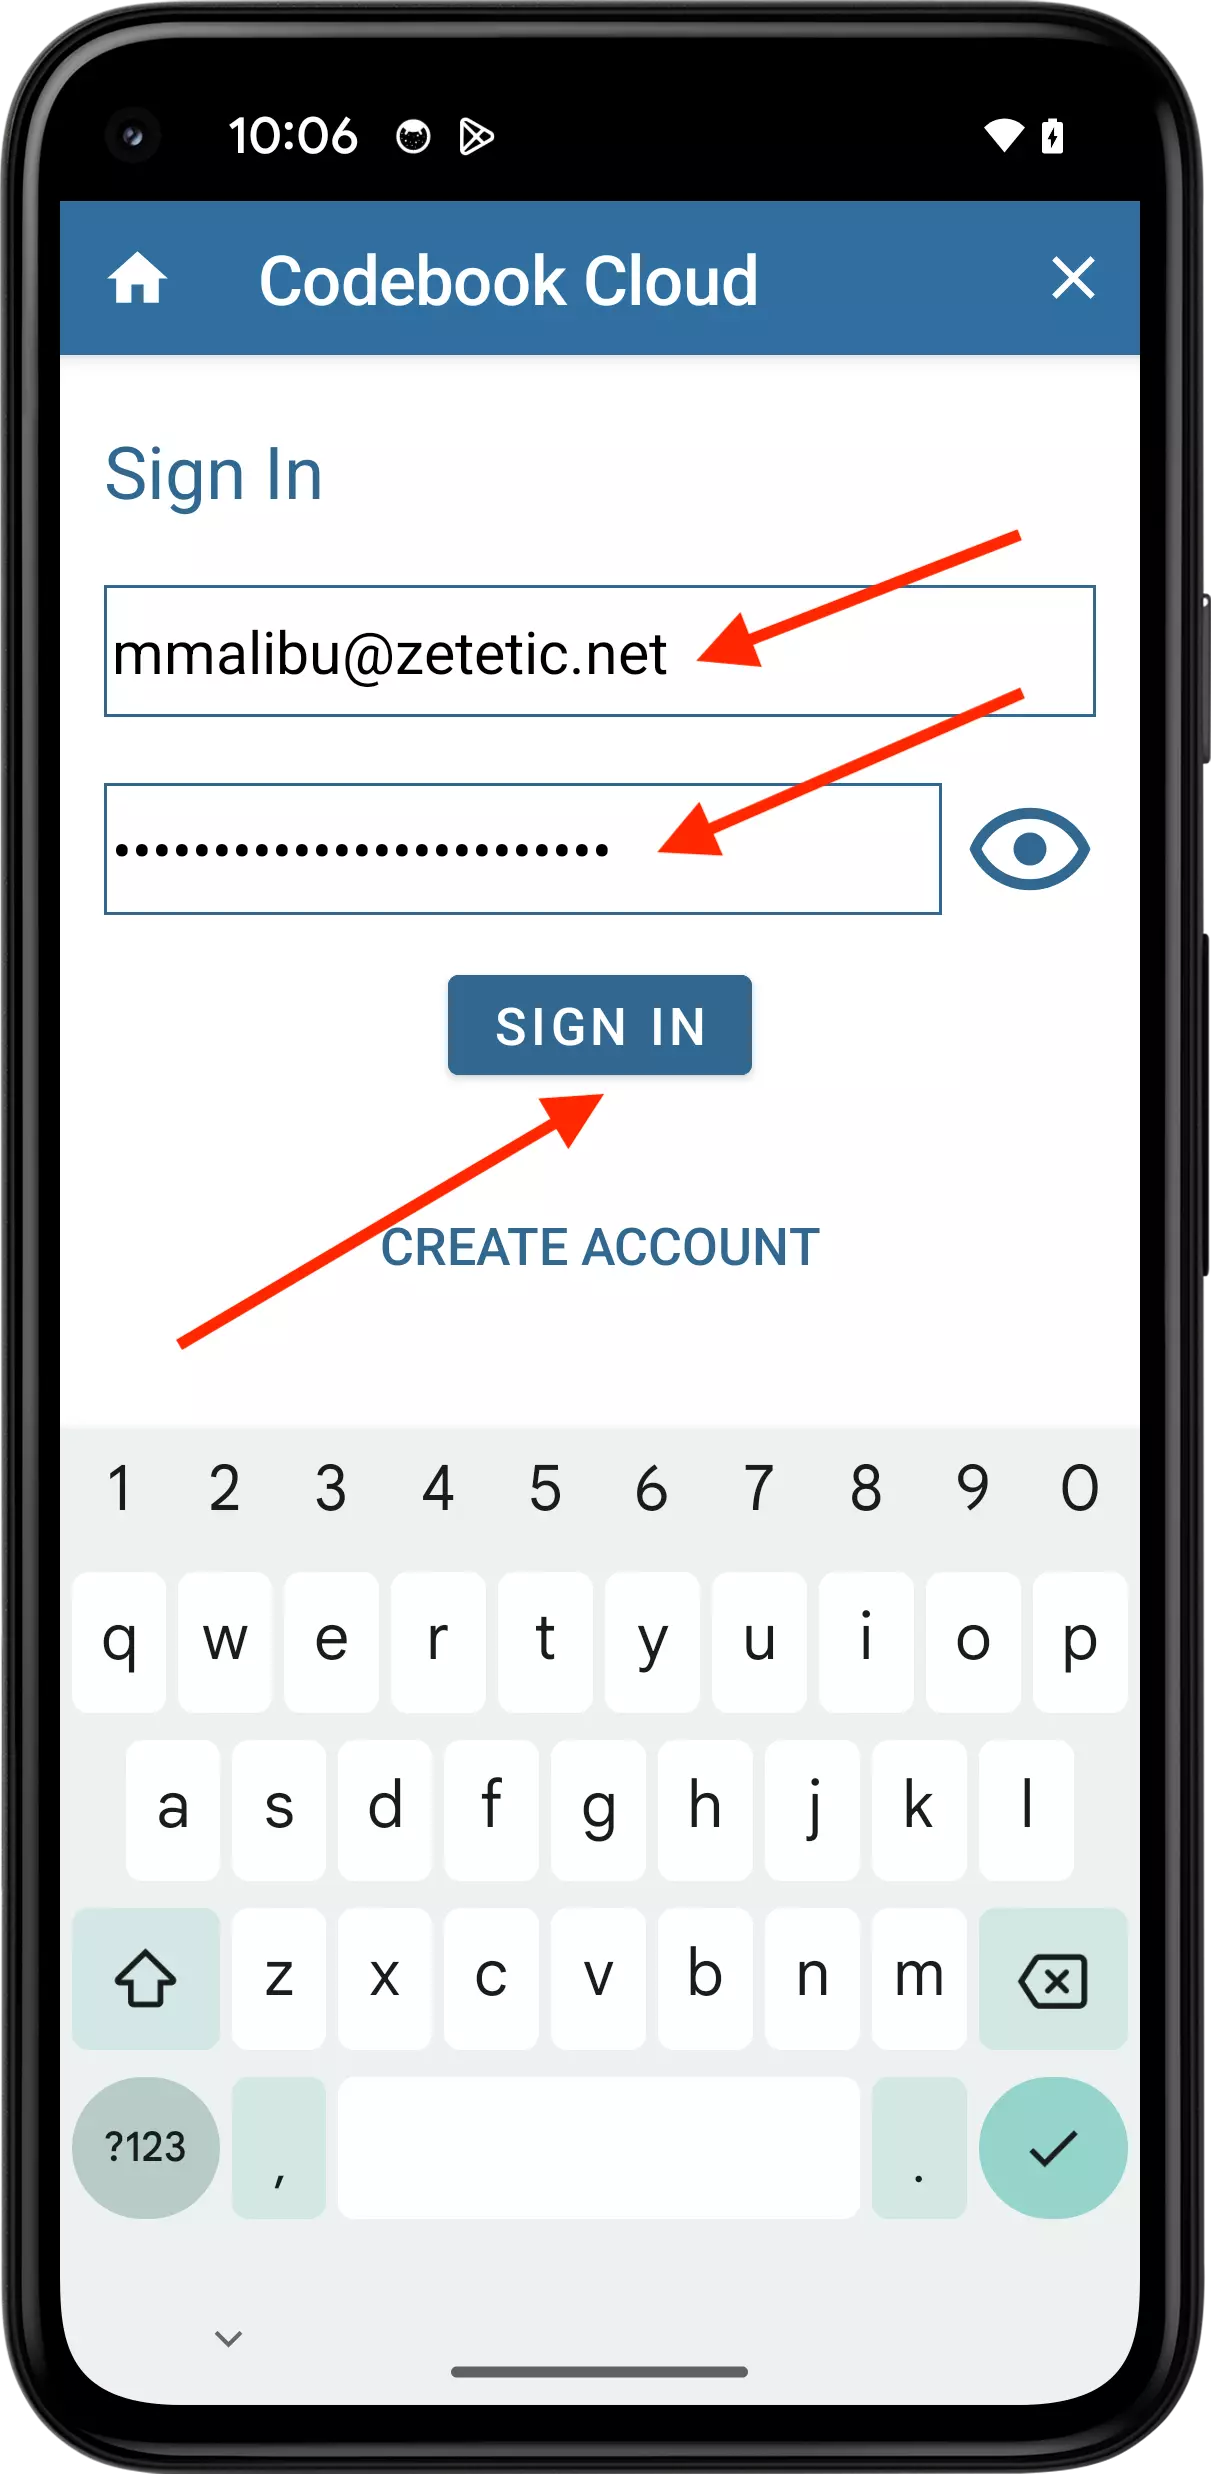
Email Link Option: Enter your Codebook Cloud email. Click Send Email
If a Codebook Cloud account exists for the entered email, a email will be sent with a link to sign in to Codebook Cloud.
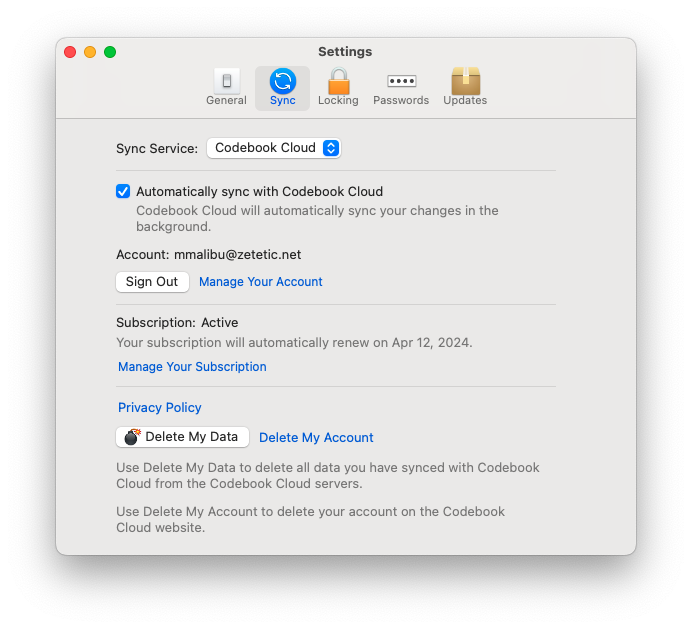
Your account and subscription status will be displayed. Click Save
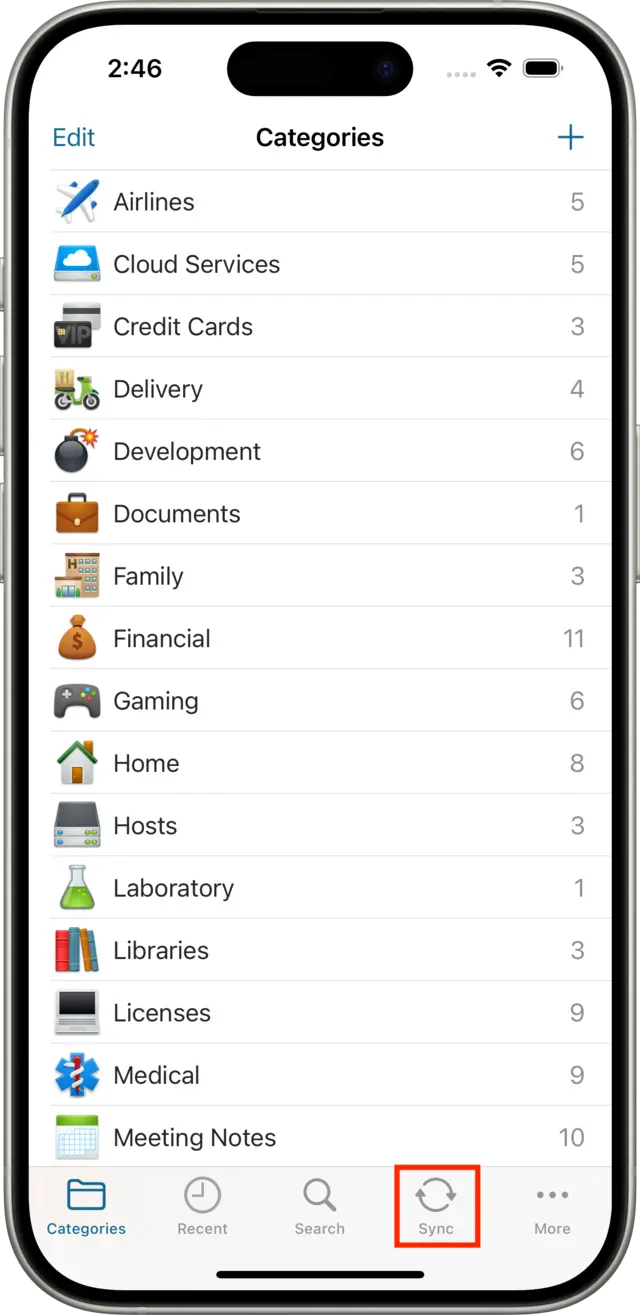
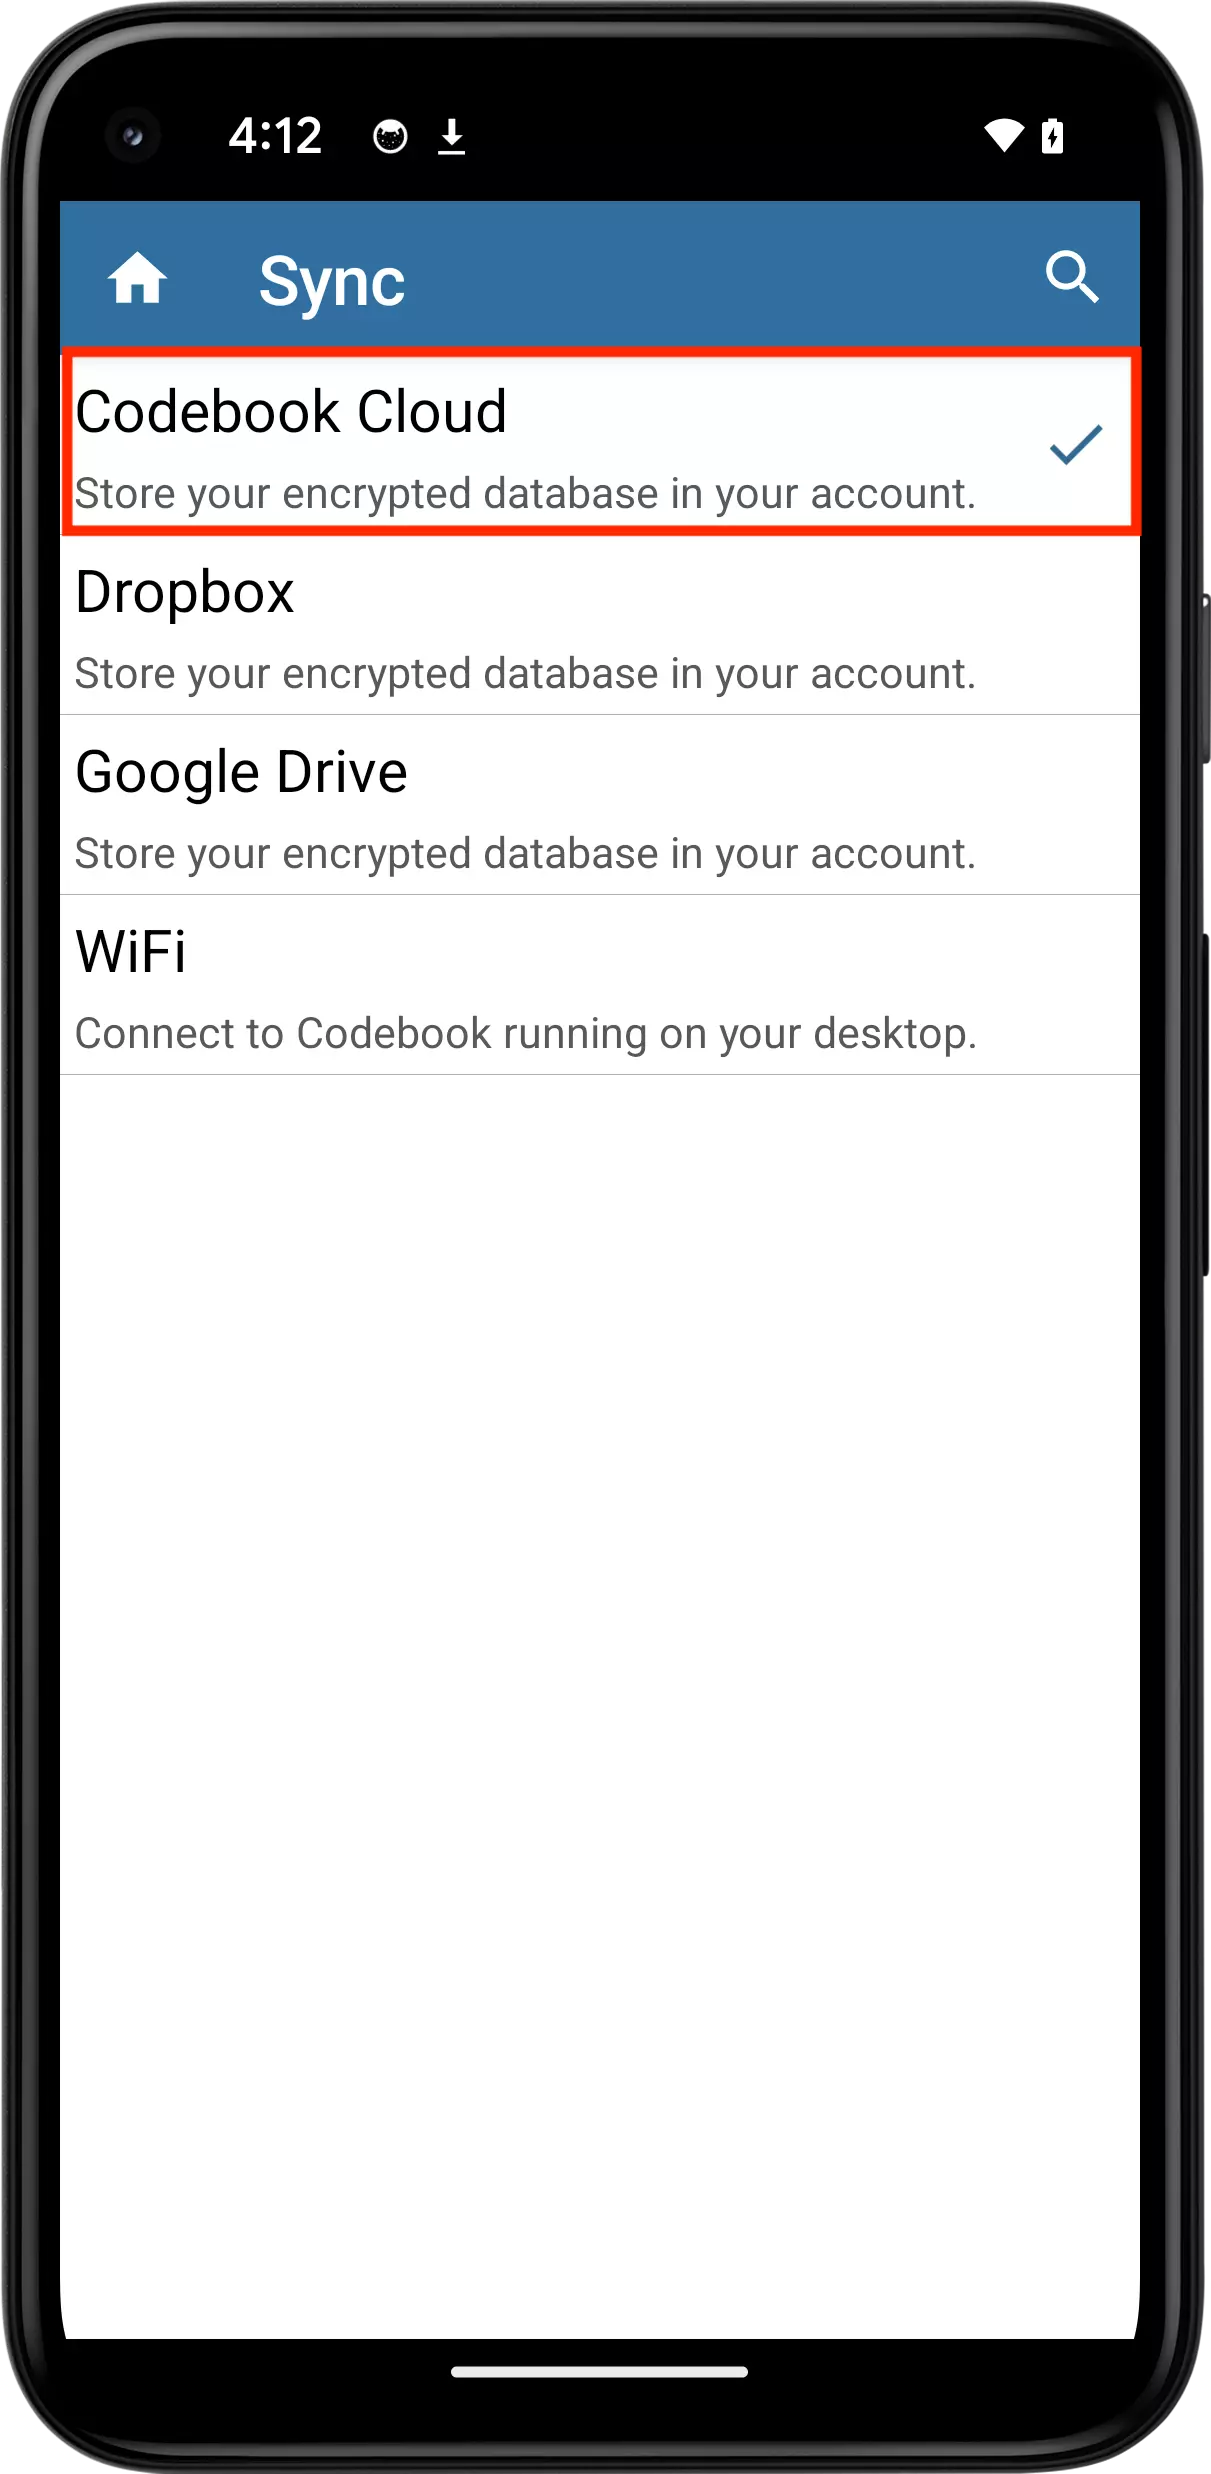
Open the Codebook Sync screen. Tap Sync in the tab bar at the bottom of the screen.
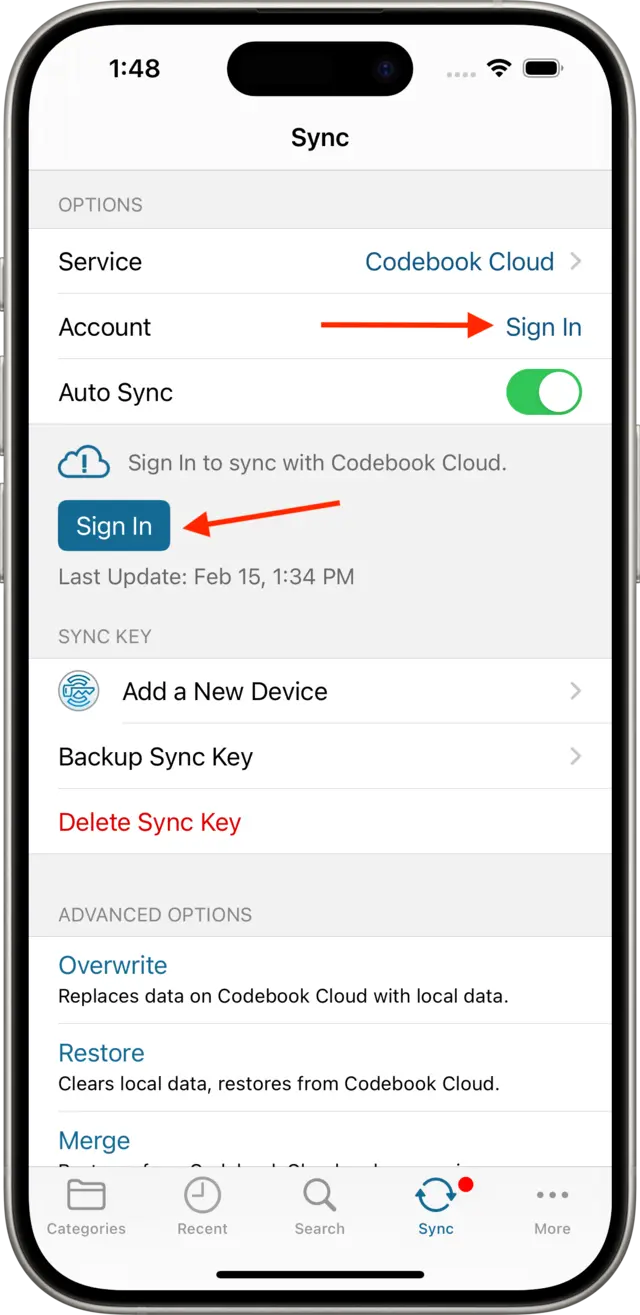
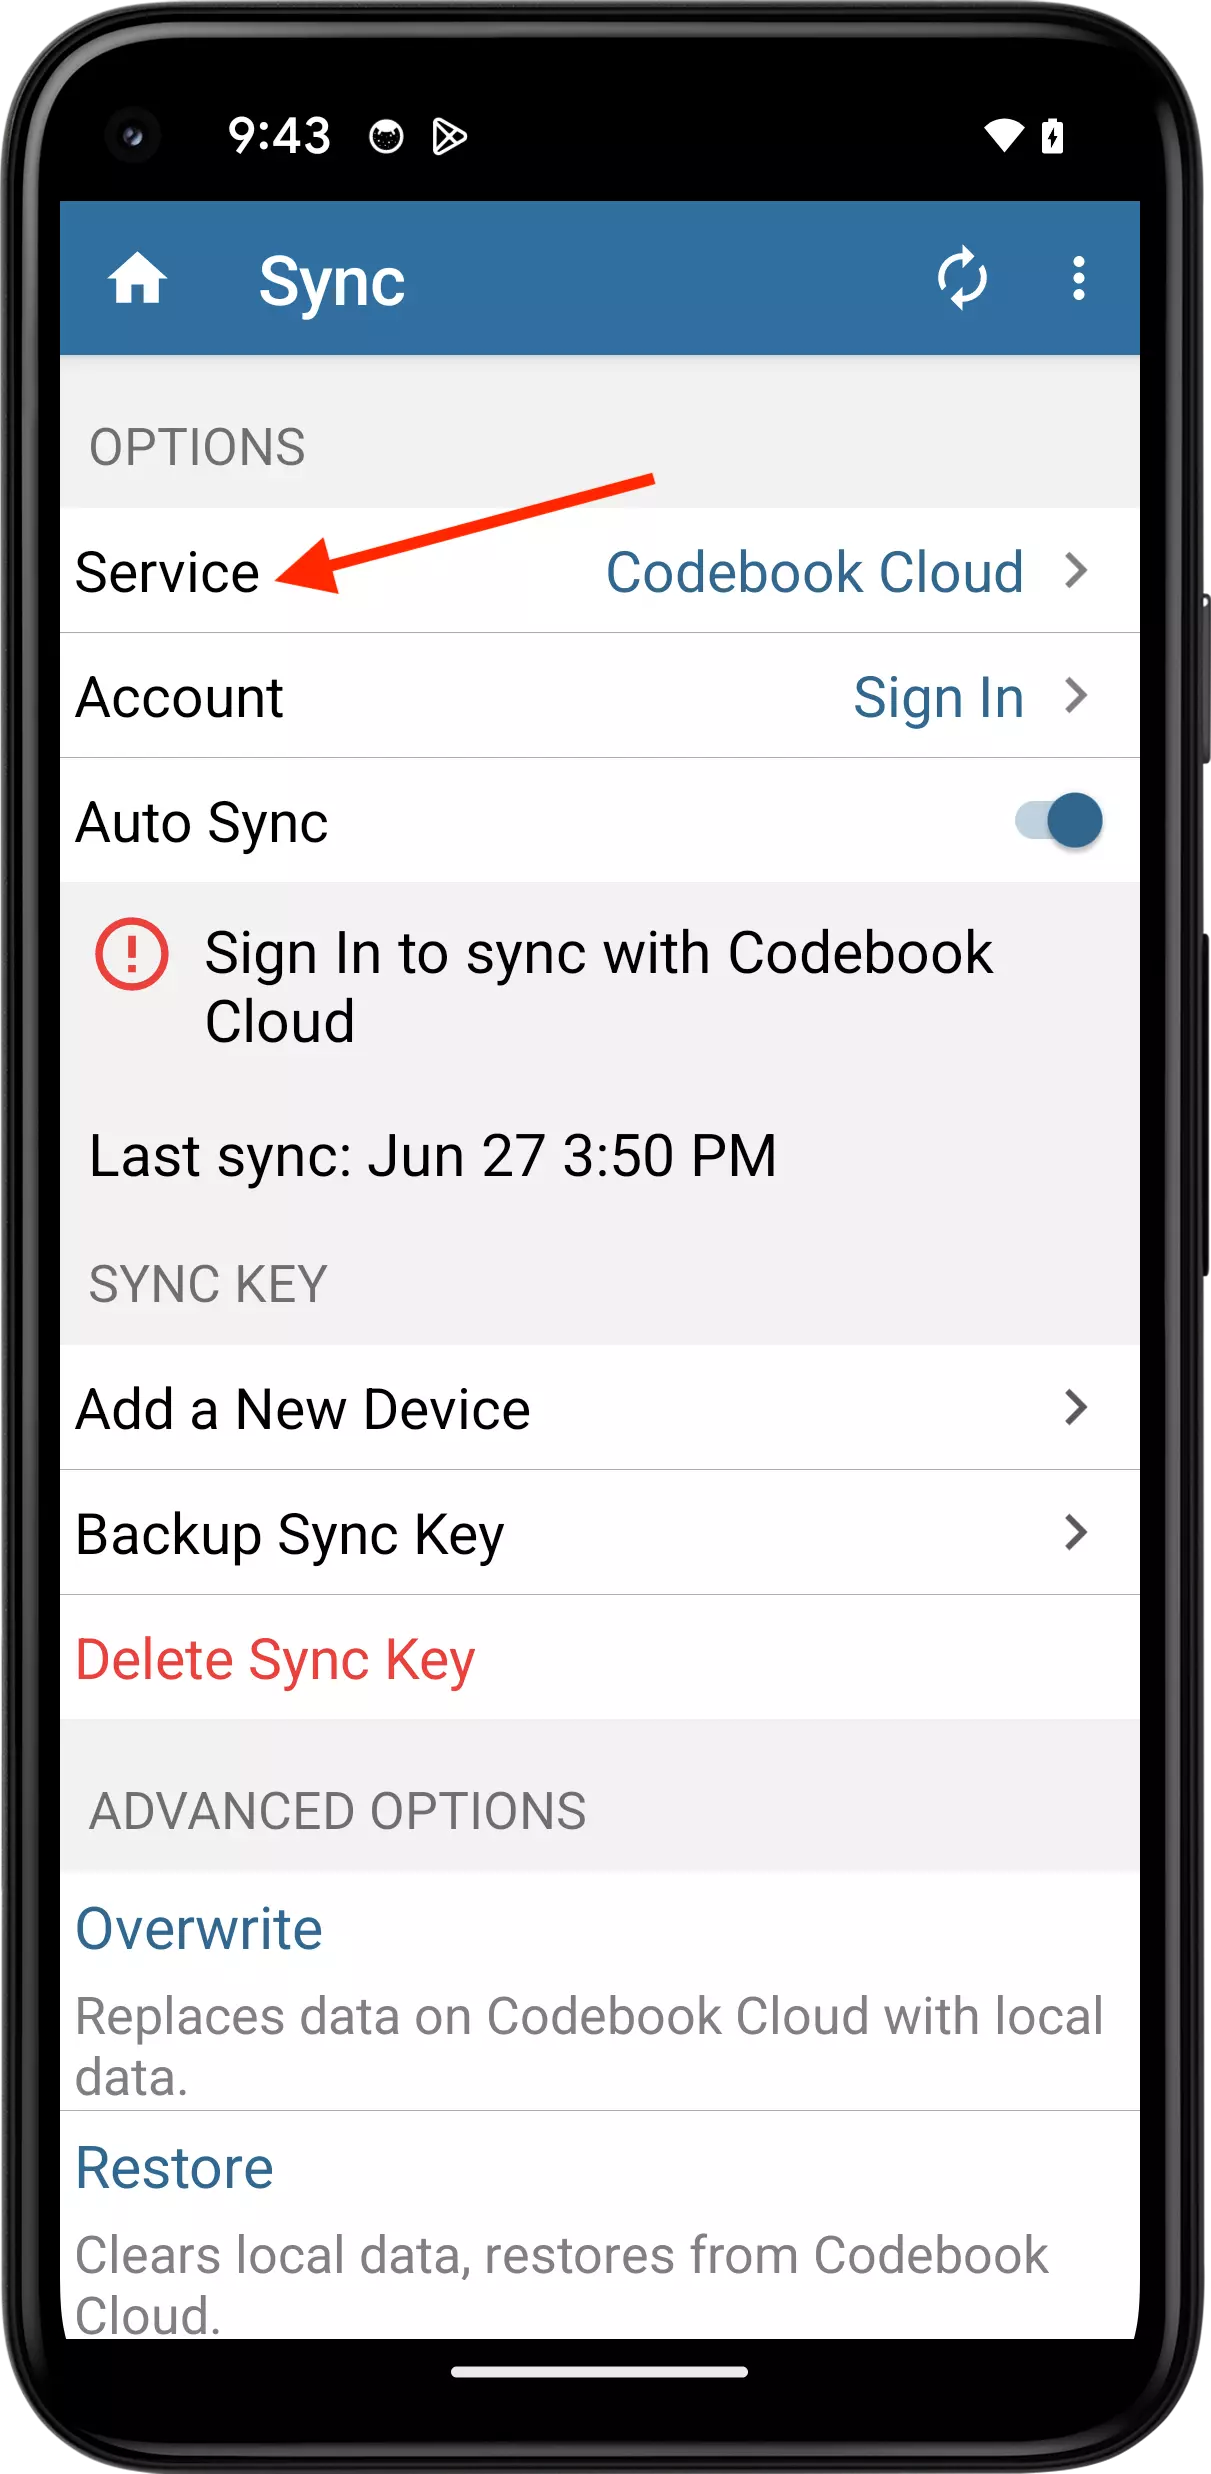
Tap to Service to select Codebook Cloud
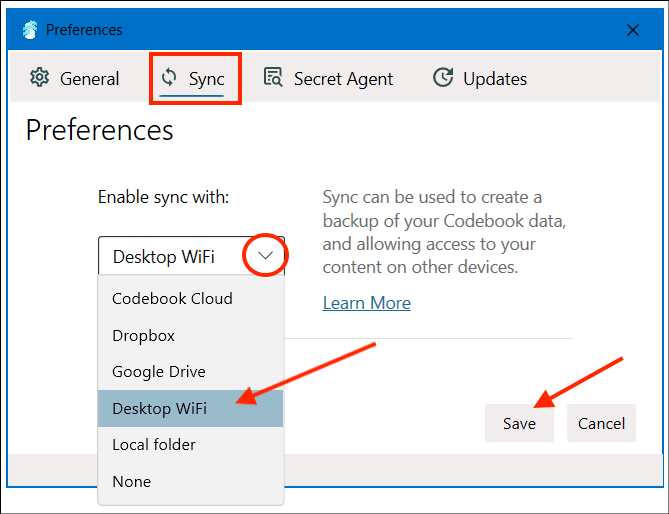
Click to open the Sync Service drop-down list.
Select Desktop WiFi from the drop-down list
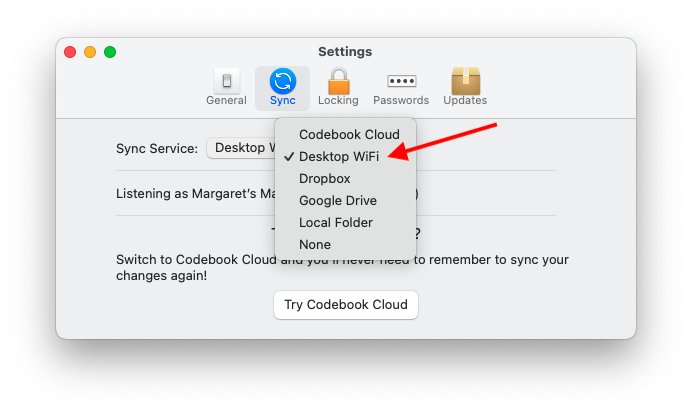
Select the Desktop WiFi and click Save
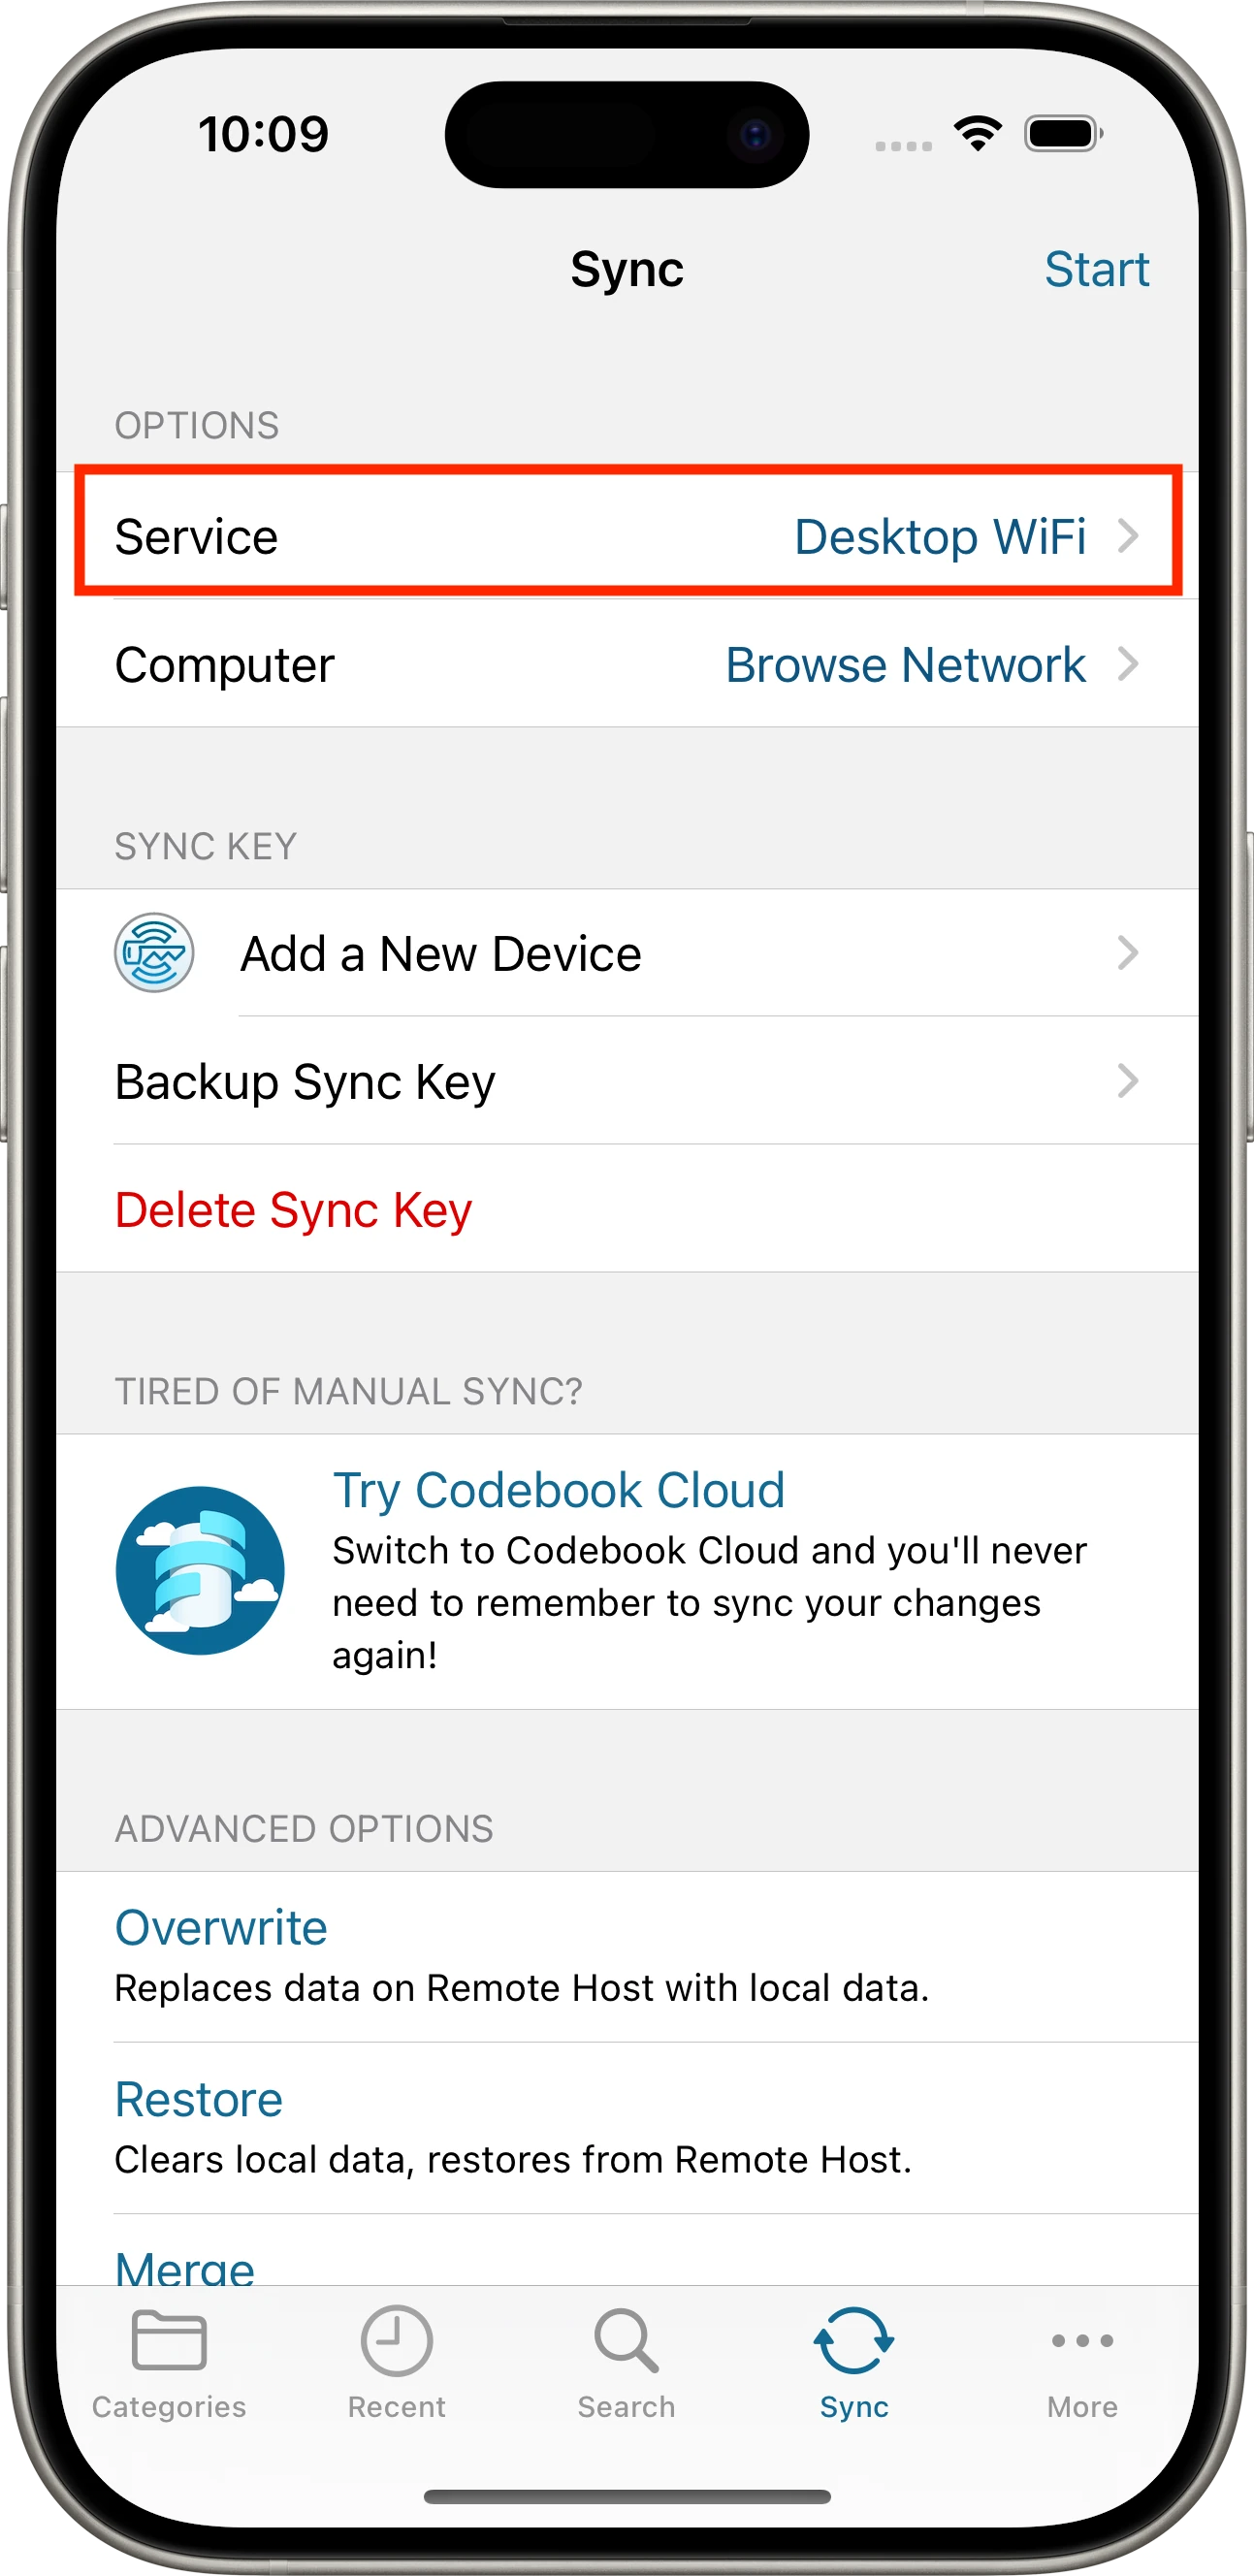
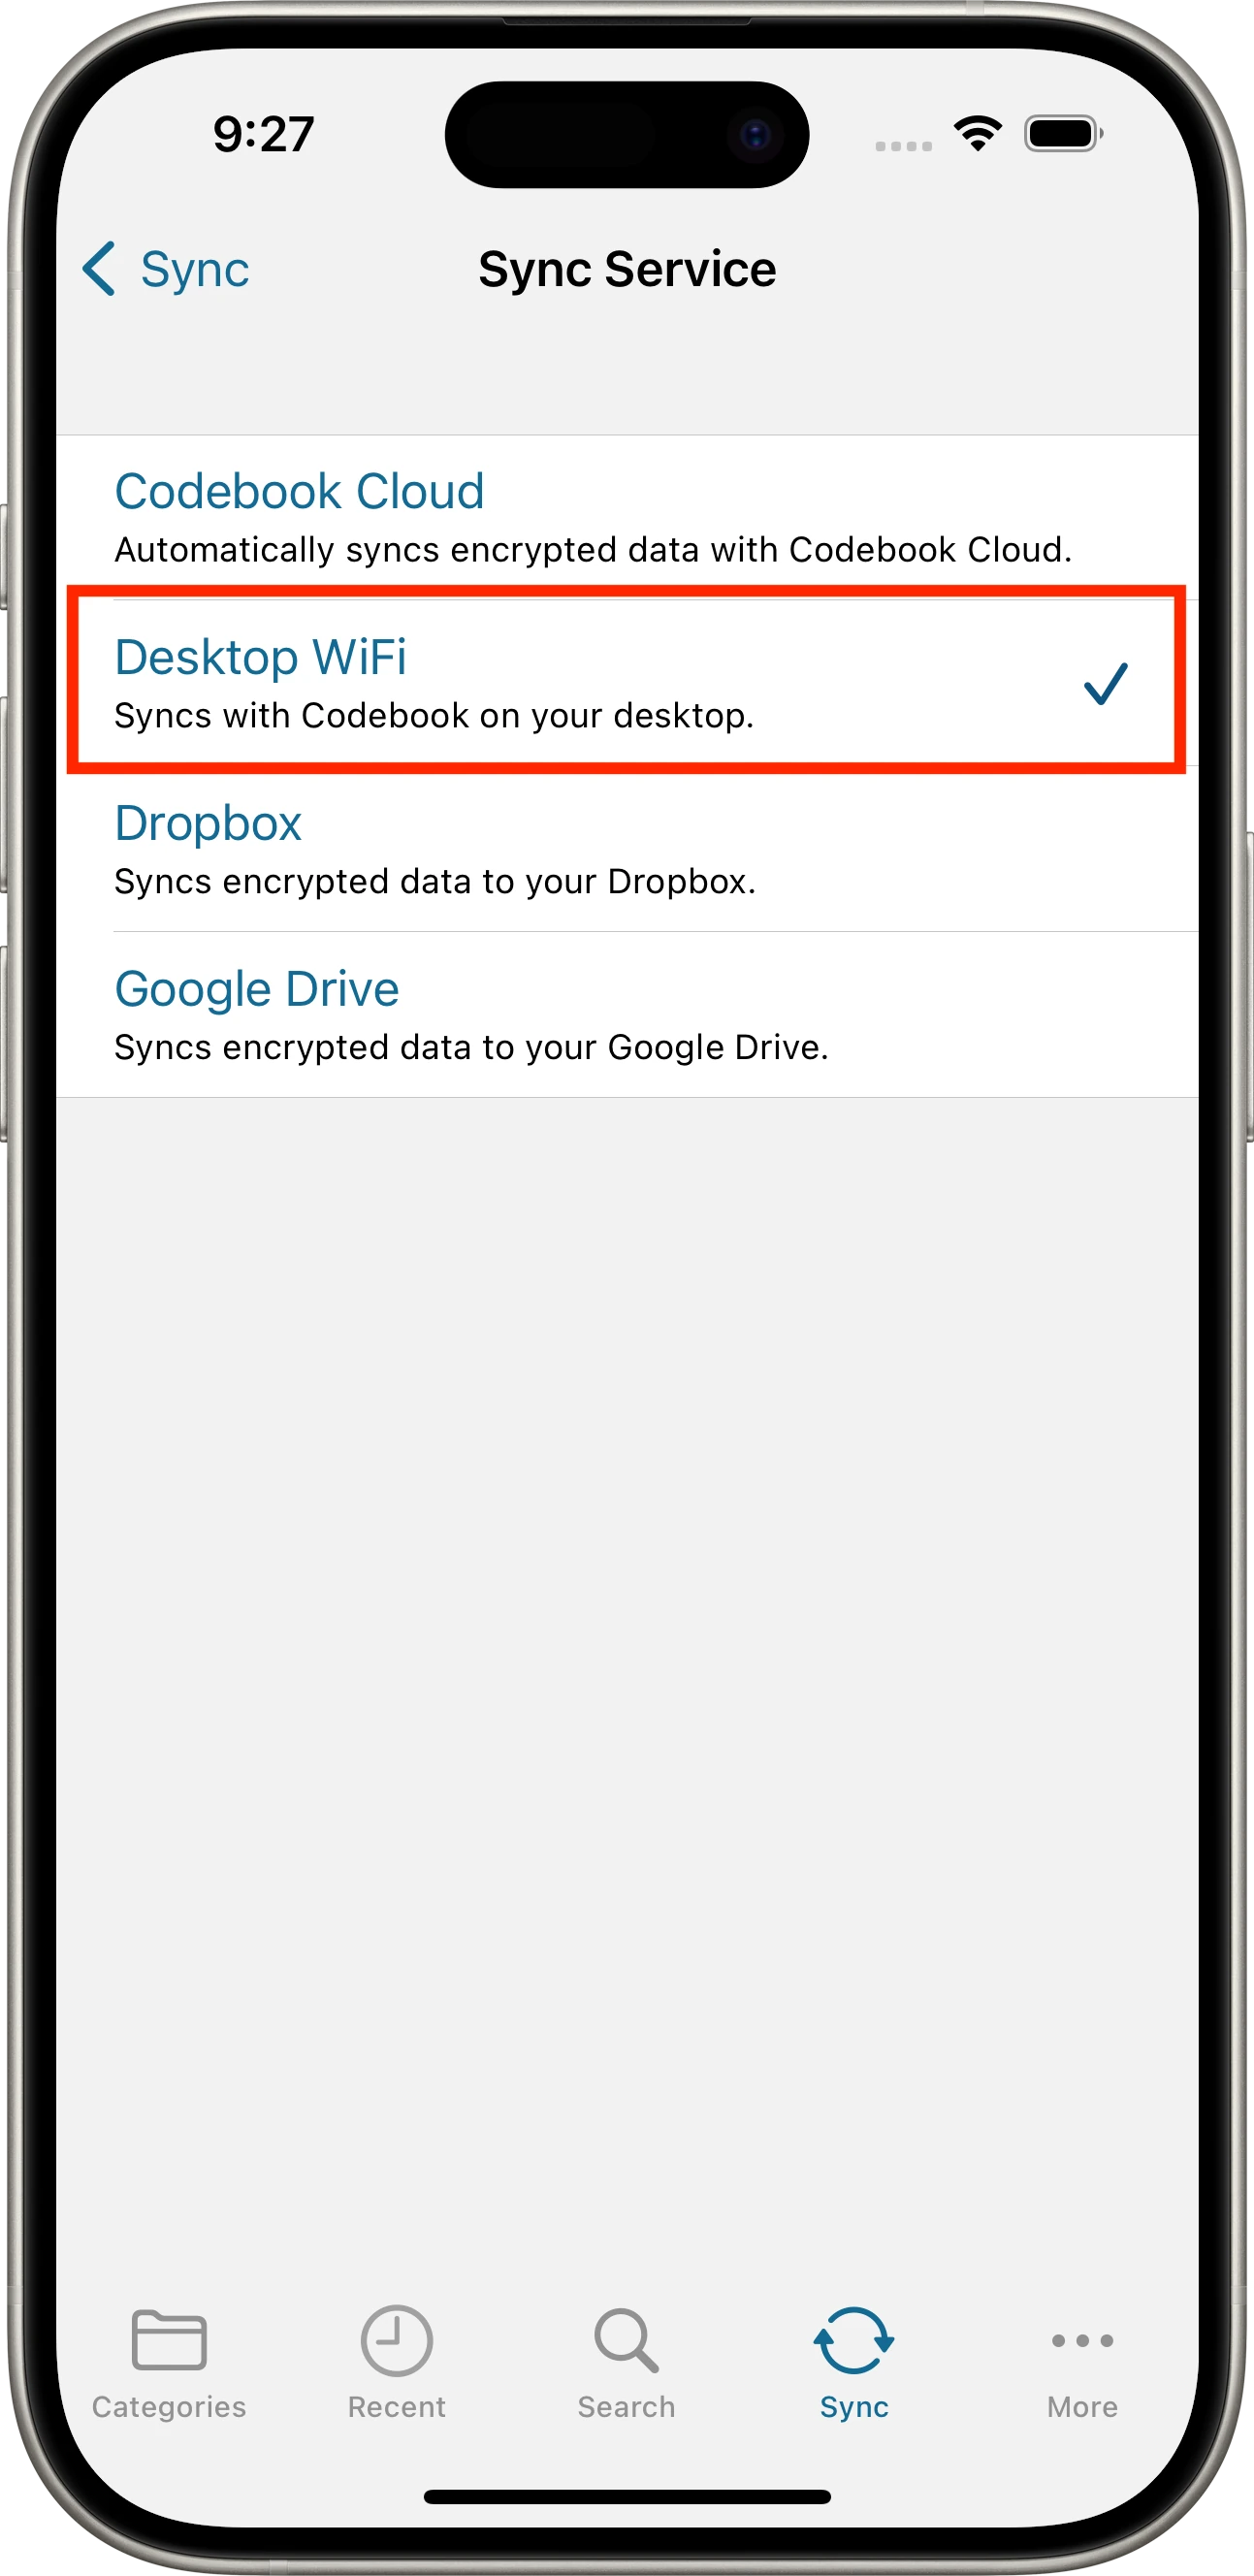
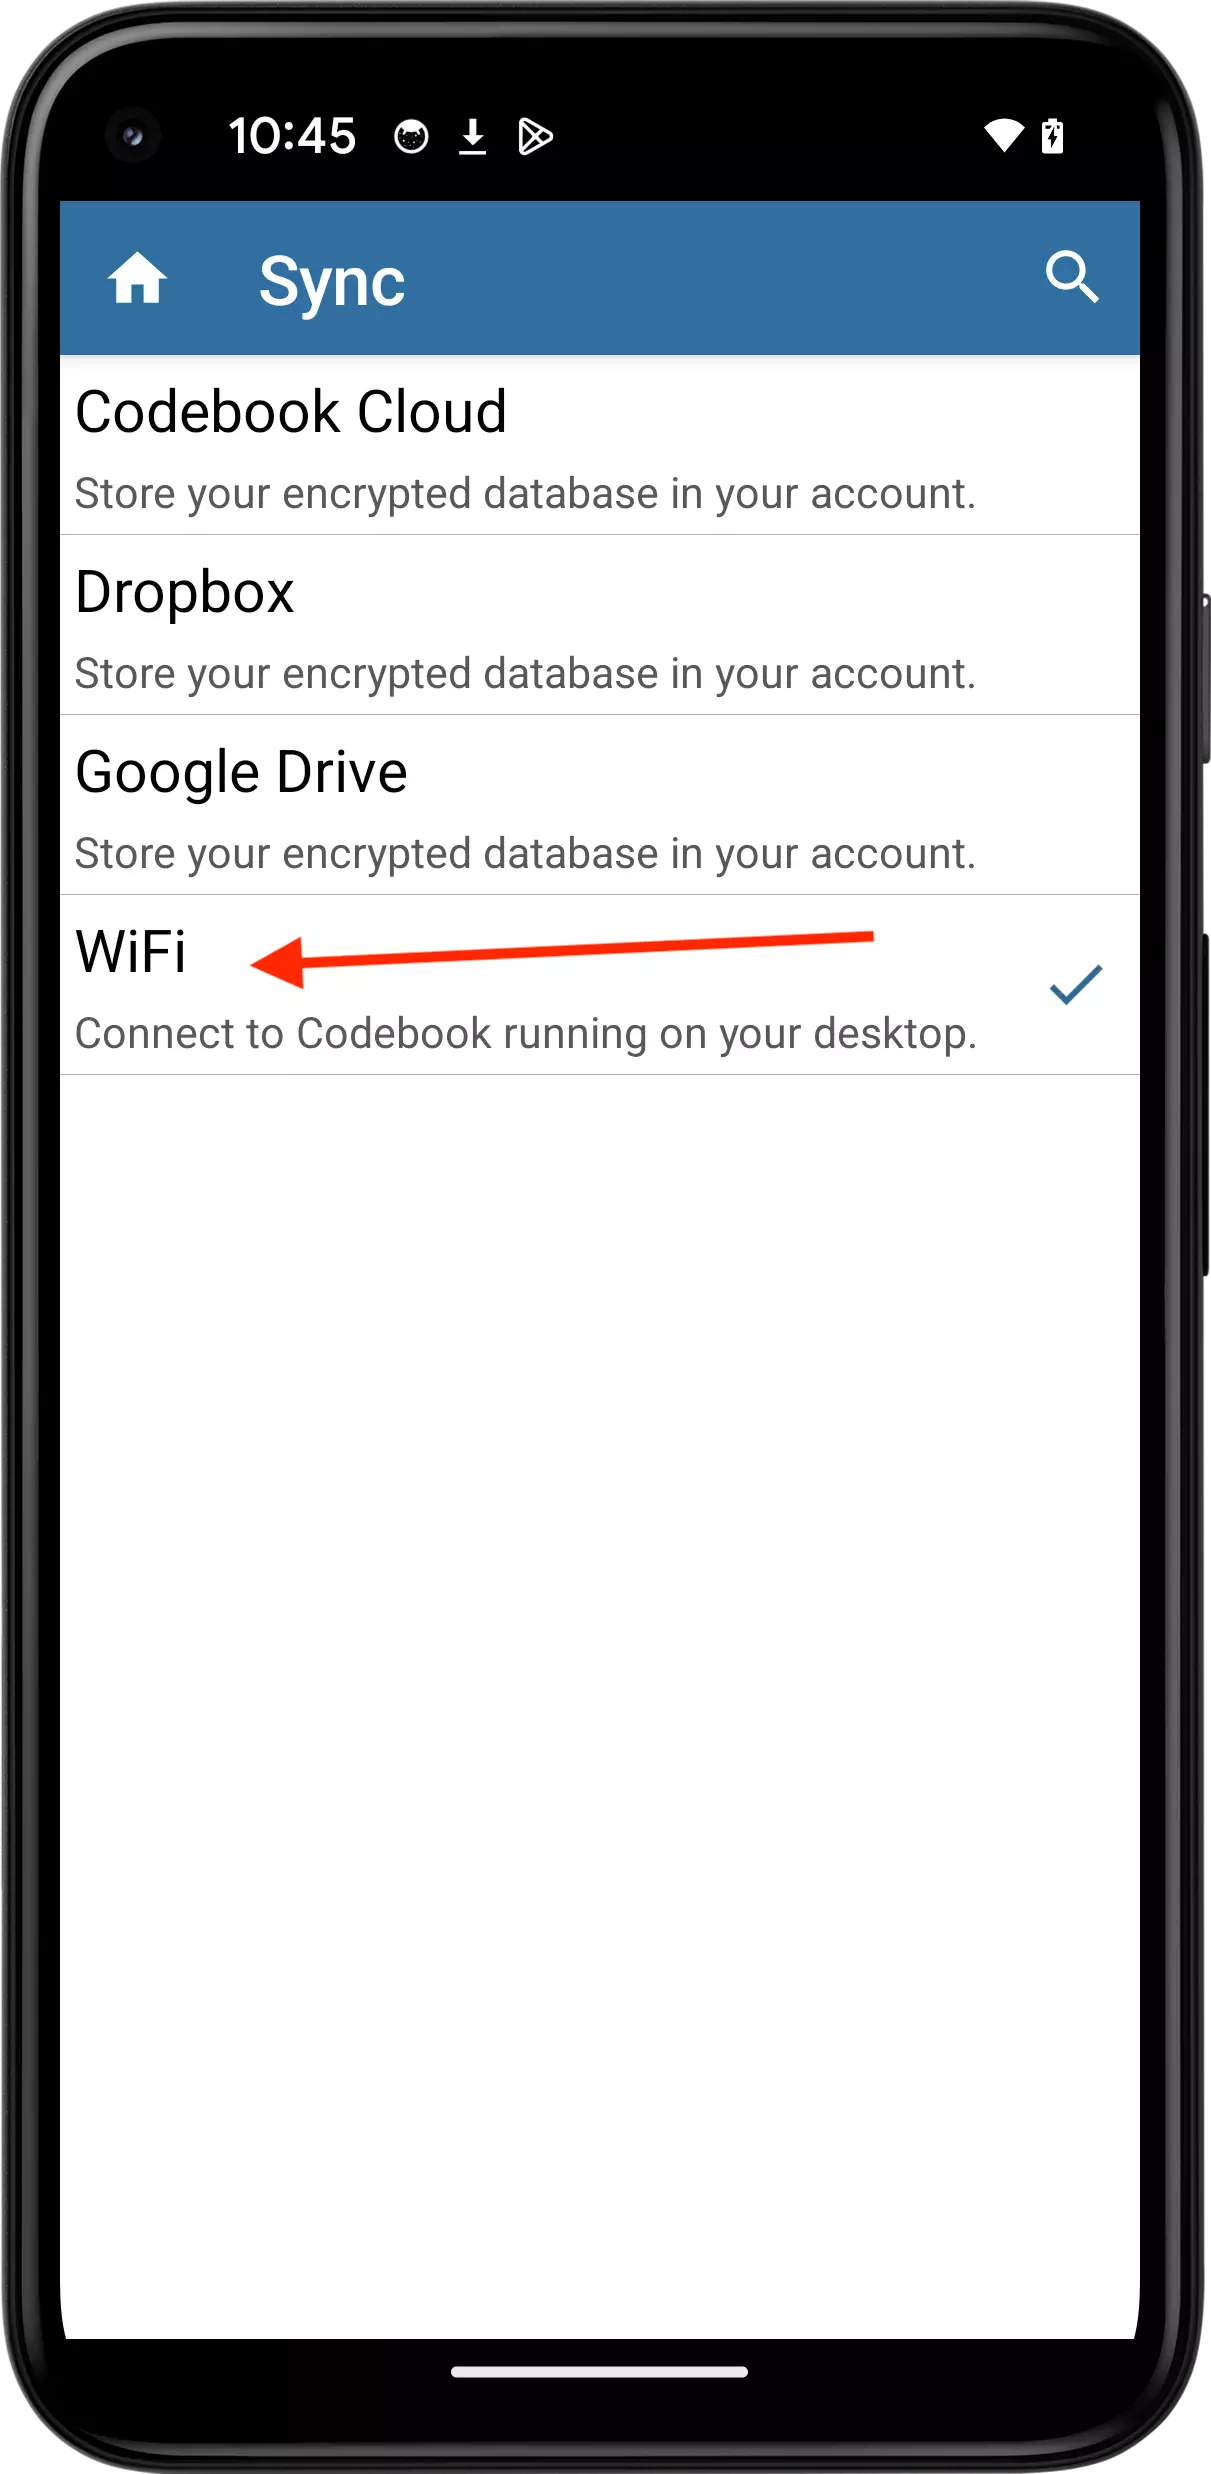
Open the Codebook Sync screen. Tap Sync in the tab bar at the bottom of the screen.
Select the sync service to use:
Tap to select Desktop WiFi
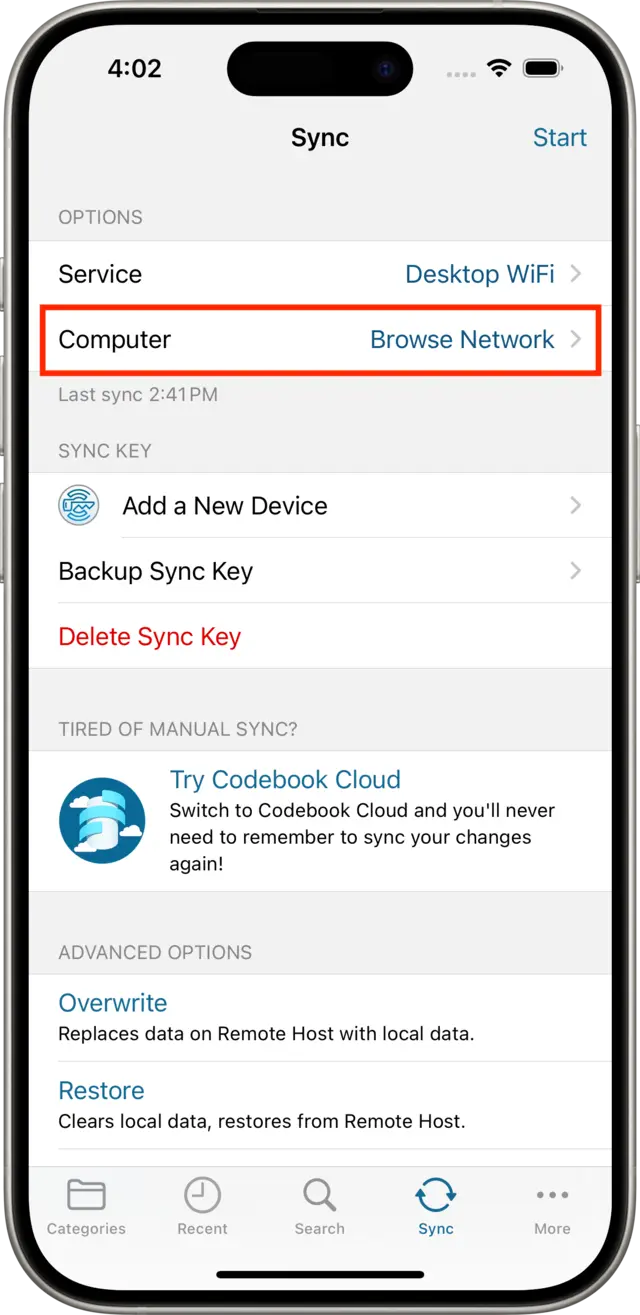
Set Computer for Desktop WiFi:
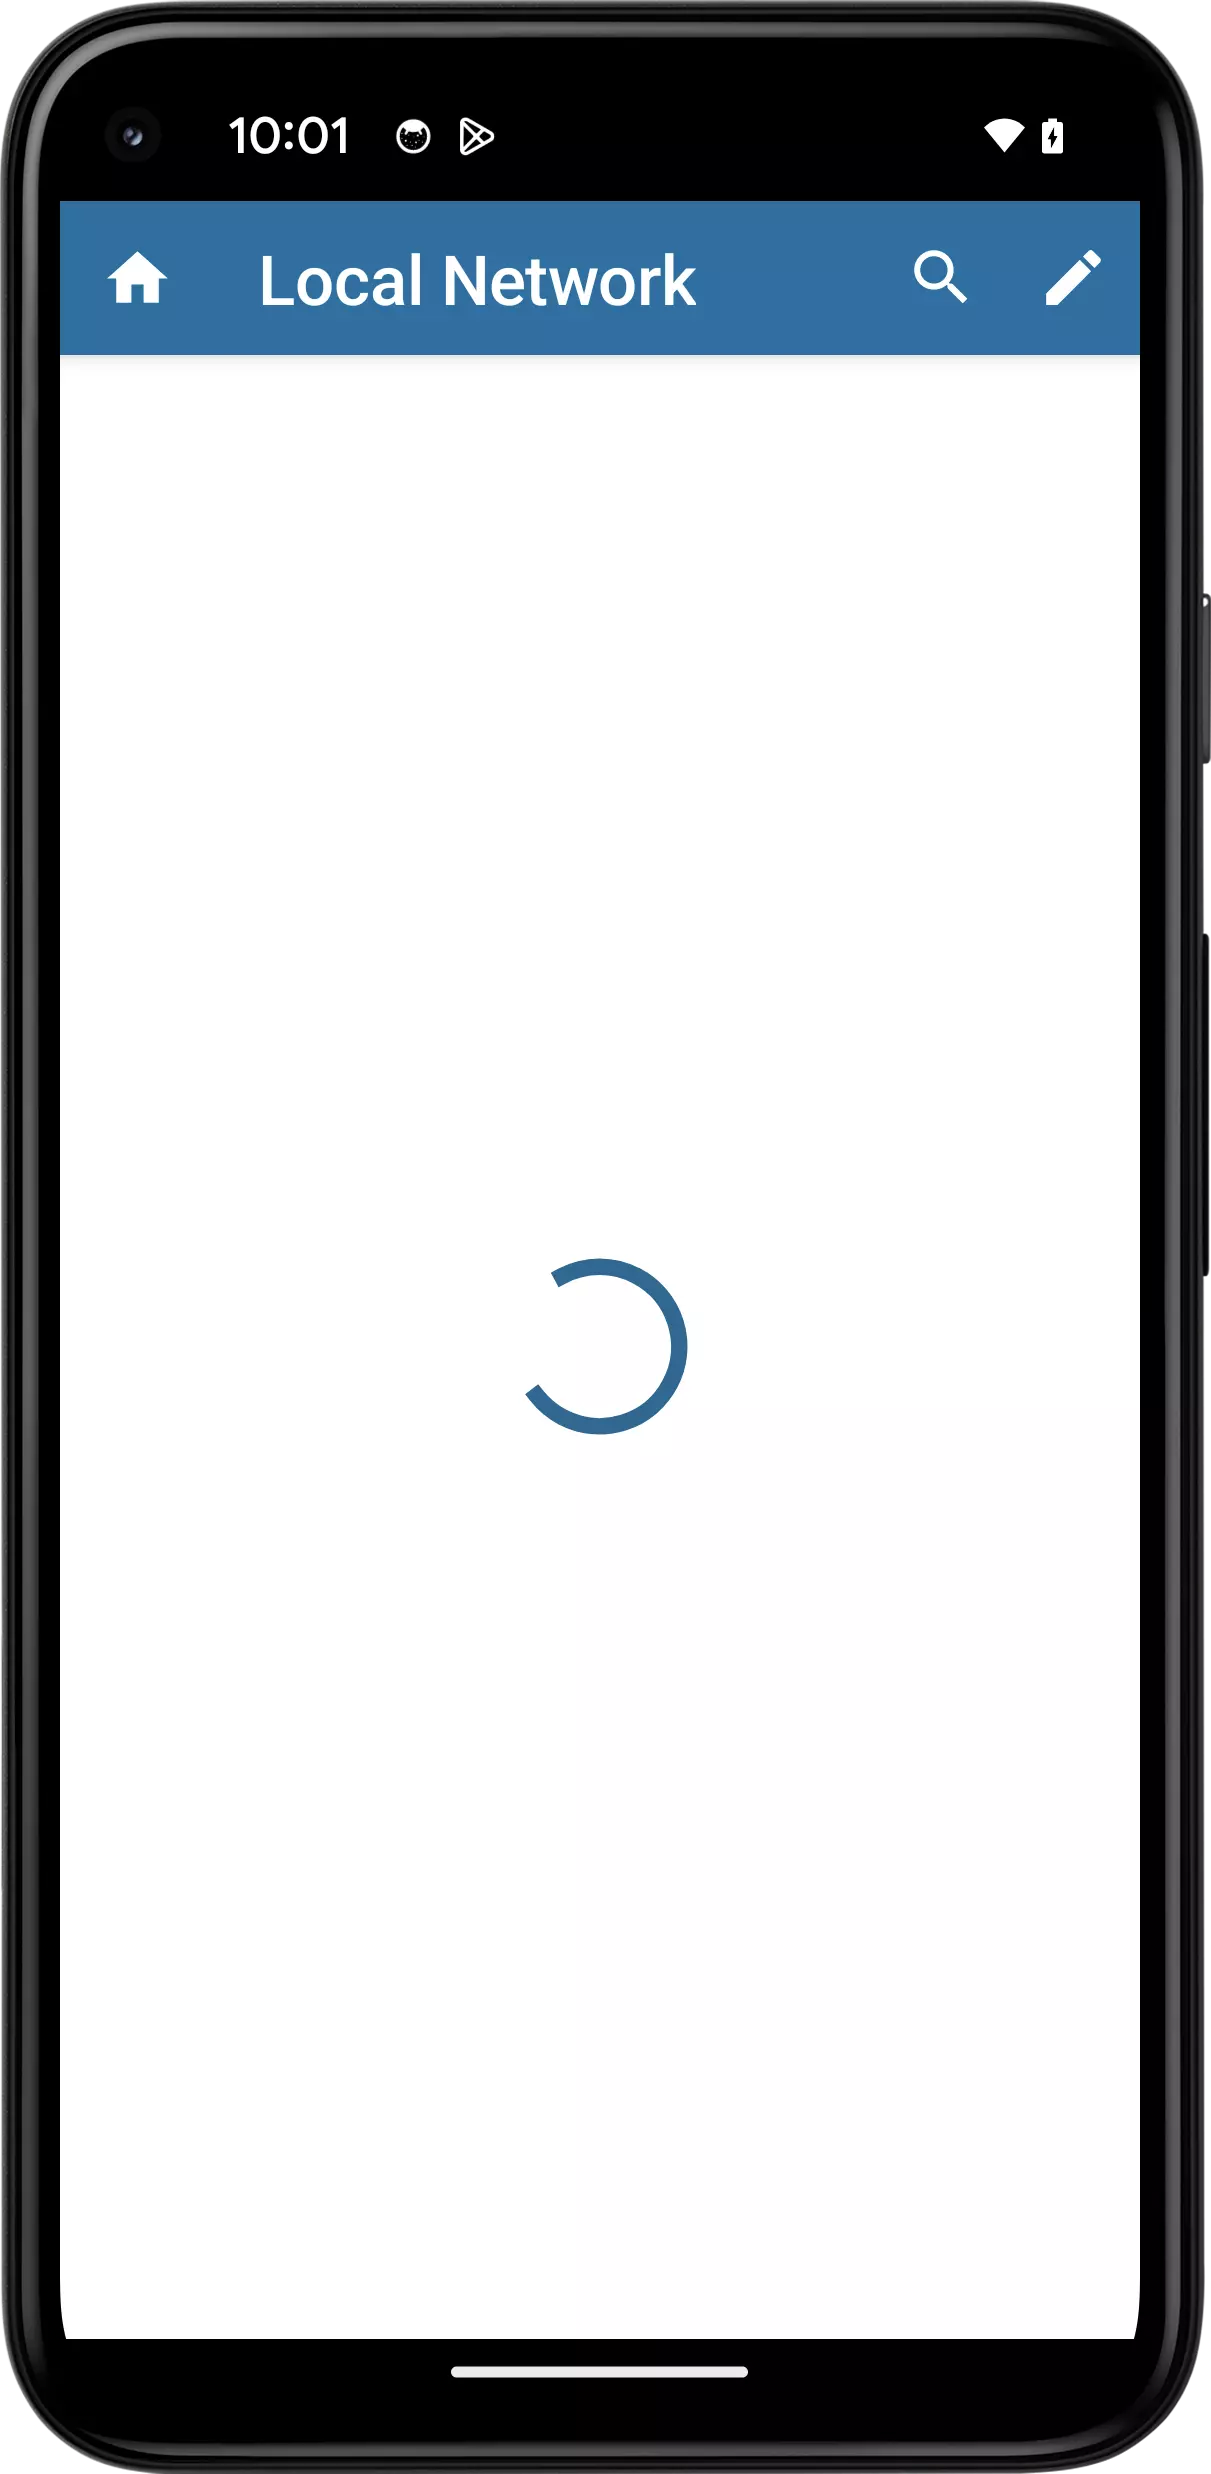
Select the computer from those that are displayed. (Only computers on the same network are listed.)
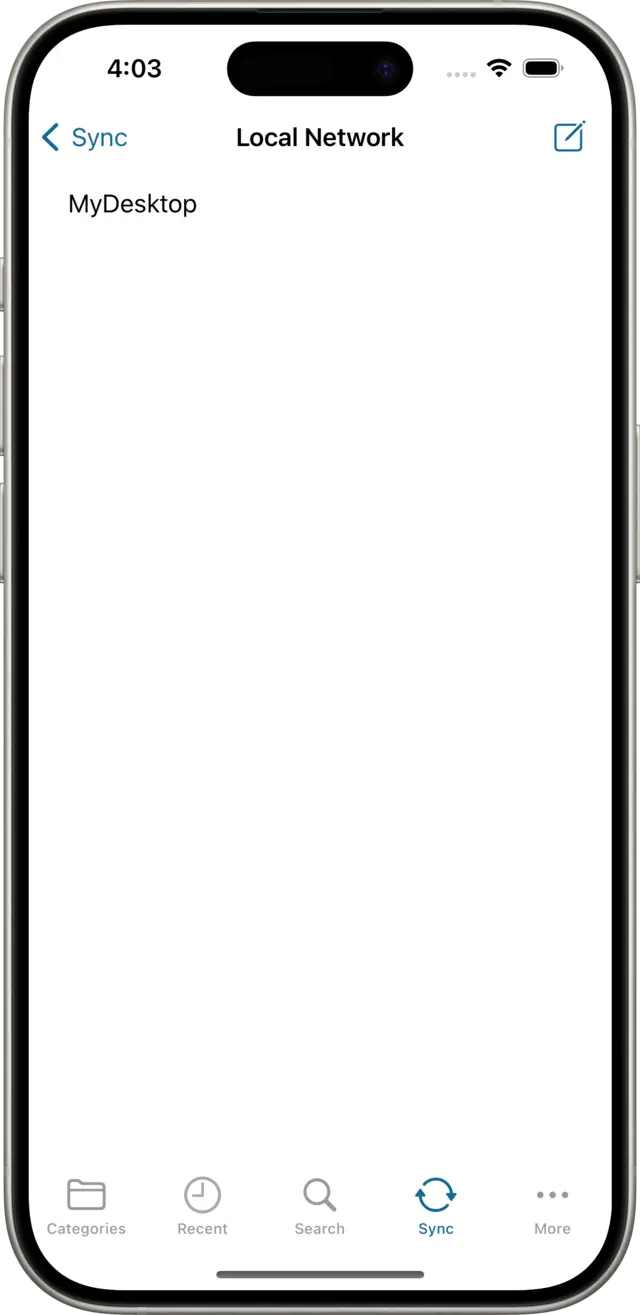
Set the Service:
Tap to select Desktop WiFi
Set Desktop WiFi:
Select the computer from those that are displayed. (Only computers on the same network are listed.)

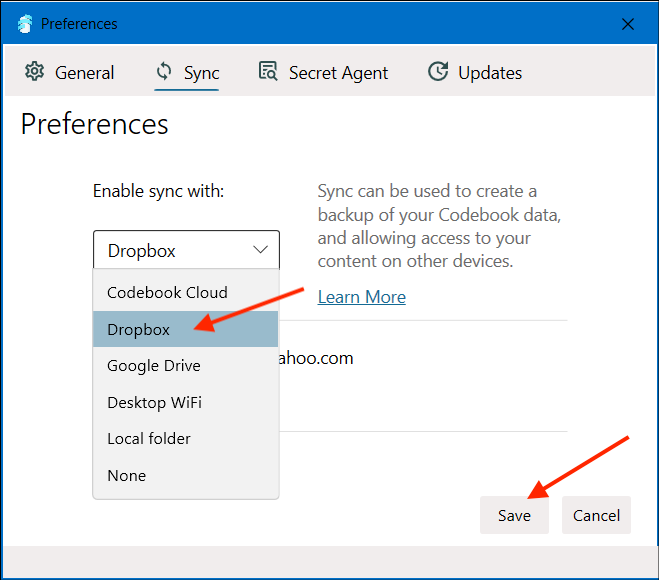
Click to open the Sync Service drop-down list.
Select Dropbox from the drop-down list

Select Dropbox and click Save
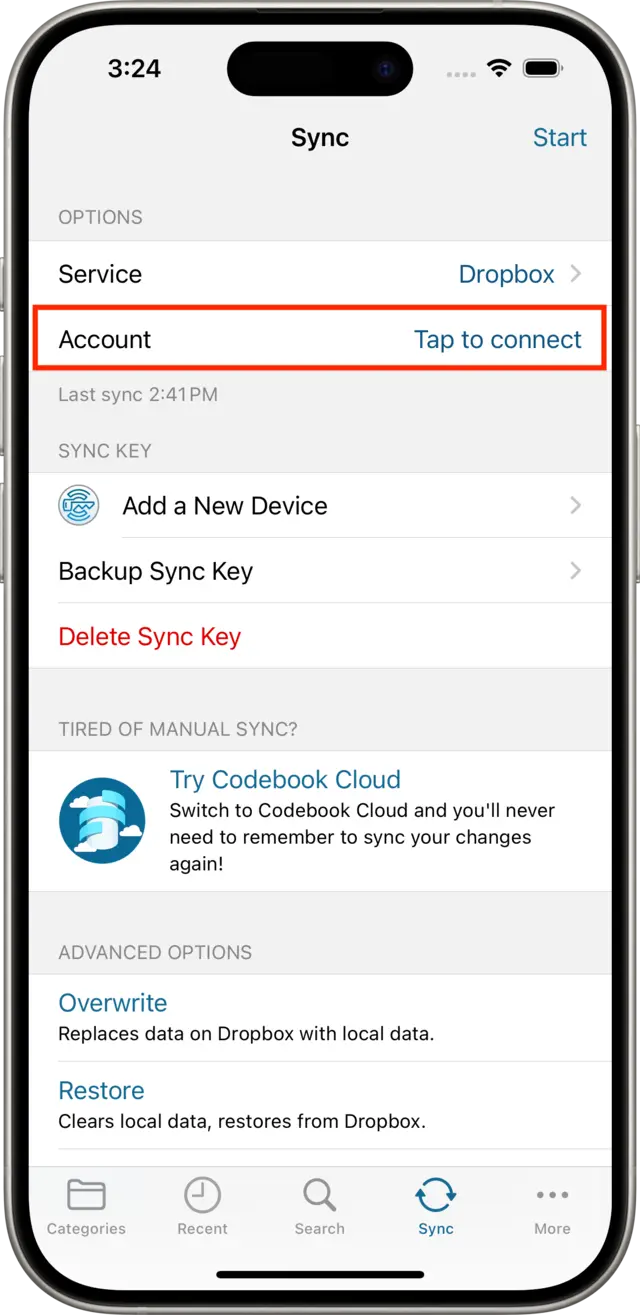
Open the Codebook Sync screen. Tap Sync in the tab bar at the bottom of the screen.
Select the sync service to use:
Tap to select Dropbox

Set Dropbox Account:
Tap Account - Tap to Connect
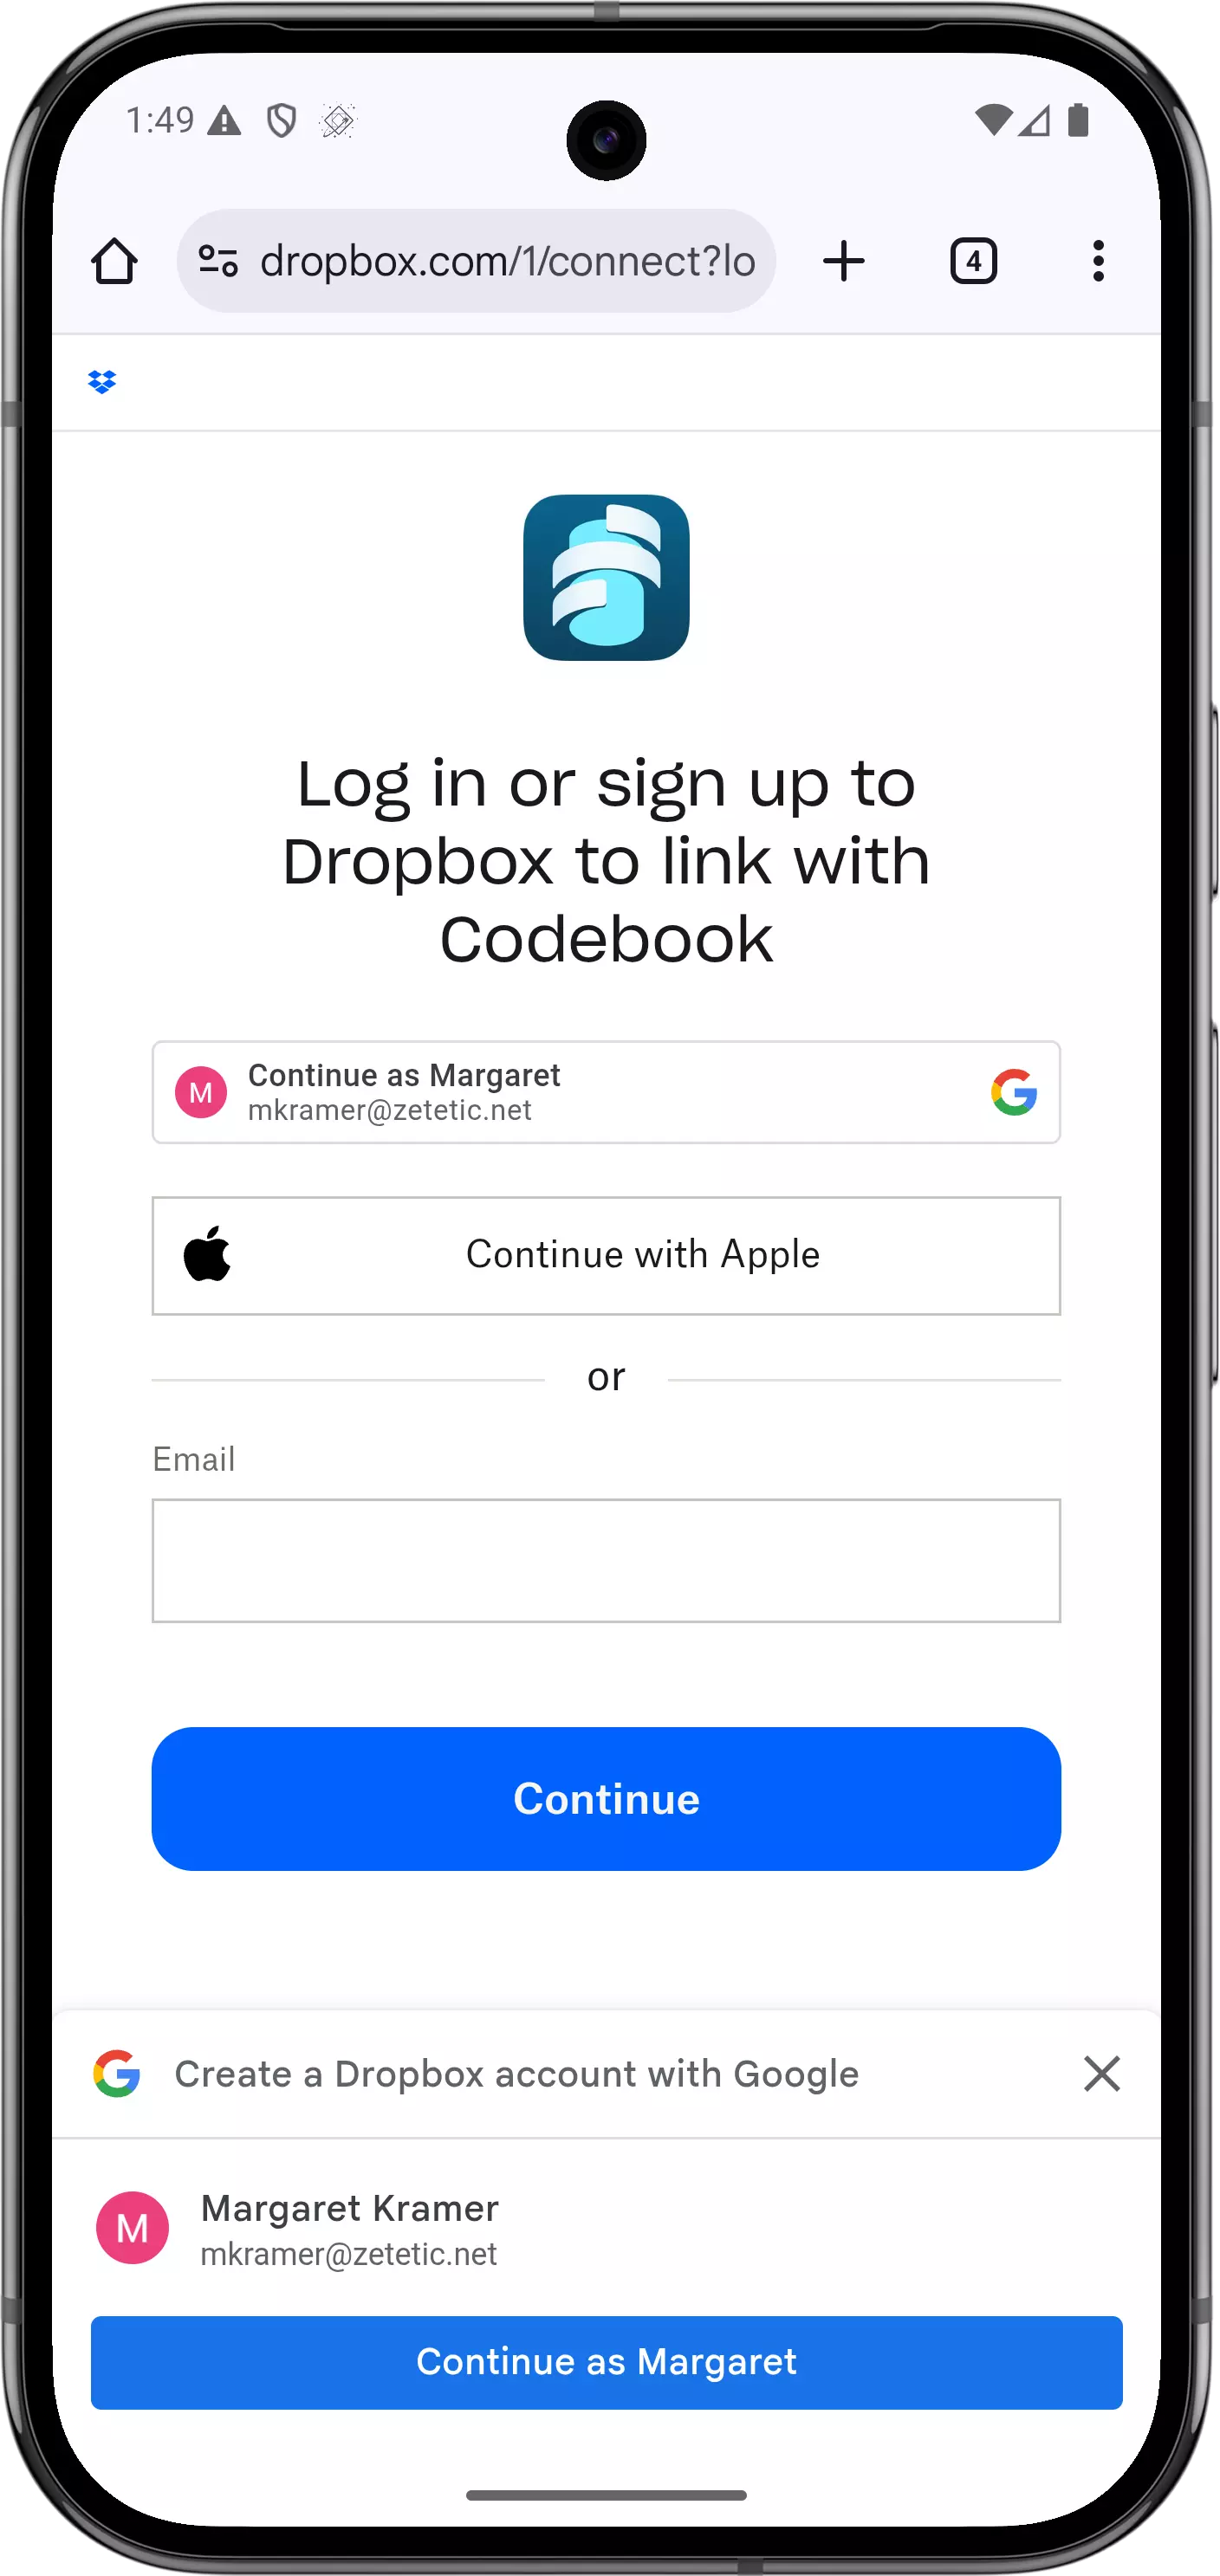
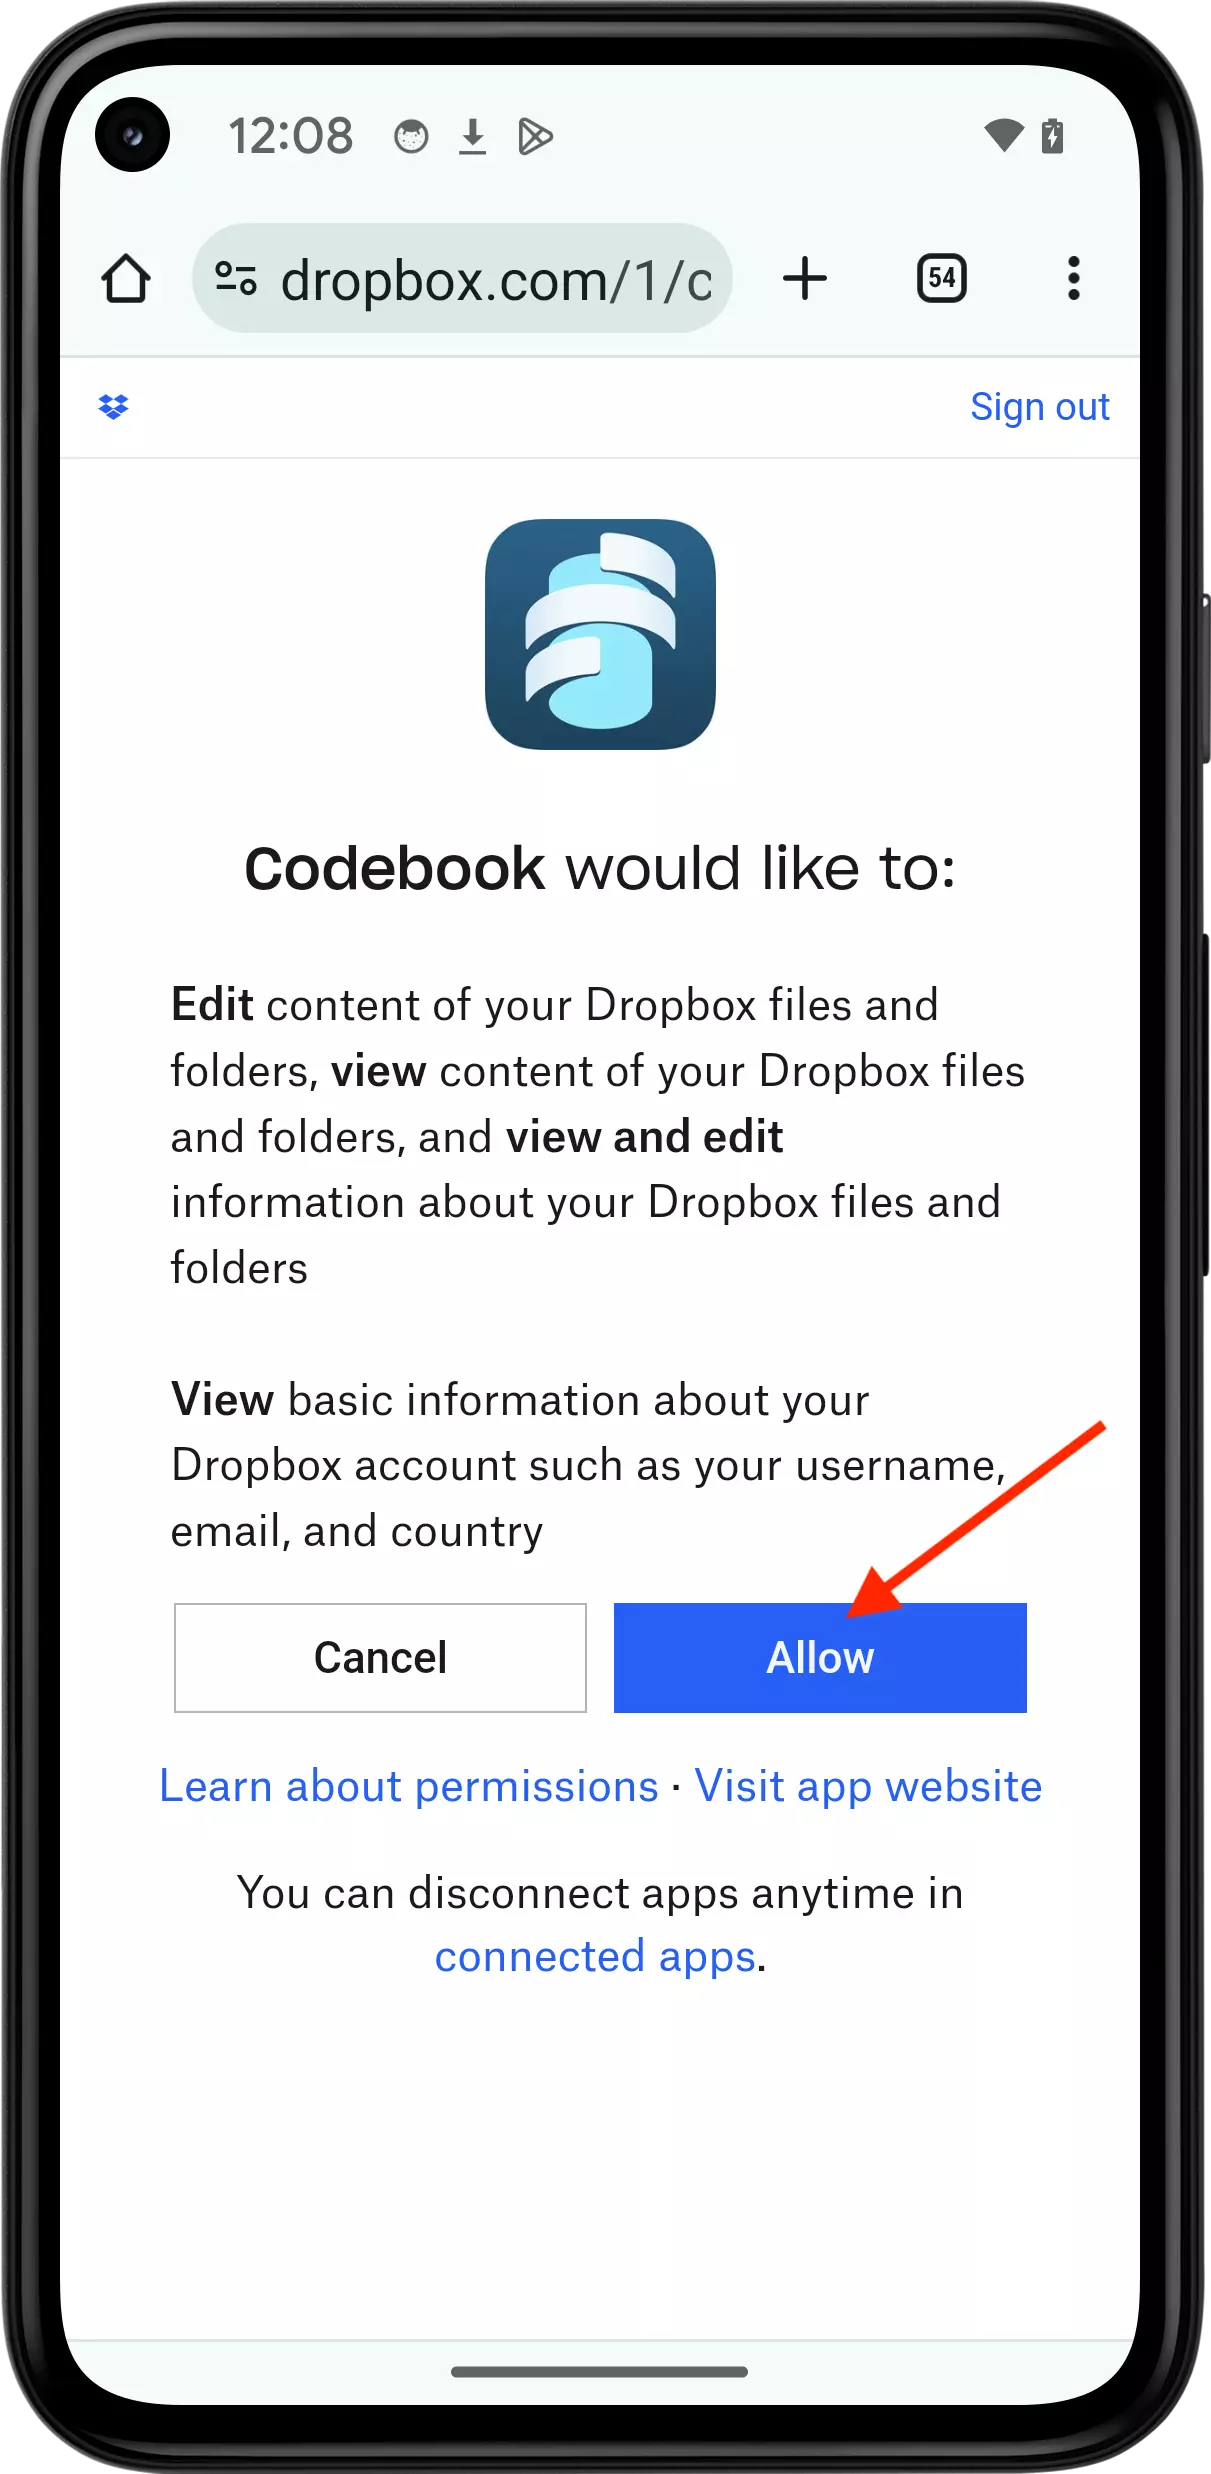
Enter your Dropbox account information and authorize Codebook to access your account.
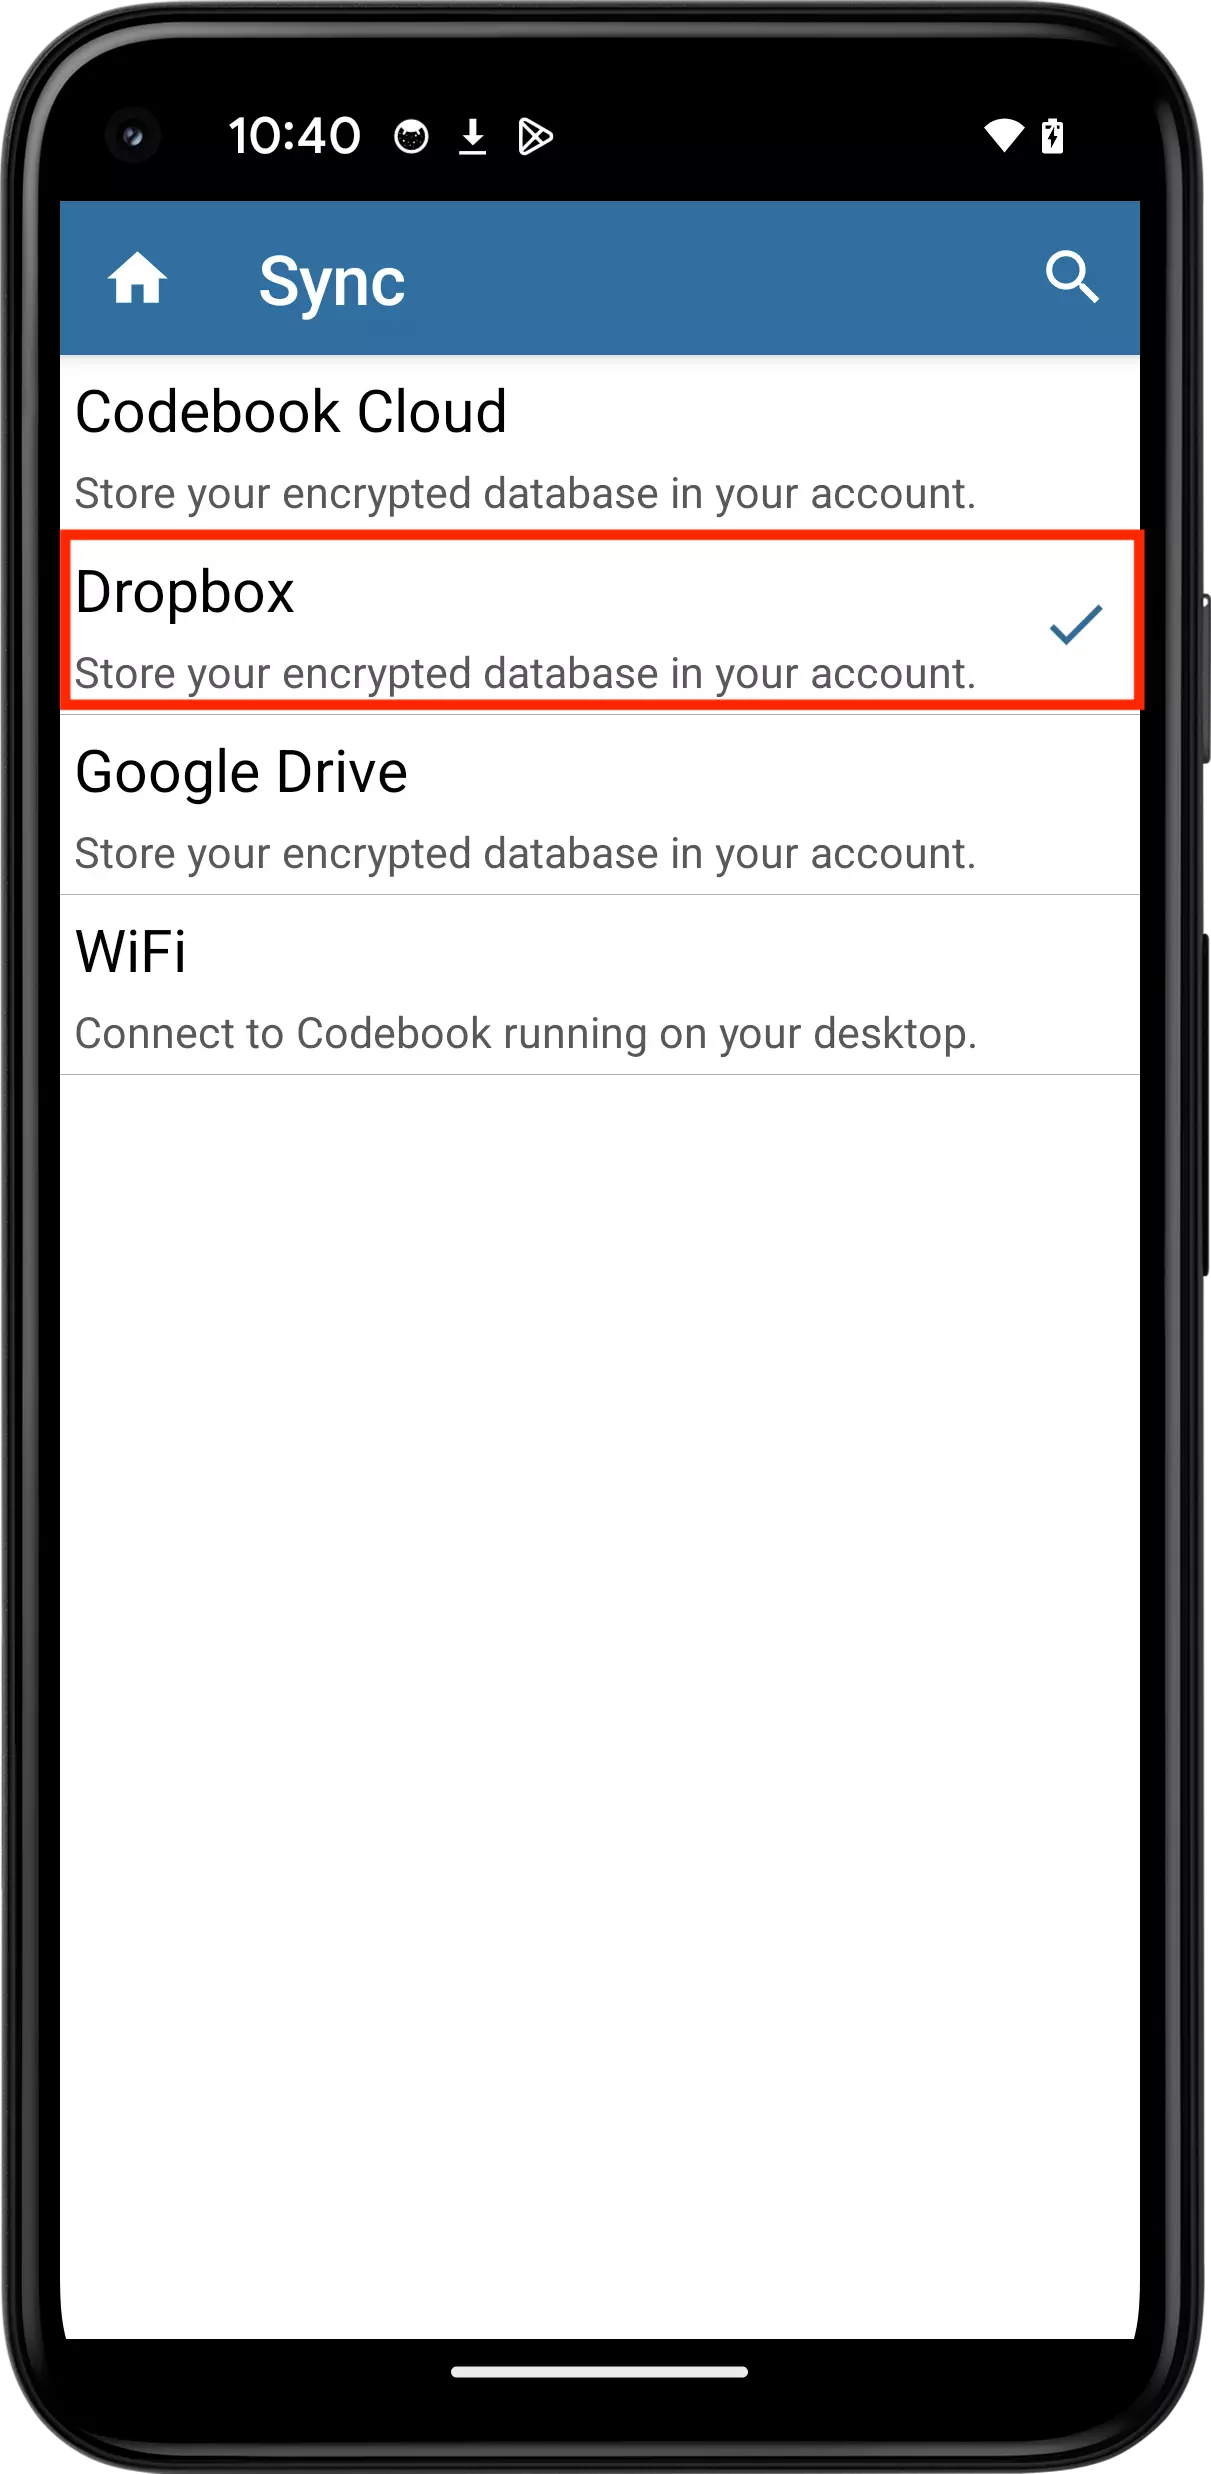
Set the Service:
Tap to select Dropbox
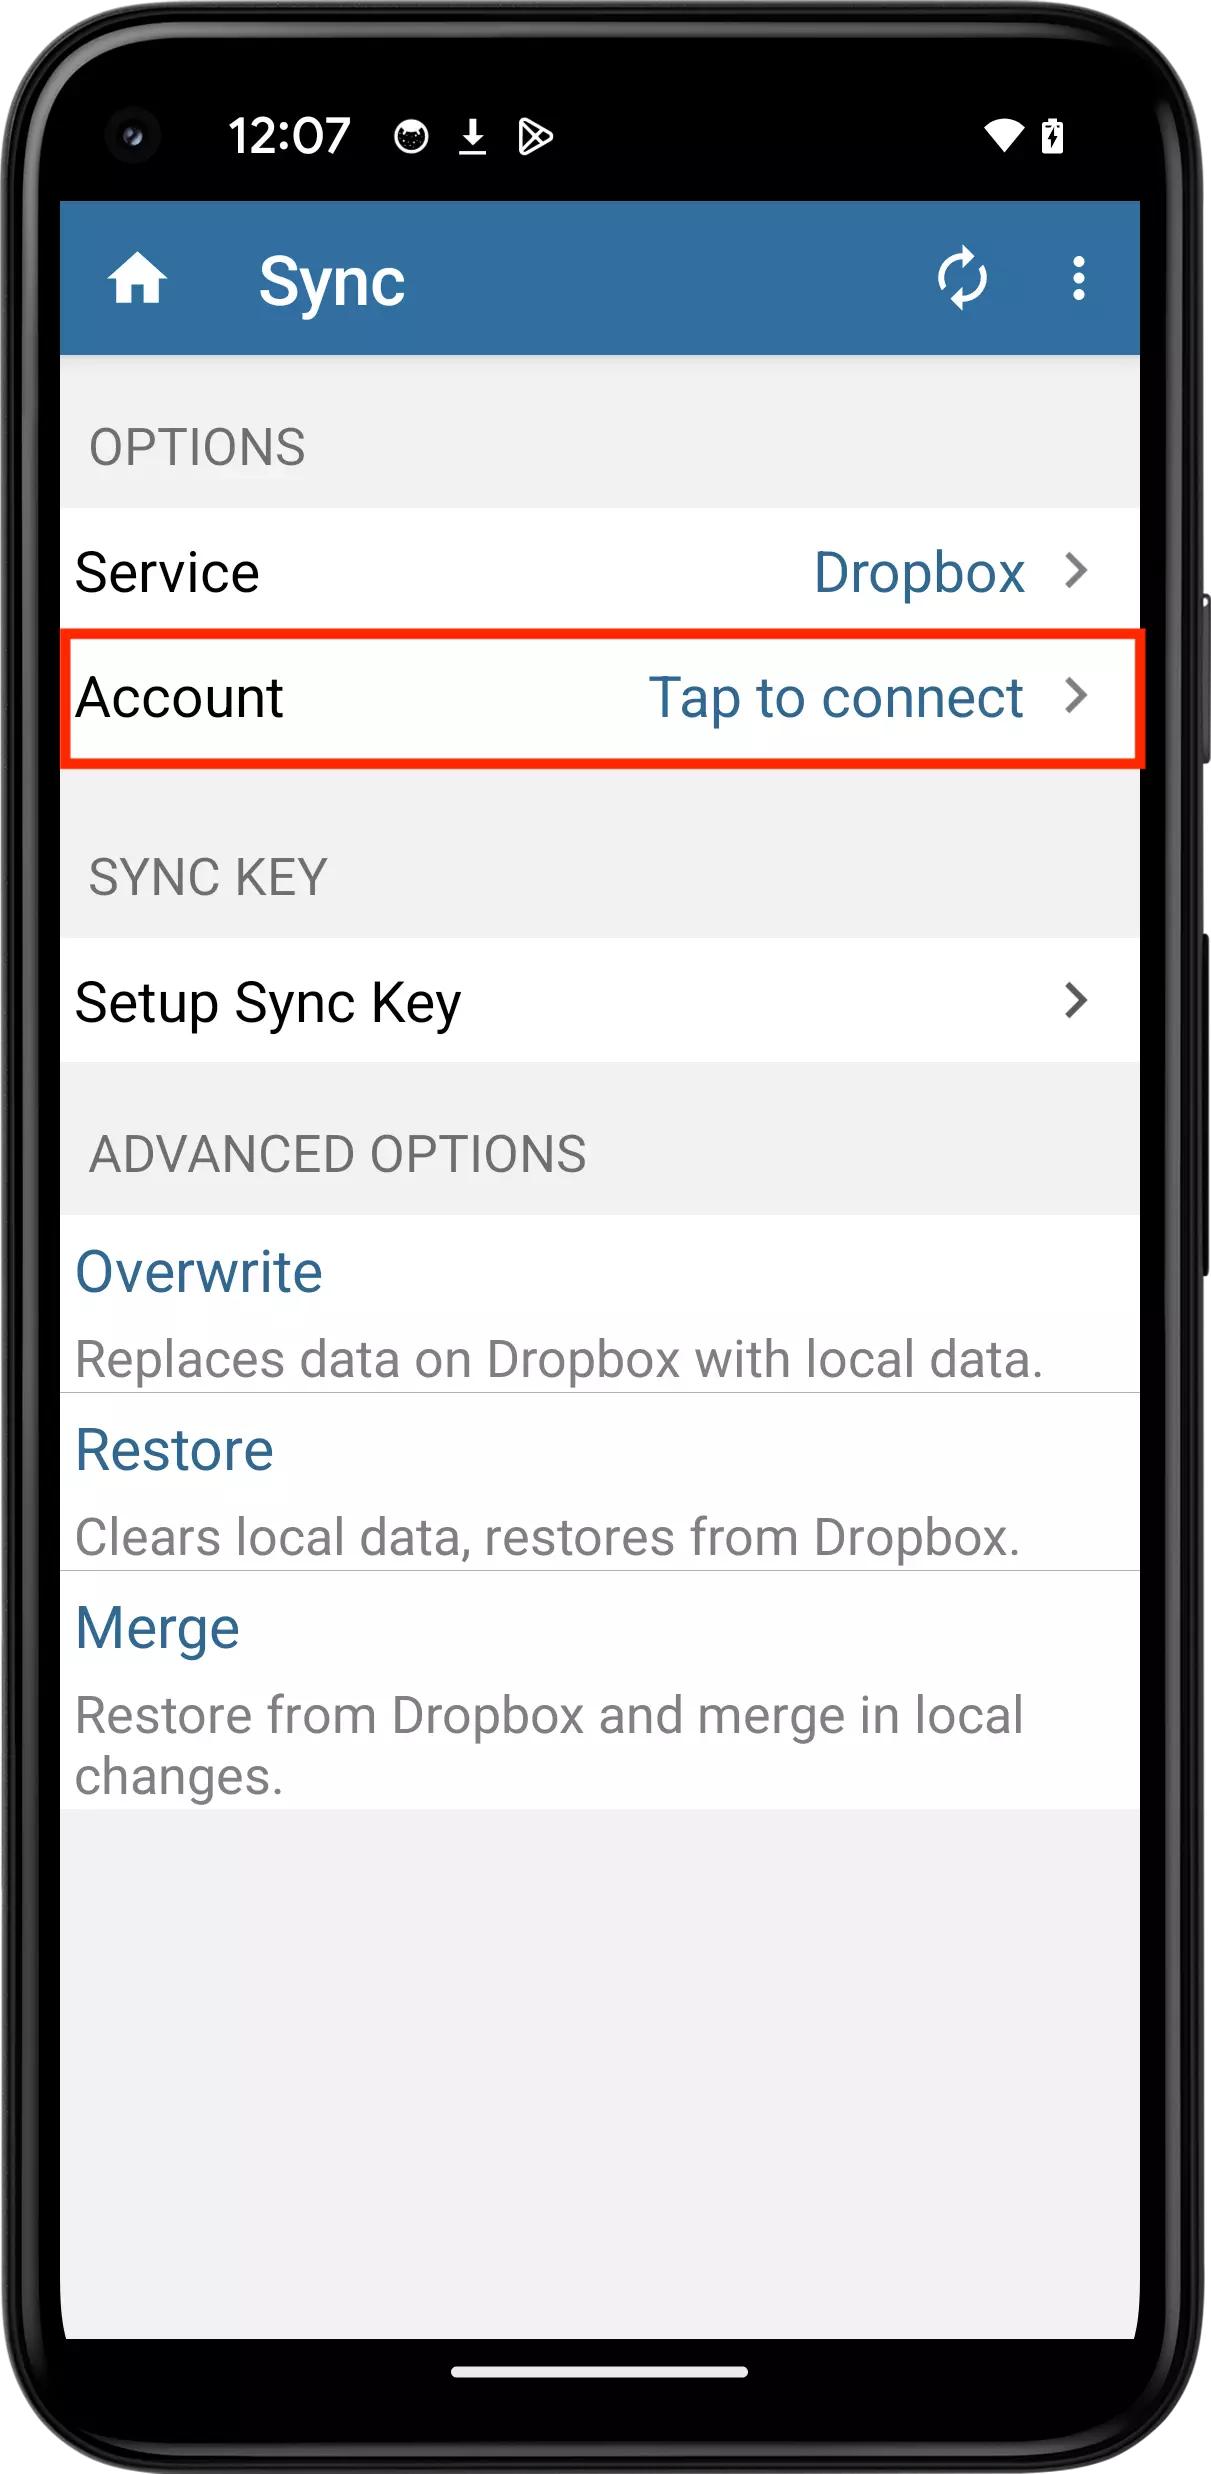
Set Dropbox Account
You will be prompted to enter your Drobox Log in information or tap Allow to give Codebook permission to access your Dropbox account that had been previously authorzied.
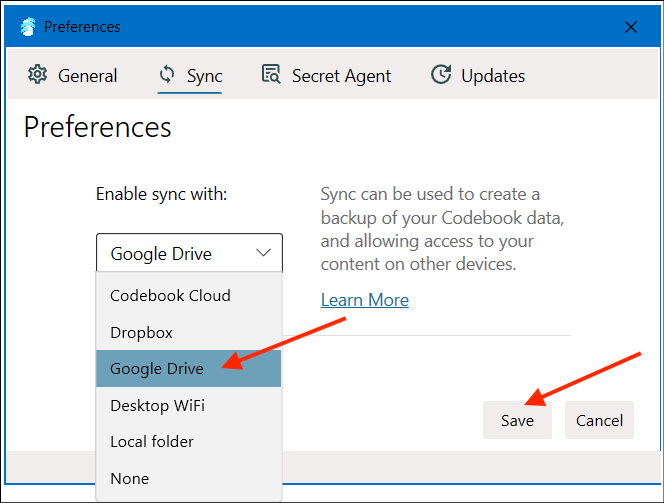
Click to open the Sync Service drop-down list.
Select Google Drive from the drop-down list
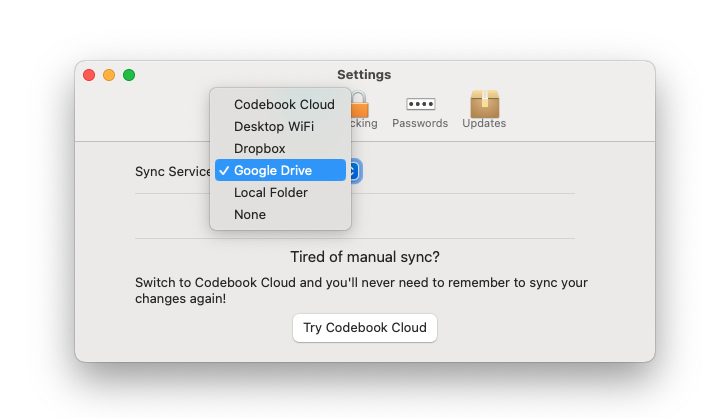
Select Google Drive and click Save
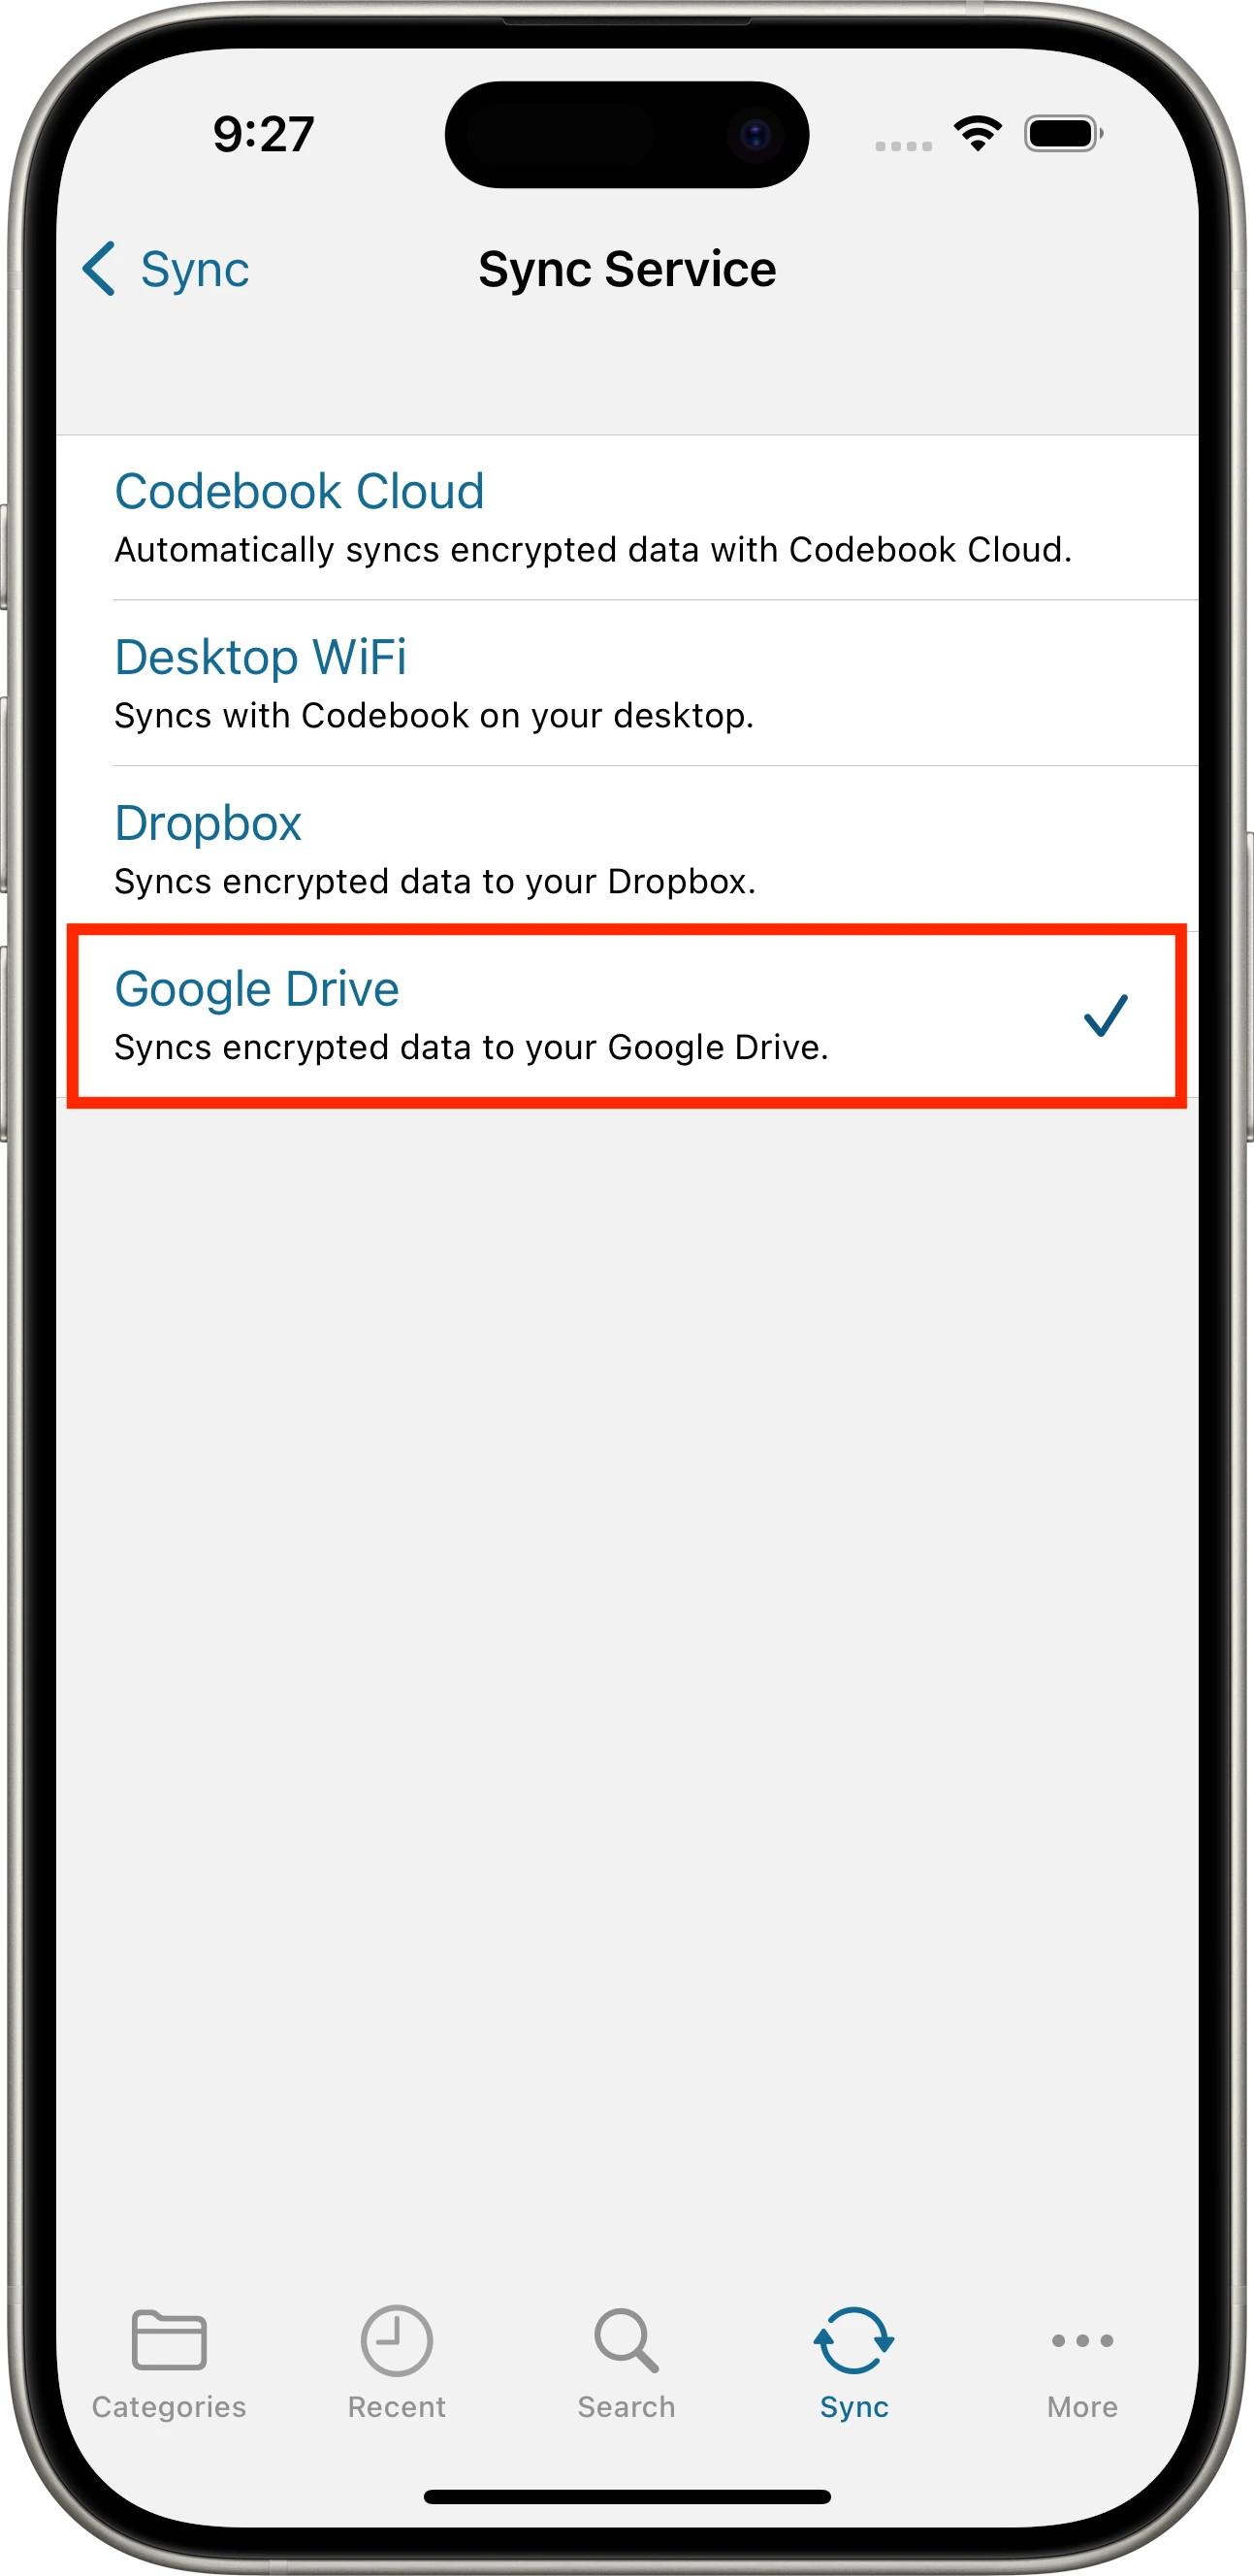
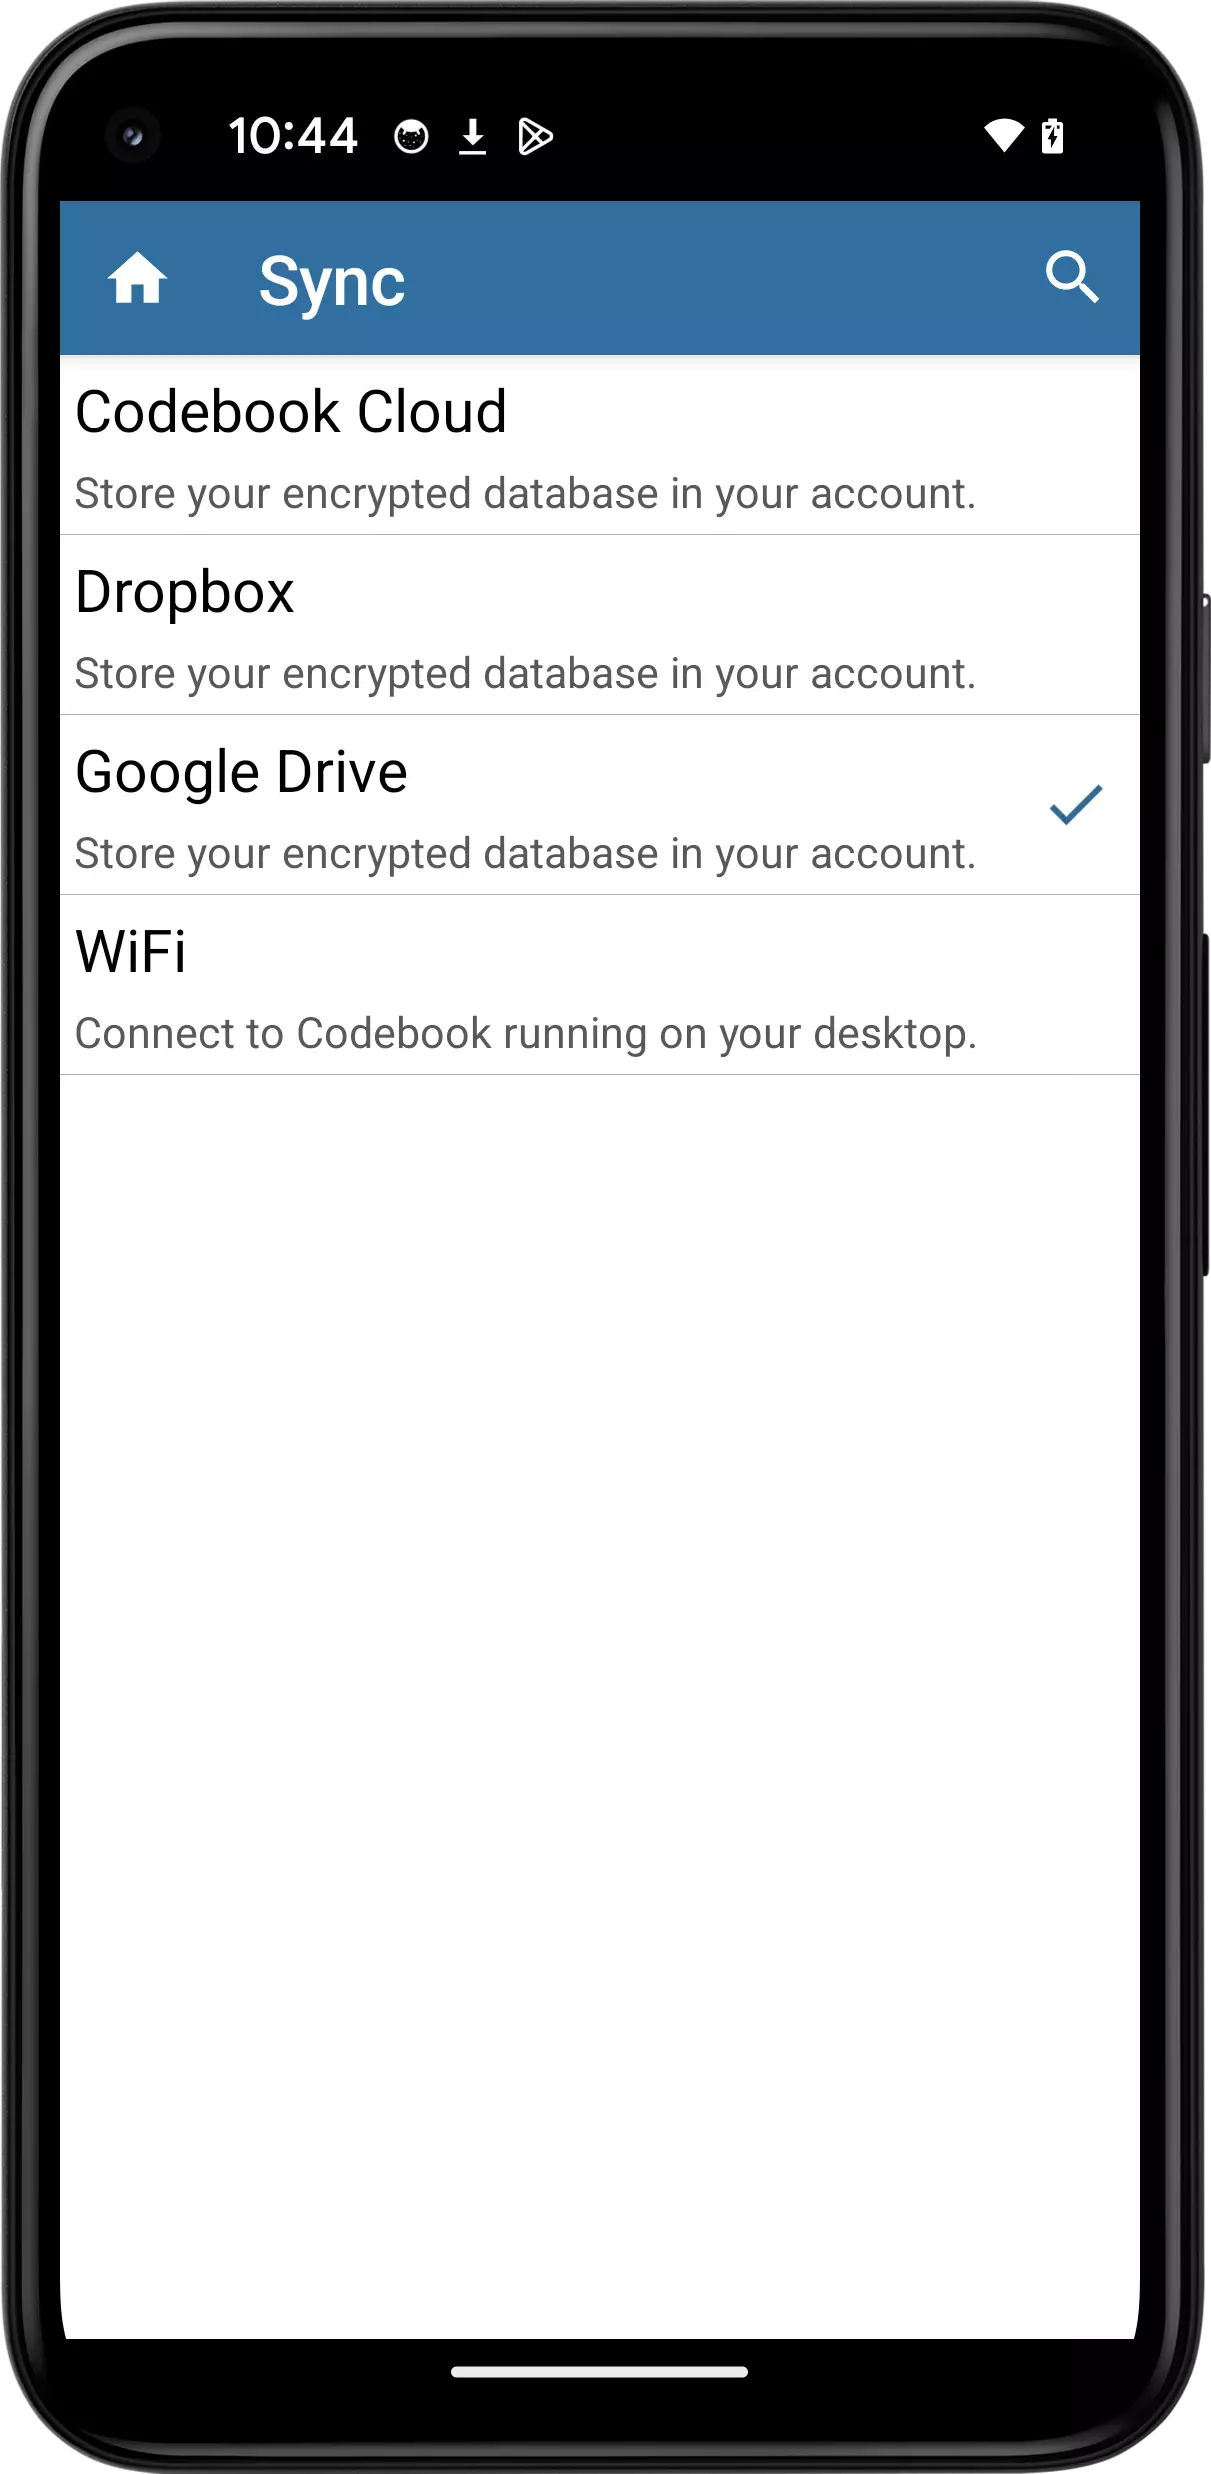
Open the Codebook Sync screen. Tap Sync in the tab bar at the bottom of the screen.
Select the sync service to use:
Tap to select Google Drive
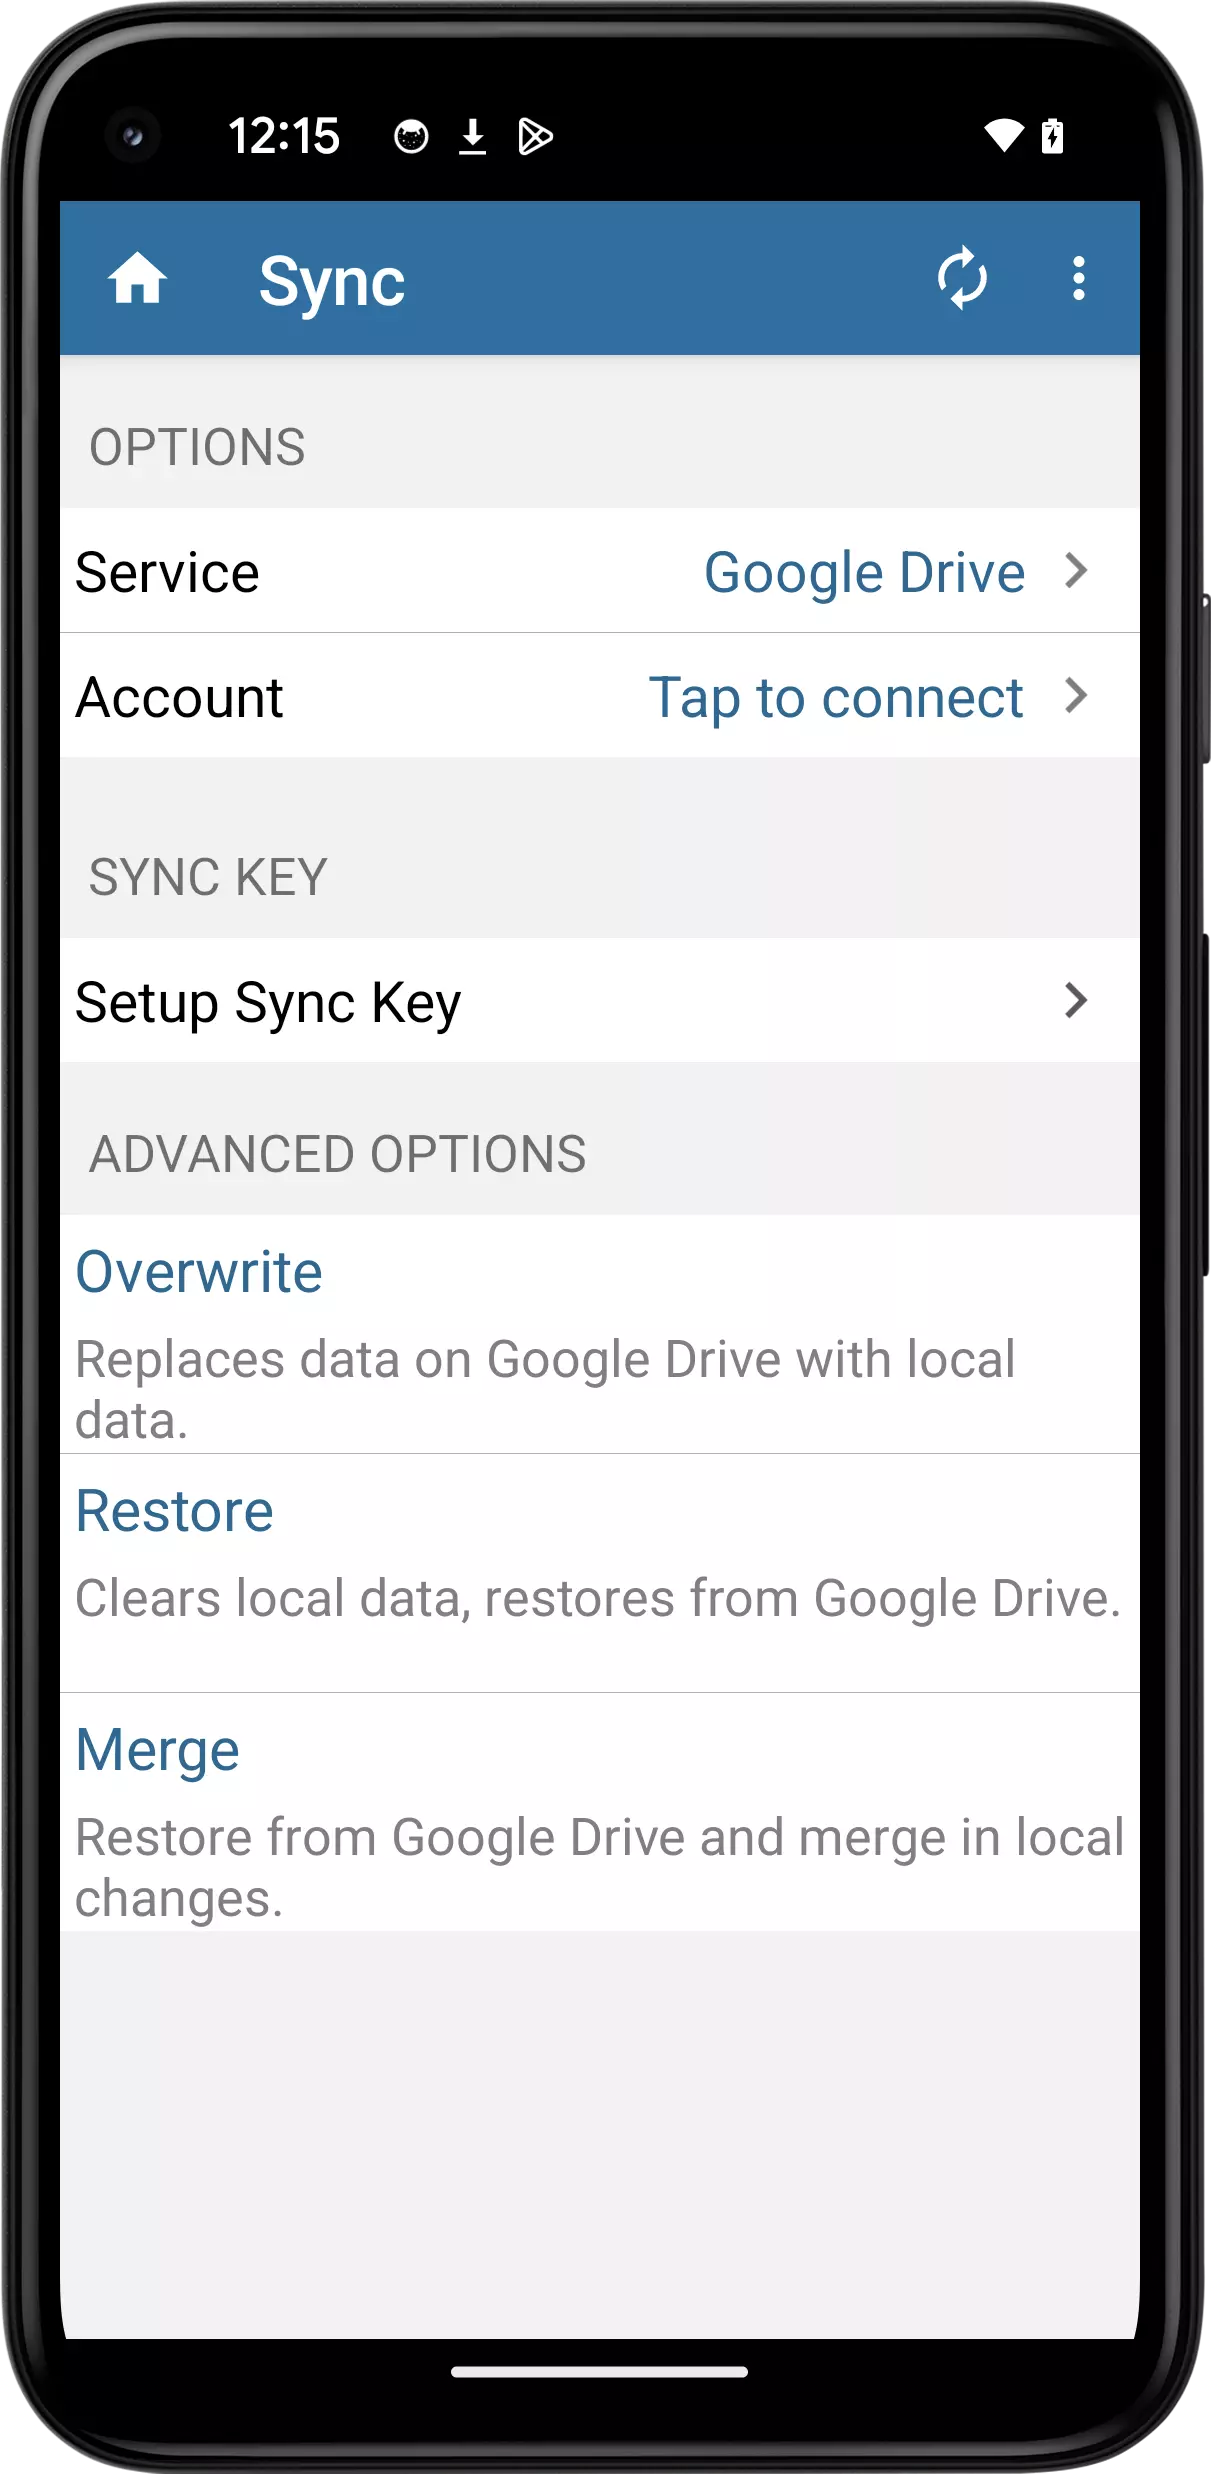
Set Google Drive Account:
For Drop Box: tap Account or Tap to Connect
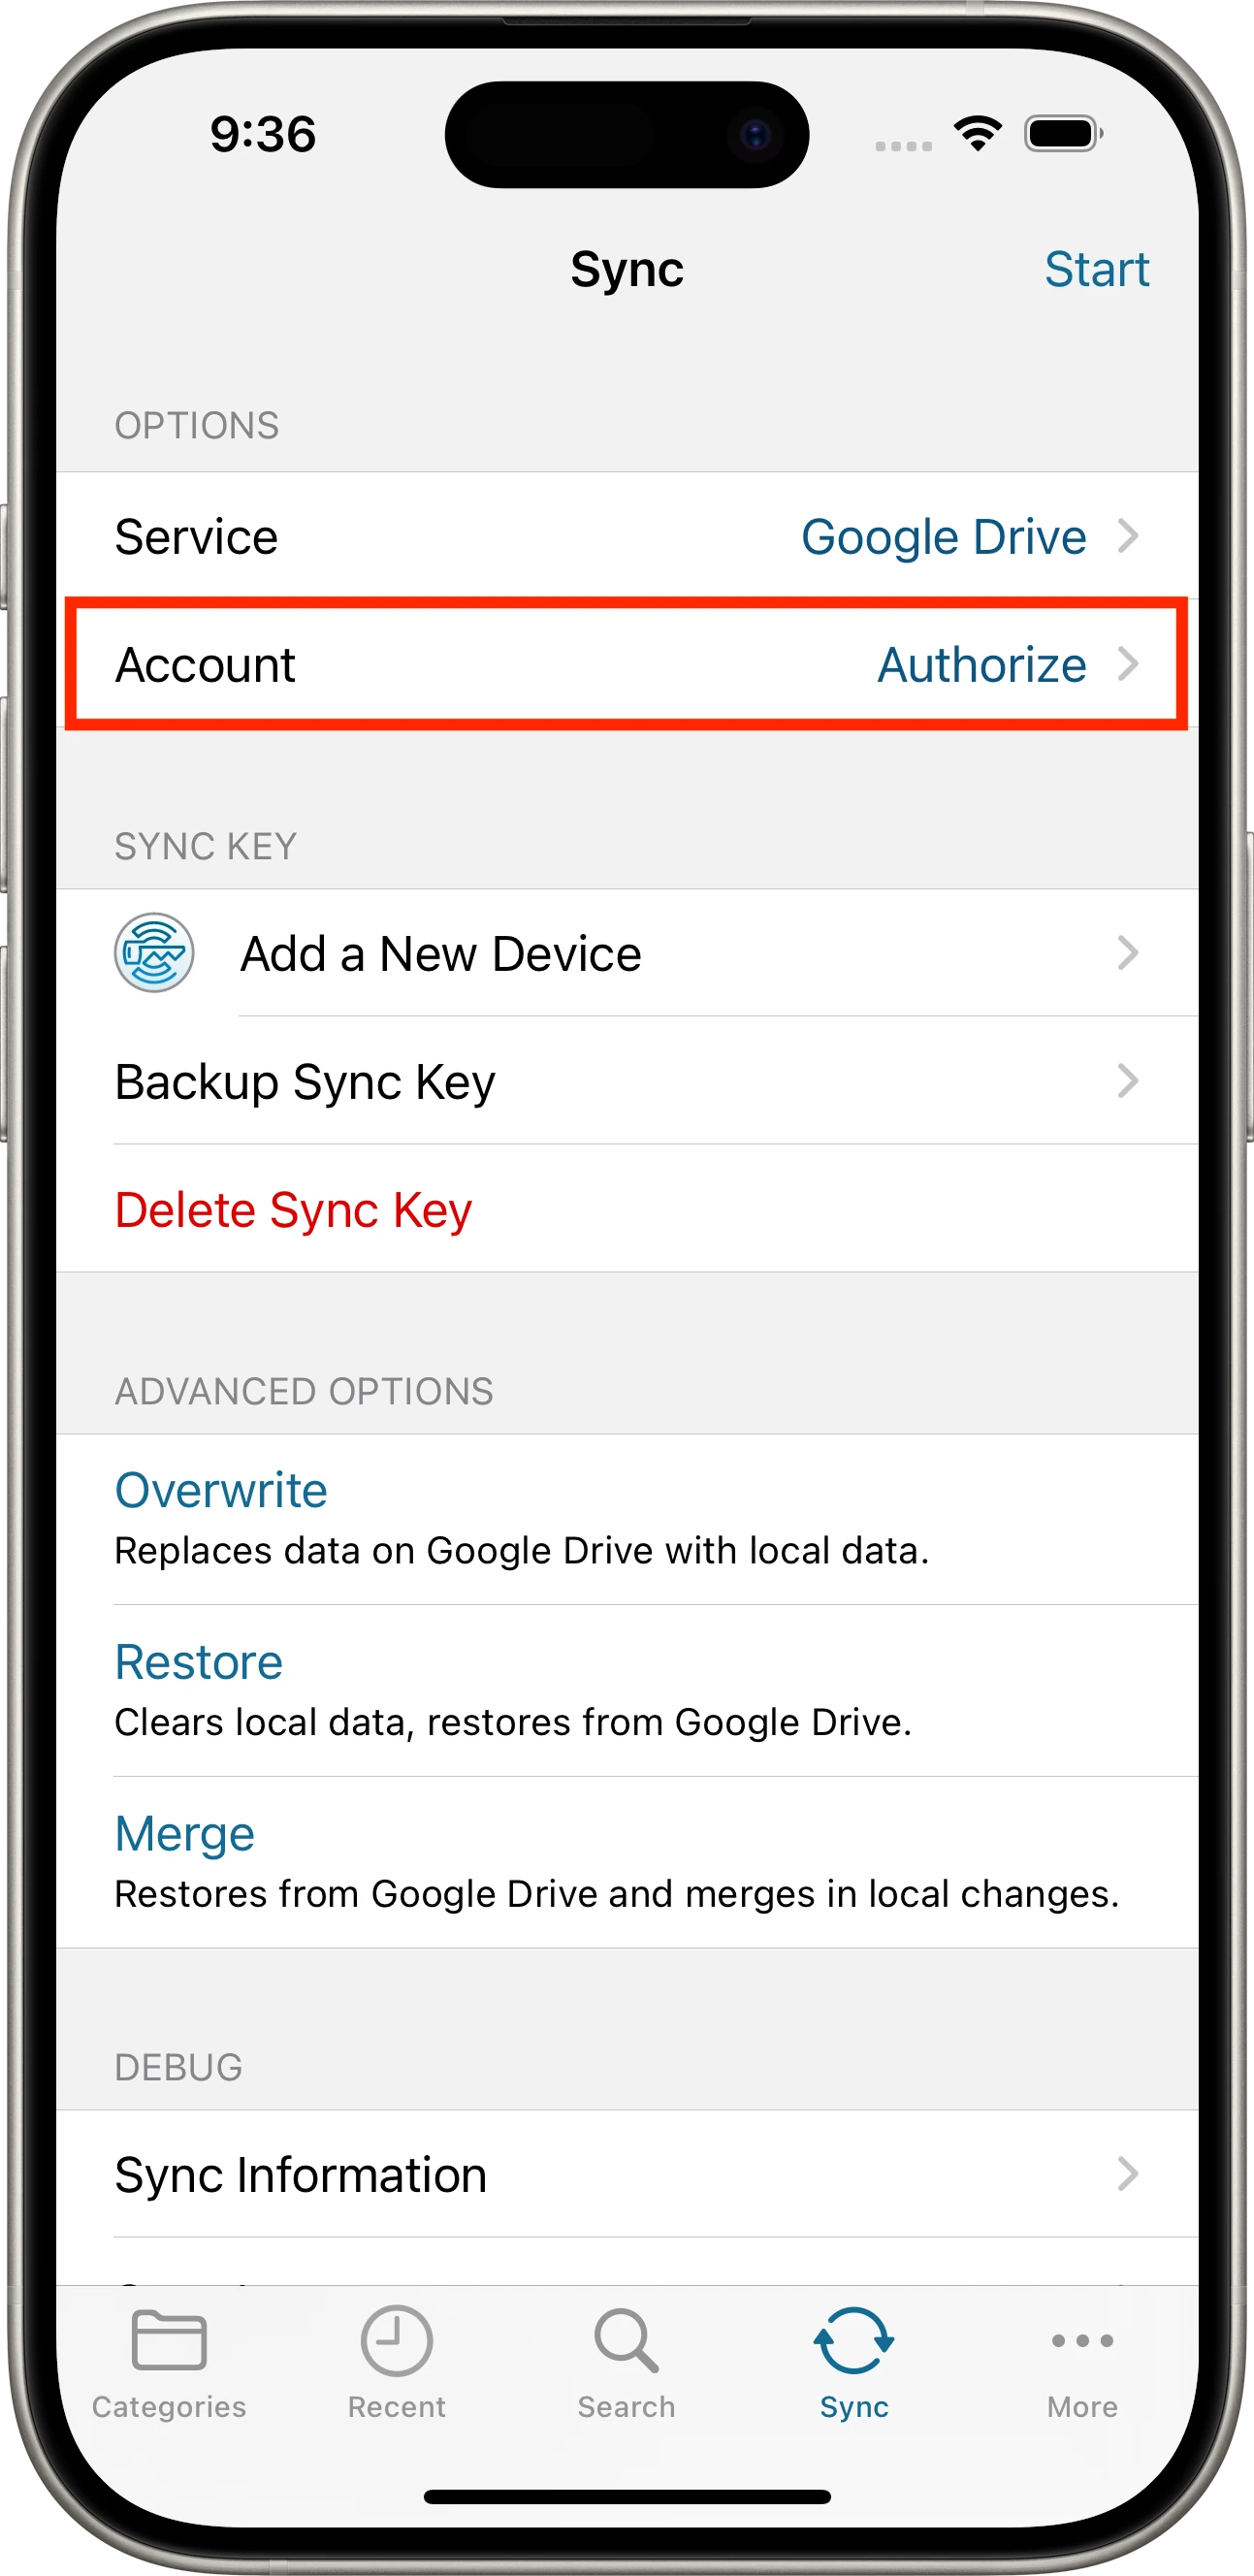
TapAccount - Authorize
Enter your Google Drive account information and authorize Codebook to access your account.
Set the Service:
Tap to select Google Drive
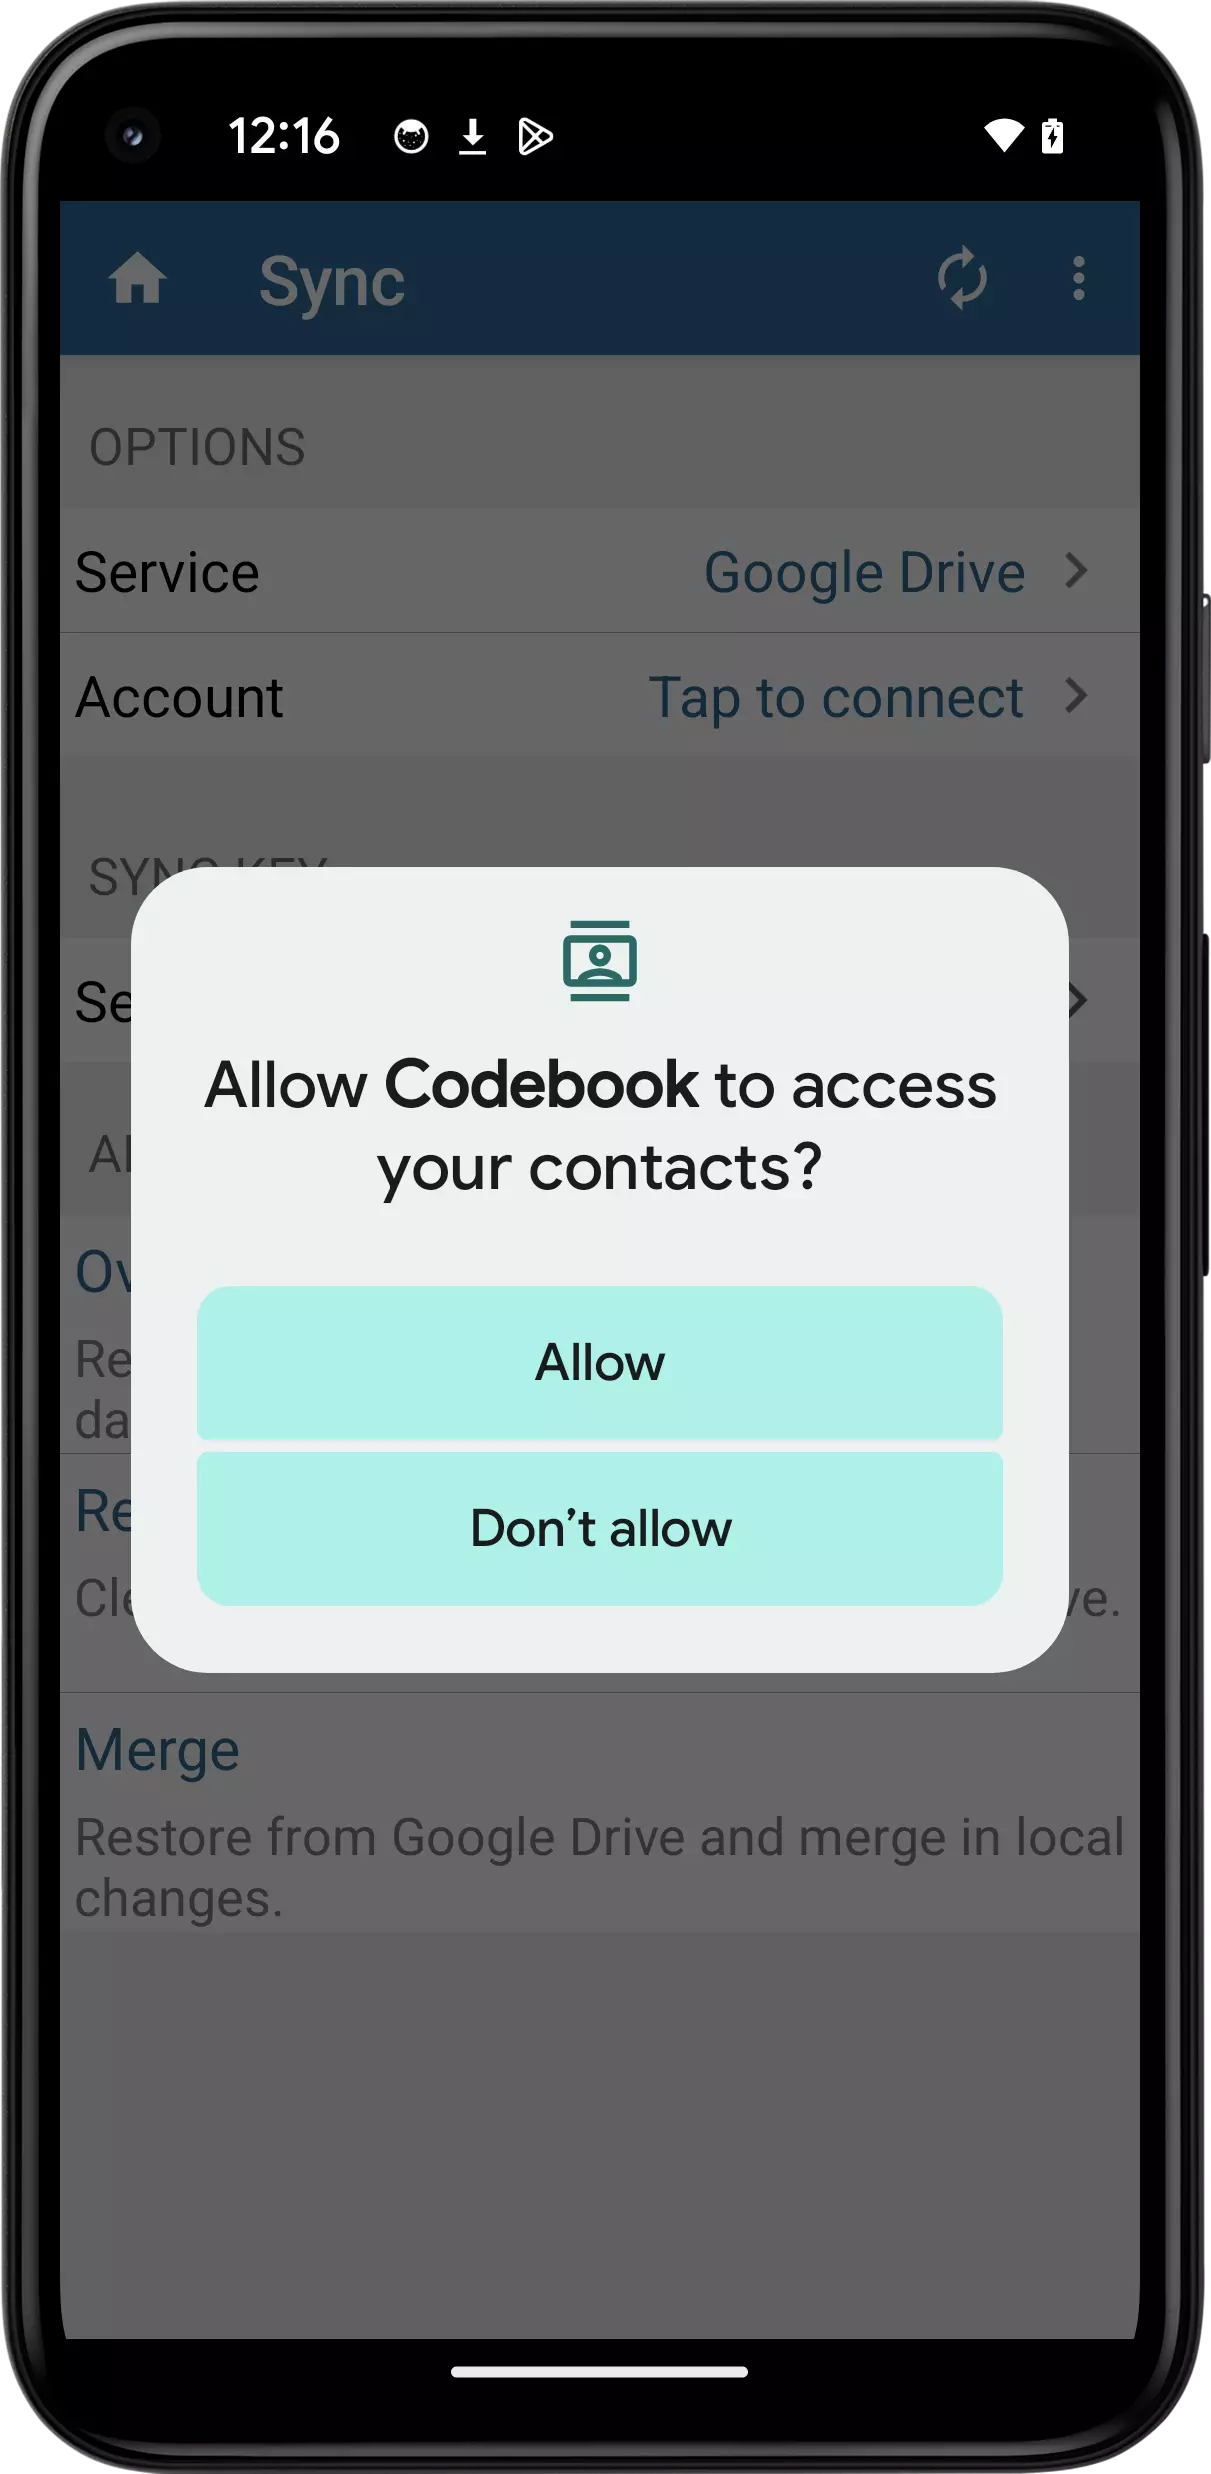
Set Google Drive Account:
Tap Allow to give Codebook permission to access your Google Drive account.
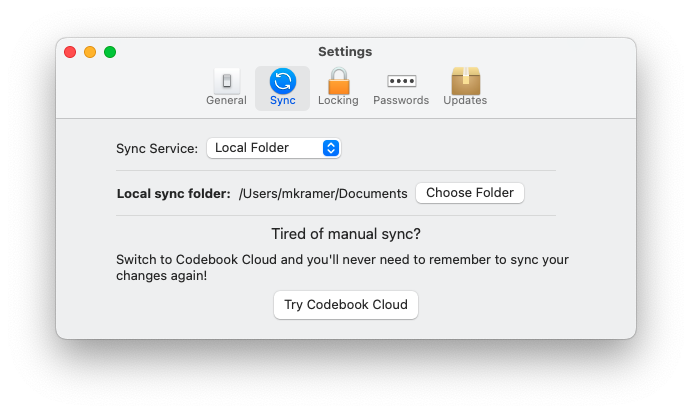
Local Folder (Desktop Applications Only)
Click to open the Sync Service drop-down list.
Select Local Folder sync from the drop-down list
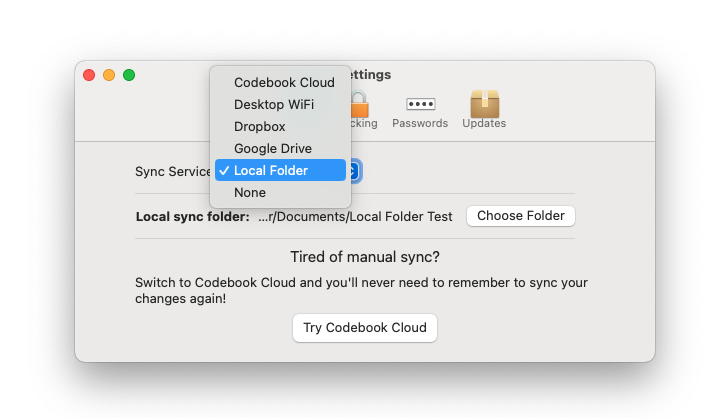
Click Choose Folder and select the directory to set as your sync folder. Click Choose
Select Local Folder and click Save
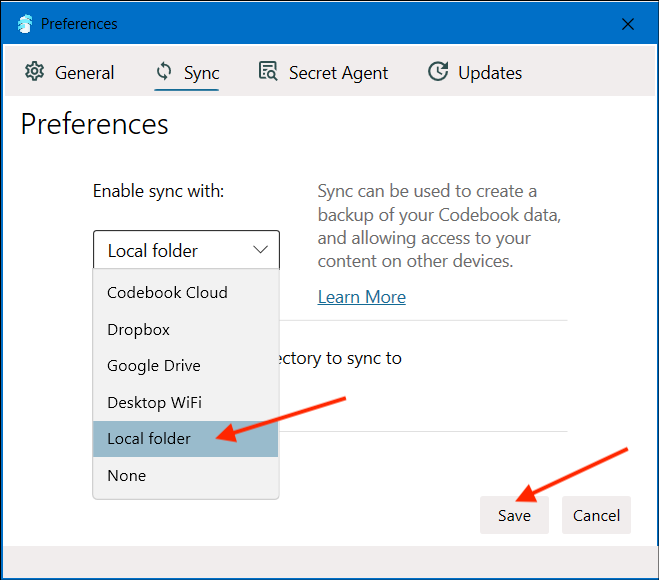
Click Choose and select the directory to set as your sync folder. Click Save

Local Folder Sync is not available on Codebook for iOS
Local Folder Sync is not available on Codebook for Android
